Archives For -Third Floor

Old Windows

June 20, 2013

thirdfloorwindow
Sorry for disappearing. Life has been much more hectic than I would like. I’m still not sure how I am going to get everything done on my ever growing list, but I thought I would update my lovely readers on the house. The good news is that we have air conditioning! Kind of crazy for our old beauty. We like to think of it as a 125th birthday present. I’m still not completely convinced that it will be able to keep up when the hot weather really shows up, but fingers crossed it will do the job.

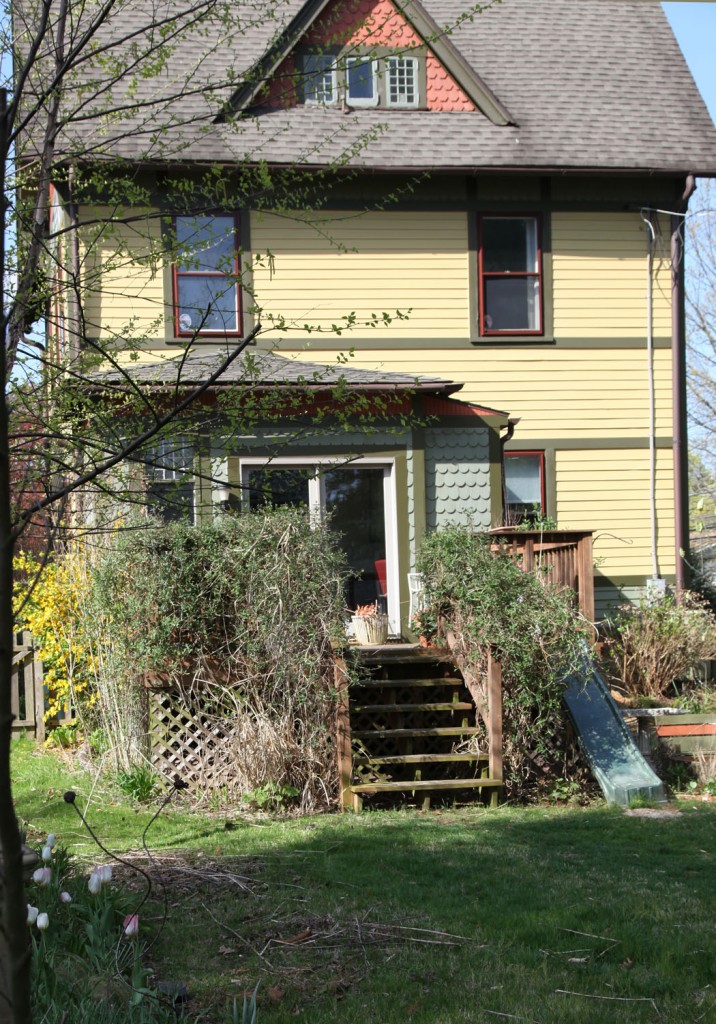
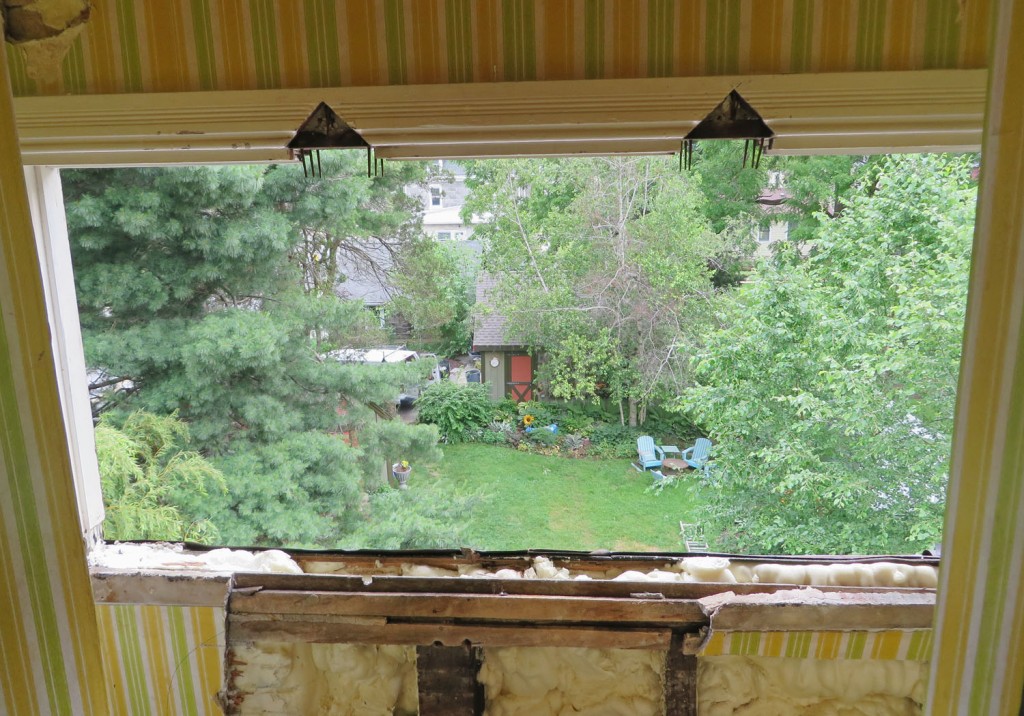
Meanwhile my roofer is almost finished except for 2 important spots. The current hot spots are the old windows on the back dormer. The sill was completely rotted, so my roofer handed the work off to my carpenter. He had to disassemble the frames and sill on both the inside and outside. He has replaced the sill but we are currently left with a large hole and some important decisions to make.

house-backdormer-before

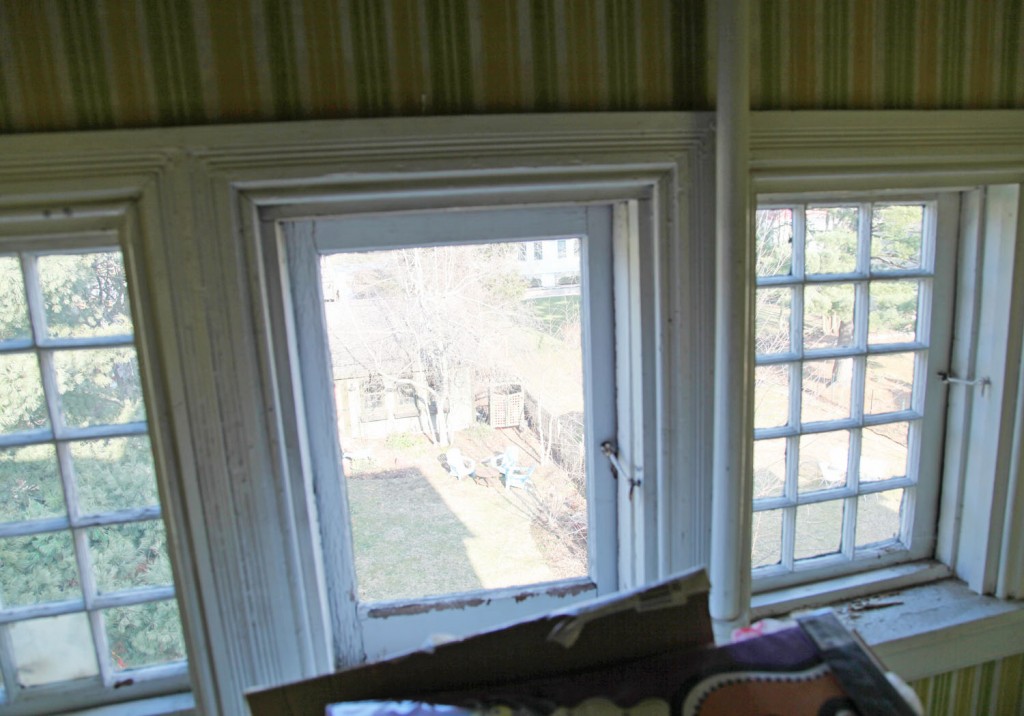
I had planned on restoring the 3 small casement windows, but they are in pretty bad shape. I also talked to a window restorer who warned me that they charge by the linear foot of glazing putty. And we have 31 panes just back here! Eeek! He also said that he had a 3 month backlog! For the the front of the house there is no doubt that we will restore, but back here it isn’t so clear. I’m in the middle of weighing the options, while a piece of plywood holds the spot.

house-backdormerwindow-before

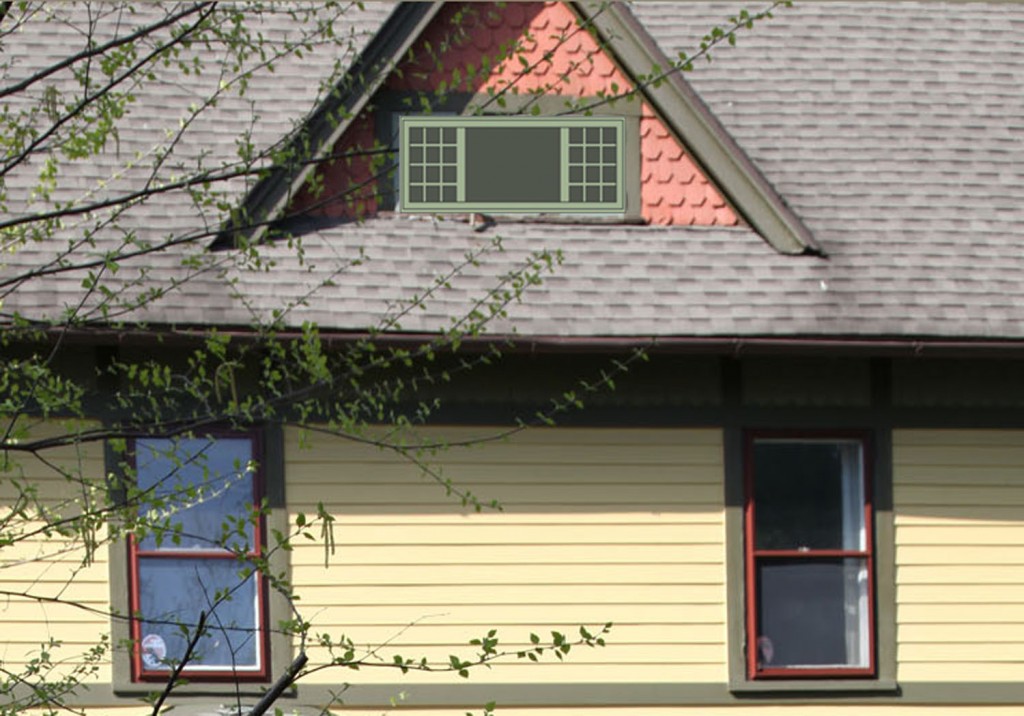
Mr. S. has left it up to me to make the decision. Currently I am leaning towards replacing them with a single awning window. Before you roll your eyes or think I have lost all of my old house cred, I am looking at a custom wood window by Jeldwen with a similar mullion pattern. We went over to the showroom to get a better look.

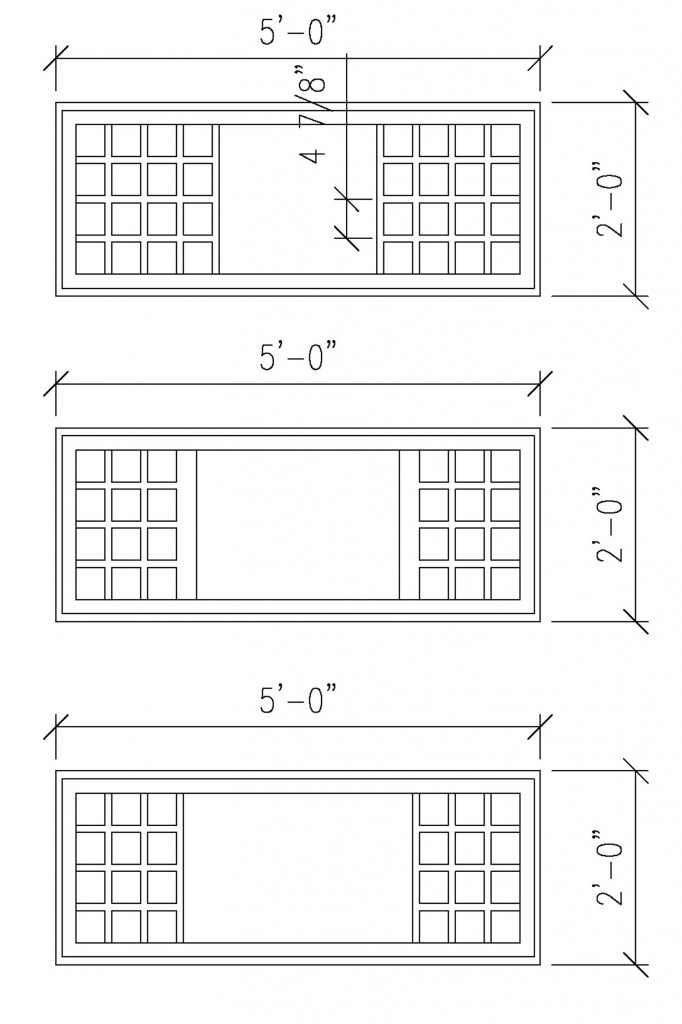
windowoptions

I am pretty torn since I am always telling people to keep their old windows. Over the years we have replaced some windows, due to sizing issues but never one strictly to be replacing it. Of course the third floor windows have been taking a beating for the past 125 years without storms. Above are a couple of patterns that I am considering. The thinnest mullion that they make is 5/8″ wide. Our current ones are about 1/2″. The smallest that they can make the pattern is 4″, our current ones are closer to 3″. I am leaning towards the middle one right now. What do you think?

house-backdormer-rendering

PROS For New Window

-Single awning window will actually increase the visible glazing.

-Awning window will allow for us to keep the window open in the rain to help exhaust out out hot air in the summer.

-It will be less expensive than restoring the existing windows

-I can get it clad in aluminum in a matching color so I won’t have to repaint it for a long time

-I won’t need to install an interior storm

-We can still reuse the existing interior window trim to match the other windows.

Cons For New Window

-Not Historically accurate.

-The window will still look different than the original windows.

I am off to give the supplier a call to get a quote. Stay tuned!

tower1

Well it is Friday afternoon and I am finally getting this together. I have been doing quite a bit of thinking about the design for the tower. When I design I like to look at the space, draw it up, look at the space some more, look around for products/ review standard size cabinets, spend too much time looking on Pinterest and then go back to drawing. It usually serves me well to take breaks and come back. I often come up with my best ideas while I am laying in bed just before nodding off. I like to visual the space in my head (yes I am a design junky).

I am liking the mix of materials in the collage above. It will inevitably be impossible to photograph but it should look pretty cool.

tower2

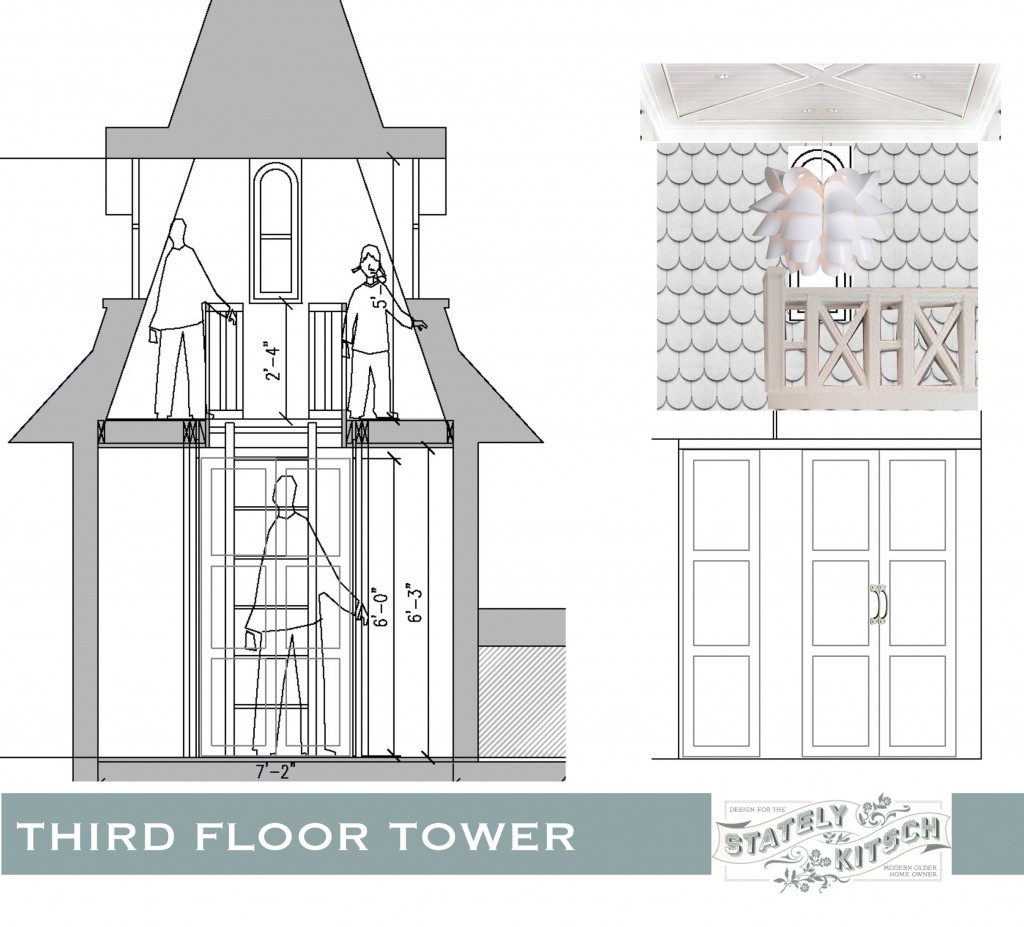
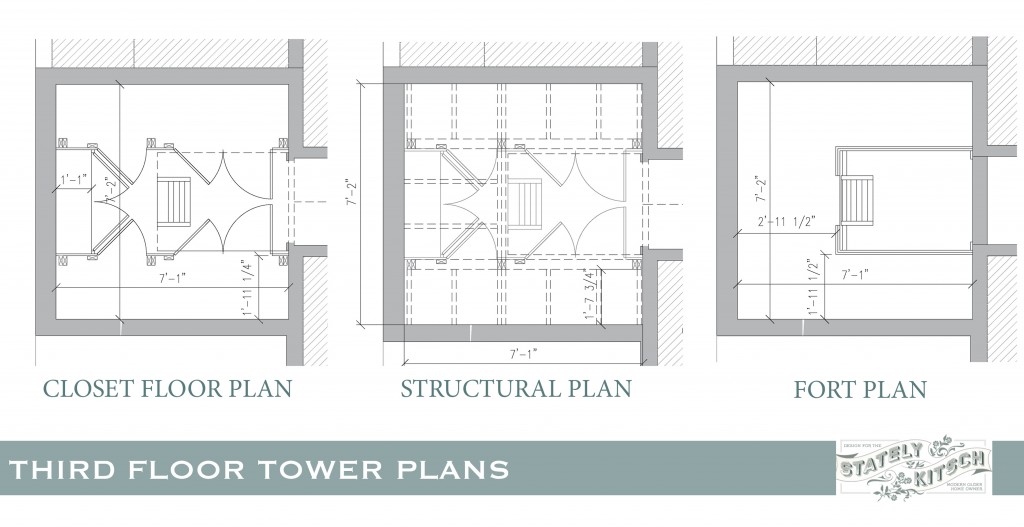
To pin down the design, I drew up a basic structural plan. I needed to get an idea of where we would put in columns and floor joists for the tower. The columns will interfere with the closet space a little bit, but we only need 6. The majority of the joists will tie into the walls. I will install a board that will attach to the wall joists and then use joist hangers off of that to hold the floor joists. It is fairly similar to a deck design.  I haven’t decided how I am going to finish the ceiling of the closets, but I am planning on cladding the beat up plaster with the thin plank material and a 1×4 board at the top to attach the clothes rod to. I figure some of the final details will have to get figured out as we go.

As part of this I needed to decide whether we were going to install doors on the closets or just use curtains. Ultimately we decided that we really want doors. Maybe I will regret that, but I like the idea of having doors that kids and pets can’t get into very easily. I am planning on using this area to store out of season clothes and storage bins that hold the kids baby clothes. At the back of the tower the closet will be narrower and have shelves, which I would like to use for some of my knick-knacks.

tower3

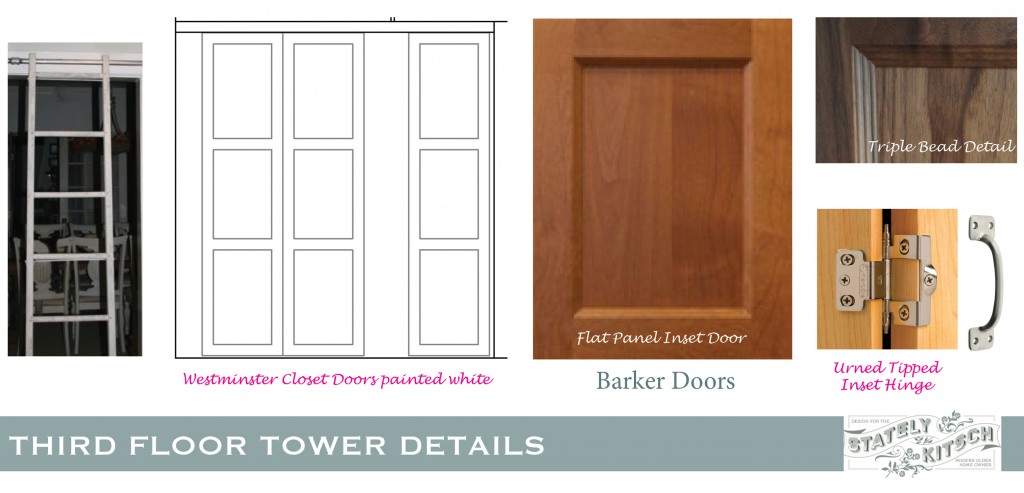
The next question was what kind of doors and were we going to DIY them. I thought about just making simple beadboard doors, which would actually match what is up there now, but after a lot of debate and reading this post from Sawdust Girl about making doors, I decided that it would make sense to buy doors, especially after I discovered Barker Door. They offer custom American made doors in a bunch of materials and finishes. They have good reviews and a pretty quick turn around. If I could stay at 72″ high the price per door was reasonable. This meant that the top couple of inches of the closet wall will have a trim piece, but considering that saves $70 a door, I am willing to make that compromise. After looking at their options and prices I have decided on the Westminster door style which is a flat inset panel door w/ a nice triple bead detail. I am going to go with the alder frame and mdf panel. These should paint beautifully and be nice and sturdy. I have been debating whether the doors should be fully inset or overlaid. Overlay doors  are much more forgiving, but I really prefer the look of the inset. Again Sawdust girl laid it all out for me. I am thinking that I may wait and order the doors after I have the frames up, so  I can make sure that everything is the correct dimension and Barker door allows you to order down to 1/16″. I am also considering their doors for the Ikea closets for the Master Bedroom.

I am off to take care of my sick little one. I hope everyone has a lovely weekend!
Tower Design Part 1

March 12, 2013

thirdfloor tower2

We had some amazing spring time weather over the weekend! Actual sustained blue skies, without the winter winds! We managed to open the windows in the third floor to try and air out from the sprayfoam. We also started planning for work in the tower. I’m not sure if this should really be the first priority, but it is definitely the most interesting. One of the reasons we bought the house was because it had a tower, but it has been totally unusable (at least until now). Isn’t that how all rational people choose their houses?
For years I have be imaging the space with a second story fort (even before kids) so that you could actually see out the windows. We also thought it would be really cool to clad the inside with half round cedar shingles (imagine the tower being inside out) and a beadboard ceiling to hide the new giant hole. But beyond that, it has always been a long away fantasy. Well now we are actually working on making it happen! Part of the rational is that we need to have the windows worked on, and wouldn’t it be easier to do that if there was platform up there to access them? And well why we are at, should we go ahead and put some closet space below (which will come in handy when we are working on the master bedroom and have to give up our closets temporarily). Besides the kids keep asking when their fort is going to be finished.

The Game Plan

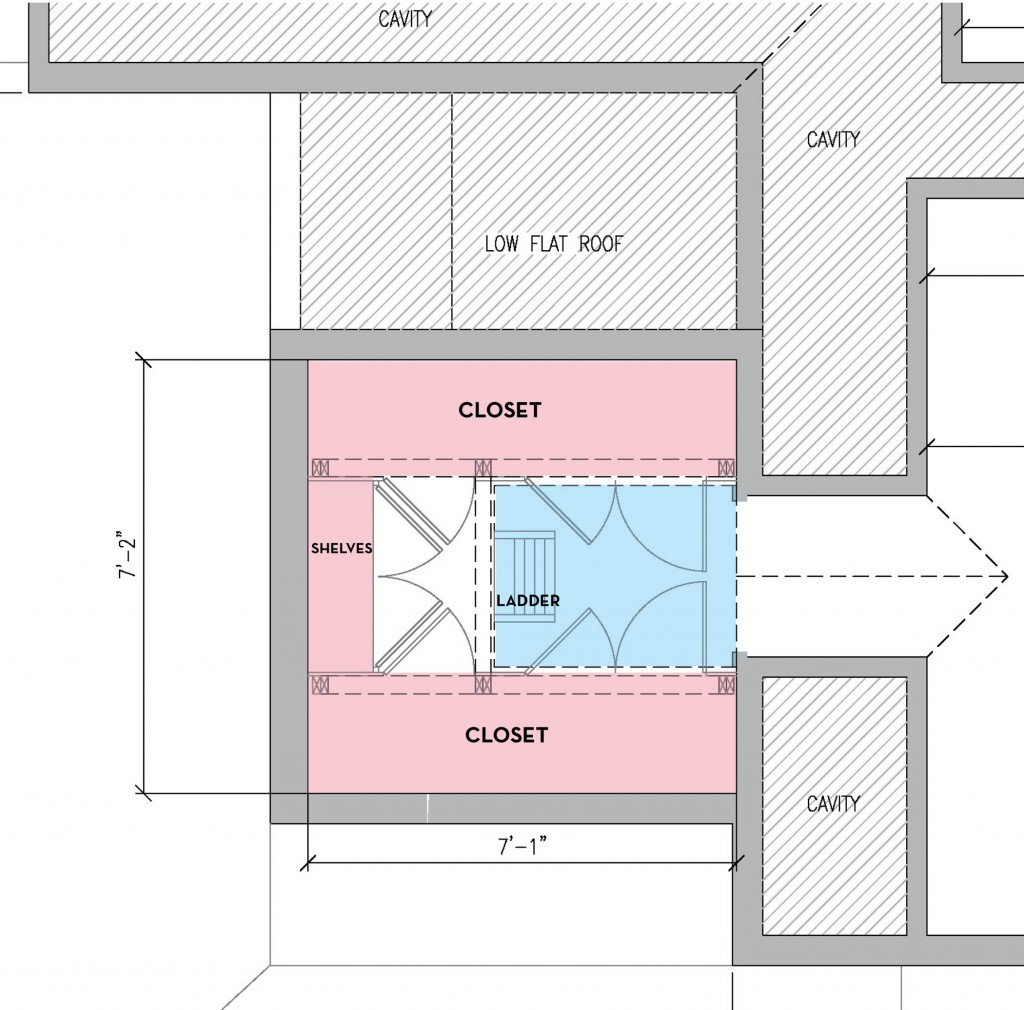
Over the weekend Mr. S. got out the blue tape and started marking closet locations on the floor.  The room is 7′-2″x7′-1″,  far from spacious. How can we retain the interesting double height space while actually getting usable closet space and hang out space? How can we install a ladder and closet doors and make them both work?

towerplan1a

After lots of noodling this is what I came up with. It is funny that even with all of the years I have been doing this a little blue tape and standing in the space is an important step. At first I thought I would make the closet on the left deep. Then we realized that it closed in the room too much and wouldn’t allow for good access to the corners. Once I stepped it back to a shelving depth, it felt right and meant we could get doors in everywhere. We are in luck that a standard walk in closet is 7′ wide (2′ on each side for hanging and 3′ in the middle). The area in blue is the portion that will remain double height. The area that isn’t colored will have loft above but not have closet space. The ladder will be on a track and move to allow for full access to the closets.

towerplan2a

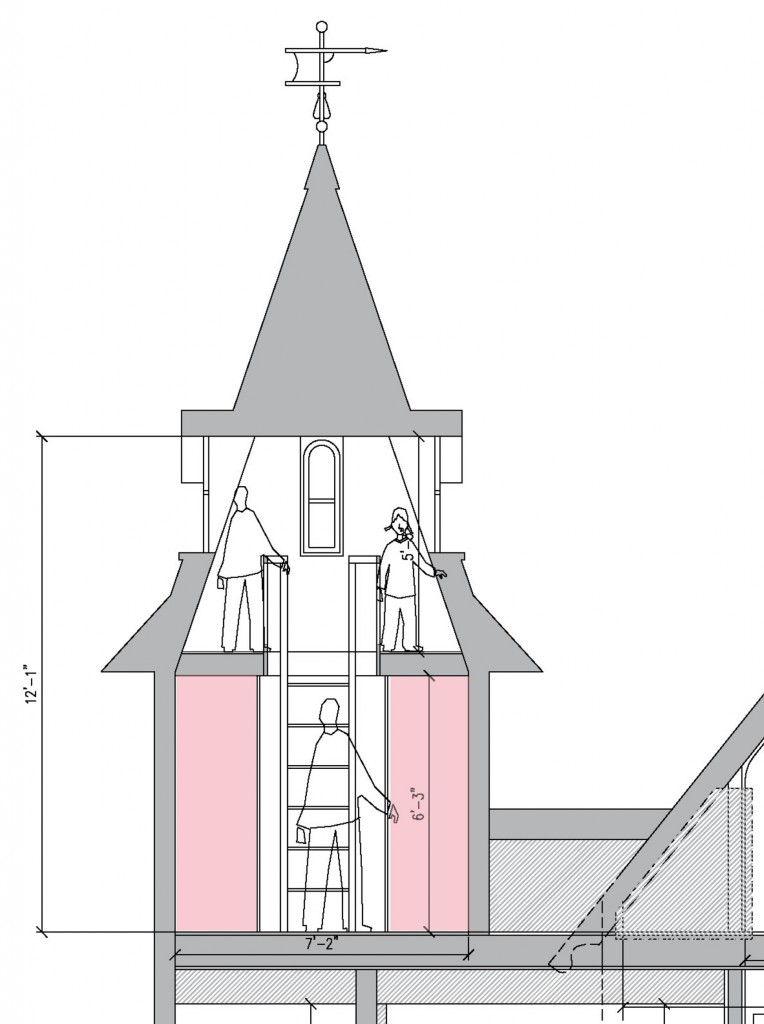
The kids (drawn to approximate current heights) should have enough space to look out the windows and curl up with some beanbag chairs on the wider end. Mr. S. says he might even want to claim the space for himself.

The Details

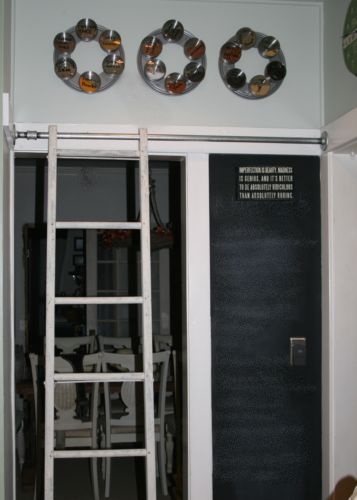
I have been trying to find details to work in the space. It has been a bit of a struggle. The ladder was the first thing on the list. I really like the library ladders but the cost is more than I want to spend (several hundred dollars just for the kit that you have to assemble), especially since I don’t need a long run of track just 3′.

diyslidingladder

Then I found this DIY ladder from DIY Show Off. They used a vintage ladder, but we could do the same thing with a DIY ladder made with 2x4s and 1x4s. The trick is using 3/4″ galvanized pipe and cutting a slightly larger hole in the top of the ladder.

ladder-trianglesupports

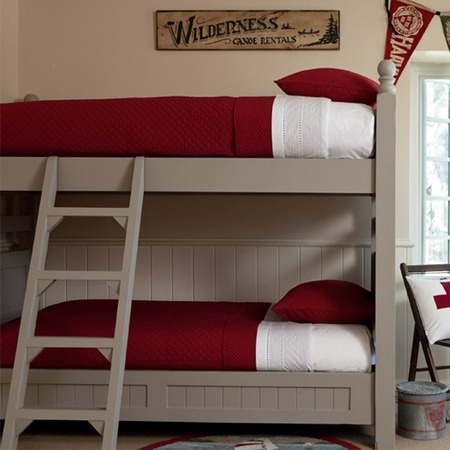
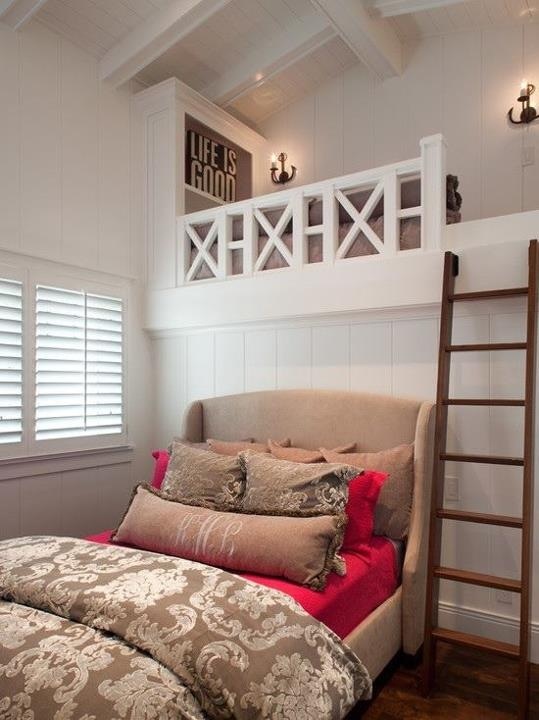
After spending way too long looking at bunkbed ladders, I came across this one (originally from Joss & Main of all places).  I like the added triangles to give the ladder a little extra support.

loftinspiration

I haven’t totally worked out the railings for up there, but I do want a fair amount of height and coverage. I like this railing above (source not identified). So I imagine I will design something similar.

knappa-ikealight

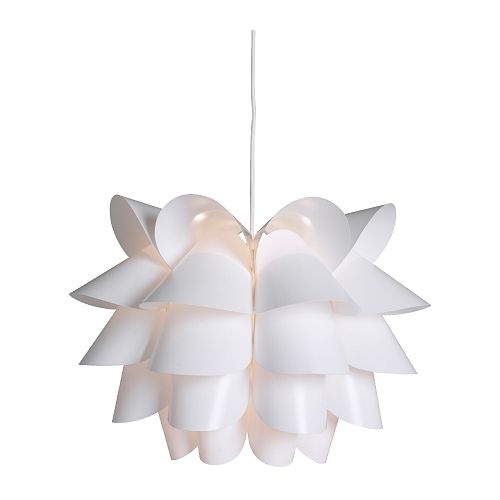
I am also leaning towards this light from Ikea. We need something that is suitable for little kids hands, but provides a nice soft light. I also want something with a little style. At $24.99 I think we may have a winner. I also think it will be a nice contrast to the more traditional style of most of the room.

There is still a lot to figure out and detail, but I think we have a good direction, so I will be plugging away on refining it.

In the meantime if you want to see what is currently inspiring me for our third floor you can peak at my third floor pinterest page.

thirdfloor-hangout1

I hope everyone had a lovely weekend! We spent the majority of the time up on the Third Floor purging, boxing, moving things around and striping wallpaper. I would say that we are about 70% of the way done clearing out the space. I have given up my garage space for the foreseeable future and we have made multiple trips to Best Buy to recycle electronics and Goodwill to drop off unwanted items. I thought you would like to see how it is looking up there.

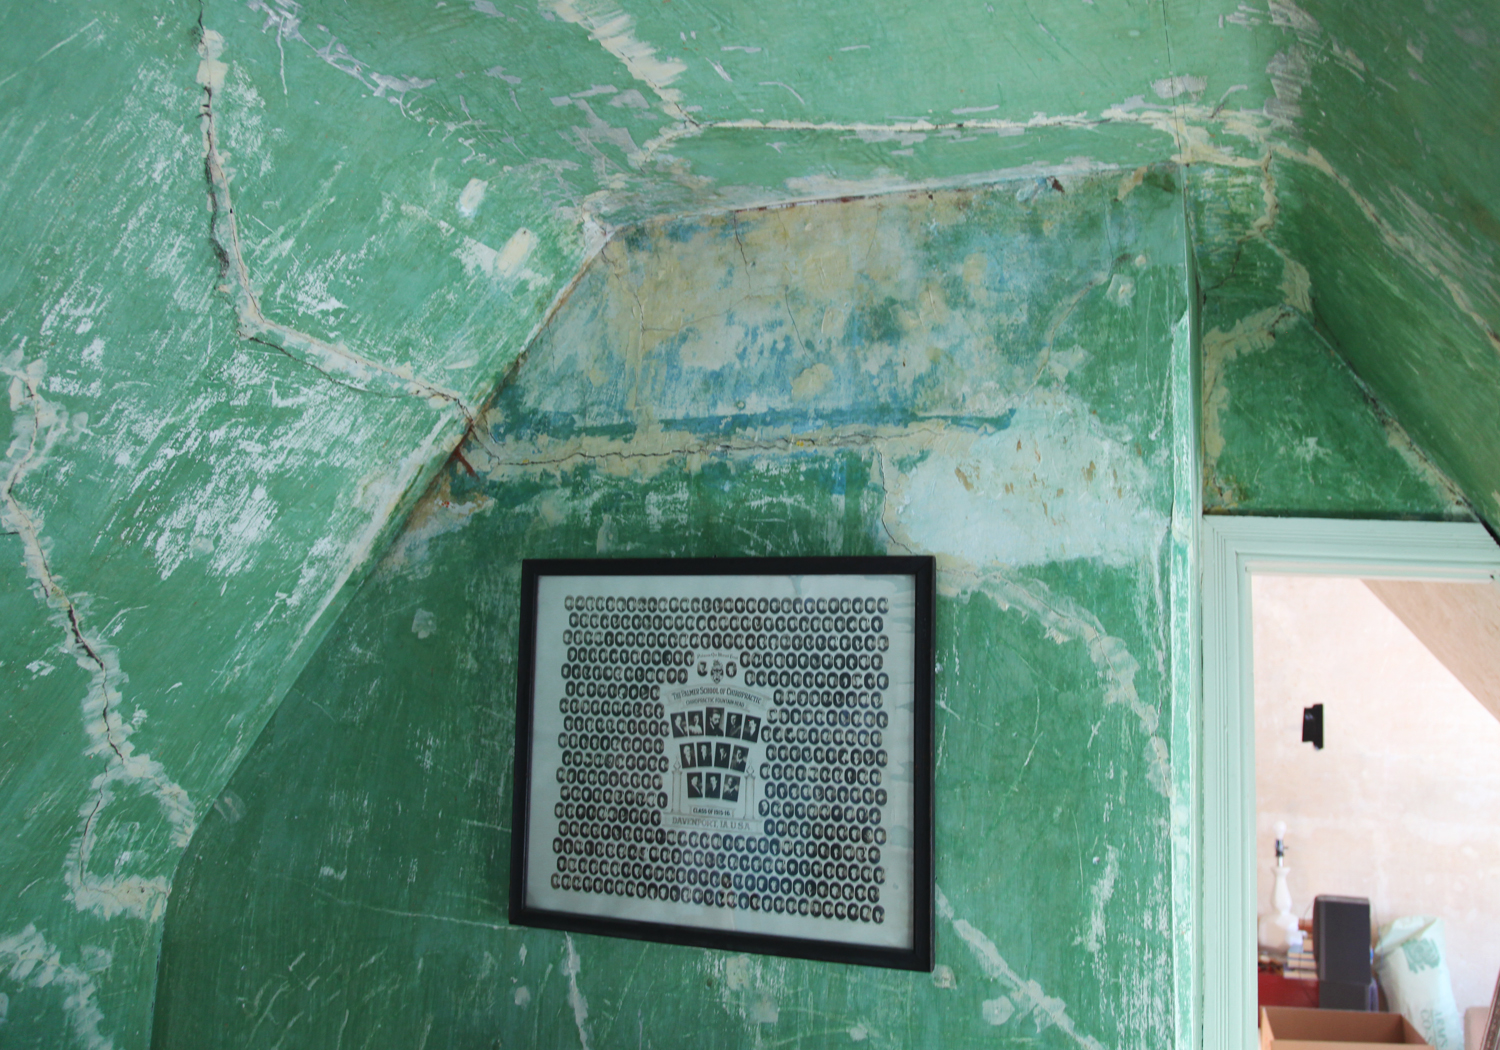
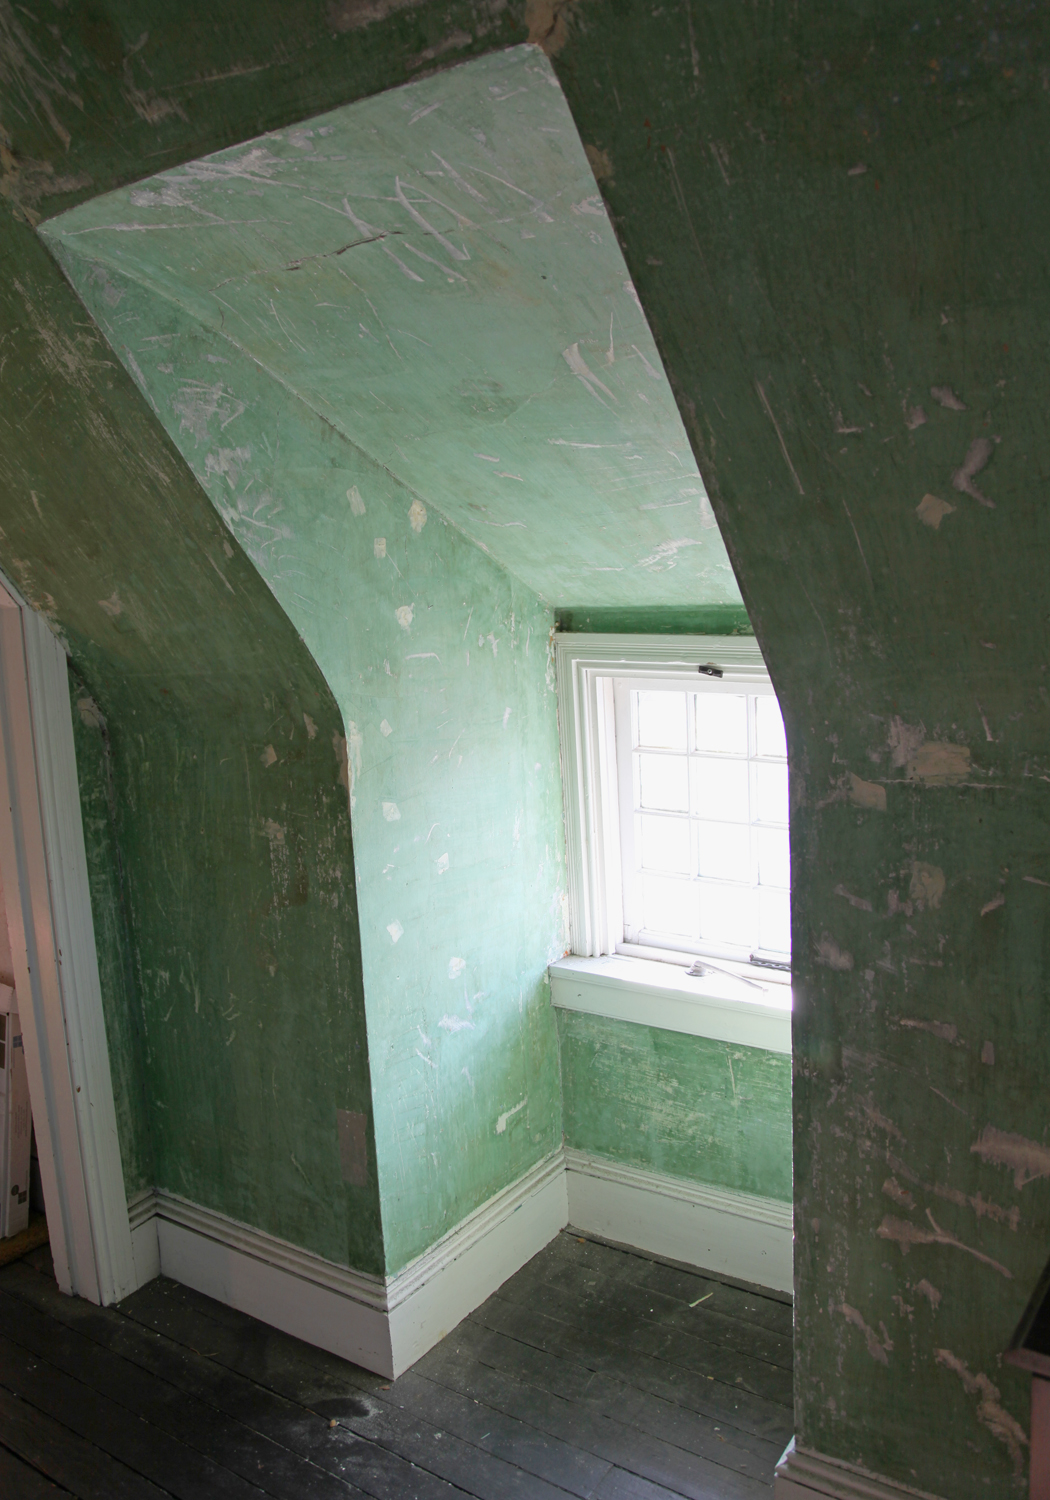
The wallpaper in the Hangout Room and in the Bedroom came off in giant sheets. It was pretty exciting. The green wall color of the bedroom was surprising. It is weirdly beautiful at the moment. We won’t be leaving it like this, but it does feel pretty surreal. The picture below is from the Palmer School of Chiropractic in Iowa from the early 1900s. The picture came with the house and the previous owner said that it was left in the house when they bought it in the 1970s. We believe that one of the former owners is in the picture. We did see on the back that it was framed in Philadelphia.  One of the interesting things about the picture is the number of women in the graduating class (at least 1/3 are women).

thirdfloor-bedroom23jpg

I especially love this little tiny dormer. I wish it were a little bit bigger to be functional, but it is very sweet.

thirdfloor-bedroom1

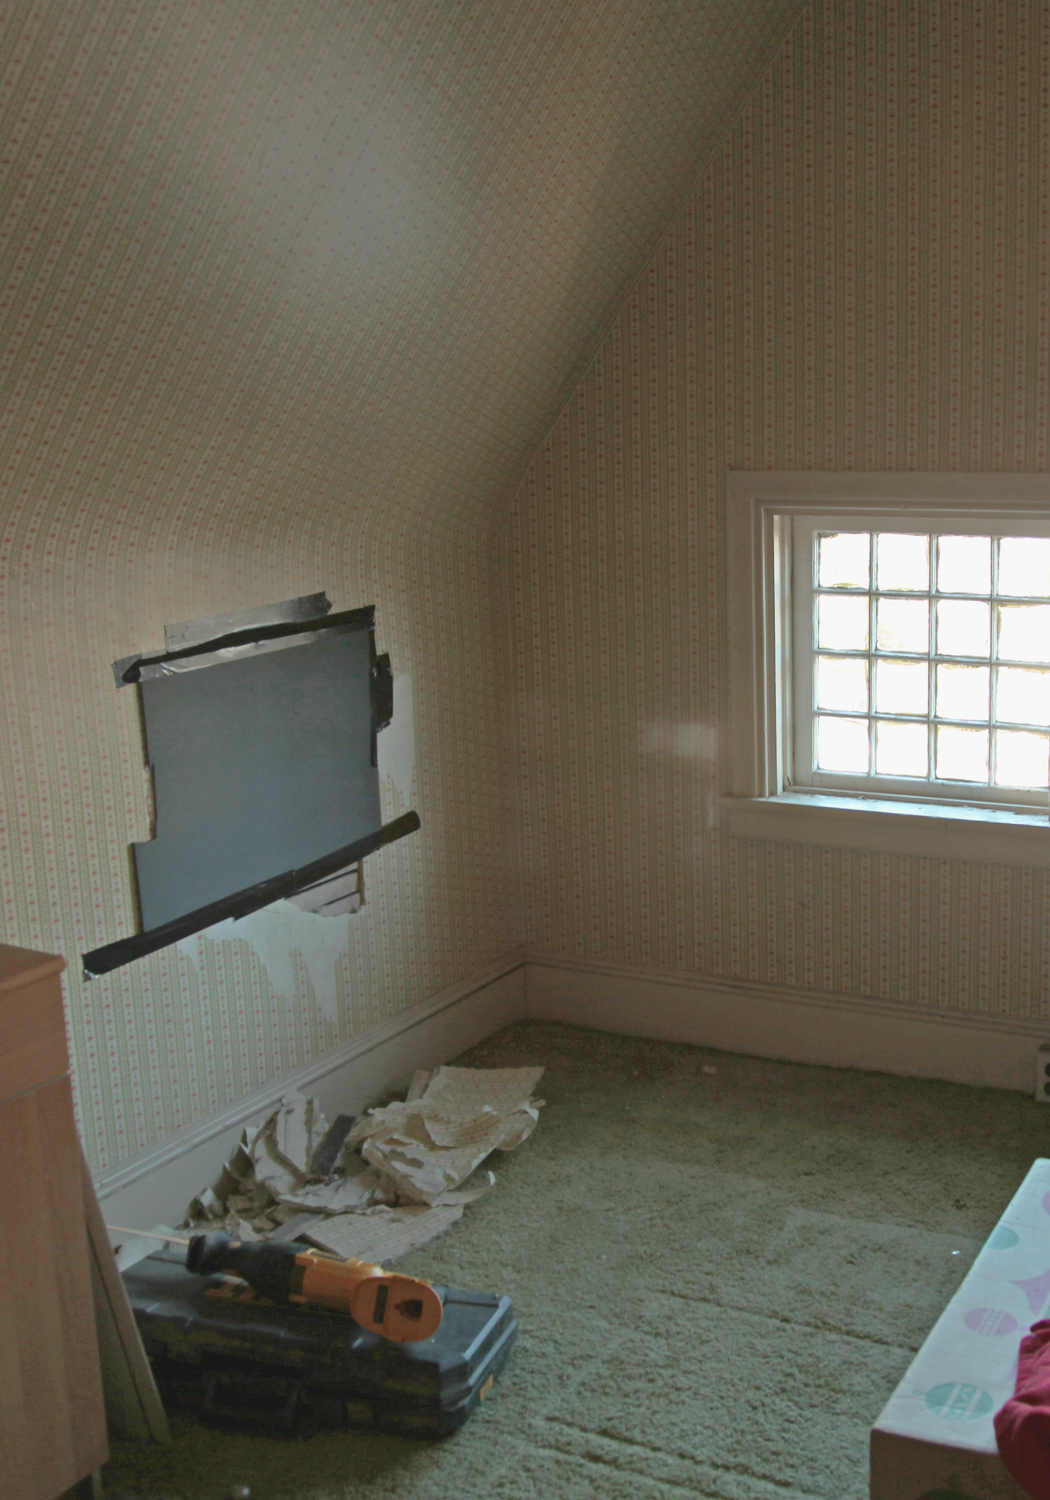
We also did a little bit of exploratory cutting, which is always exciting! We cut a large hole (now covered for the safety of the kids and the cats) in the craft room (where unfortunately the wallpaper is better adhered). This section connects to the flat roof and is above the closet in the kids room. The ceiling of the closet in the kids room is the same height of the door frame (6′-8″) so I wasn’t sure what happened above it. Well we now know that it is just open all the way up to this space. Which means when you look down you see the closet ceiling 4′ down, which is really strange and slightly unsettling. You can also see the flat roof structure beyond. It will make framing some of the built-ins extra fun!

thirdfloor-craftroom1

We did the test cuts with the sawsall. The horizontal cuts went really well since you are going parallel to the lathe. The vertical cuts did not go nearly as well. They pretty much shook the heck out of the plaster. I really want to save the curved plaster, so we will have to see how the rest of it goes. Once we start cutting some more the rooms will also have to be off limits to the kids and cats, which makes working on it that much more difficult. I’ve got a long list of contractors to call this week. Wish me luck!

Third Floor Inspiration

February 23, 2013

boxes1

Mr. S. has been on a mission!  He has been purging away up on the third floor for a little bit each night. And now he is joking that it is all my stuff that is left up there. Of course “my stuff” includes all of the holiday decorations, old furniture and our shared collection of books that don’t fit in our Living Room bookcases. He has actually chosen to throw away/recycle/donate a lot of old stuff (including all of his original video editing equipment). In exchange we are keeping a large portion of his cds, which will eventually go in built in bookcases up there (currently residing in the boxes above next to Spike). I do have to go through my pile of curtain rods (i.e. Pottery Barn dumpster finds from a long time ago) and several boxes of old tchotchkes from years ago. And “a few” magazine piles (which is a whole other problem).

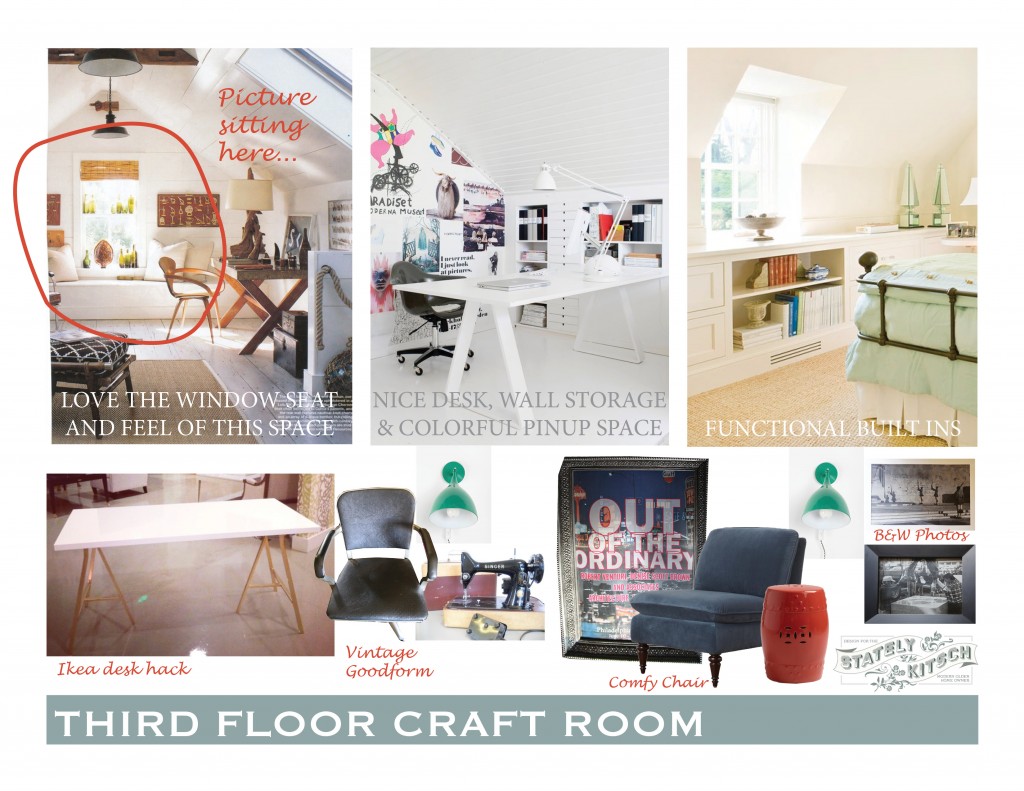
thirdfloormoodboardI thought I would show everyone a mood board for the craft room today. I call it Victorian Industrial Glam.

thirdfloor craftroom

The Victorian part comes from the house and our old 4 over 4 casement windows trim and curved plaster and well the fact that we are in an old Victorian. I am also planning on keeping the new built-ins in a similar style to the trim of the house.

goodformchair2

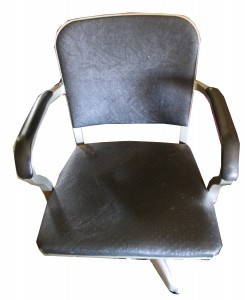
The industrial is inspired by he vintage Goodform chair that we actually bought from the previous owner. It is in need of a new softer seat and upholstery (I am thinking possibly bright faux leather) but I have always liked how it looks. We also have a couple of matching regular chairs that have been gathering dust in the garage. My pocketbook likes the idea of actually using some of our existing furniture. I think my vintage Singer sewing machine will also look nice with this and finally have a home (that is not shared by 2 little ones).

urbanoutfitters-sconce

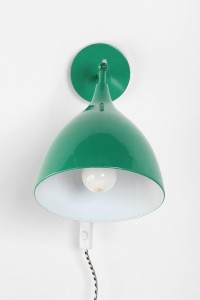
I am also really liking this industrial looking sconce from Urban Outfitters. I think a row of these mounted to the wall would be really interesting paired with grouping of Mr. S and my black and white photos.

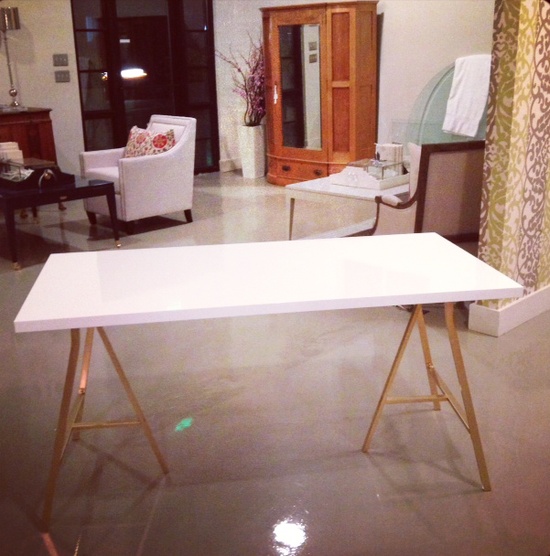
Finally the “glam” part. I’m not normally a glamorous person. Quirky and colorful, yeah that closer to home, but I really liked this Ikea Hack which are just some really inexpensive Ikea trestle legs spray painted gold. I think some mixed metal finished up here with a little bit of sparkle might be nice, especially since this room is mostly for me and sort of the opposite of the “man cave” in the basement.

What do you think?

I hope everyone has a lovely weekend. I’m off to work on purging some more stuff! Wish me luck!

We have been busy doing some not so glamorous or photogenic work in the last week. We have been trying to get the third floor cleared out enough that we can it insulated shortly. I wasn’t in such a hurry but my spray foam insulation guy has some openings in the next few weeks, and I don’t want to not take advantage of that.  Mr. S. even spent a good portion of Sunday up there going through stuff and purging. The last step will be giving up my garage space in the coming days to store some of vast piles of stuff while the work is done. I also need to move some of the potential Craigslist items out there. Anyone in need of some old ikea furniture? hahaha…

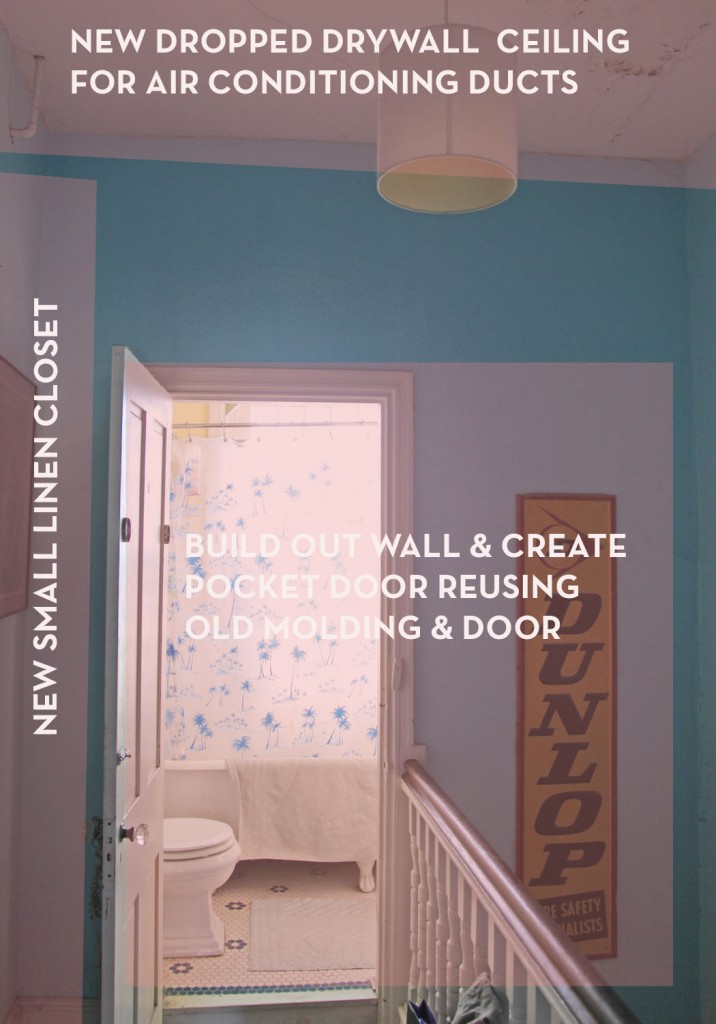
So while I hurt my back, I thought I would show you some of my inspirations for the second floor bathroom and hallway.

hall-before3

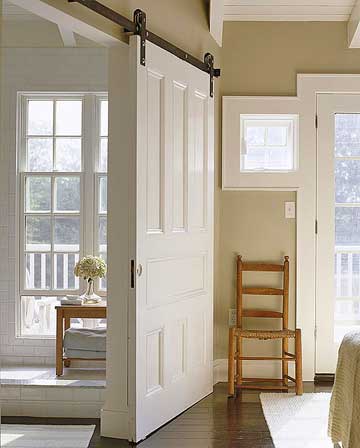
We will be adding some sort of sliding door to this room. I am conflicted between a pocket door (more historically accurate) and an exposed rail system. Doesn’t this rail look cool above? I’m a little nervous though that even if it is cool, it might not be quite right for the house. Although we do now have an extra newel post to install at the railing to allow the door to pass behind it and over the staircase.

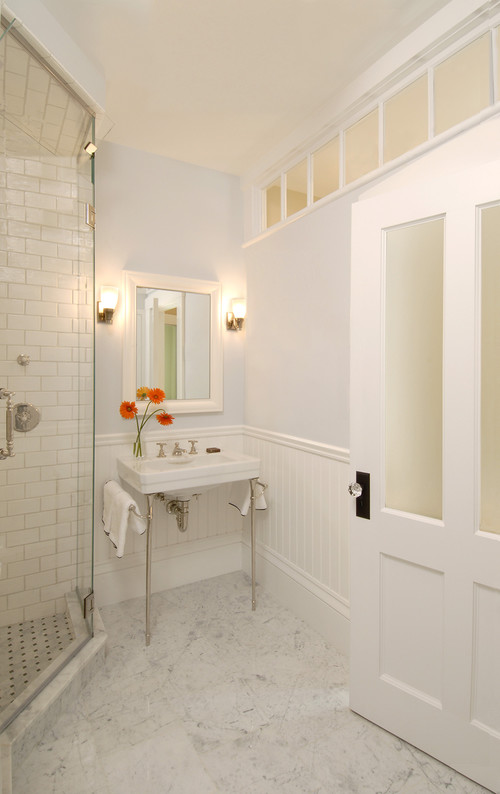
Along with this I am contemplating adding a transom window above to add some additional light. Probably not all the way across, although I think that is pretty cool. The hallway is a bit dark since the only natural light comes from the stained glass window and the surrounding rooms. So far I have not convinced Mr. S. that this is a good idea.

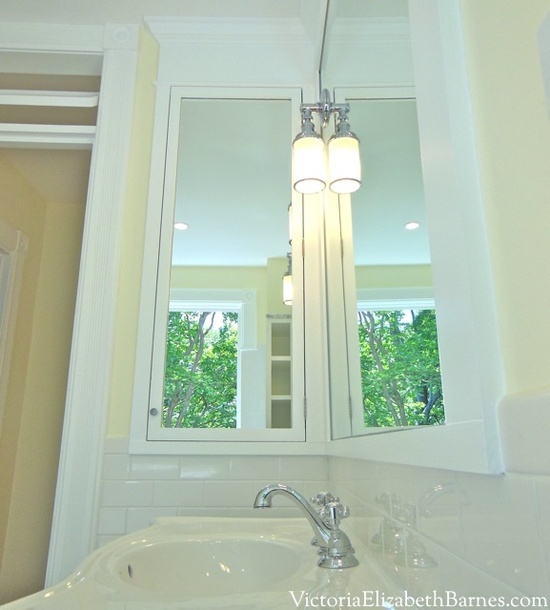
I am also in love with Victoria’s bathroom renovation (which if you haven’t seen I highly recommend). We won’t be gutting anything major here, but I really like the side medicine cabinet that her husband created. We can’t install one behind the sink since it is an outside wall, but we could put on on the side wall (behind the new sliding door).

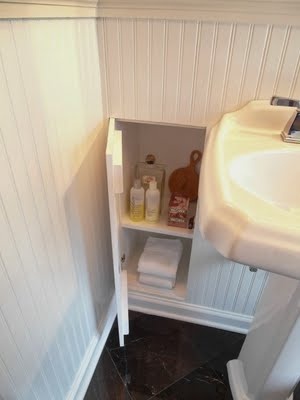
Finally I like this little recessed storage niche. I am thinking that a small one near the toilet would be perfect for extra toilet paper and other unmentionables.

Third Floor Before Tour

February 7, 2013

thirdfloorplan3

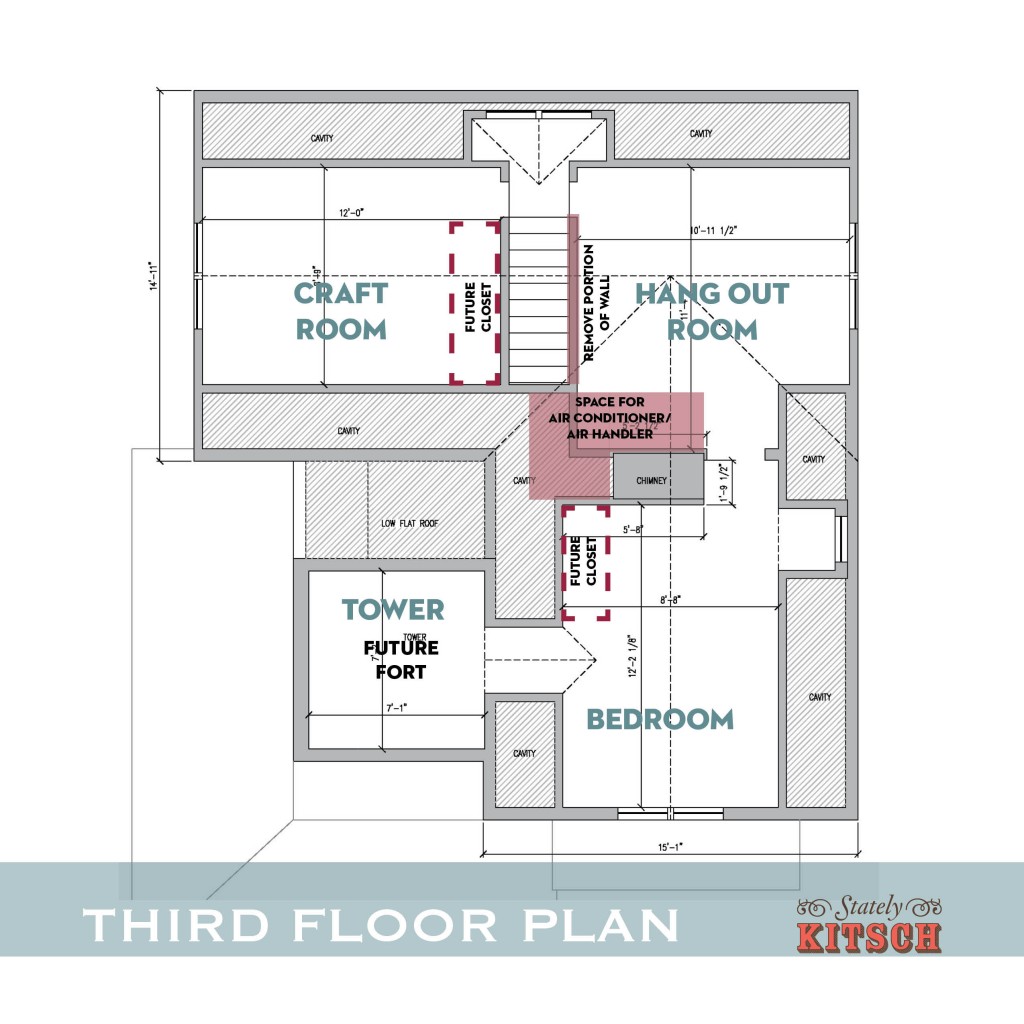
I know its been a while! Things have actually been quite busy here. My contractor has been over finishing up some long over due projects (YEAH!). More to come on that later but I thought I would give an update on part of our upstairs project. I had a spray foam insulation contractor in last week to take a look at the messy, messy third floor. As part of this I had to finally draw some accurate plans of the third floor. I found it fascinating to see how it all fits together, since there are lots of bits in the eaves that aren’t accessible and it has been hard to figure out how they connect (and dream of future storage space). I thought I would share some before pictures. Beware I don’t usually let people up here and the in case you were wondering where the 1970s went, they are alive and well up here. This floor is currently a wasteland of stuff (12 1/2 years of stuff). Please try to not judge too harshly! Some of the furniture will actually stay, but it is impossible to see it will all of the boxes and piles of stuff. It is really hard to photograph the space, but it is actually one of the reasons we bought the house. The scale is perfect for kids (if you ignore the dangers of steep steps and low old casement windows).

thirdfloor-stairs

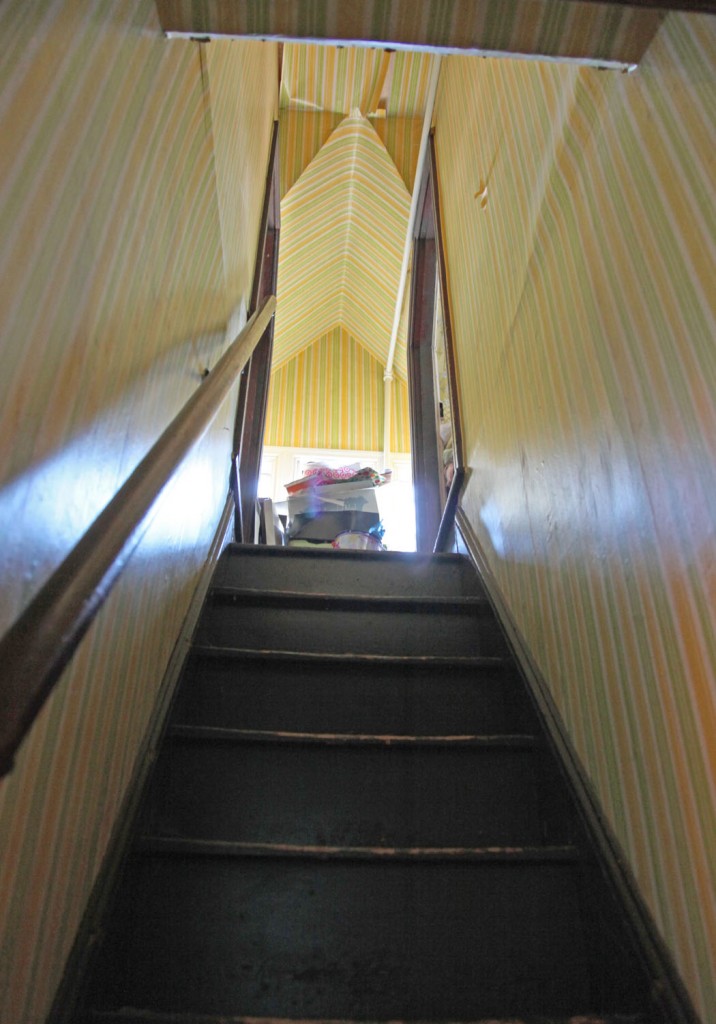
Yes, those stairs are as steep as you think they are. Brown painted pine steps that are taller then they are wide. And isn’t that wallpaper a nice complement! We are thinking about removing the wall to the right to open up the hang out space.

thirdfloor-craftroom

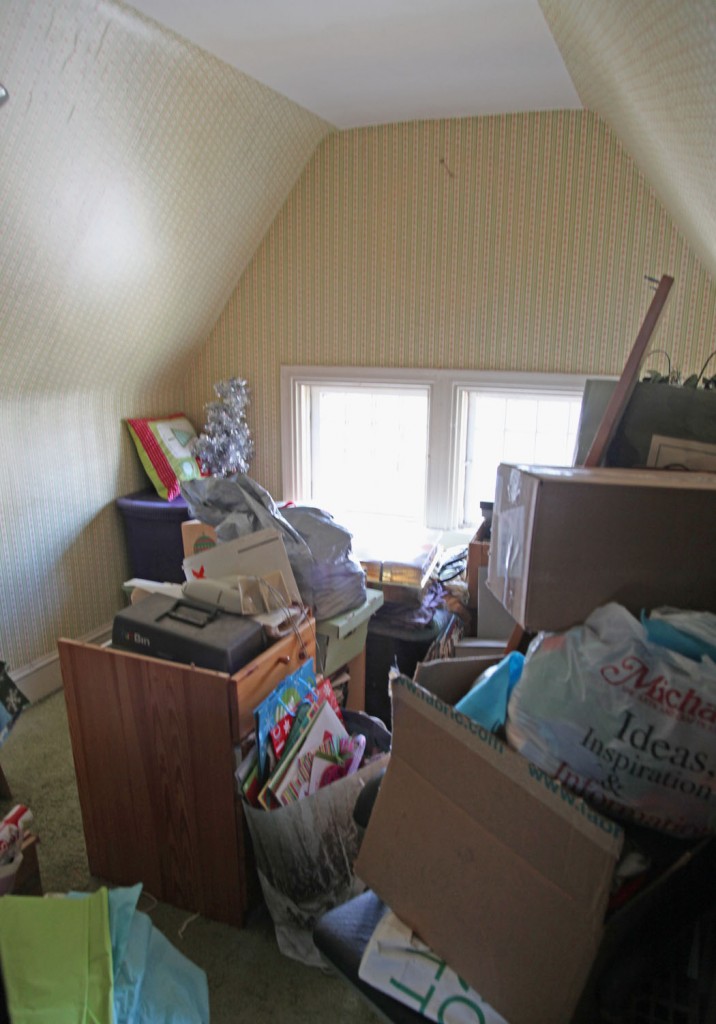
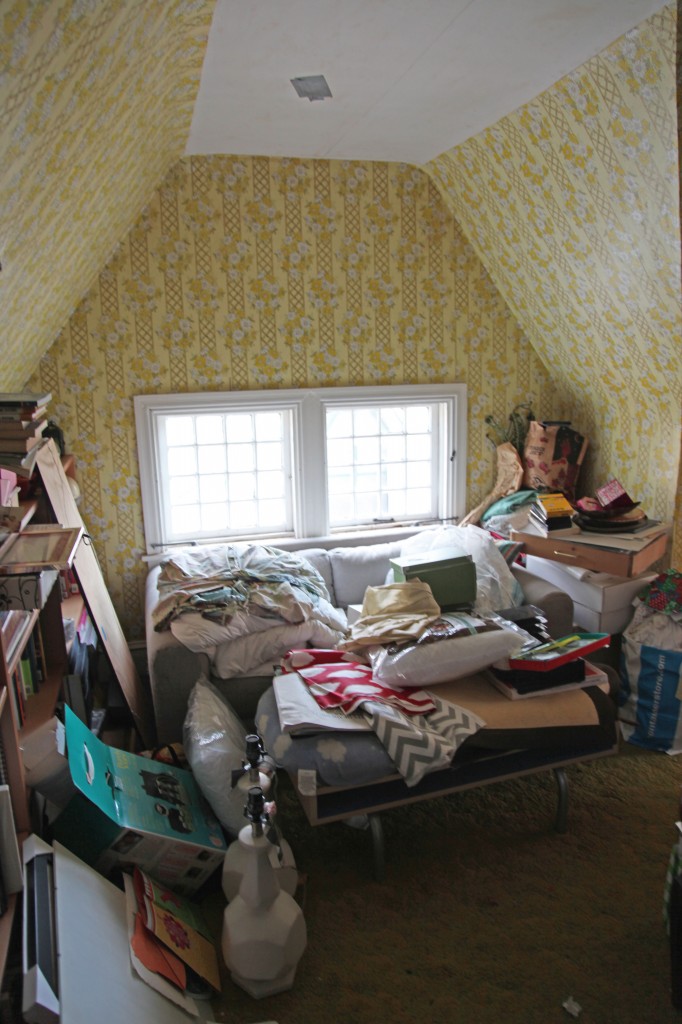
This is my future craft room. It currently holds random Christmas decorations and half finished crafts, as well as my husbands CD collection. It is the one room where the wallpaper is not crazy, although it still needs to go!

thirdfloor-hangout

This is actually not the same room as the previous photo (I know it is hard to tell). This is our future “hang out” space. I can totally picture a bunch of kids hanging out up here. We currently have a wall of low Billy bookcases on one side holding our books. I would like to replace them with built in bookcases some day.

thirdfloor-hangout2

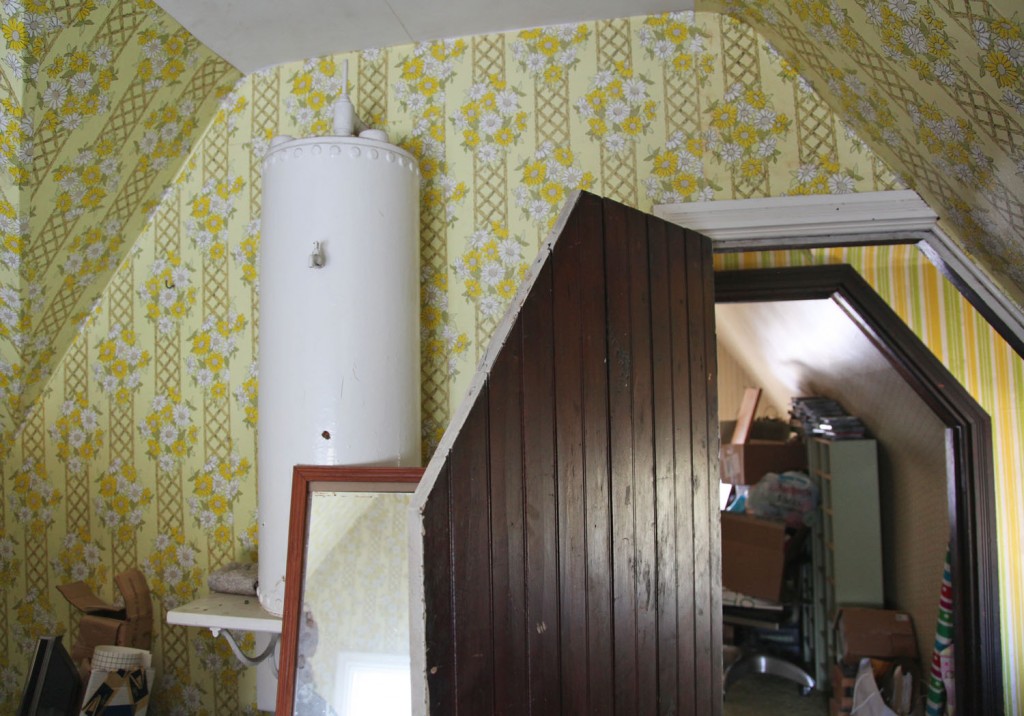
This is the wall we are looking at taking out to open the space to the stairs. Any what is that crazy thing on the wall? Well that is a Victorian expansion tank for our radiators! Crazy I know! It actually was still in use until we redid the boiler about 7 years ago and added an expansion tank down there. I think it may become garden art someday. You can also see the craft room across the way.

thirdfloor-hangout3

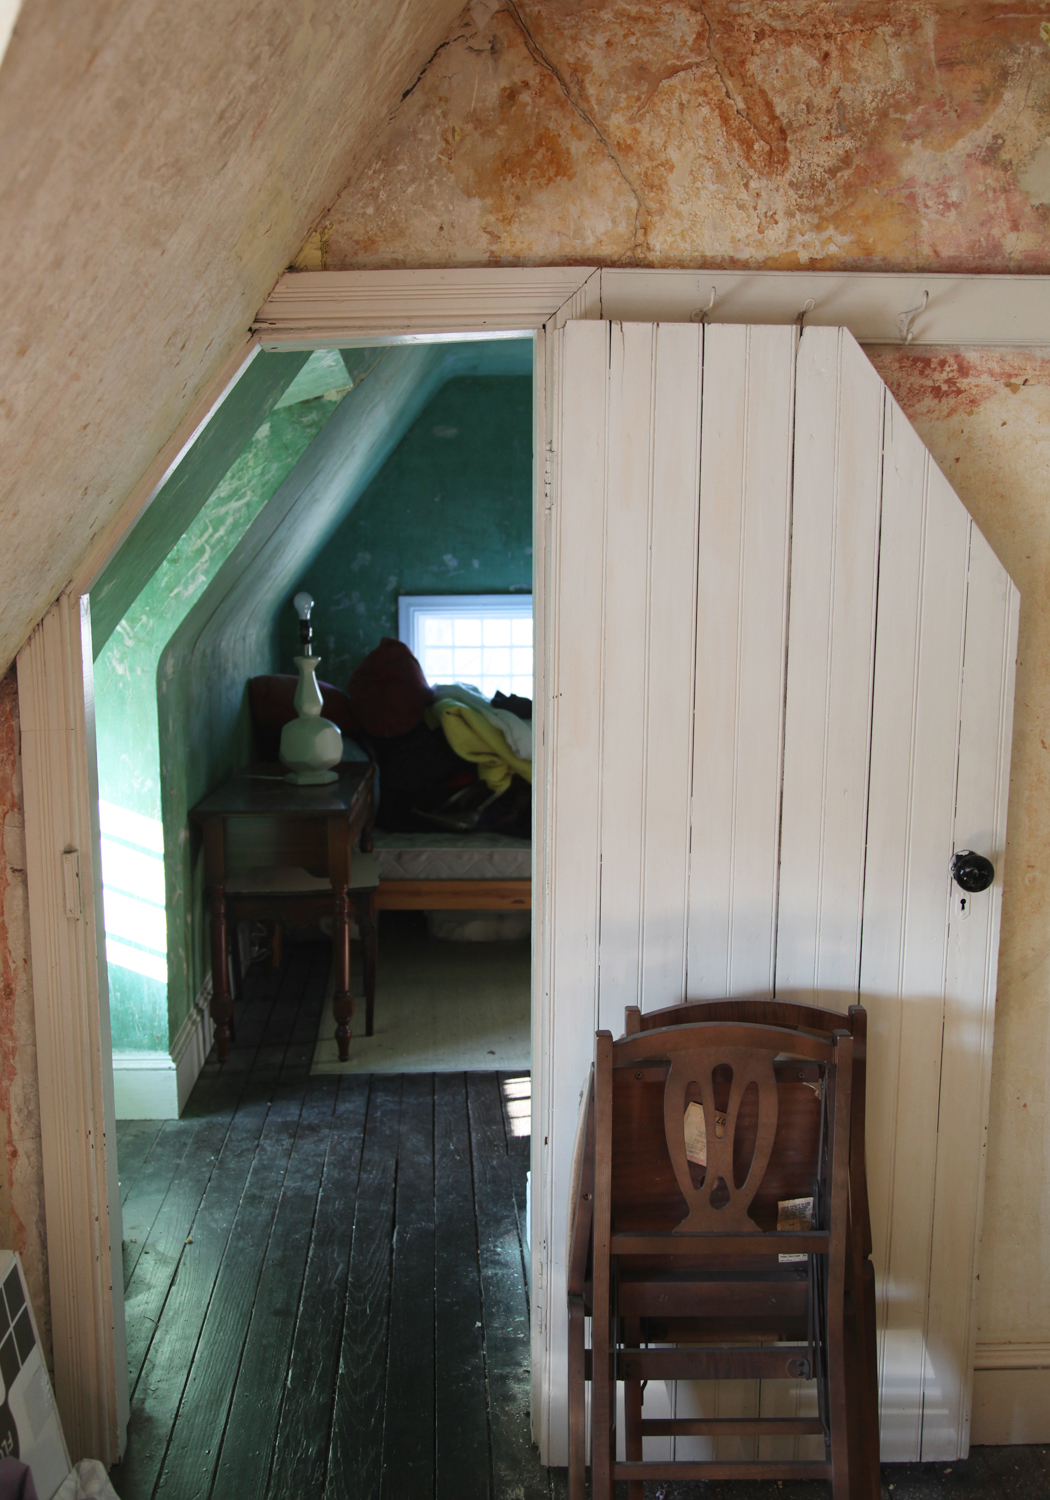
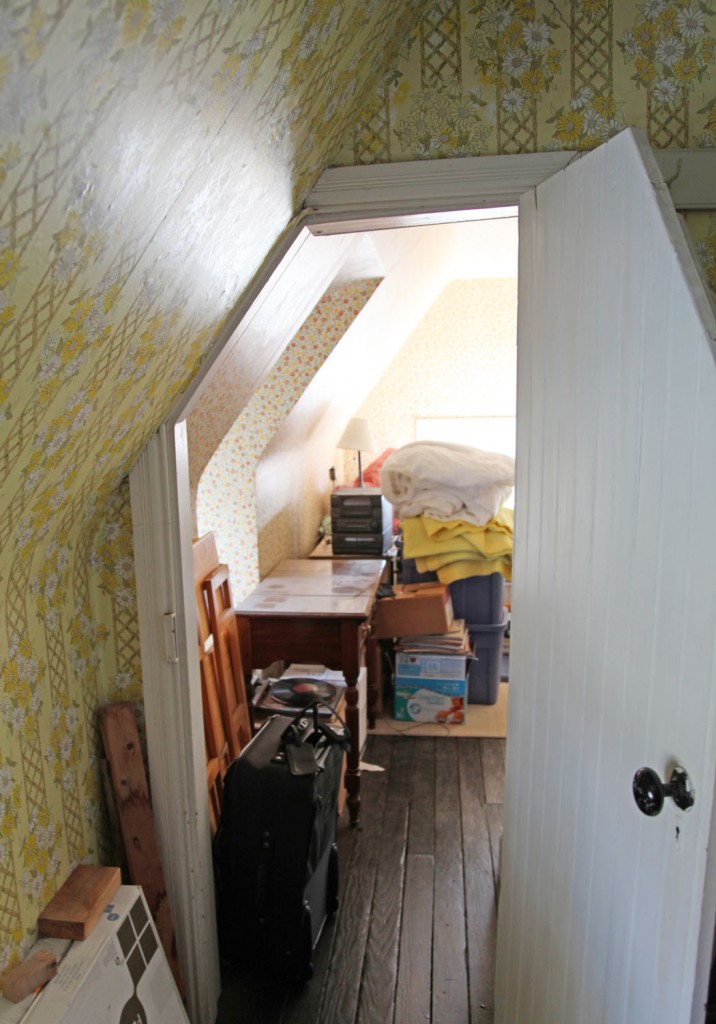
This is the doorway to the bedroom. I don’t have to duck but Mr. S. does.

thirdfloor-bedroom

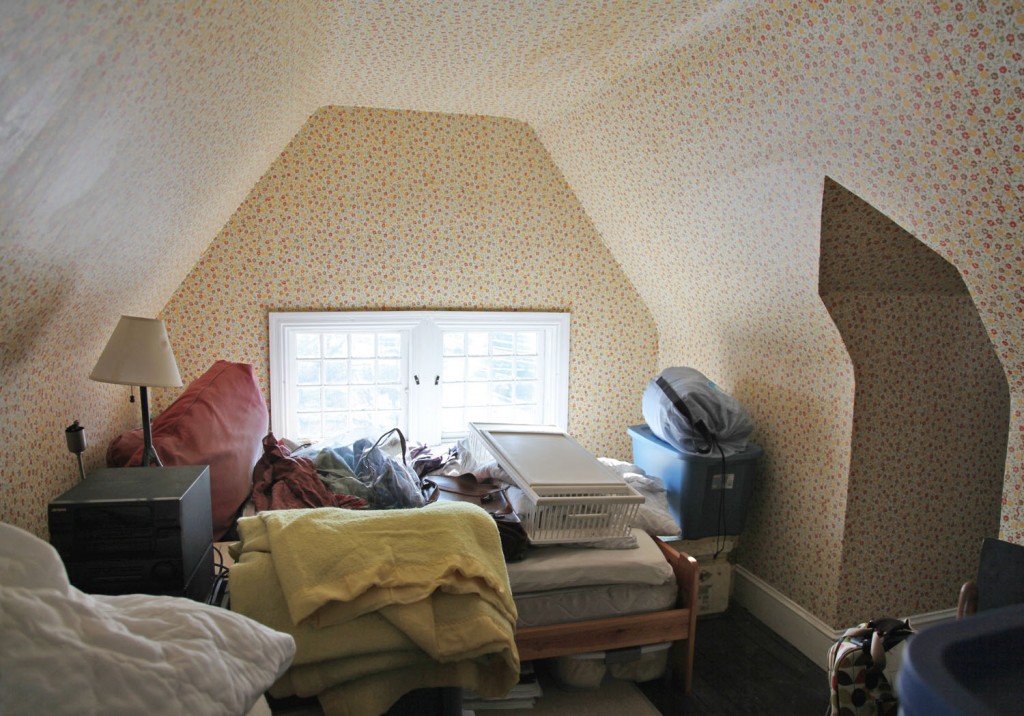
This is what we would like to use as an extra bedroom/ kids room (when they get older). There is actually a bed already here! I think a built in bed under the windows, with storage on either side, would be amazing.

thirdfloor-bedroom2

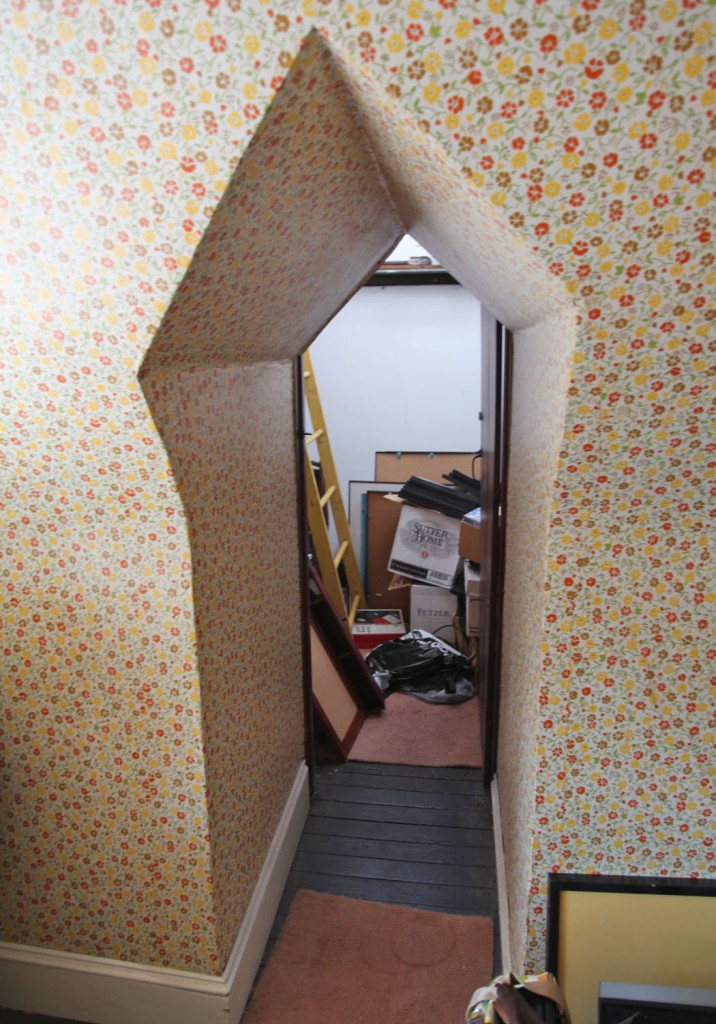
And the one space that everyone wants to see, the tower! I can just fit through this without ducking!

thirdfloor-tower1

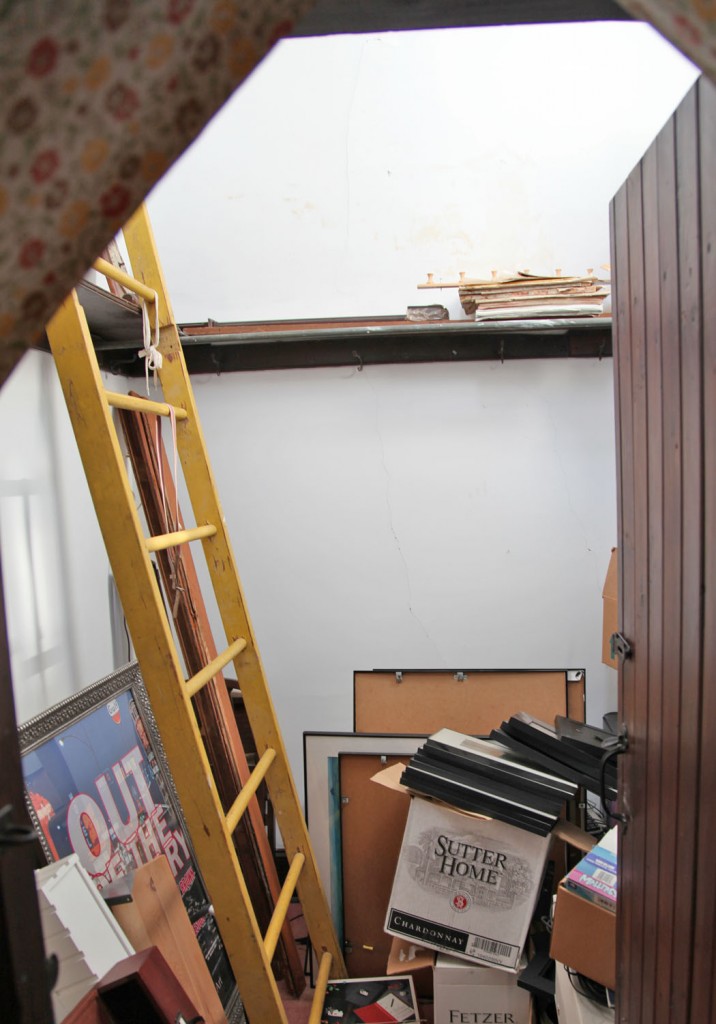
Did I mention that we have a lot of stuff? This space is quite strange. There are no windows at eye level but the light is amazing.

thirdfloor-tower2

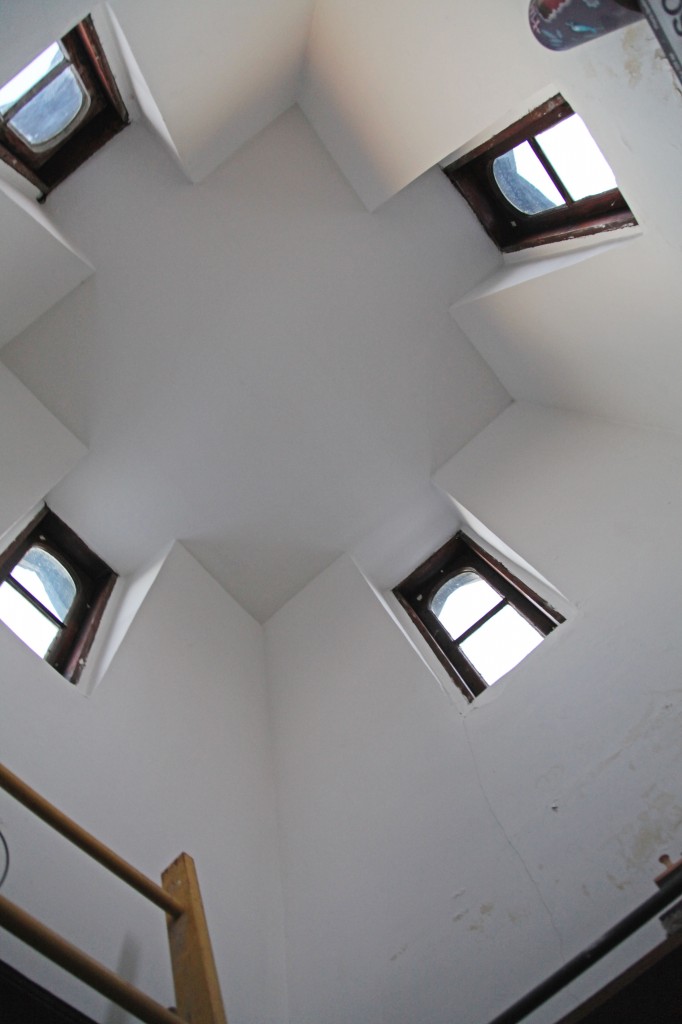
Here are the tower windows! This is where we would like to build a fort up high for the kids. This space is a little strange. They never installed the interior trim on the windows. These unfortunately need to be rebuilt, but aren’t too hard to pop out.

So there you have it! You have now seen some interesting and embarrassing photos. You can see we have years of work ahead up here, and it will get much worse before it gets better. Stay tuned for another 100 posts or so on how we go about making these spaces our own.