Archives For OUR HOME

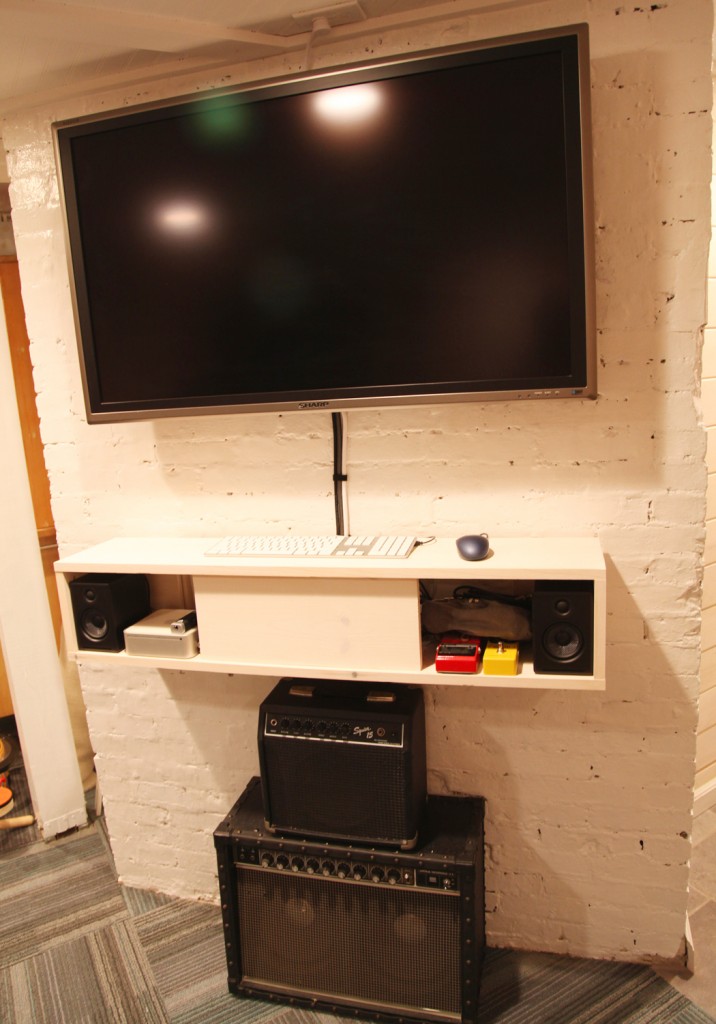
New TV Console/ Floating Shelf with Guitar Amps Below

It was a busy DIY weekend here! I think this is the most woodworking that I have done in a single stint in a LONG time, certainly in the last 5 years. The good news is that the TV console and the wine rack are done. I still need to whitewash the wine rack, but it is up and in place, which is great. I made the TV console on Saturday and whitewashed it Saturday night. Then Mr. S. hooked up all of the TV components on Sunday morning, so this project is actually complete! I spent most of the day Sunday working on the 6’x2′ wine rack, which I will write about later this week.

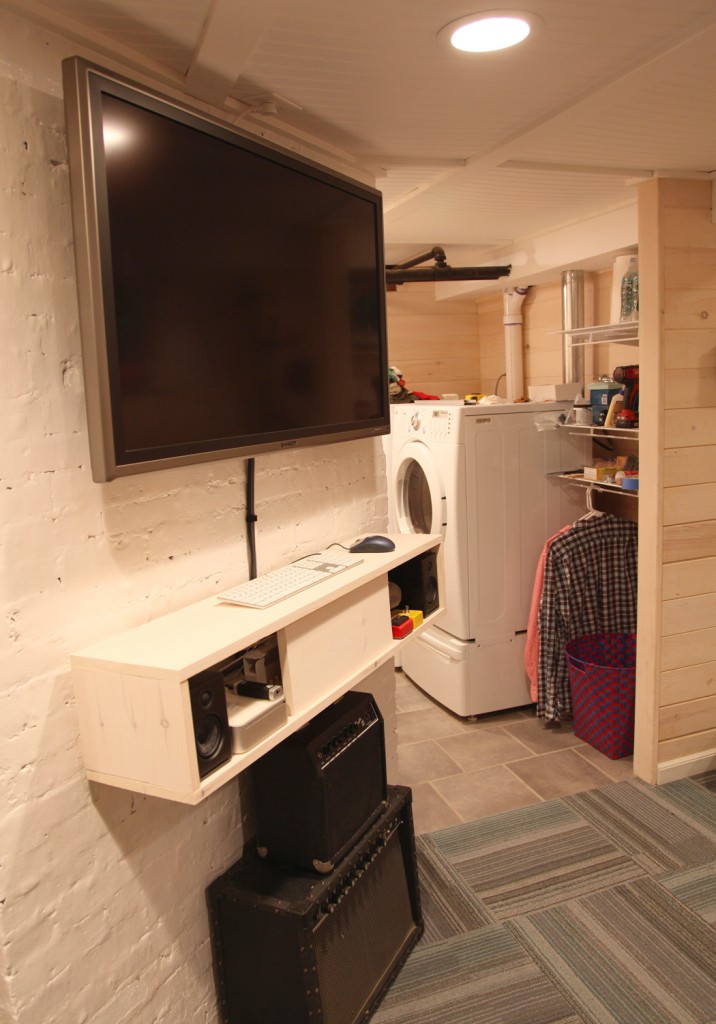
So anyway, back to the TV console. I have been tinkering with the design in my head for a few weeks, but Friday night I decided that it was now or never and spent some time drawing up the “perfect” shelf. I measured our new tiny speakers, the small computer (a mac mini with all of the hookup on the back), the giant power strip and some miscellaneous smaller bits. I wanted to minimize the dimension that it stuck out from the wall (since it is in a major pathway), while provided enough depth for the computer. I also needed quite a lot of space for allowing wires to go up and down and all of the plugs and electrical bricks. Somehow the idea of a sleek TV set up still seems pretty elusive. In the name of minimizing its size we don’t even have a cable box down here, and have to rely on the computer for everything (which is a whole different experiment).

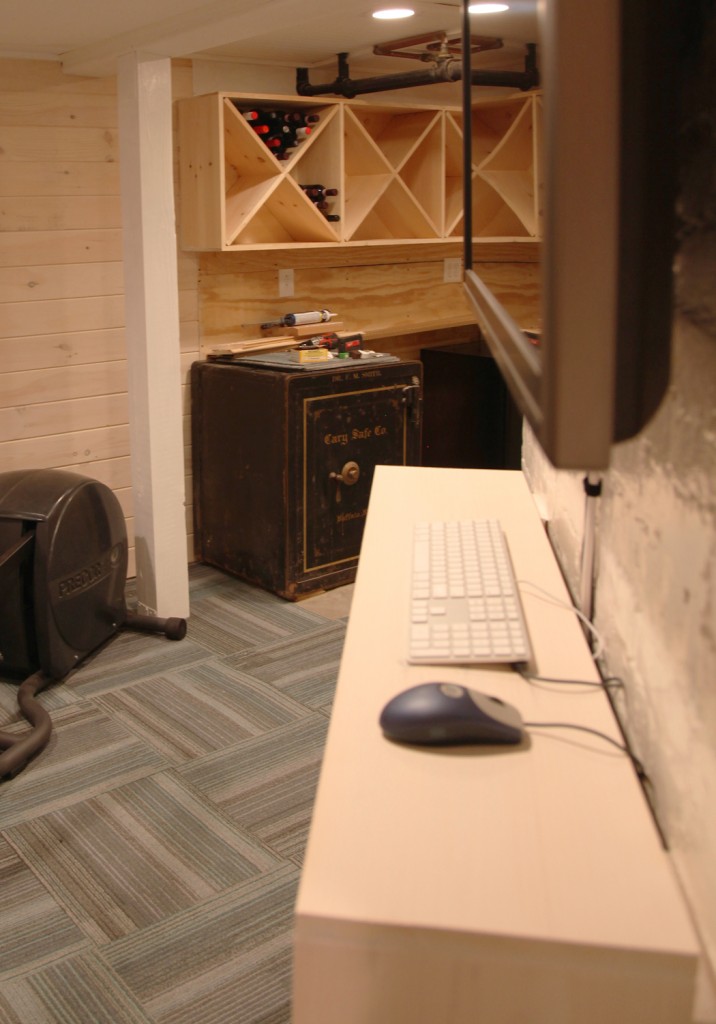
Close Up of TV Consule

The Design

I decided to keep it simple. I went with a box with enough height on the inside to accomodate the speakers (I went with an inside height of 7 1/4″ to allow for the front cover plate to be a 1×8). The depth is 10″ including the mounting blocks. This allowed enough space for the computer and the hookups on the back (approximately 9 1/2″). I used 1×10 pine for the box (9 1/4″) plus the depth of the 3/4″ mounting blocks. The width is 44″. The TV is 42 1/2″ so I started with that width and added a little to make sure that I could fit the speaker and computer on one side of the wood cover plate. In the middle there is an 18″ wood cover plate to hide the 17″ power strip. It is funny that the power connection takes up almost 3 times the width of the computer. On the right side there is space for the other speaker and a little bit of miscellaneous storage.

Materials

1x10x10′ Pine (3/4″ x 9 1/4″ actual)

1x8x6′ Pine (3/4″ x 7 1/4″ actual)

Kreg Tool w/ Pocket Screws

Wood Screws

Glue

Masonry Nails (to attach it to the wall)

Total about $40

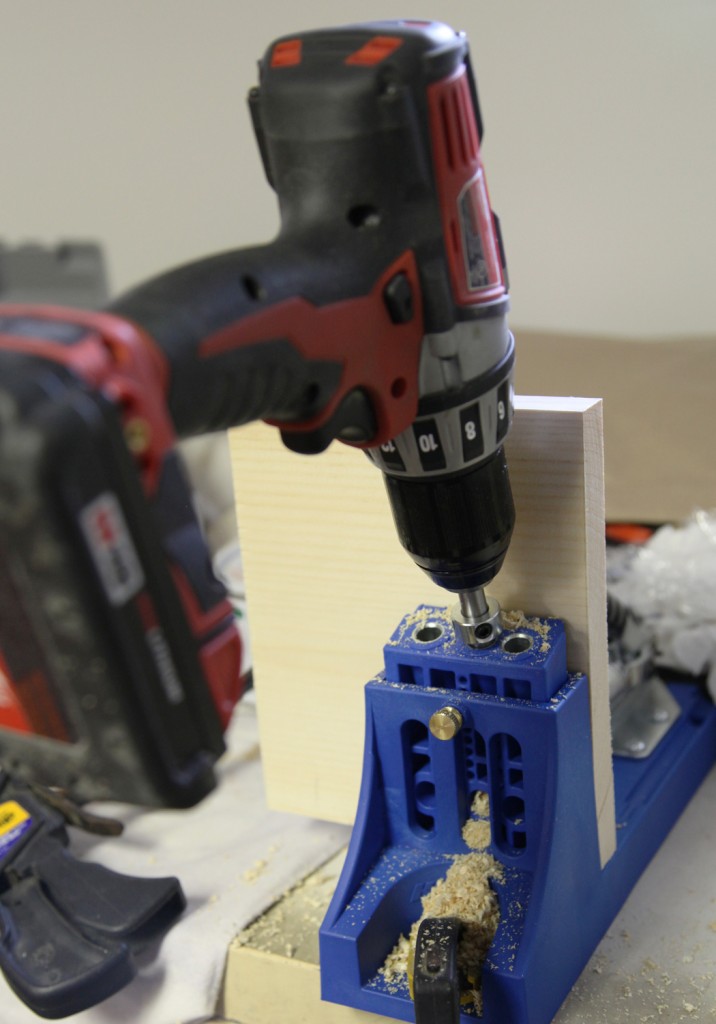
Kreg Tool for Making Screw Pockets

Instructions

1. Cut the top, bottom and 2 sides out of the 1x10x10′ (in our case: 2 @ 44″ and 2 @ 7 1/4″)

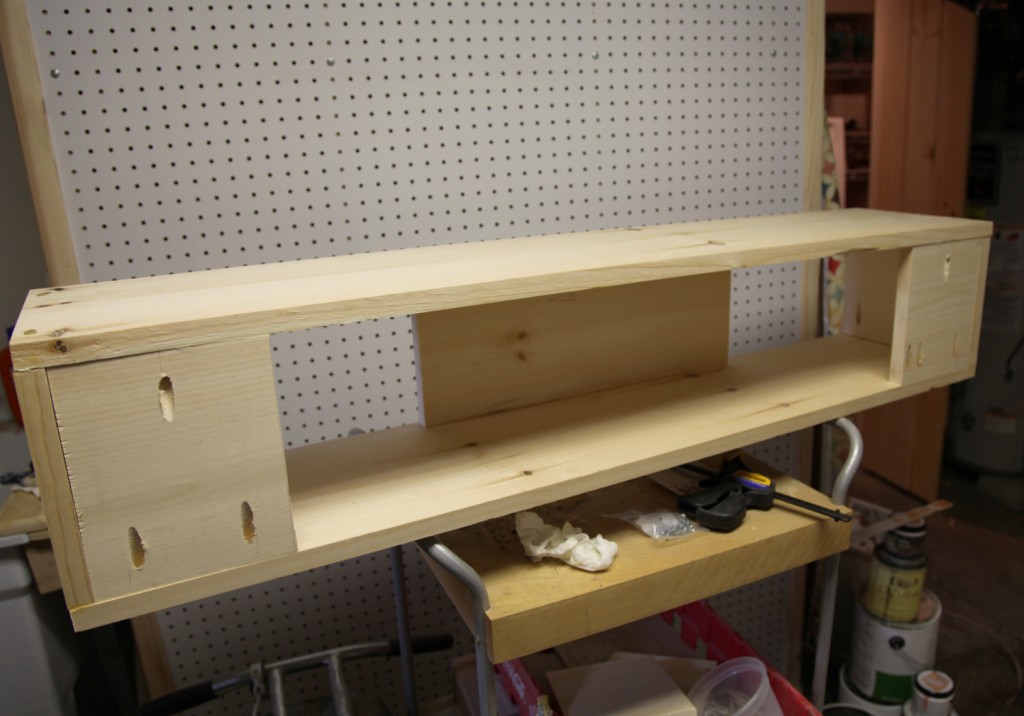
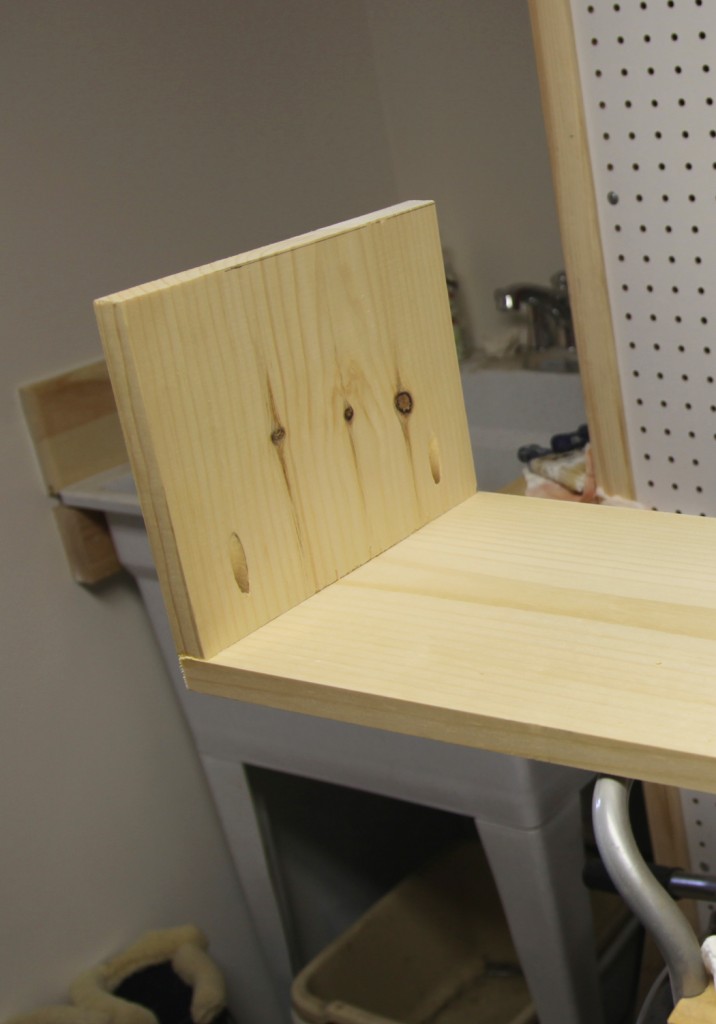
Side of shelf attached to the top with pocket screws

2. Use Kreg tool to make holes for pocket screws to attach the sides to the top. This way there are no exposed screws. I also glued the pieces together.

3. Screw the bottom with regular wood screws (since the bottom won’t be visible it doesn’t matter if they are visible).

4. Cut the back corner pieces and front cover piece out of the 1x8x6′. I used 6″ wide pieces for the back and 18″ for the front piece. I also cut 2 extra 6″ pieces for spacer to attach to the brick wall.

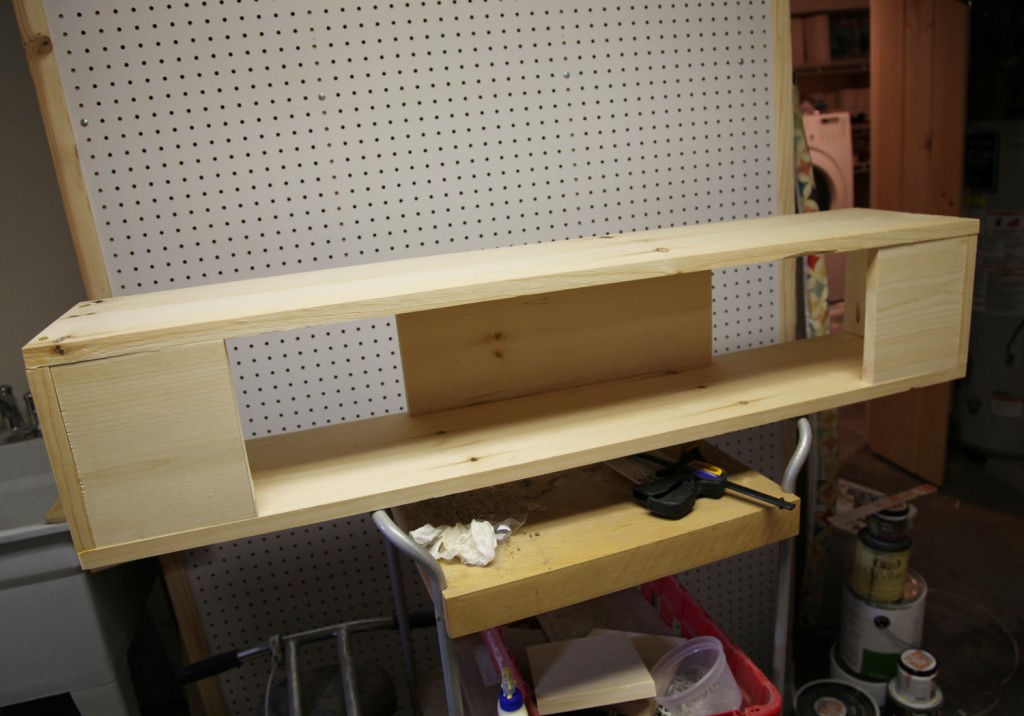
Shelf with the back pieces test fit in place

5. Test fit the pieces.


Back of Shelf w/ Pocket Screws Installed (upside down)

5. Using the Kreg tool add pockets in the 2 back pieces (I went with 2 on the top and one on the bottom). The back pieces will be supporting the shelf so I wanted to make sure it was totally secure to the shelf.

6. The front cover piece is to be secured later after installing the shelf to the wall.

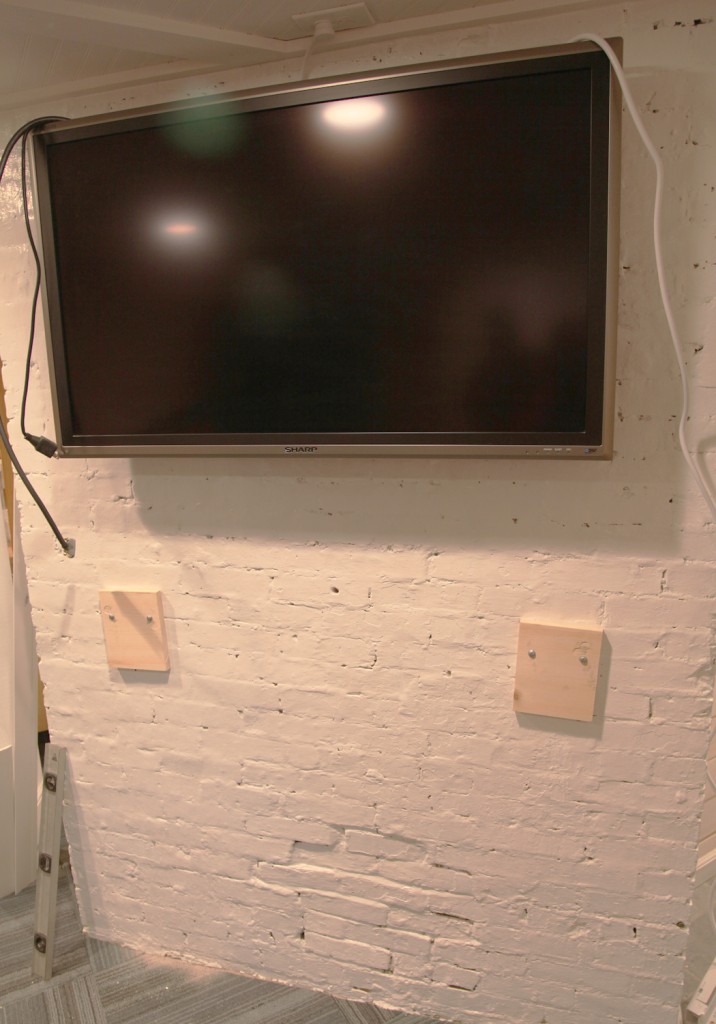
Blocking/Spacer installed on Wall with Masonry Anchors

Installing it on the Wall

Our old brick wall is VERY difficult to  drill into. The Masonry Anchors we used require pre drilling 1/4″ holes to the proper depth. After blowing through more than one bit anchoring the TV we decided to align the holes with the softer mortar.

7. We decided where we wanted the shelf (high up enough to allow the amps to fit below and low enough to be able to use the keyboard on top).

8. I roughly measured the placement of the wood blocking with the mortar joint. Then we predrilled the holes in the wood with a wood drill bit. This left a mark on the wall and we drilled with a masonry bit.

9. We hammered in the masonry anchors through the wood blocking. This left everything a bit wonky, but we decided to proceed.


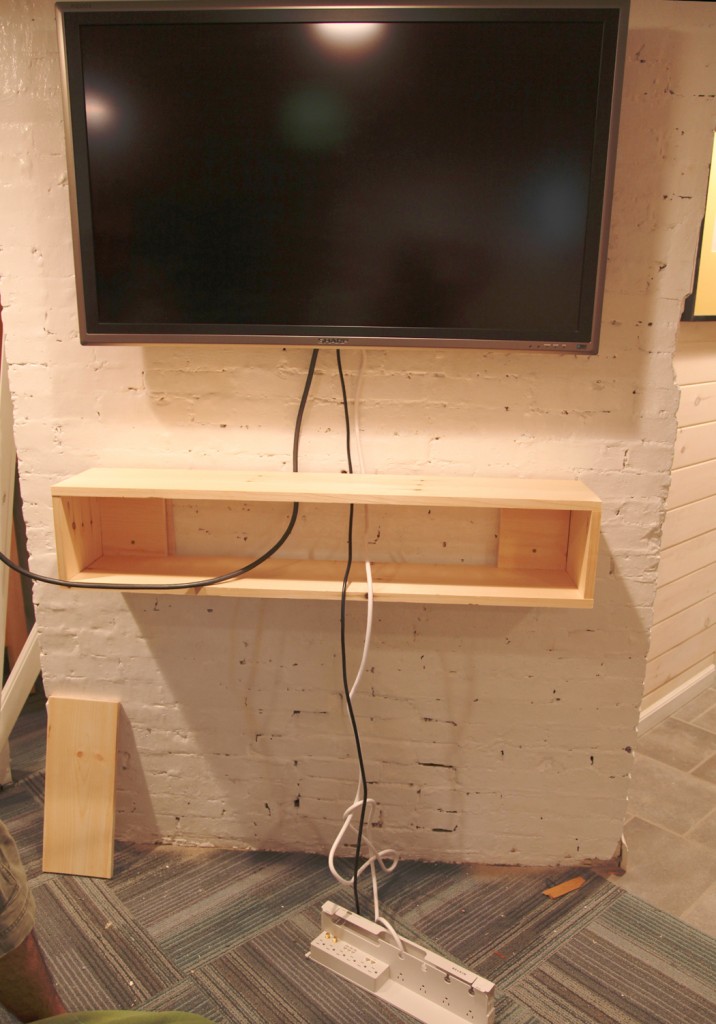
Shelf in place w/ Power Strip Slid Through the Rear

10. We screwed the shelf to the blocking. We actually had to do this twice because we released that the power strip needed to go through the back first (and the other end was located in the outlet above the TV).

11. At first this wasn’t as secure as I would have liked. Then I realized that by tightening the screws we had actually pulled the blocking away from the brick wall at the bottom (while keeping it tight at the top). The anchors were still secure, so I was a little unsure what to do. Then I tried a shim underneath the bottom of the blocking at it was suddenly nice and tight and secure. Phew! Just a little caulk to cover the seam and we were good to go.

New Shelf filled with equipment

Finishing

After the shelf was in place we used the gloss white to match the wall for the blocking on the back (along with the caulk). For the rest of it I white washed it similar to the walls. Then I let it dry overnight before installing the equipment.

What would I do differently?

After I do these projects there are normally a few things that I would do differently. The main thing is that I would have made the blocking for the wall smaller than the back corner pieces on the shelf. In the end they didn’t end up aligned very well and you can see one side of it sticking out if you are looking at the inside of the shelf. Otherwise I would have been more careful about the various plugs and making sure that I had put them through the rear of the shelf before installing it.

All in all this was a pretty easy and quick project. I think it is something that most people could do. It also cost less than anything  I would have bought at Ikea which is always a nice feeling.

Shelf w/ gap left at the rear for wires to run

Finally, I will leave you will a detail of the shelf and a sneak peak at the wine rack in the distance. Later this week I will break down how I made it.

* To see all of the posts about our basement click here.

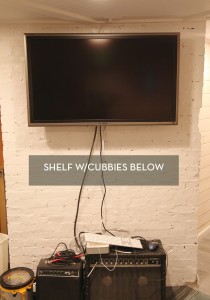
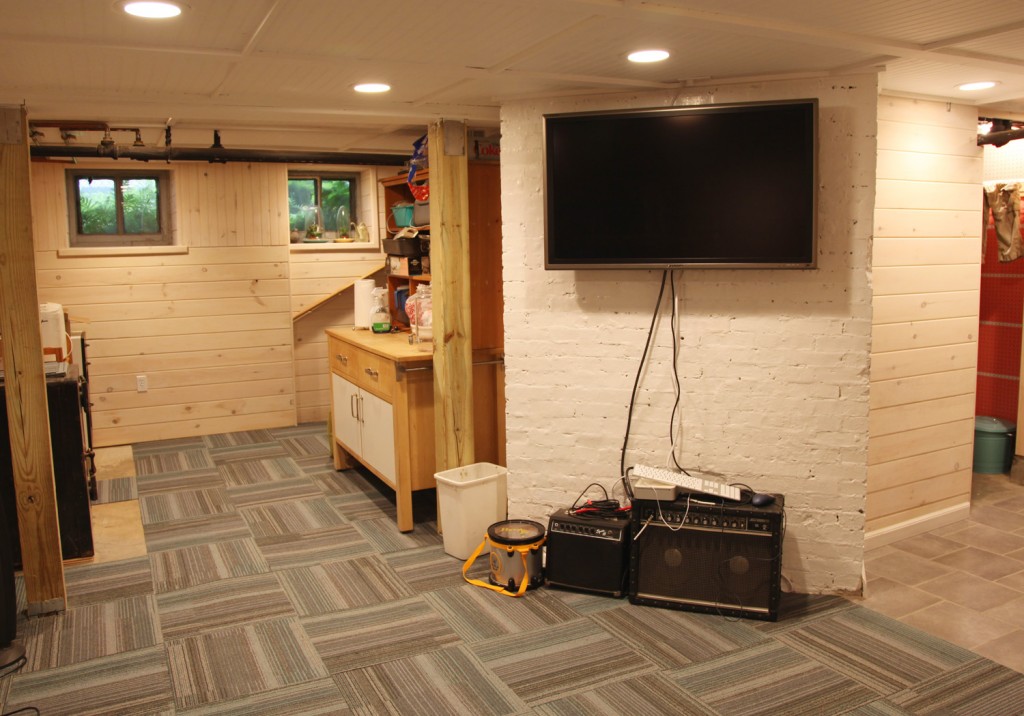
TV Wall Before

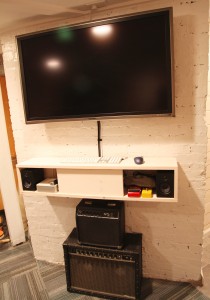
New TV Consul/ Floating Shelf

Well the day has gotten the best of me! I had hoped to have instructions for our new TV consul/ floating shelf. Unfortunately it is only half done, so in the meantime I thought I would give you a sneak peak into some of the woodworking/DIY from the weekend.

Doesn’t that look better! (And, yes I am patting myself on the back.)

New Beadboard Doors for the Workroom

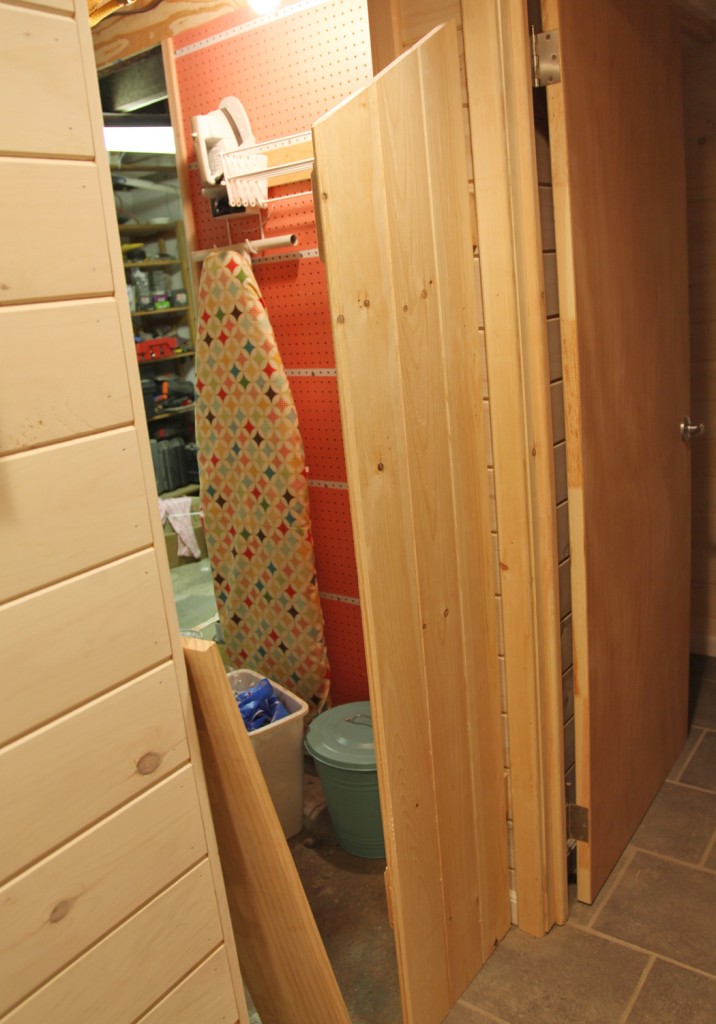
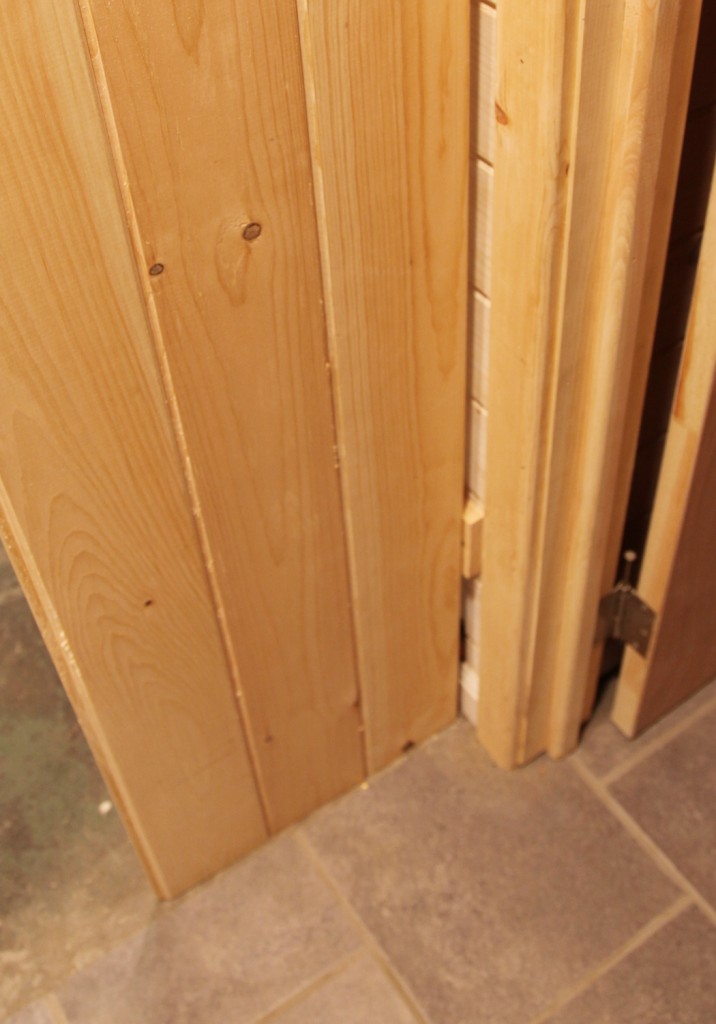
Until now we have not had any doors to our workroom in the basement. If we didn’t have little kids I probably wouldn’t worry so much, but since the doorway is on the way to the bathroom we decided that we needed to be able to close it off. It also will hide the hot water heater and boiler from view when you are coming out of the bathroom (bonus!). It is an odd doorway with lots of piping on the other side for our boiler and hot water heater. The head clearance is partially affected by these, so a full height door was not going to work. I also liked having only a partial height door to help with air flow.

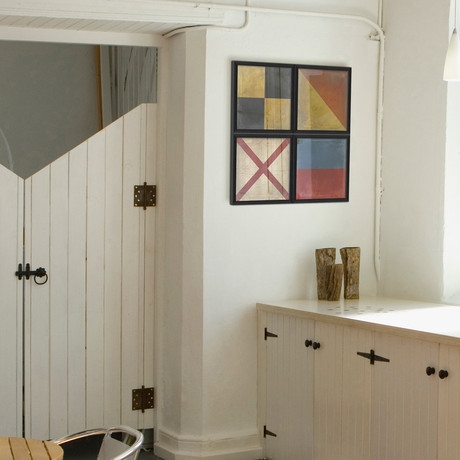
Door Inspiration from Fab.com

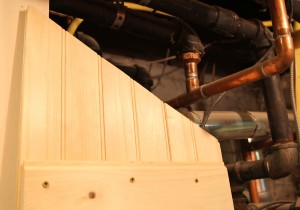
I was a little stumped on what to do exactly. I was considering buying a premade door and cutting it, but after taking a look around, I couldn’t find anything I liked. Then I was looking at Fab.com for totally unrelated reasons and saw the picture above and was sold! The V in the top would allow the doors to clear the piping and it looked totally buildable. The doorway is approximately 32″ wide. I would loose 3/4″ for cleats on the one side (so I was at about 31″). I wanted to use the same beadboard that we had used elsewhere. It is a nominal 1×6. In actuality it is 3/4″x 5 1/2 (including the tongue) or 5″ on the ones where the tongue fit into the other pieces. So, if I used 3 pieces on each side of the door it should work almost perfectly (5″+5″+5 1/2″) x 2= 31″. If the dimensions didn’t work out I was prepared to rip a piece down to fit.

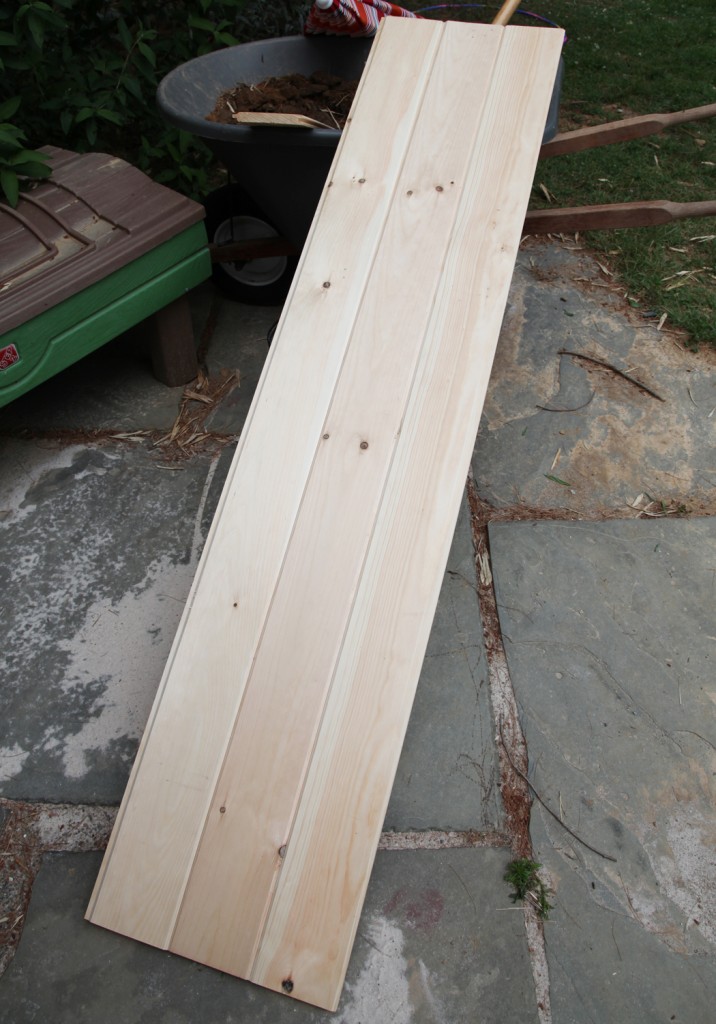
3 Boards Fit Together

1. I bought six 8′ boards. I only needed about 6′ but they don’t come in that dimension and I didn’t have the bigger SUV so using 12′ boards was out unless I wanted to make a separate trip (which I didn’t want to do). In the end 8′ boards were the better choice because I used the scrap for cross pieces. These are available at Home Depot although be prepared to go through a bunch of boards to get clean ones. The total was about $45 + hinges. I also bought 3″ gate hinges meant for outside (about $5 for a two pack).

2. I cut the first door pieces to 6′. Then I played around with the angle at the top to allow it to clear the piping. In the end I had it angle down a total of 8″ over the 15 1/2″. I marked it and cut with my circular saw.

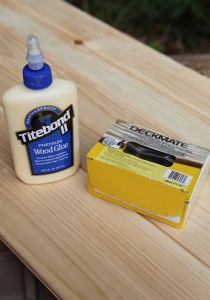
Glue for the Joints &Â Deck Screws

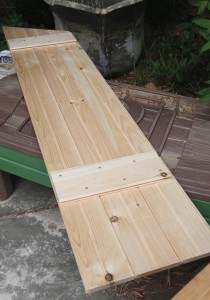
First Door w/ Staggered Screw Pattern

3. Next I glued the tongue and grooves together and screwed in the cross pieces in a staggered pattern, making sure I had two 1 1/4″ screws in each piece. I made sure to align the cross pieces with the cleats that I had installed on the wall. I used my trustee star bit deck screws again here.

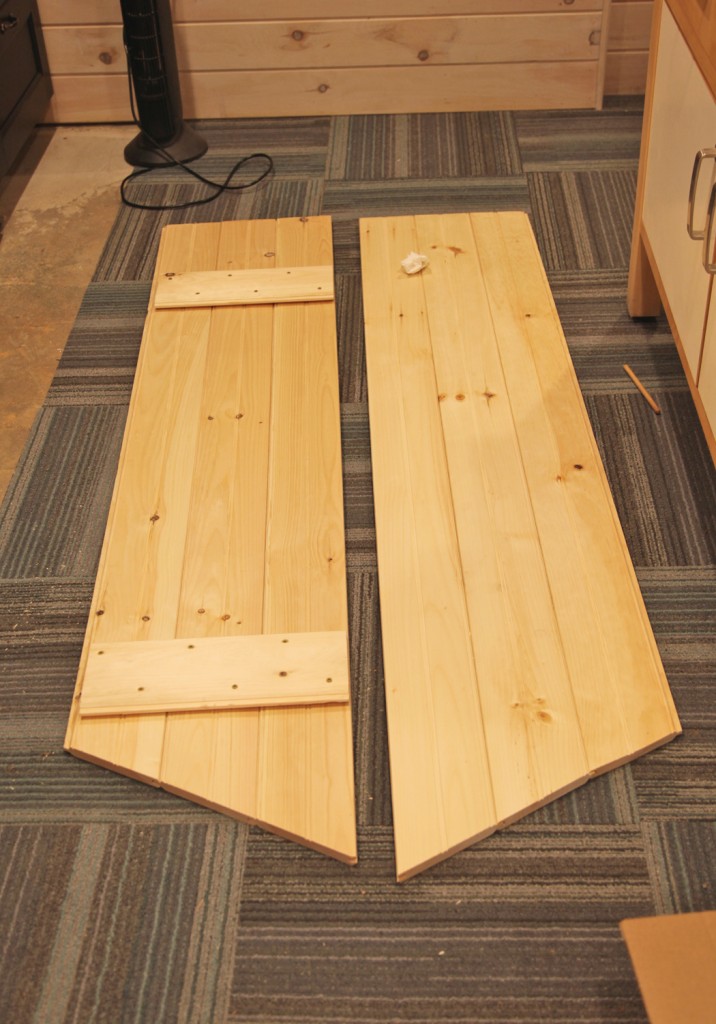
Second door

4. After testing it out in the doorway, I laid down the door and used it as template for the second door (checking to make sure it was reversed from the first one).

5. I cut the second door and glued and screwed the second door.

Testing the Door in the Opening

Testing the door to make sure it fits with the pipes

6. Now for the fussing. I brought the doors over and test fitted them. I quickly realized that I was going to need to cut down the tongues on the inside of  the doors (which fortunately can be done with a small planer).

Aligning the bottom of the door w/ the flooring

7. I then carefully installed the hinges. I first put down a piece of 3/4″ scrap to make sure that the door would sit well above the floor. I also aligned the bottom of the door with the edge of the flooring. Then I carefully marked the holes for the hinges and predrilled the holes.

8. Next I installed a couple of screws on each hinge (so that I could still tweak it a little bit).

9. After I had pulled, pushed and screwed, I planed the tongues on each side of the door to get a good fit. It is not totally perfect, but it is okay in my book.

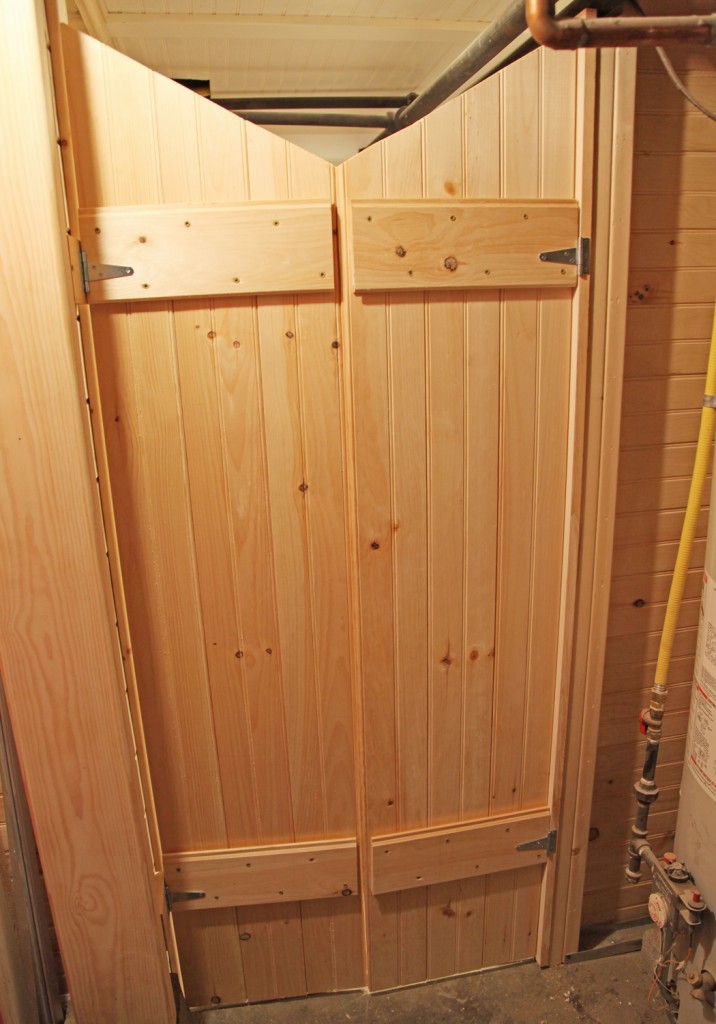
Door from the Workroom Side

10. I still need to install a latch at the top and whitewash it to match the rest of the paneling.

I actually prefer the workroom side of the door, but it wouldn’t work very well to switch the doors, so it will be staying this way for now.

What do you think?

Next up is adding trim to the bathroom door.

* To see all of the posts about our basement click here.
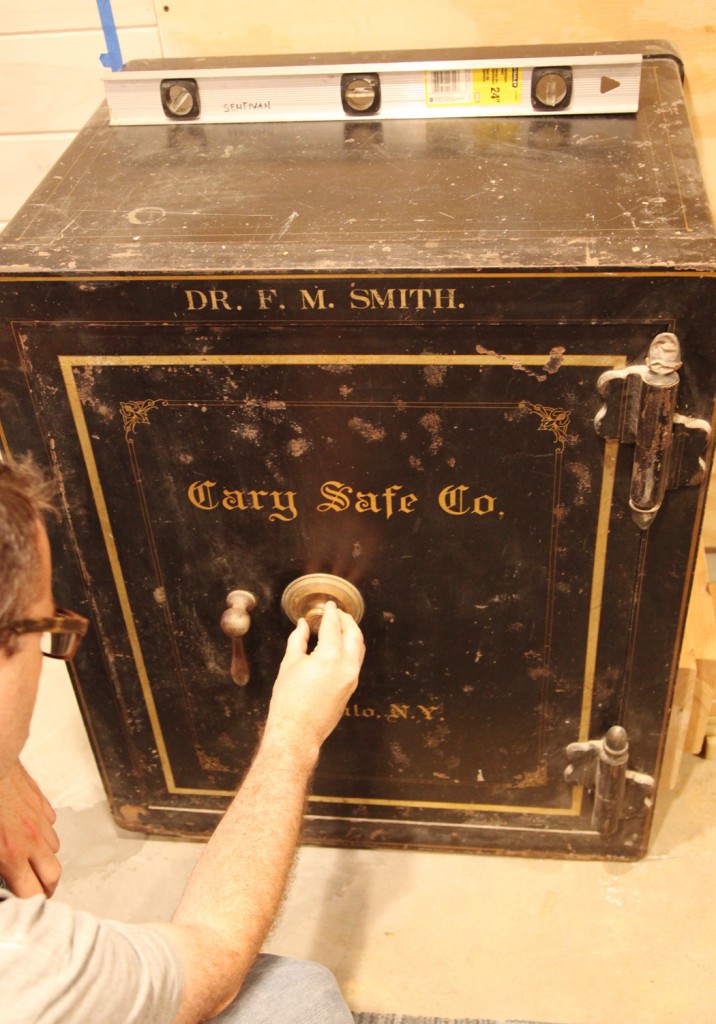
Victorian Safe by Cary Safe Company Circa 1878-1929

Our giant Victorian safe is really a beast! Interestingly, we looked up photos of similar safes from Cary Safe Company over the weekend and we discovered that it should have wheels at the bottom, which must have broken off before it made its way into our basement in the 1970s. Wheels sure would have made it easier to move!

Cary Safe Company Ad from 1920

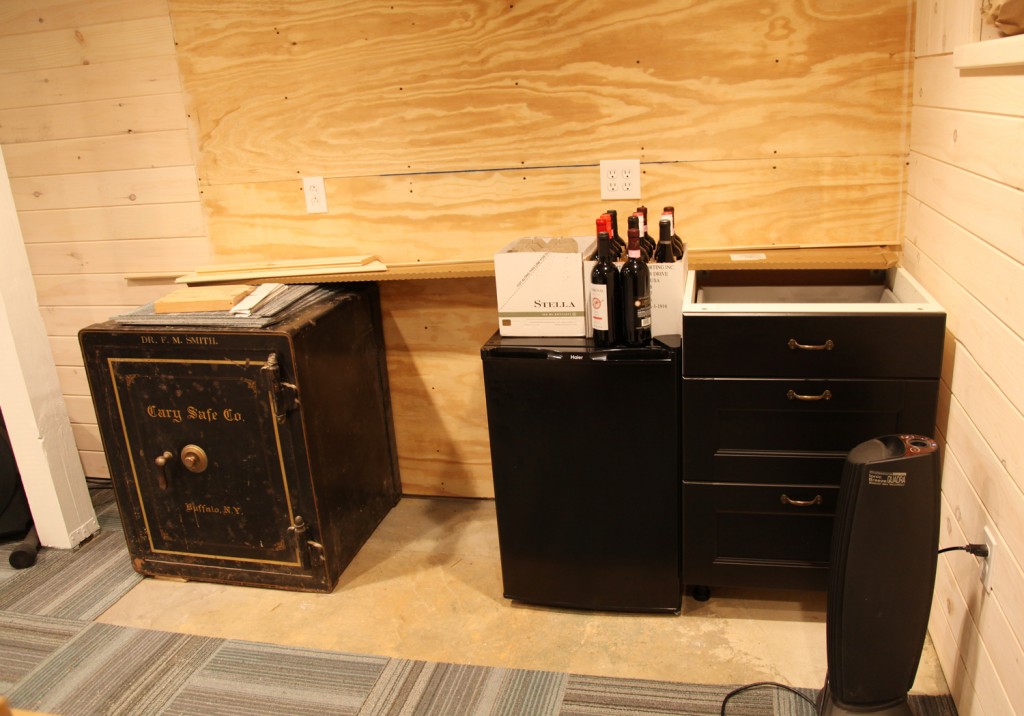
Since we have had the house we have only moved it a few feet. Once to allow the waterproofing contractors to get behind it, and secondly up against the wall. When the contractors moved it to its current resting place, I hadn’t finalized the size of the fridge and freezer so I told them to put it about 8′ off of the side wall. It ended up a little bit less than that, and now that I have my dimensions, we needed to move it about 3 1/2″ to make our panty/ wine storage area work and in preparation for the wood countertop. I was originally planning on having my contractor (3 of them) move it over, but I have been holding off calling them, since I want to give them a complete list of work to finish off the basement rather than having them come out repeatedly. So what to do?

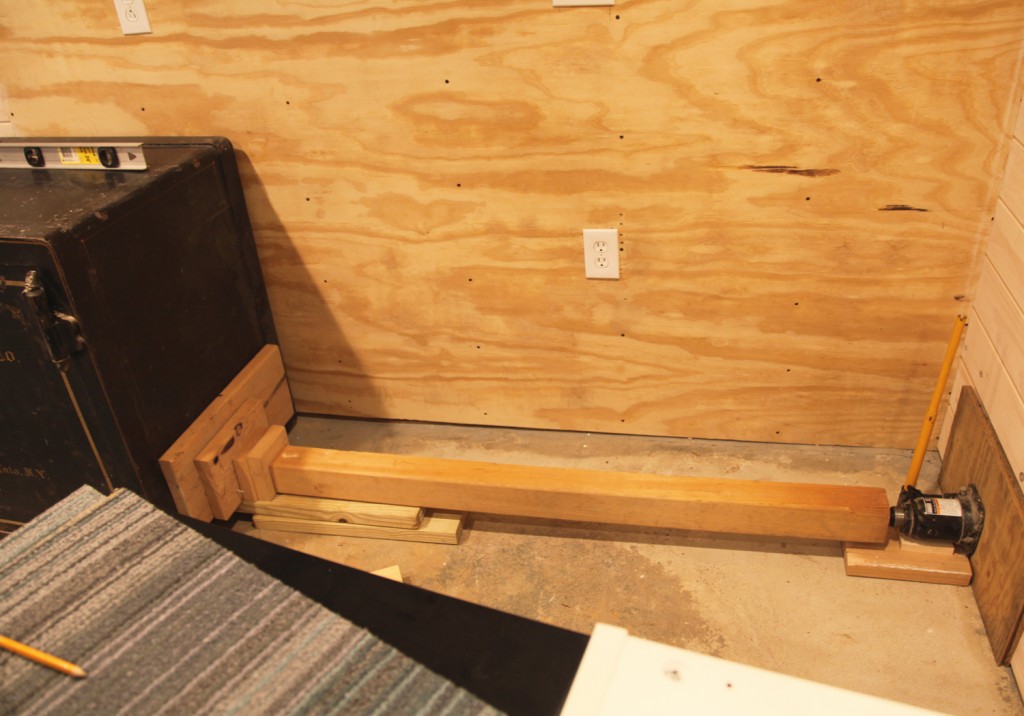
Our Contrapsion for Moving The Safe

Mr. S. had tried shoving it with a hand truck with no success (it weighs about 1000 lbs). It also has almost no clearance below to make it that much trickier. I was getting ready to reluctantly call the contractor when Mr. S. mentioned it my brother-in-law Matt, who had a brilliant idea. Why not use a jack to push it? hmm….that sounds plausible and we own several hydraulic jacks. So on Sunday we pulled out the drawer unit and fridge and used a bunch of scrap wood and pushed it along! Starting from the right, we used plywood to protect the wall and help even out the load, the hydraulic jack (lifted up with some scrap wood). Then we used a 4×4 post cut to length. On the safe side we used some more scrap underneath to keep the pushing point up a few inches and a longer piece of scrap across the side of the safe. And the verdict? It was slow but it totally worked. First the wall pushed in about 1/4″ (as I was keeping my fingers crossed). Then the safe starting moving. We could move it between 1/2 and 3/4″ per session. Then we would loosen the jack and add an extra piece of scrap and do it again. So all in all I think we moved it in 4 pushes to its new resting place. The picture above is after we finished pushing it so there are 2 extra pieces of scrap on the left side.

Safe in its new resting place w/ fridge and drawer cabinet

Now we have the space left for the freezer and we are ready for the counter (which should be here in about 1 1/2 weeks).

Thanks Matt!

Tomorrow I will post up the design and installation of our new beadboard doors for the workroom, which I think came out quite well.

* To see all of the posts about our basement click here.

Mirror Installed

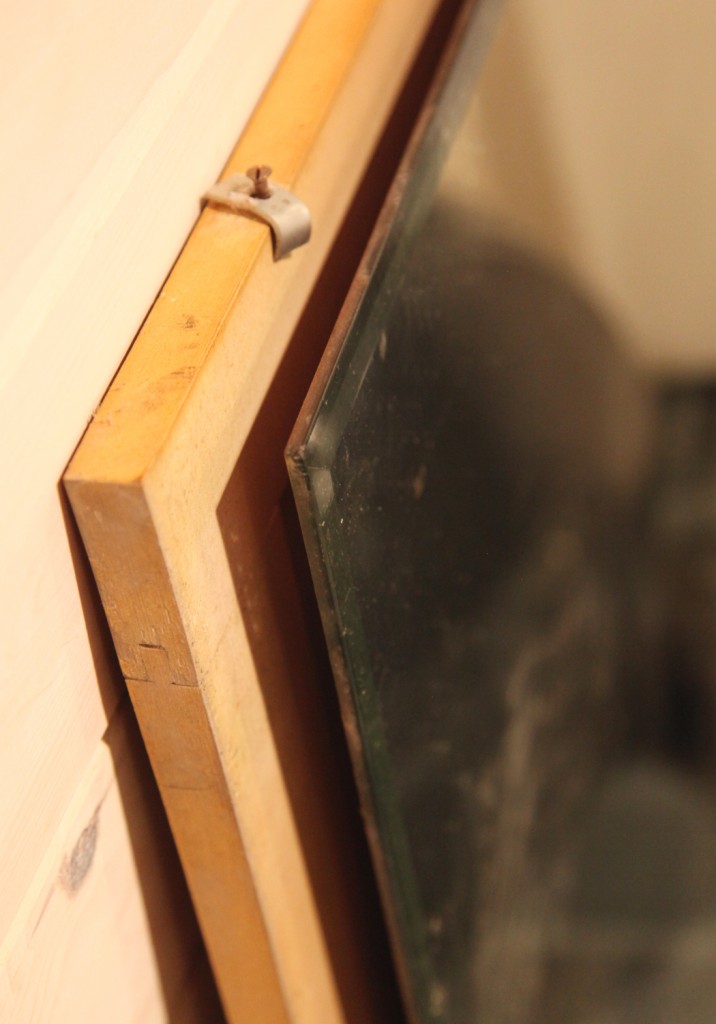
Last night I finally got around to hanging the old mirror in the bathroom. This mirror use to hang in the main space in the basement (it came with the house). It had an old wood frame which was definitely part of a dresser at one point, based on the design I would say it was from the 1920s or 30s. Since I was looking for a larger mirror for the bathroom it made sense to try to reuse the one I have, especially since it has a bevel and a nice patina to it.

Mirror with old wood frame

Fortunately the mirror was only secured to the wood frame with 4 clips so it came off in a couple of minutes, but then became the question of how do I install it? I took a trip over to HD to see what the options where. I actually came home with several different mirror hanging kits (different kits were located in both the bath area and in the picture hanging area). They ranged in price from $2 to $20.

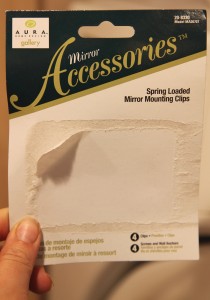
Mirror Mounting Clip Set

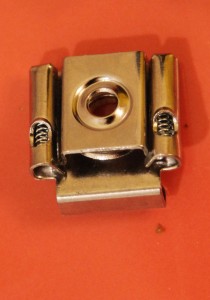
Back of Top Spring Mount

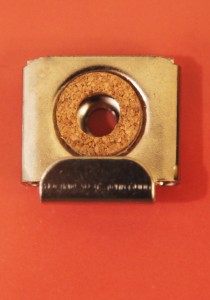
Front of Top Spring Mount

After looking through the options in more detail, I decided on the spring loaded mirror mounting kit, $9.99. It has spring mounts at the top, which will allow for easy installation. It also looked a lot sturdier then the plastic clip options. The installation process was really easy.

Clips screwed into the wall

I marked the top and the bottom of the mirror with a line after checking for level. Then I measure down from the top to the center of the spring mount to the dimension given in the instructions. I pre-drilled the holes for the screws and screwed them in. I did use wood screws instead of the ones provided since I was screwing into the beadboard (actually the same ones that I am using on the sandbox). The clips allowed for up to a 1/4″ deep mirror. Because of the bevel, ours was closer to 1/8″, so I added felt stickers (the kind you use on the bottom chair legs or for uneven furniture) at the back of each clip. Then Mr. S. and I carefully pushed the top spring clips up with the top of the mirror and then carefully pushed the bottom in towards the wall above the bottom clips. Then we let the mirror sit down into the clips. It was actually quite easy and the whole installation took less than 1/2 an hour. I would definitely recommend this system!

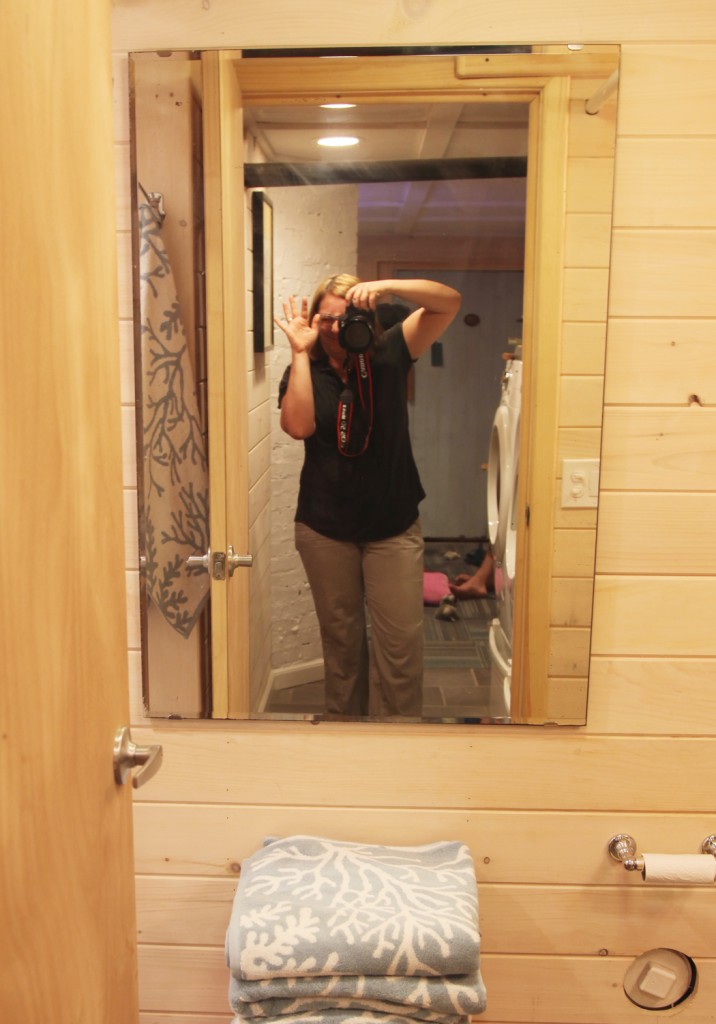
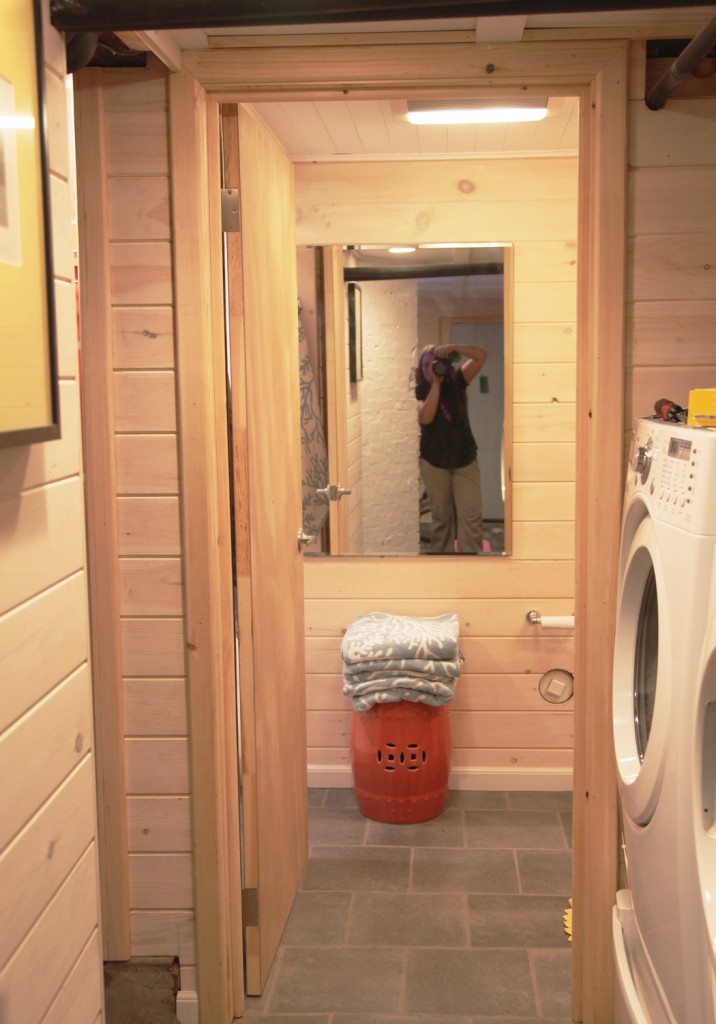
Old Mirror Reinstalled & New Coral Garden Stool and Towels (and me in the reflection)

The mirror feels very secure (which is important with 2 little kids who enjoy looking at themselves in the mirror). Next I placed my new coral garden stool in front. It is from One Kings Lane. I had been kicking myself for not picking it up last time it was on sale, but fortunately it was available again, so I quickly ordered it and had been waiting for the last couple of weeks for it to arrive. Unfortunately I can’t seem to get the color quite right in the photos. It is a lovely bright coral color. I then added new towels that I picked up at HomeGoods yesterday. They are light blue with a nice coral pattern on them. They may end up upstairs, since we could use some new towels upstairs, but for the moment they are looking pretty down here.

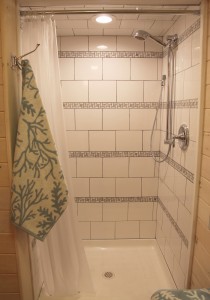
Shower with temporary shower curtain

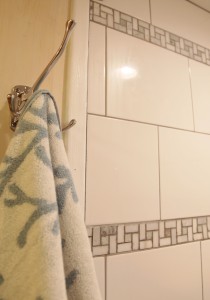
Shower Tile, Adjustable Hook & New Towel

We also hung a temporary shower curtain up over the weekend. We have plans for a glass door, but since I still need to research and get a couple of quotes, we decided it was worth the $20 to get a tension rod, rings and a clear shower curtain. Mr. S. has now officially tested the shower and gives it a thumbs up (which is good since the shower ceiling is fairly low and I was concerned that it would be comfortable for him). I also hung an adjustable hook for hanging the towels. It is nice because it has 3 hooks on it that rotate. I picked this Chrome Hinged 6″ Triple hook up for a steal at Rockler for $2.99 (I actually bought several).  I may need to move it once we get a shower door, but for now it will definitely do the job.

There are still a bunch of things to finish up down in the basement, but it is nice to start seeing it come together. The couch and countertop are ordered and should be here in about 1 1/2 to 2 weeks. Our goal is to have everything pretty much finished up by June 23rd (Sam’s birthday party). Fingers crossed we will be ready!

I hope everyone has a great weekend!

* To see all of the posts about our basement click here.
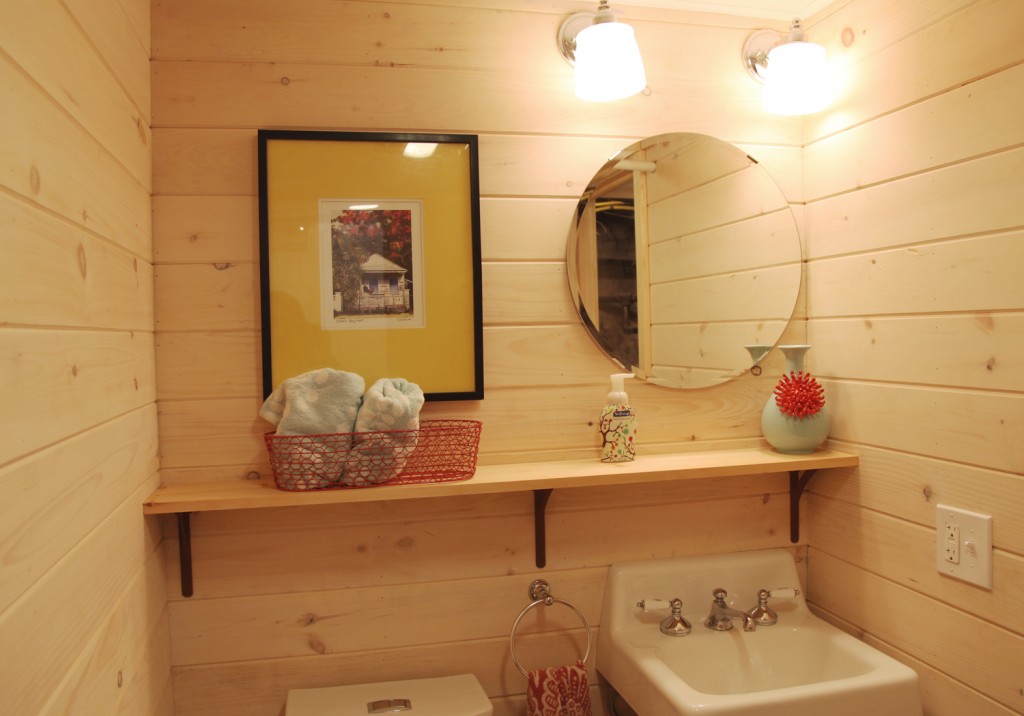
Bathroom with new shelf

This past weekend we continued to plug along on the basement. Mr S. painted some more trim including the windows and the columns. I worked on the bathroom and finally installed the first shelf. I also hung a couple pieces of art, because I couldn’t stand the bare walls anymore!

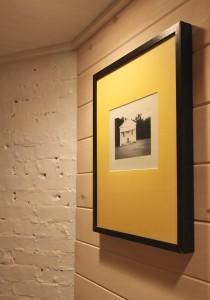
Key West Photo by C.J. Groth

Photo of an old Building outside of Watkins Glen, NY

This art use to hang in our Dining Room (before it became the kitchen). I still quite like the photos, so I am happy to give them a new home. I will also be replacing the mats with white instead of the bright gold/yellow. The Key West photo is by C.J. Groth and we picked it up years ago while on vacation. The old building outside of Watkins Glen is a favorite of mine. I took this picture years ago and Mr. S. colorized it for me. It is now across from the washer and dryer.

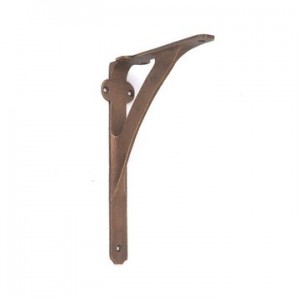
Metal Shelf Bracket, $12.99 a pair in Rusty Iron

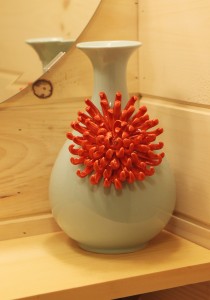
Flower Vase from Anthropologie

The shelf is a 1×8 piece of pine (that needs to be whitewashed to match the walls). For the brackets I gave up waiting for the ones I wanted that are now backordered until August and ordered these rust ones  from VanDykes instead. I have more, and will probably eventually add 2 more shelves above the toilet area (and move the picture). But for now I like how this looks. We will see how much more storage I need in the future.

I am so happy to have my vase finally in place. It looks fabulous. I just need to find a better spot for the liquid soap, so the kids don’t try and reach up to the shelf (and potential knock the vase over).

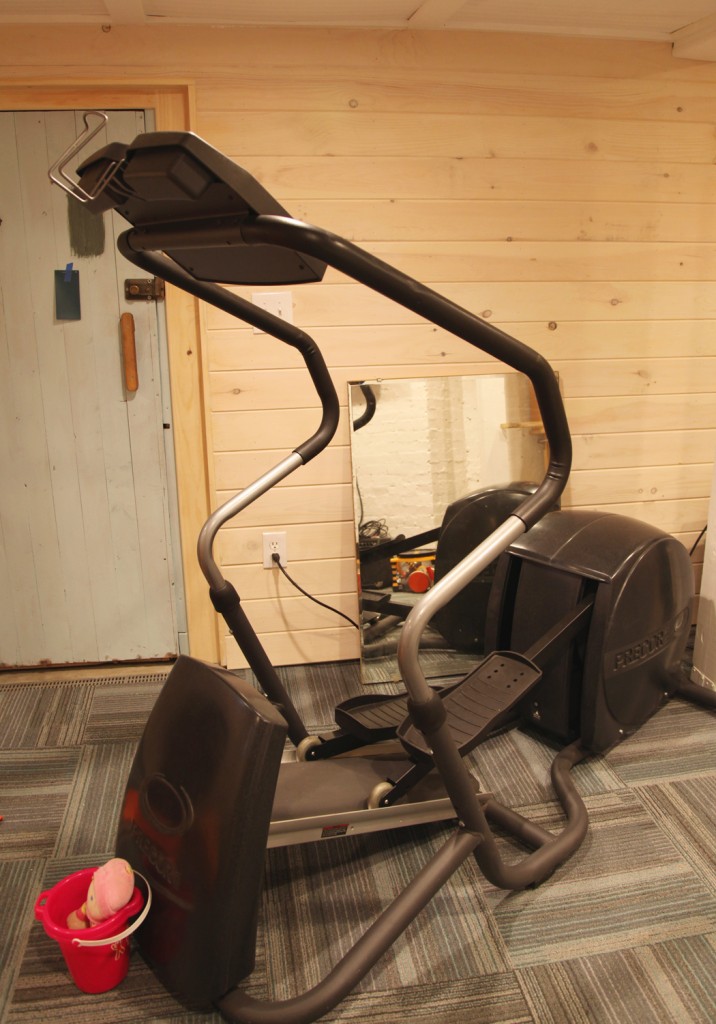
Giant Elliptical Machine Taking Over our Basement

We also finally brought down and assembled the elliptical machine, which has been sitting in various locations for the past 7 years waiting for a home. And now that it is in, WOW it is big! A big part of finishing the basement was to give us a place to exercise. This has been re-thought as the space has come together and quickly become a summer living room (thanks to the early summer weather). Fortunately the couch should still fit okay, although for anyone staying over, you will have an exercise machine looming over you.

We also ordered the couch and the counter top. It will probably be another week and half or so until they arrive. In the meantime the mirror behind the elliptical machine will hopefully get hung in the bathroom tonight. I can’t wait to show you that with my new garden stool!

* To see all of the posts about our basement click here.
 

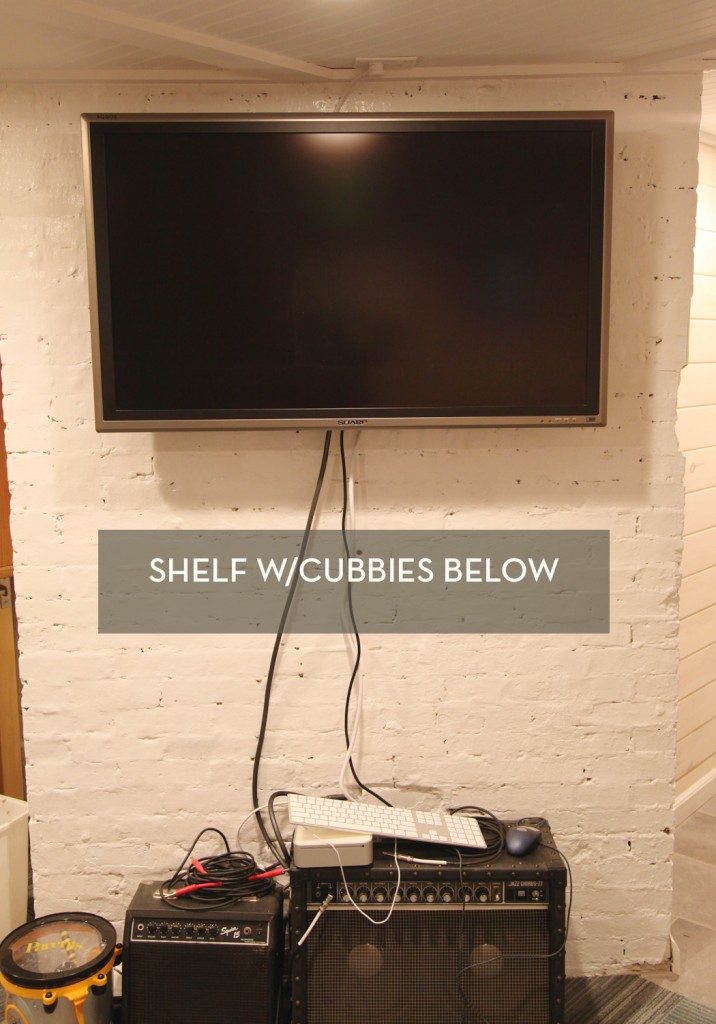
Big Room Progress: We need a shelf for below the TV to hold the computer

We had a busy weekend working on the basement and on the sandbox this weekend. The weather was beautiful (although a little hot for the middle of May). For the basement, it is time to start thinking about furniture layout, while trying to keep enough momentum to finish up the countless little projects. We even squeezed in a reconnaissance mission to Ikea on Saturday night with the kids.  The goal was to look for a sofa (since it looks like this space may become our summer hangout, thanks to the cool temperatures), some kind of shelf or cabinet for under the TV and a countertop for the pantry/wine area.

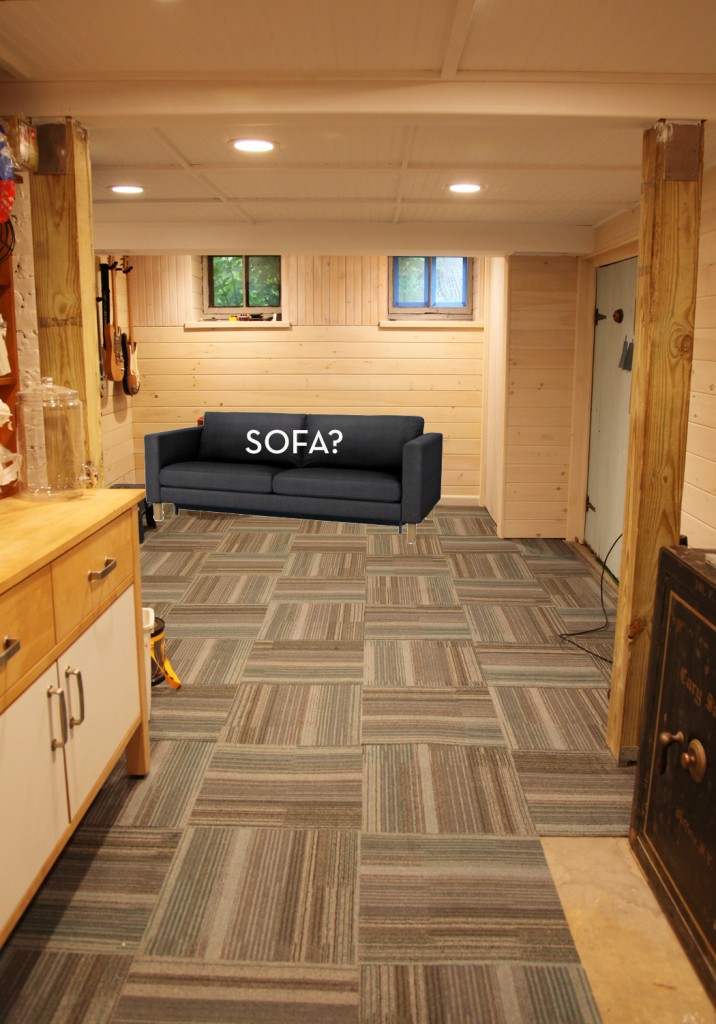
Cleaned Out Big Room w/ Proposed Karlstad Sofabed

We checked out the Karlstad sofabed in dark gray. I have seen several good reviews for the Karlstad sofa and the dark gray material which is machine washable. The only strange thing about the bed part is that you lay sideways on the sofa, so if you are on the inside it is difficult to get out. We tested it out and thought it was pretty comfy though. We weren’t originally planning on having a sofa down here (and certainly not a sofabed), but now that the space is finished, and we have a bathroom with a shower, it actually seems like it would make a reasonably good guest suite, since it is on its own floor, far away from the kids. The sofa is quite long (longer than it looks in the picture) but it should fit okay.  Is it wrong to have a nicer sofa in your basement than in your living room?

TV mounted on Brick Wall

As part of the work down here, Mr. S. has been looking at the best options for hooking up our old TV. We have gone back and forth several times about how it should be configured. In the end we have decided to only hook it up to the computer, which will minimize the amount of stuff we have to mount below it. We have an old Mac Mini (about 6″x6″) that will sit on a shelf along with a mouse and keyboard. We looked at a bunch of shelf options from Ikea but I think we are going to make something (nothing was quite the right size). The design will be to have 2 or three cubbies below. One or two will have baskets to store stuff and one will have a little door on it and house the electrical hookups. The shelf will float and the guitar amps will sit below. It looks a little crazy right now, but I actually really like the look of the amp with the brick wall. We also need to put in the baseboard here.

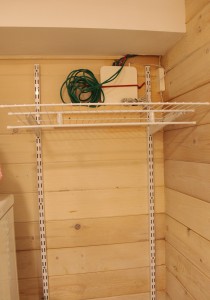
Old Location for Wireless Router

New location w/ vertical installed for shelving

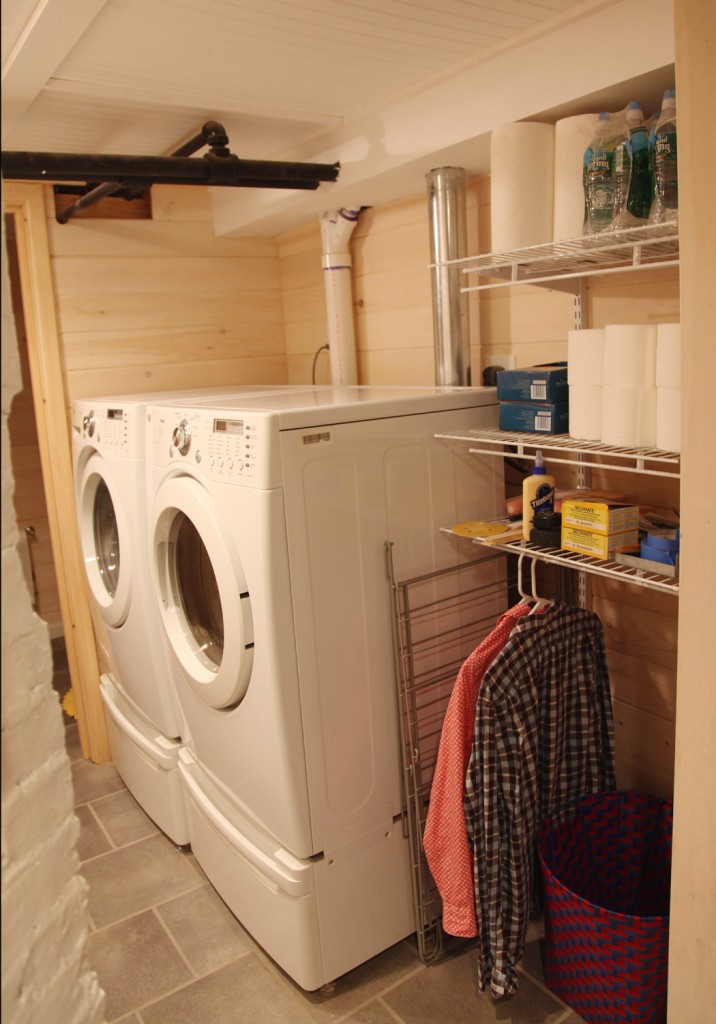
I also finally got around to installing the standard and bracket metal shelves for the laundry area. First I had to move the wireless router, which meant making a new shelf for it. My contractor had made a shelf out of scrap (which looked pretty wonky). I used some 1×3 scrap and made a new shelf by glueing and screwing the two pieces together at 90 degrees. Then I screwed the bottom piece into the beadboard. I mounted it in between the two vertical standards. Then I installed the shelves (I had them cut at Lowes where I bought a 6′ length and had them cut down into 3 2′ lengths).

New standard and bracket shelving w/ bar for hanging clothes

It may not be the prettiest set of shelves, but they are really practical. I have space below for a laundry basket, I can hang shirts to dry, and I finally have a place to put toilet paper and paper towels! I also have a shelf set aside right now for the current project (in this case the bottom shelf has all of the miscellaneous stuff I need for making the sandbox). I still need to decide what to do with the area behind the washer and dryer. I am leaning towards some burlap curtains and maybe some smaller shelves in between the dryer vent and waste pipe that would be hidden by the curtain.

I will be back tomorrow with the sandbox progress (not finished but at least well underway).

* To see all of the posts about our basement click here.
New Handle

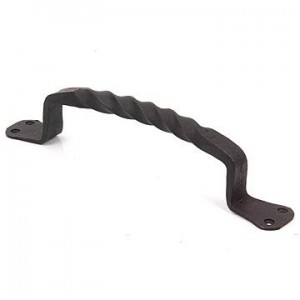
13" Clover Leaf Door Handle in Black, $17.99

9" Bulkhead Handle, $10.99

After I painted our backdoor last week I realized that it was in desperate need of a new handle (somehow the home made 20 year old one wasn’t cutting it anymore). I also needed to pick out pulls for the new lower cabinet drawer unit at the pantry/wine area. So I took a look an VanDykes’s Restorers and they were having a sale on most of their handles! Fortunately they arrived quickly and I have installed the handles for the drawers and I will probably get around to installing the backdoor handle this weekend. I also picked up handles for the bulkhead door (for when we get around to making new doors).

For the backdoor I chose this beautiful clover leaf handle.  It is super heavy and slightly rustic looking in person. I think it is going to look great once I repaint the door a darker color and install it. I will also be installing a matching one on the outside (since this handle is suitable for outdoor exposure). I also picked up a similar, although slightly smaller set for the future bulkhead doors (currently we have a piece of exterior plywood on hinges).
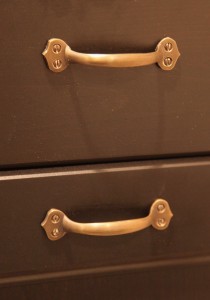
New Cabinet Pulls, $3.49

Victorian Safe

For the cabinet pulls I decided to go with a similiar finish to the safe handle. In this case I chose a an antique brass finish (not something I would normally choose) and I think it looks great against the brown/black finish of the Ikea drawer unit. In between these two units will go the fridge and freezer. Right now I am leaning towards a white freezer (unfortunately the model that I want only comes in white). My plan is to use chalkboard contact paper and cover it. Then finish it off with some gold/brass colored vinyl details and maybe some fun lettering to match the safe.

I also need to pick up the wood counter from Ikea. When I checked last week it was out of stock, but hopefully it be back soon. I can’t wait to get this area further along. Now I just need to get moving!

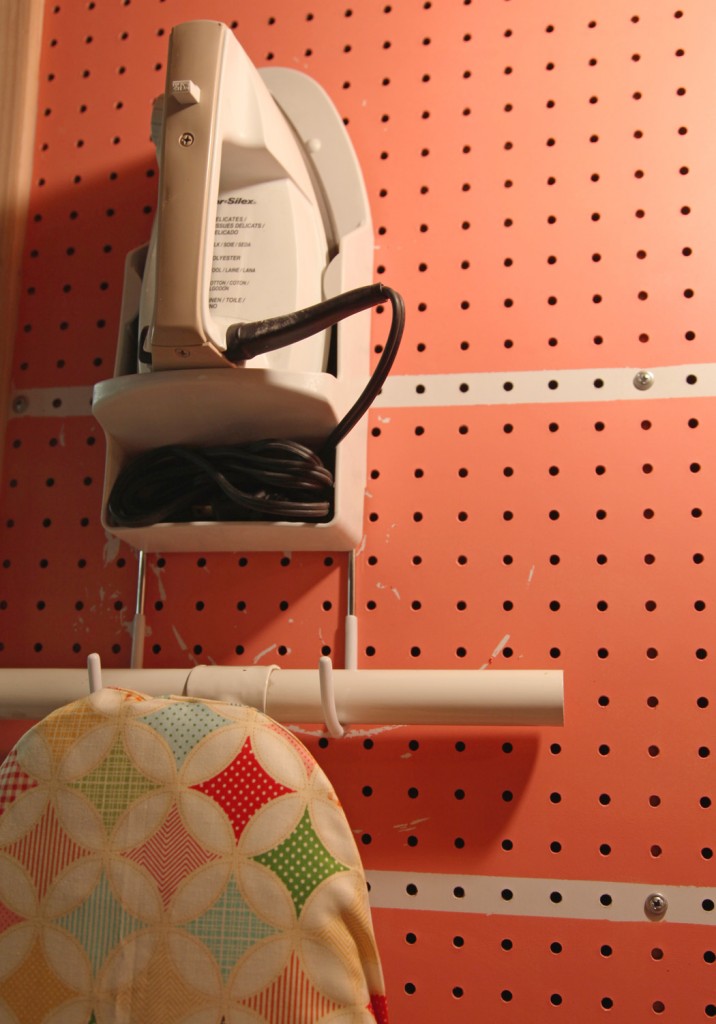
Coral Pegboard w/ Ironing Board (and all of the marks from installing the ironing board bracket)

This is an oops moment and it is totally my fault. I don’t have anyone to blame but myself.  I insisted on painting the pegboard in the basement. It had a nice white smooth finish on it, but I was not happy about it. Too boring I thought! Mr. S. thought it was kind of silly to paint it, but I insisted. So now I have to deal with the consequences! At first I was worried about painting the screws, since  I liked the pattern that they made on the board. Then I realized that I could use some masking tape and stripe off those areas and then paint the rest. I picked up the paint samples on Friday and went to town. It was Friday night by the time I actually painted and I wanted to get this project done (yes, that is the kind of life I lead, painting on weekend night). So I taped everything up, and then brushed on a first coat in sections and smoothing it out with a smooth foam roller. Then I repeated about an hour later. I peeled back the paint and went to bed.


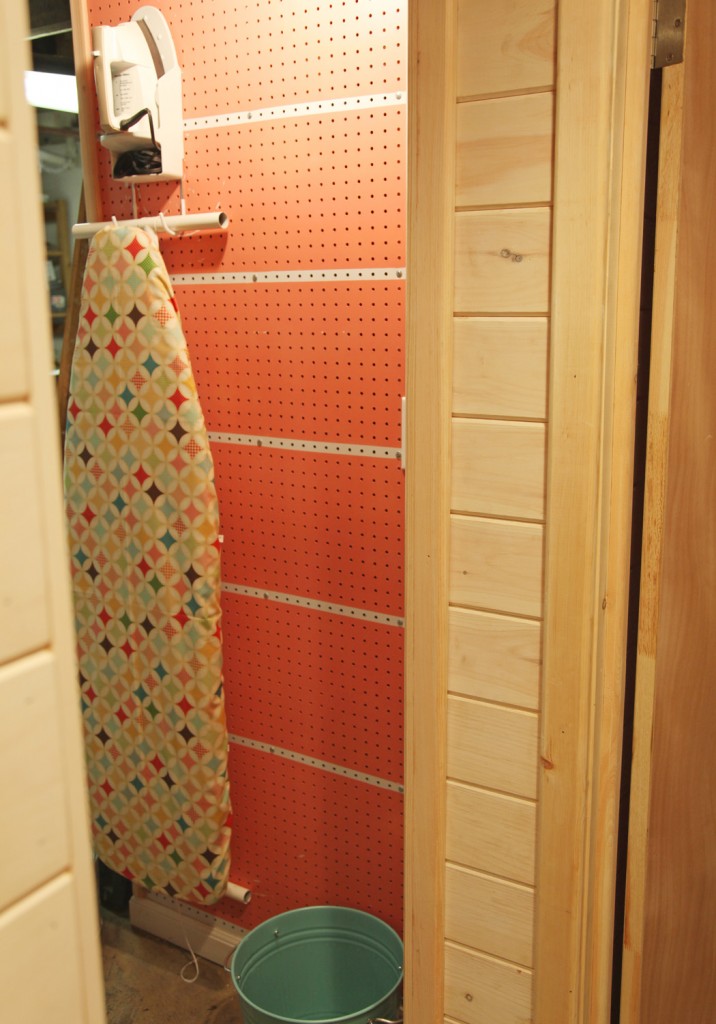
Coral Pegboard looking from laundry area

So when I went to check on it on Sunday, I was disappointed to find that the paint did NOT adhere very well. I guess I really should have sanded it first. errr…. My next stupid move was deciding to hang the ironing board bracket anyways (by myself). I just wanted it done and I really wanted to get the ironing board off the floor. My first mistake was mounting it too close to the corner. But the bigger mistake was trying to hold it in place by myself while screwing it in. It turned and wiggled and scratched the crap out of the wall. Alas I hung it up anyway, feeling completely defeated. I’m not sure when I will get around to re-taping, sanding, and painting again. I fortunately did not do the other side around the corner yet. This side will have lots of hooks for tools, so the finish is even more important. I may need to do some testing on that side first. hmmm…

Hint of Coral Pegboard from the Main Room

At least I really like the color  (Behr “Mellow Coral” which is not actually mellow at all). The one interesting thing with the color is that it almost looks like I did an umbre with the stripes because of the bare light bulb above (which I totally didn’t do). Oh well, I guess it is just paint.

Does anyone have any good DIY disasters to share?

Old Electrical Box w/ Sam's Guitar

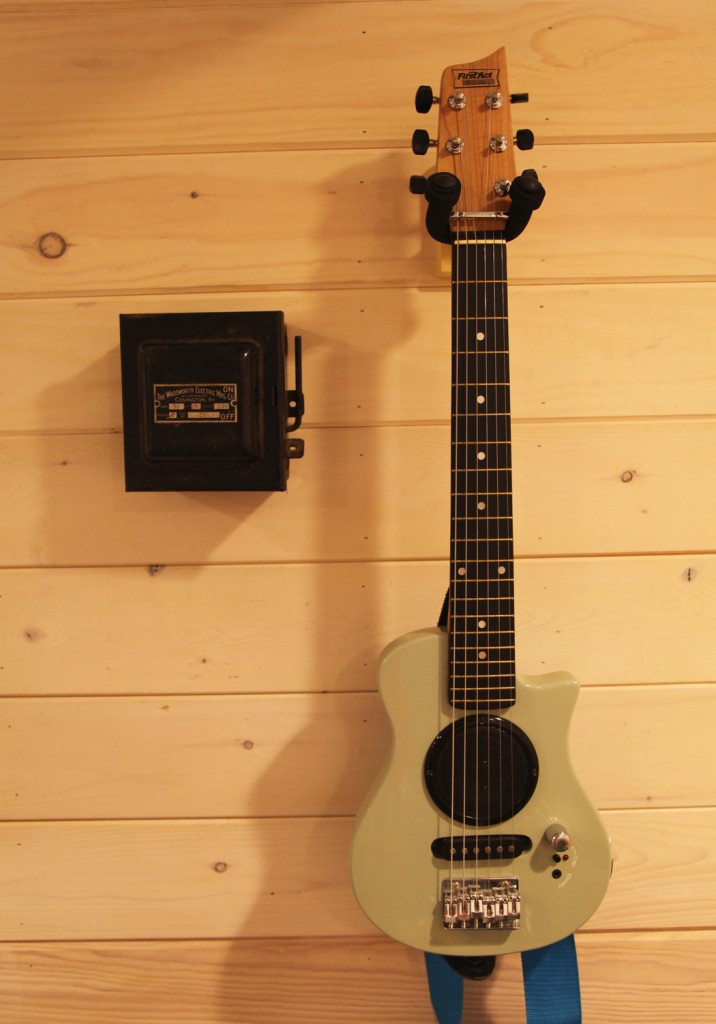
I have been trying to break up the long tasks of making the basement usable by starting to bring in some of the fun accessories for the space. My favorite right now is our old electrical box, now used to hold extra guitar strings and picks. This OLD electical box was actually in use when we bought the house! It connected our ancient oil boiler to the more up to date electrical. Since we replaced the boiler 6 years ago it has been sitting in a box, waiting to be used (after our plumber briefly freaked out and threw it in the garbage). I was really excited to see that it perfectly fits a couple packs of strings and guitar picks.

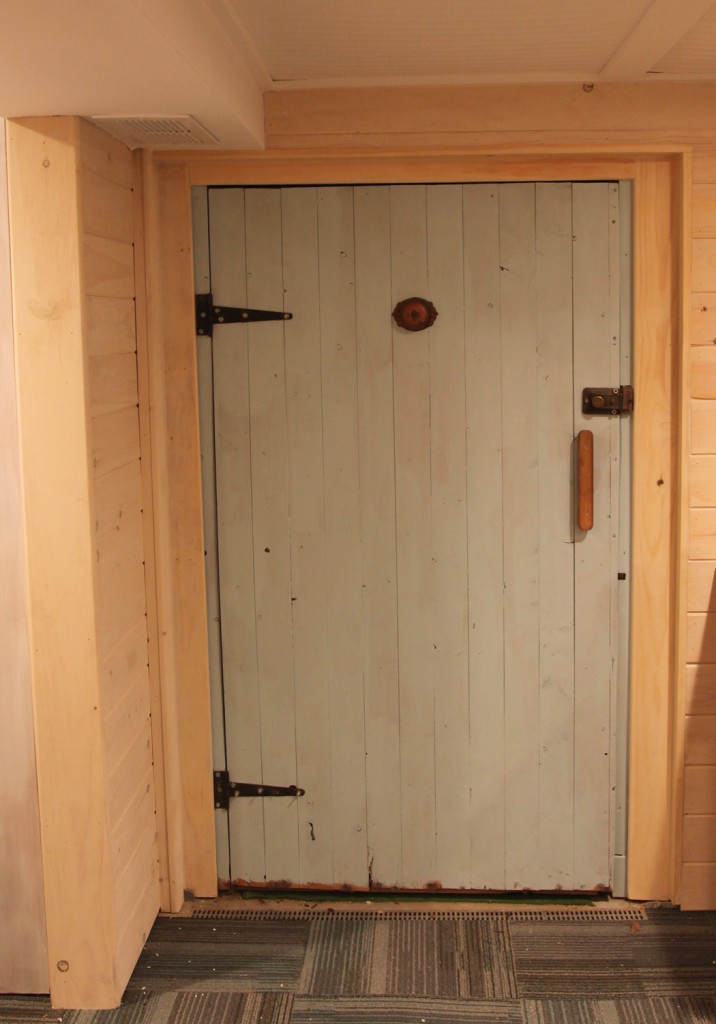
Blue Beadboard Door to the Backyard

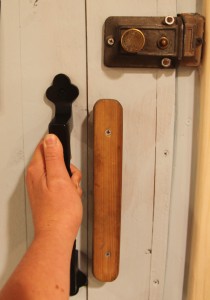
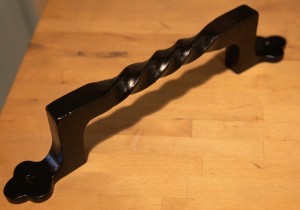
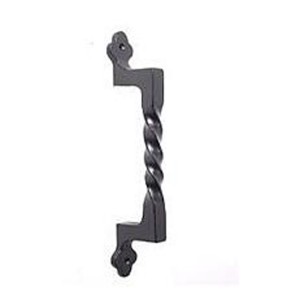
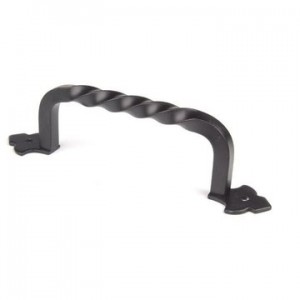
I also painted the old beadboard door to the backyard over the weekend. I am not loving the color, I think I am going to repaint it darker, but I do like that it provides some color to the space. I am leaning towards a dark moody blue-gray. I don’t want it to look too much like I am matching the carpet, so I think I will have to get some more paint chips and see what I can come up with. Also in the works is a new handle for the door. We already have a vintage bell (in the middle of the door) and some old school gate hinges. Now that the door is painted the old wood handle feels a little out of place. I am thinking of something like this or this:

Handle 1: 13" Twist & Clover Leaf Handle, $16.79

Handle 2: 11" Top Knobs Normandy Collection, $10.79

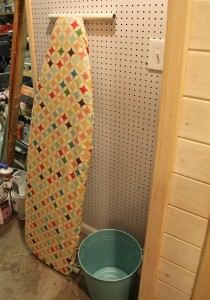
Ironing Board & Garbage Bin

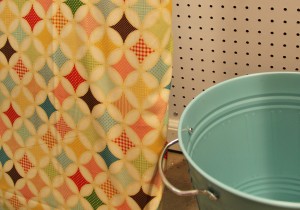
Ironing Board Fabric & Garbage Bin

I haven’t painted the pegboard in the workroom yet either, but I thought I would show you the pretty ironing board cover  that will go on the pegboard that faces towards the laundry area. I also picked up the cutest garbage bin (Knodd Bin) at Ikea yesterday. Anything that will inspire me to do laundry is a good thing!

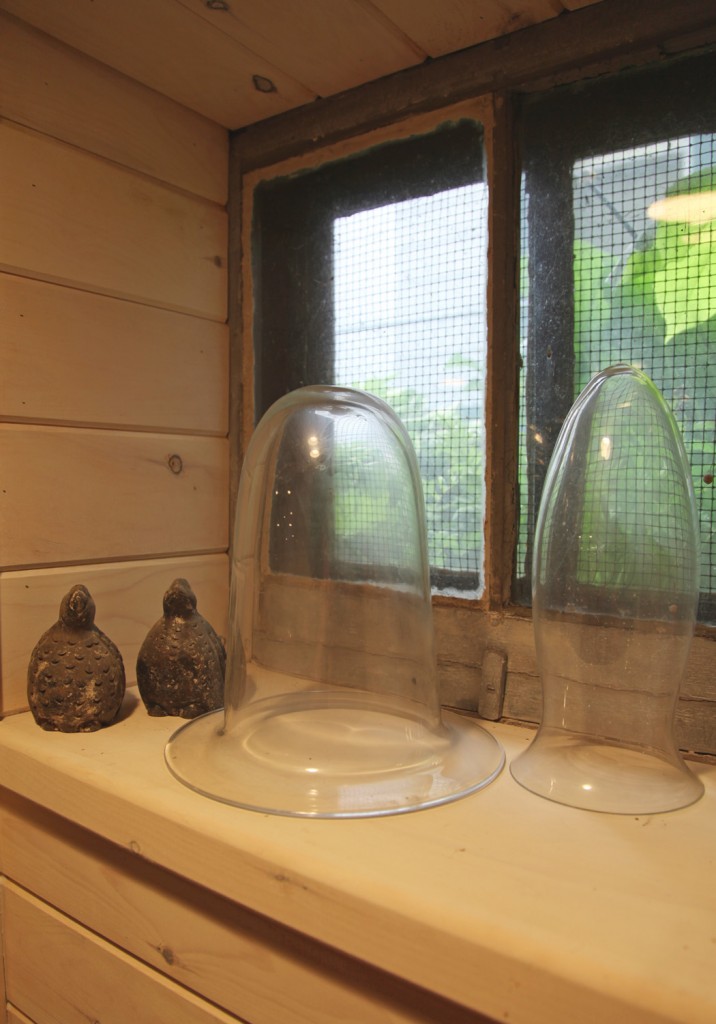
Basement Window in Progress

I have started to work on a vignette for the basement window (the one that you see as you come down the stairs). I have had these old glass vessels for years (ever since I took them out of a dumpster when I worked in the city next to a certain retailer). It is funny that I had always planned on making them into terrariums, and now I have waited long enough it is really popular so it will be pretty easy to get supplies. I am thinking possibly a violet and fern (things that like low light). I think a trip to Terrain may be in order!