Archives For OUR HOME

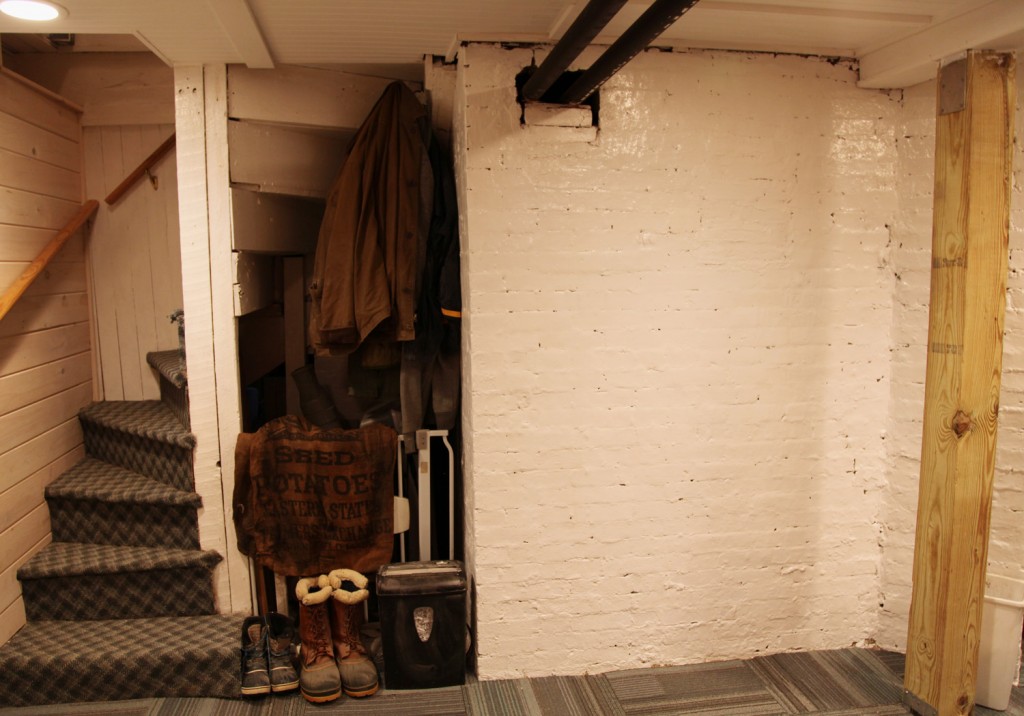
Painted Brick Walls (area to the left is going to become a closet and columns still need to be routed and painted)

I hope everyone had a lovely weekend. We had a productive and fun weekend. It is really nice now that the basement is far enough along that the kids can come downstairs and “help”. My parents came down on Saturday, so we took the opportunity to scrape and paint the brick walls (the bottom of the fireplaces) in the basement while the kids were down at the park, since those were not activities that could be done while they were there (i.e. lead paint and wet walls). We also cleaned the last corner that still had dust from the renovation (future closet), and although there are still a lot of things that are not in their final resting place, it is feeling nice down there.  The carpet is almost all in (minus some at the pantry area that I won’t install until we have everything). We are still in discussions about where to put furniture in the main space, although we did manage to decide on a general direction for the panty/wine storage. Mr. S thought that the Ikea options were too Euro, so I drew up some ideas for wall mounted wine racks.

I have always liked the look of the X type storage, so I think we are going to go with that. I looked online first for kits and plans but couldn’t come up with anything that I liked, that wasn’t overly complicated or didn’t involve a million little pieces.

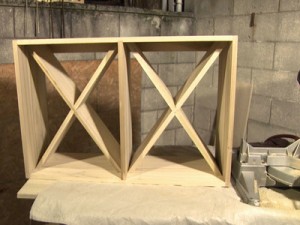
DIY Network X Wine Rack

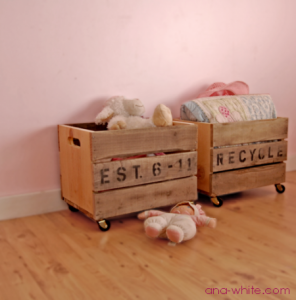
Ana White's Pallet Crates

The closest wall mounted wine rack was this from the DIY network. I also looked at these pallet crates from Ana White’s site for ideas. The DIY version, was overly complicated with lots of unnecessary cutting and fitting. I liked the pallet crates from Ana’s website but obviously that needs a fair amount of tweaking to work.

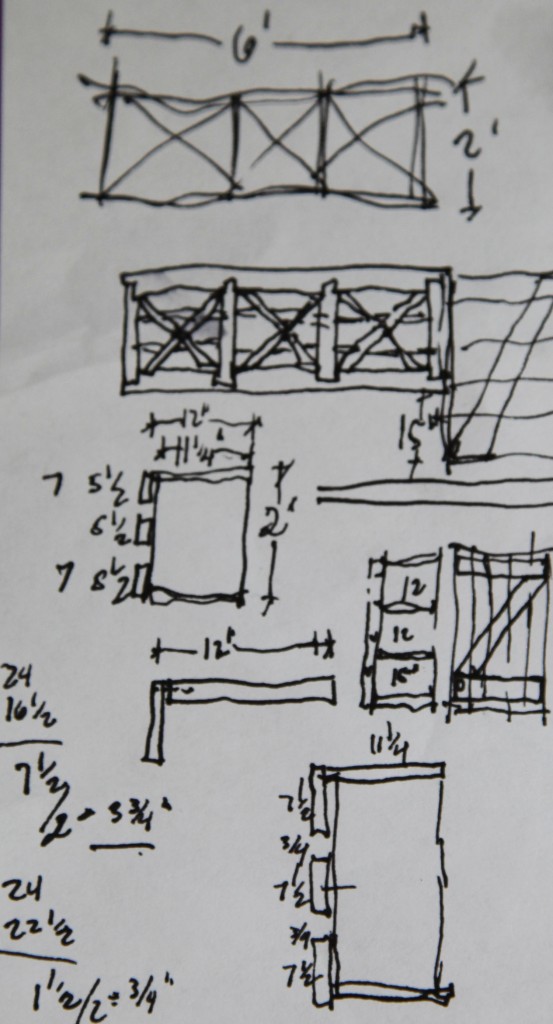
My Sketches for DIY Wine Rack

My plan uses pine 1x12s as the frame and 1x8s for the back. I looked at Home Depot to price it out, and this should be less expensive than using Home Depot Cabinets, and then it can be whitewashed to match the rest of the beadboard. I plan on rabbiting the verticals into the horizontal members with our router (which I don’t think you would have to do, but will add to the strength). The back pieces will screw into the frame. The nice thing is that I can also screw into the back of the diagonals, making it quite a bit more rigid. Then I can screw the unit up to the studs from the top of the back piece. For the cabinet to the right, I haven’t decided whether we are going to go with a standard wood cabinet from Home Depot or make our own to match (in my sketch I have drawn out a beadboard door for the cabinet). For the bottom drawer cabinet, I am still planning using an ikea cabinet, since they are still the best deal on full extension drawer cabinets, and I really need the storage.

Pantry/Wine/Storage Area

I still have to decide on a wall treatment for behind and above the wine storage. My friends have weighed in on the backsplash and are heavily in favor of the bottle cap option. So, time to start saving up those caps! So if you are my favorite sister-in-law, I am making my official request for you to start saving some interesting beer caps for us! I am also thinking up some fun ways to make the fridge and freezer better looking, since they will be arriving in white (the only color that the freezer is available in).

Tomorrow I will show you a couple of the fun details that we are working on elsewhere in the basement.

* To see all of the posts about our basement click here.


Pantry & Wine Storage Area

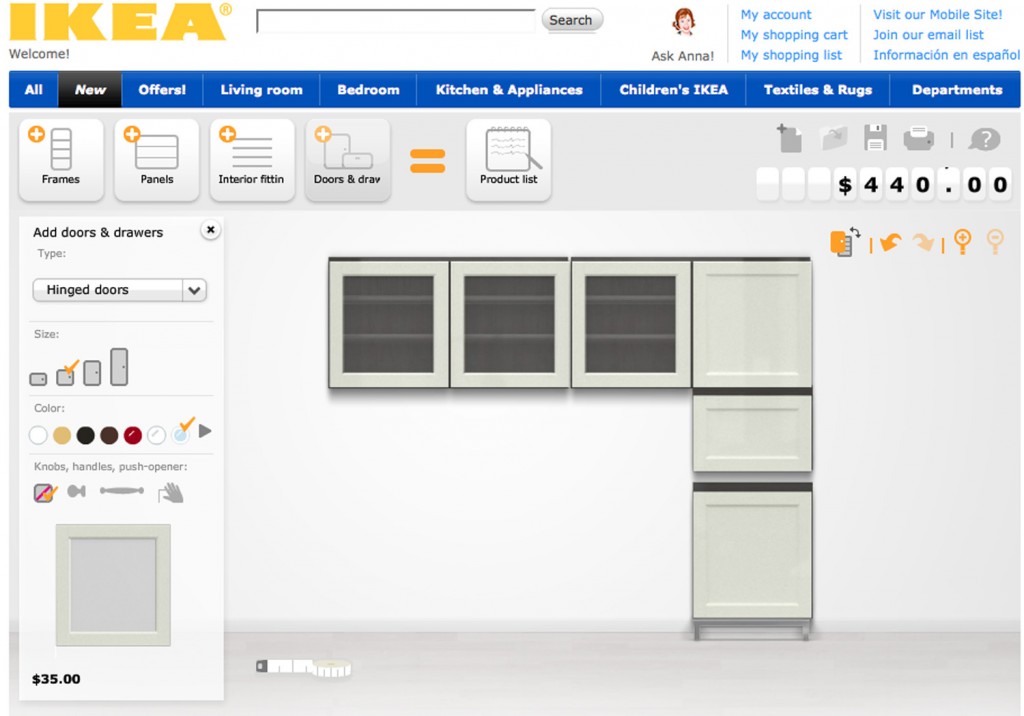
I have been doing some research and looking at my options for the pantry and wine storage area in the basement, since the space is now screaming at me every time I pass it. I need a mix of closed storage for my miscellaneous pantry items and wine storage that can be open or closed. I was looking at the Ikea hackers website  when I discovered that Ikea in fact makes a  metal wine rack for its Besta line. I like the Besta line, which is a modular storage for the living room. The nice thing is that they offer the wall shelves with a metal cleat that attaches to the wall (very similar to their kitchen cabinets). The difference is that the Besta are 15 3/4″ deep instead of 12 3/4″ for the kitchen cabinets. The system comes in some suitable sizes but I am not sure if they are quite as sturdy as the kitchen cabinets (which has me a little worried especially if I fill them up with wine). I used Ikea’s Besta Builder and Kitchen Builder to get a general idea of my options. One of the benefits to the Besta is that with the deeper box you could close the cabinet doors even if it was full of wine. The kitchen cabinets would have to be left open without doors since the wine bottles are about 12-14″ long.

Option 1: Besta w/ White Glass Doors

Option 1: I‘ve used the Besta for the 4 upper cabinets, plus a 5th cabinet that would sit on the counter and then a Besta shelf with legs that would sit on the floor. This would leave a gap above it and below the counter and I would loose the back 9″ behind it since it is only 15″ deep. I am also liking the dark brown/black boxes with the white door.

Option 2: Besta with Red Glossy Doors

Option 2: Similar layout to Option 1 but with open shelves for wine storage and bright red shiny doors. I am thinking if I went this route I might use white boxes instead. hmmm…

Option 3: Using Ikea Kitchen Cabinets

Option 3: This is using Ikea kitchen cabinets. The three upper cabinets to the left would be open (without doors). The lower 3 cabinets represent the safe, the fridge & the freezer. This would work although I would end up with white boxes and I’m not sure which door I would use since they discontinued my favorite door.

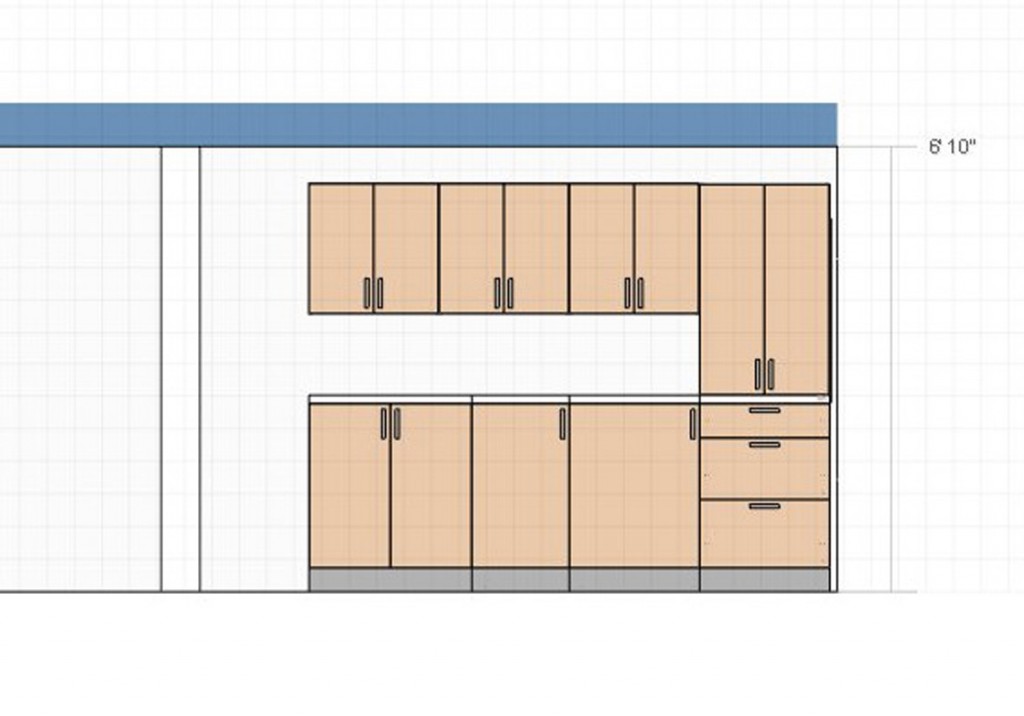
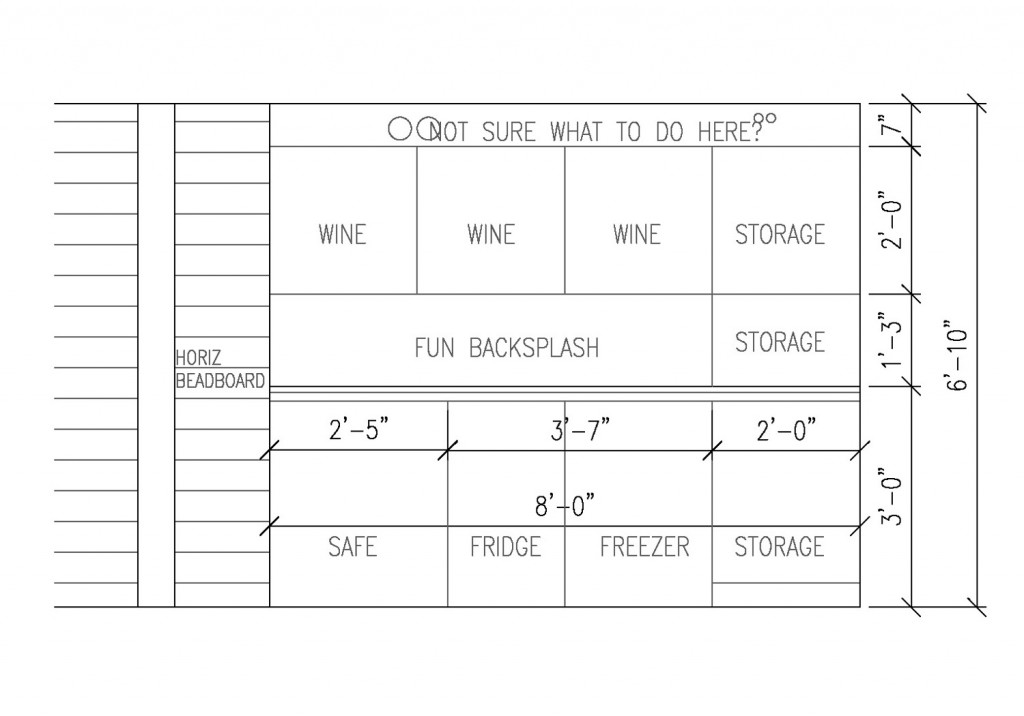
Sketch Elevation in AutoCAD

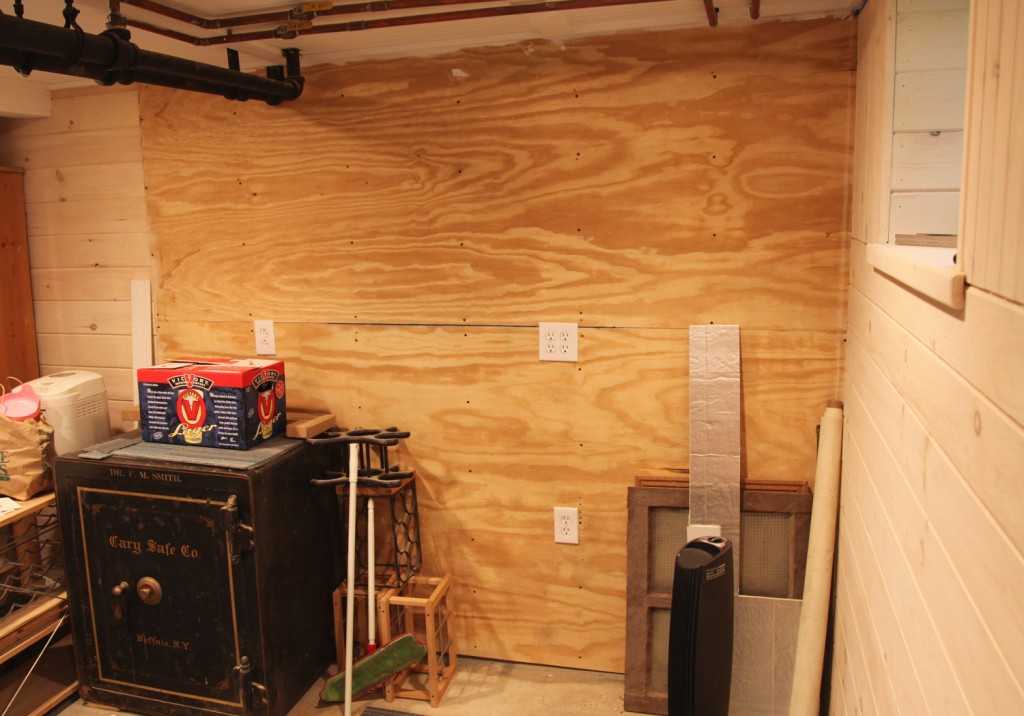
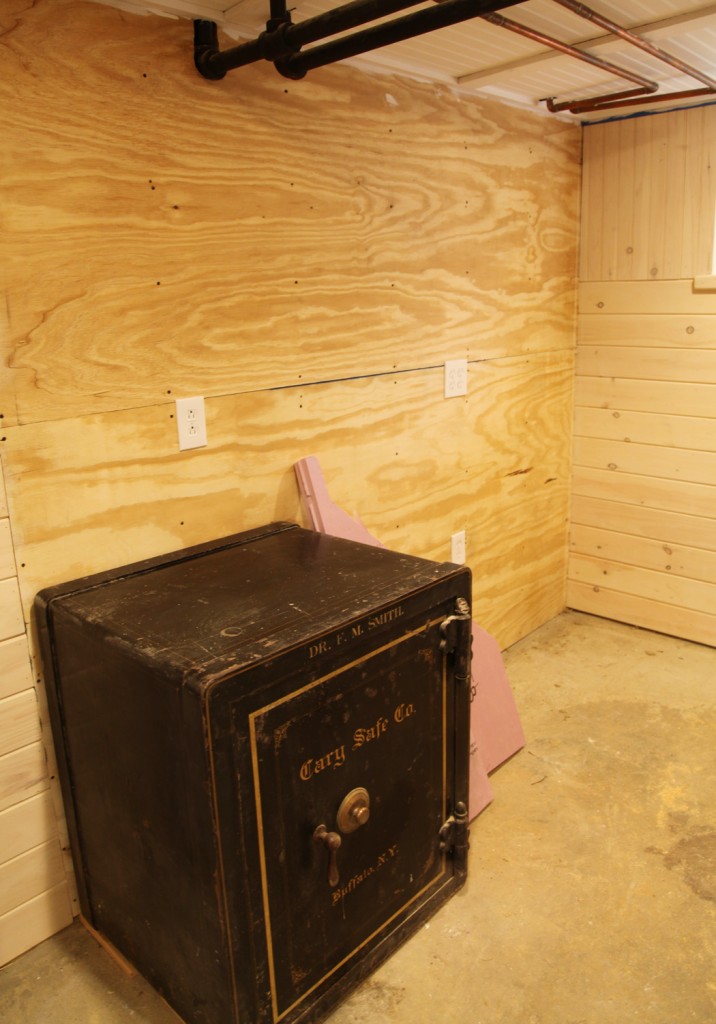
I also put the elevation and plan into autocad to check some dimensions. Now that I have double checked the measurements I can pick a fridge and freezer (which I have been reluctant to do until now). It also shows me that I’ve got to deal with the gap above the cabinets. This section of wall has plywood instead of the horizontal beadboard, so I don’t think it will look nice if I keep it exposed. Depending on the color of the upper cabinets maybe I will paint it to match. hmmm…so much to decide.

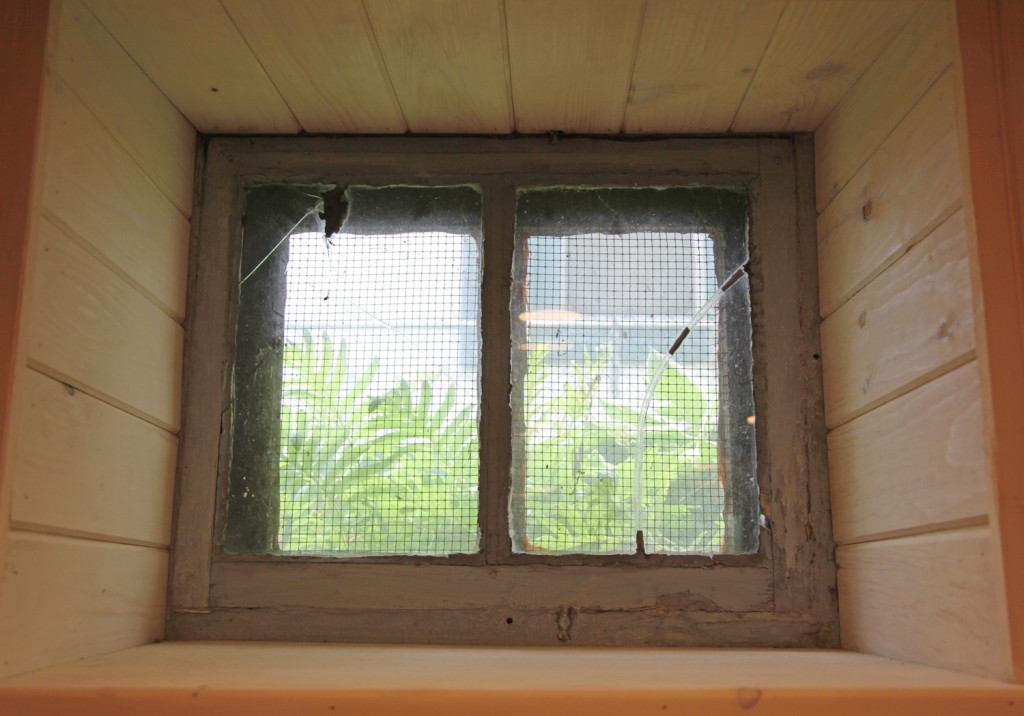
Basement Window w/ Ferns and Hostas

Our basement windows are in a desperate need of a cleaning, but I wanted to take a minute to talk about them. They are original to the house and consist of an outer and inner sash. I have chosen not to replace these, since they match the rest of the windows in the house and since there is already a storm, we wouldn’t gain much energy savings by replacing them. As part of the basement project I will be sealing them with caulk, since there is no reason to make them operable (we have a basement door that we can put a fan in if we need to exhaust something). One of my favorite features of them is that the exterior window has chicken wire installed against the inside of the glass. It gives it a really nice texture.  The other nice thing is that it provides an extra security measure (probably why it was put in). I haven’t ever seen any other Victorians with this detail, but I quite like it. Unfortunately one of the windows is missing the chicken wire on the front and I need to add it, fingers crossed I will be able to get it open.

Sensitive Fern

Ferns and Hosta

Nandina

The other thing, which I have never heard talked about before, but is important to me is the view outside the window. The bottom of our windows sit more or less flush with the ground. This give us a view of the planting beds around the house at eye level. I planted sensitive ferns on the one side of the house shortly after we moved in and I remember realizing that I could see them out the window as I went down the staircase and really liking that. It is an interesting view, since you don’t often get to see plants from that low of an angle. I think the ferns are an excellent choice since they still let some light in and change in the wind. On the other side we have a hydrangea bush. I quiet like seeing the back of the shrub and some of the flowers. Fortunately it doesn’t totally block the window and there are a few flowers that I have been trying to grow in that vicinity to add to the view. I am thinking of adding some columbines since they are not fussy about the light and they have such nice foliage. At the front of the house I added the nandina in the fall. I will have to think about something to plant between those and the window, maybe some more ferns or small grasses.

Has anyone else thought about the view from their basement windows before?


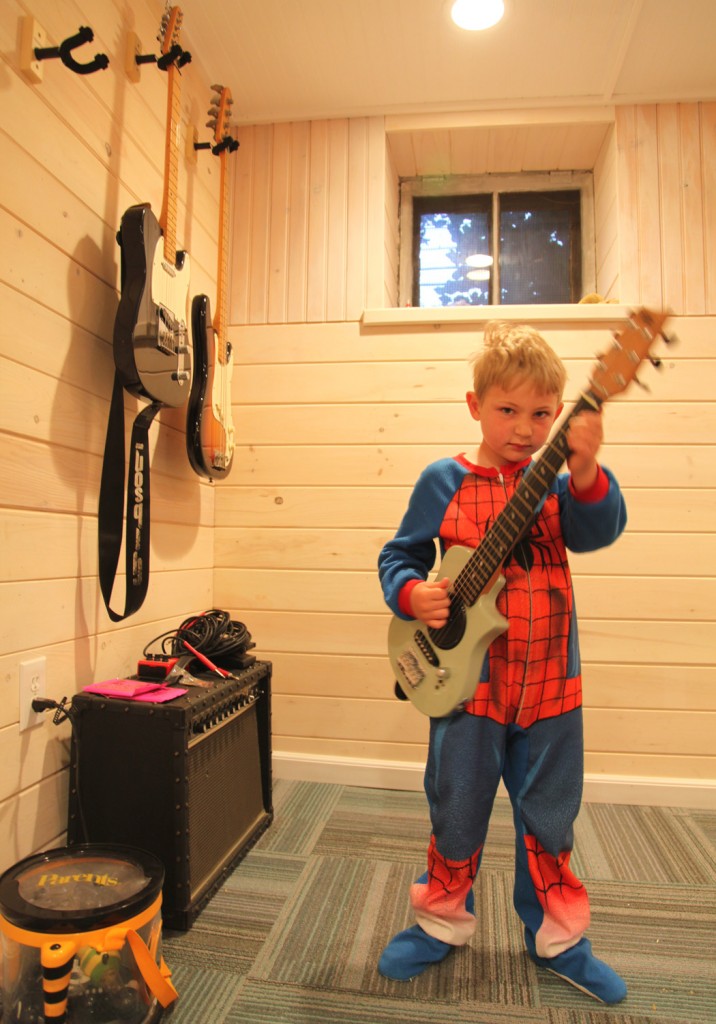
Our Little Man, Rocking Out in the Mancave

I hope everyone had a lovely weekend! We managed to get some work done in the basement and find time to hang out outside. : )

Two weekends ago we took a break from some of the more boring basement tasks and hung up the guitars on the wall. Is it really a mancave? More of a boy cave? Mr. S. has been waiting patiently for the last 11 3/4 years to find a space for his guitar, bass and amp. Well we finally have the perfect spot! The boys had been rocking out up in the dining room/study area, but it was really too tight and not suited for an amp. So now they can REALLY rock out down here. Sam and Maisie have also formed a band called the ‘Weirdo Fish’. There are a couple of song in the works but no record deal yet. Maisie has been joining in on drums on occasion (which are a set of old stools). There is already talk of a drum set. There is still much to do in the space, but fortunately the kids are happy.

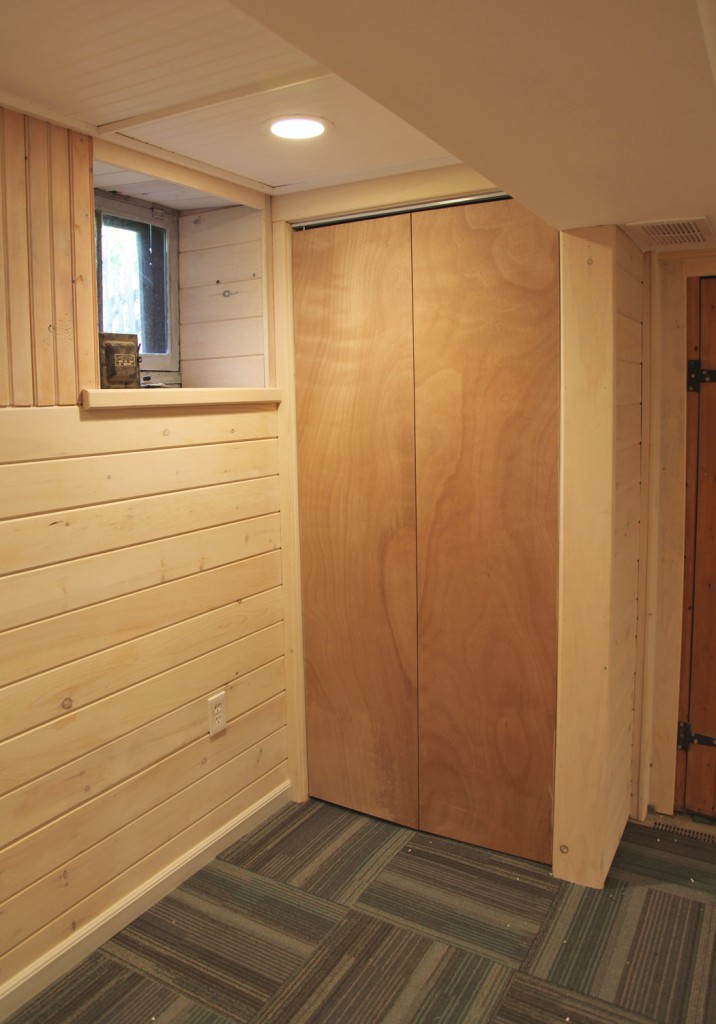
Mechanical Closet Door: Maybe chalkboard paint?

This door is opposite the guitar wall. I was planning on finishing it off with beadboard, similar to the back door. But while I was down there this weekend I was thinking that maybe I would use chalkboard paint instead. I thought it could be a good place for the kids to draw and work on their song list.

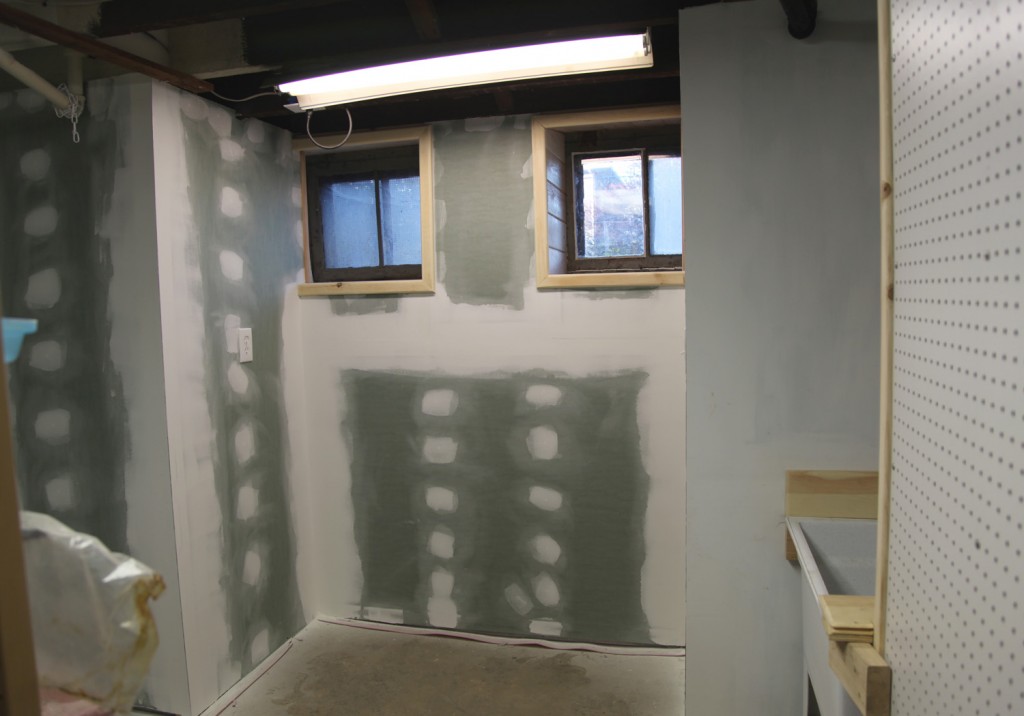
Workroom w/Drywall

Workroom w/ Painted Walls

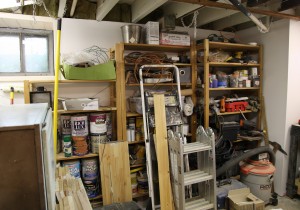
Workroom w/ Shelves

This past weekend we rolled up our sleeves and got to work on some of the outstanding projects left. We primed and painted the Workroom, moved the shelves and built a workbench.

I think this is the most boring color I have ever chosen! We went with the same warm off-white that we used as a whitewash for the beadboard walls.  I considered lots of colors, but in the end it is a dark basement room, that we will be using for lots of projects, so I thought I would keep it neutral. I am still planning on painting the pegboard a fun color as an accent. I am also considering painting the center of the concrete floor, to give it a little more contrast and even out the very rough look (old paint mixed with old adhesive). Please excuse the messy state of the room. Believe it or not a lot of stuff is in the right general spot, but it needs lots of tweaking (never mind making it pretty)!

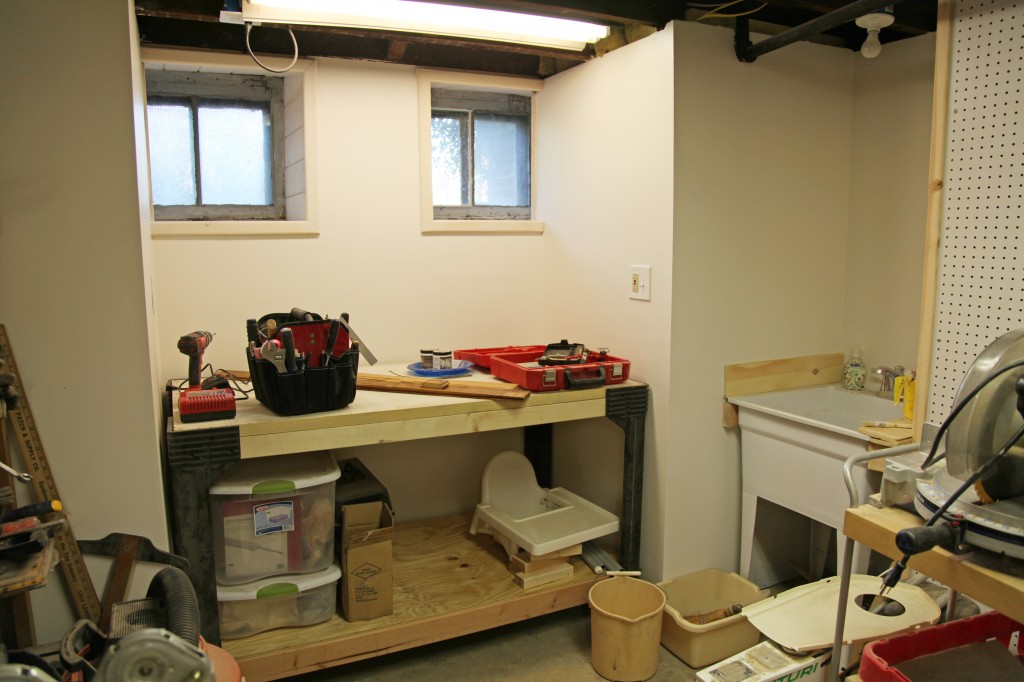
New Workbench

We also managed to make and install a new workbench for the bay area. We have had the kit for a couple of years, but never got around to putting it together. It is by 2×4 Basics and it consists of the heavy duty plastic legs and screws, then you buy the 2x4s and plywood to make the bench to whatever size you need. Given the final size we needed, we only used 2-2x4s, 2 2x3s, 1 piece of plywood and an old hollow core door cut down to size. It has space for a shelf in the middle but we decided against it, to give us room for larger storage. It went together in under an hour, once we had all the parts, although it is definitely a 2 person job (to help hold everything together as you screw). I would definitely recommend it! It is super sturdy and quite affordable!


Future Counter & Pantry Area

A good chunk of our basement work has involved moving stuff from one corner to another, to make way for all of the work. Now that most of the walls are complete, we can finally begin putting things in the right space! We are far from done with prettying the space up, but it is big step forward to actually put most of the stuff in the right general vicinity, which means that we finally managed to clear out the pantry area. There will be a wood counter in this area with an under counter fridge and freezer. In addition there should be space for a small cabinet or roll out for extra pantry storage. I have been waiting to buy the fridge and freezer until after we had space, so I am excited about filling out this space!

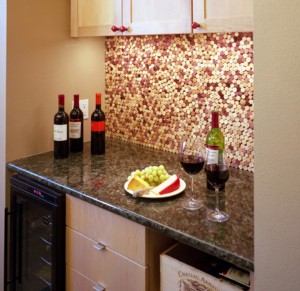
Winecork Backsplash via Pinterest

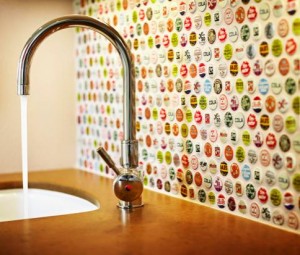
Bottlecap Backsplash via Pinterest

I haven’t decided on a backsplash yet. I am considering wine corks or bottlecaps (or maybe both).  Definitely something fun! We decided to use our old upper cabinets in the workroom, so I need to also decide on what we want to do with upper storage. I could do open shelves, but I am a little worried about dust collecting. I also have to contend with the pipes in the ceiling. I would also like to have a fair amount of wine storage above. I’ve been looking at old wooden crates as well.

What do you think?

Sam's Car Bed & Room Before

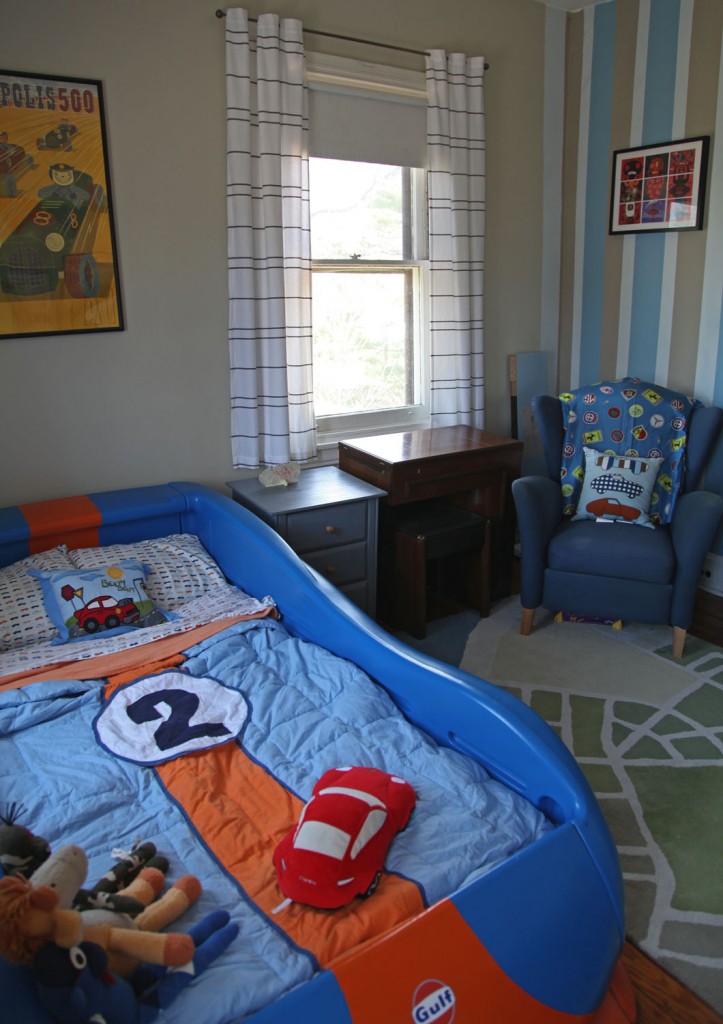
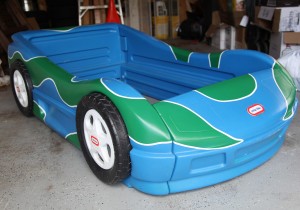
My daughter has been requesting a car bed for quite a while now, so we thought it was time to get on that. This is not a surprise of course since we come from a long line of car people. Fortunately we are a couple steps closer to giving my littlest one the bed of her dreams. Sam has had a car bed for a while and they both love it. I am not usually in favor of giant pieces of plastic decorating the house, but this is an area where I have given in to make the kids and my inner child happy. The two are sharing a room now (it was their idea) so we needed a strategy that would still leave some space in there for moving around.

I measured and re-measured and decided that another twin size version was out of the question if we wanted to be able to open and close the door. Good thing Little Tykes makes a toddler size (it uses a crib size mattress). So like Sam’s bed I started scoping out toddler car beds on Craig’s List. It took a little while to find one not too far away and at a good price but we finally have it, assembled and all.

Option 1: Pink Pig Le Mans Porsche 917

Option 2: Hippie Le Mans Porsche 917

Sam’s car is based on the Gulf Livery Design for the LeMans Porsche 917, probably the most famous race car paint scheme. We originally really wanted to use the Pink Pig design but that would require painting the entire car bed pink first. Little Tykes does actually make a pink version, but only in a twin size. I was a little sad when we had to give up on this option. However we thought we could work with the Hippie design. We decided that we would leave the car blue and add the green pattern with white pin striping. We thought it was a fitting choice since it lives just down the road at the Simeone Automotive Museum (which by the way is an amazing place and well worth the trip).

Partially Masked

First Coat of Paint

First Coat of Paint

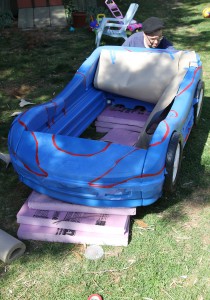
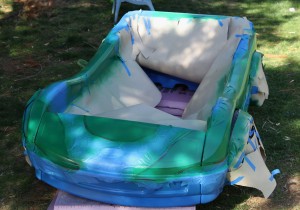
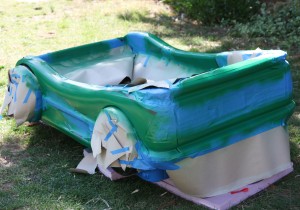
The process of painting involves lots of masking and some spray paint that is suitable for plastic. For masking tape we actually used electrical tape because it is more flexible for making curves. It worked really well! Unfortunately we didn’t have any newsprint so we used some rosin paper that we had in the basement. It was too thick and a pain to work with. Otherwise it is pretty straight forward. 2 coats of paint later and it was done. We then took off the tape and let it dry for 24 hours in the garage.

Hippie Car Bed w/ Pin-Striping

Rear of Car Bed

Next we decided that it definitely needed the white pin-striping between the two colors. We ended up using regular vinyl pin striping from the auto parts store (1/4″ wide to be exact). We used almost 2 40′ rolls, but at about $5 a roll, it was a good investment. It took Mr. S. about 1 1/2 hours to carefully place it and burnish it.

So far we have spent about $60 for the project, $40 for the car bed, $10 for the pin-striping and $6 for the spray paint (one can is plenty for the small bed) and $4 for the electrical tape.

There is still quite a lot to do. We need to do some rearranging of furniture in the bedroom and move some stuff into the playroom (Maisie’s old room).  I also need to make a bedspread with a big #3 on it and some interesting green patterning to match the frame. Not sure when it will be finished, but the girl is getting pretty impatient for her bed, so stay tuned.


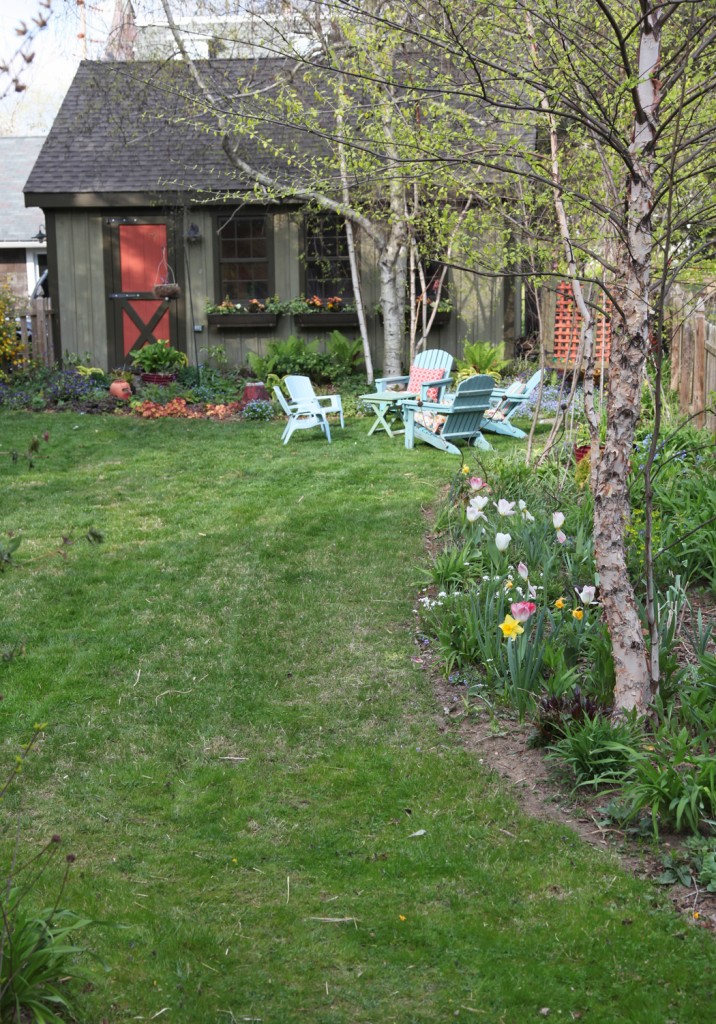
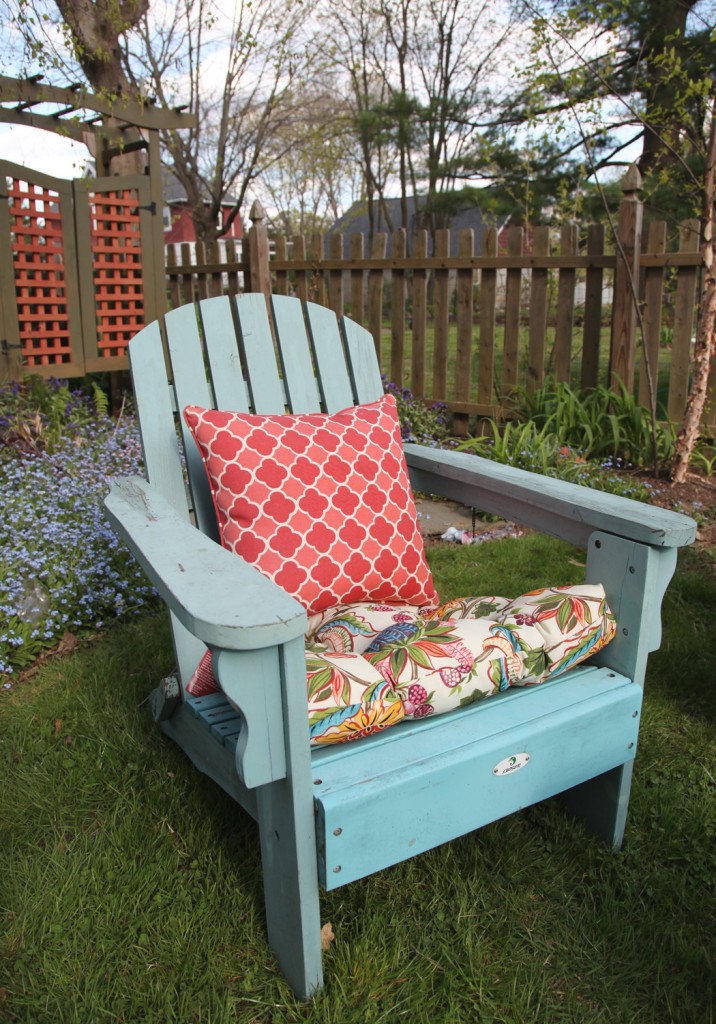
Backyard this week w/ new chair cushions

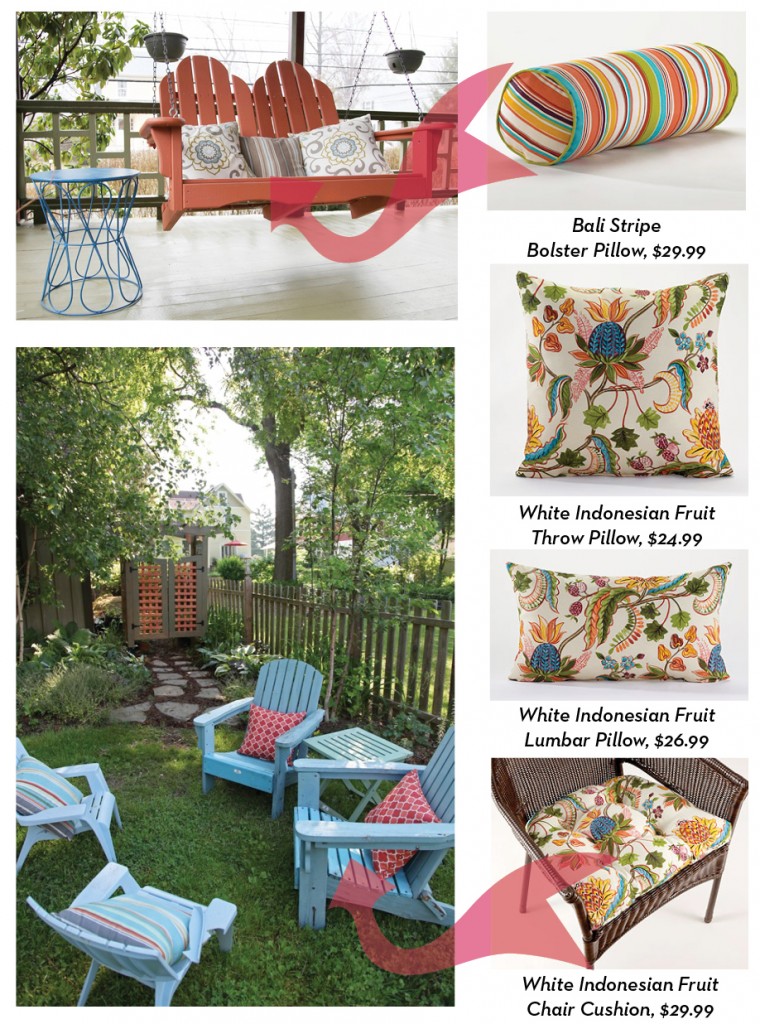
I have been admiring the tropical style White Indonesian Chair Cushions from World Market since February. I decided that it was time to order them (I found a free shipping coupon).  Here was my original inspiration:

In the end I decided that ordering the seat cushions was my biggest priority since we don’t have any for the Adirondack chairs at the moment, and they could definitely use something to soften them up (in addition to a paint job). I also ordered one lumbar pillow to see if I wanted to use it anywhere else.

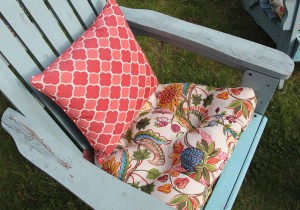
New Outdoor Chair Cushion

New Chair Cushion Close Up

So far I am loving them! They make the chair much more comfortable and they look great. It hasn’t rained much since I put them in, so we will see how they hold up. If I could get my shed cleared out I would store them in there when we weren’t using them.

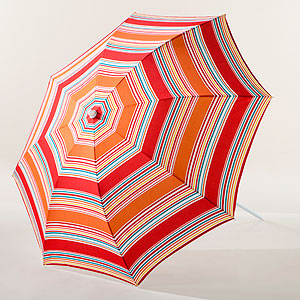
Beach Umbrella, World Market $14.99

As part of our future sandbox area I also ordered a pair of beach umbrellas to keep the kids out of the sun. They just arrived last night, so I haven’t had them out yet but I am hoping to put them directly in the sandbox, although I may need to install a small piece of PVC pipe to keep them in place.

What do you think? Too much color?

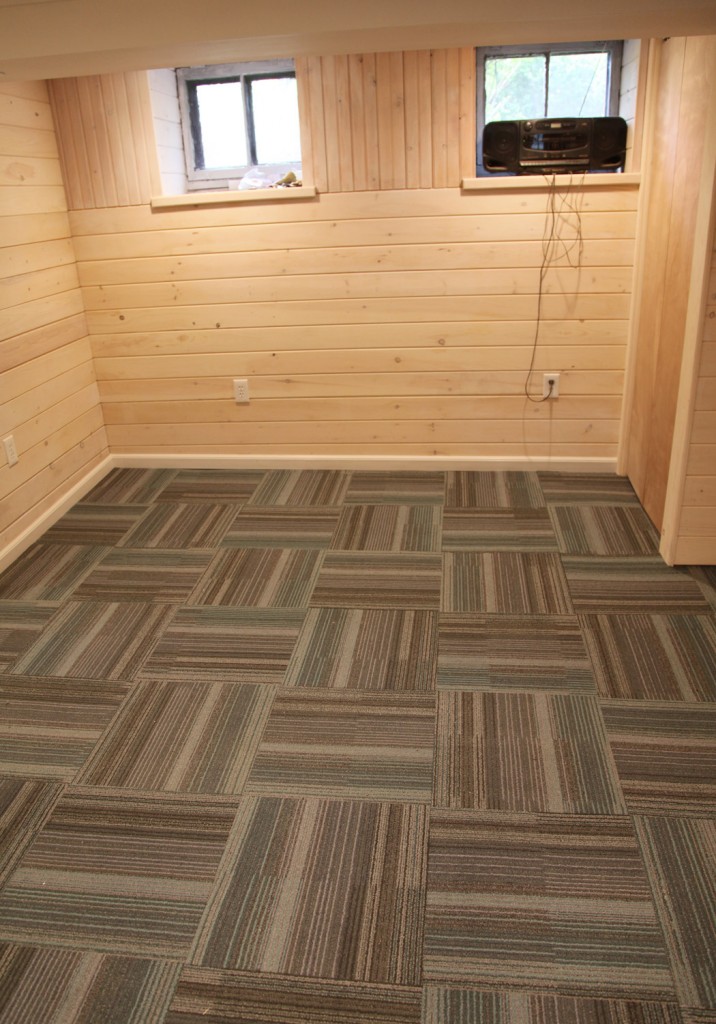
Carpet Tile Installed in Main Basement Space

I hope everyone had a lovely weekend. We spent a good part of the weekend trying to catch up on EVERYTHING. I don’t think we succeeded but we did manage to get a few things done. The taxes are ready, there is carpet tile in part of the basement, I have dug out the area for the sandbox and Maisie’s long overdue car bed is painted and pinstriped. Unfortunately the list is still pretty long. The good news is that the kids are stocked up on candy, LOVE Easter Egg hunts and are generally a happy pair.

Back to the carpet tile! I decided to start on the larger of the two main spaces in the basement (i.e. the one that wasn’t full of stuff). There is still trim to paint and things to do, but I REALLY wanted the space to start feeling more finished so I went ahead with the install.

Carpet Tile Samples

I bought this carpet tile (which is remnants and seconds from larger orders) for $.69 sf from an online store called Carpet USA (with $99 shipping). The deal was by far the best option I found. I wrote about the exciting adventure of picking it up a while ago. Previously I had pulled several pieces out to check out the pattern and to see how it was going to sit on the concrete floor. When pulling out some more pieces, there were definitely a few that had imperfections (which I knew could happen). Mostly it meant a darker color yarn was visible in a spot or two. There was one that had a loose piece of yarn sticking up. I decided to put those to the side and use them in less conspicuous places if at all since I bought some extra.

Laying Out The Carpet Tile Pattern

Laying Out the Carpet Tile

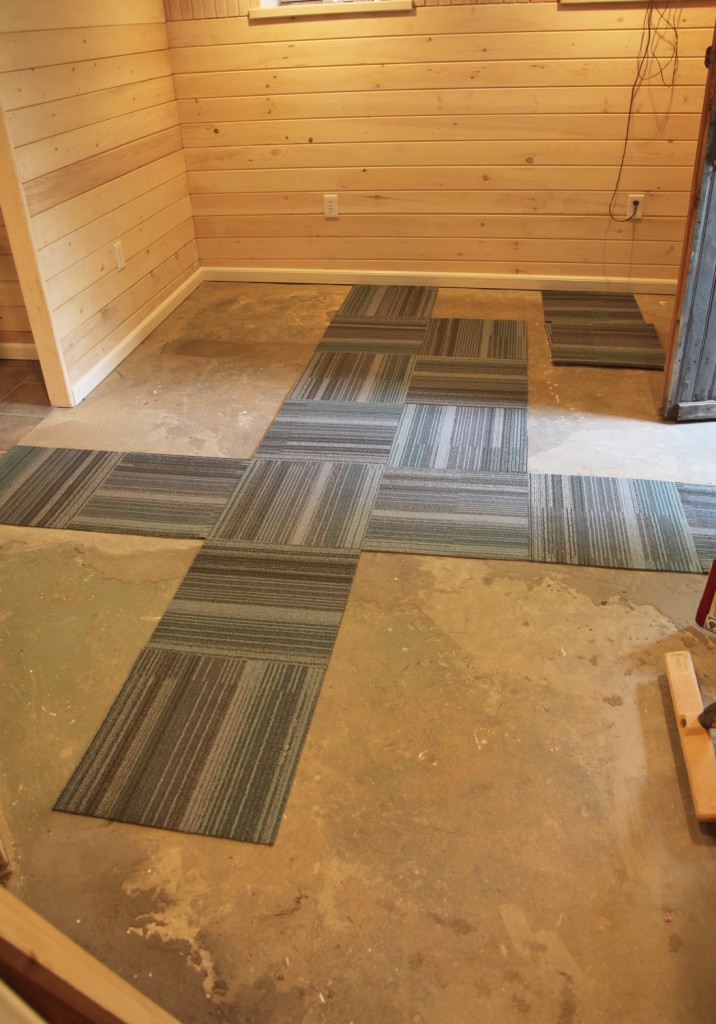
I started out by laying out a row of carpet tiles in each direction in a cross pattern to determine the best layout (I had done a rough layout in autocad, but for the actual installation this is actually easier, because you can fuss with it to find the best areas to cut the tiles). I decided that I wanted a full tile where the carpet tile meets the vinyl tile in the laundry area and I thought I would start with a full row on the perpendicular window wall. This meant some cutting on the walls perpendicular to the window wall for the doorways and closet.

Cutting the Carpet Tile

Cutting the Carpet Tile

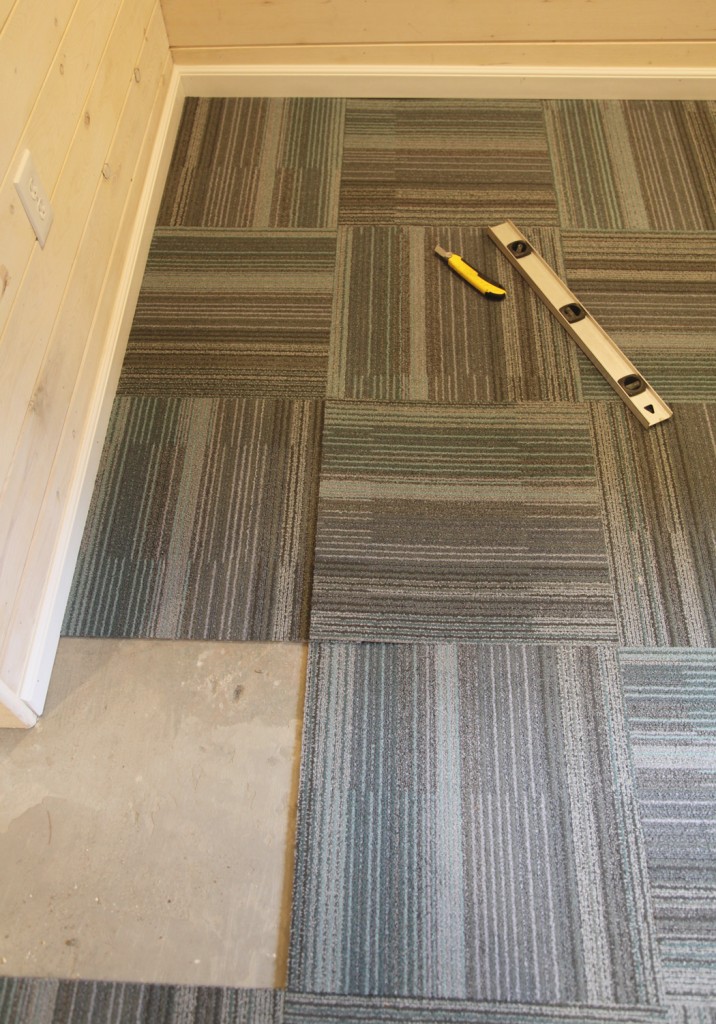
I still had left over utility blades from cutting the vinyl tile, so I just used these. I found that the blades get dull even quicker with carpet tile than with the vinyl tile.  To cut them I put the carpet tile I wanted to cut under the adjacent full carpet tile. Then I just cut along that line following the edge of the adjacent carpet tile. This worked really well for the straight cuts. For the cuts around the doorways I lined the carpet tile up with the wall and used my metal level as a straight edge and cut one side and then the other. I downside to the carpet tile is that you can’t mark it like you can with tile. This worked pretty well, just took a little bit of tile (and a bunch of blades).

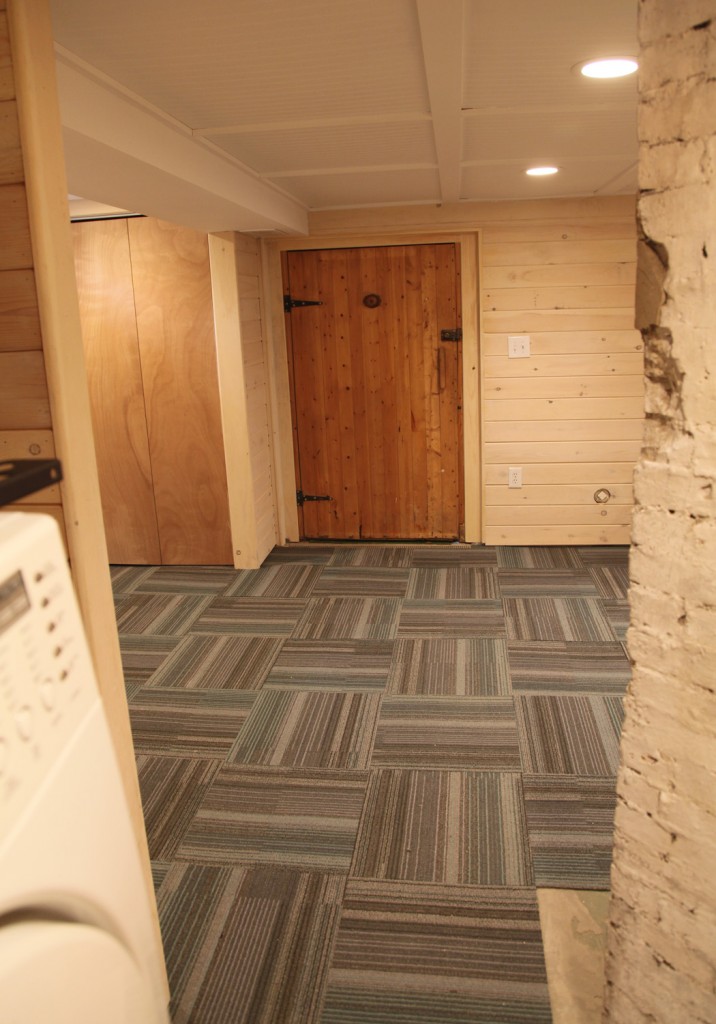
Carpet Tile in Place (now I need to decide what color to paint the door)

Gluing The Carpet Tile

The carpet place had said that we wouldn’t need to glue the carpet tile down or attach them together. I wasn’t so sure since when I have used FLOR in the past they give you stickers to hold everything together and I have found that you definitely need these.  But I had my samples out for a while and I noticed that these stayed together very well without anything. They are thinner than the FLOR tile but somehow whatever the rubbery substance that is on the bottom they stay put.  In our installation we are going wall to wall so I figured that it would help hold everything together. So now that it is down, they feel very secure, but at the same time I can pick one up easily and put it back in place with a problem, which is GREAT!

As you can see the carpet install went pretty well. Now I need to decide what color to paint the door. I was going to go with blue, but with the carpet tile I think I might need to pick a different color. I also need to install beadboard on the closet door to make it less noticeable.

* To see all of the posts about our basement click here.
 

Main Space in the Basement: Waiting for trim paint & carpet

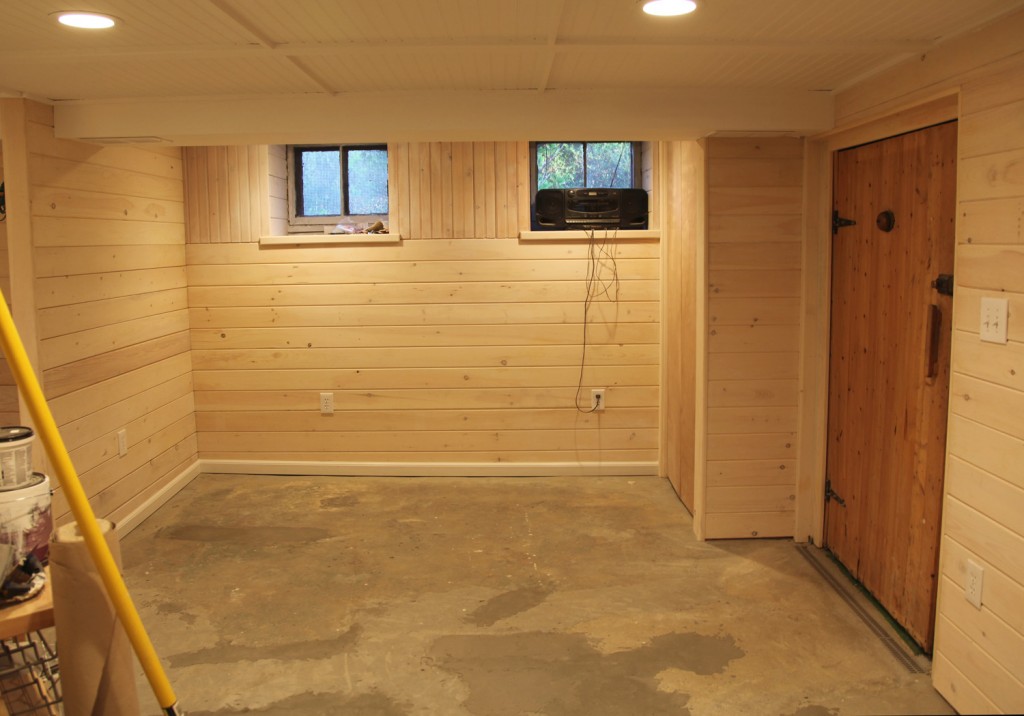
We have reached a major milestone in the basement. The contractors are done, they have taken out all of their stuff and left us to finish up. They will actually be back in a couple of weeks to finish some baseboard trim and a few other small items, but it is strange to have basement back. I suddenly can do laundry whenever I want! Of course this doesn’t mean we are done, we still have lots of painting to do, carpet to install and decorating but we can at least move forward on the cosmetic stuff, which is a big deal. If all goes well we will get at least part of the carpet in this weekend, along with some trim painting. I thought I would give you a quick update of where we are right now.

As you can see part of the basement is looking pretty cleaned out (this is where they were storing a lot of their stuff). Of course all of our basement does not look like this, since we do have our fair share of stuff (which needs to be organized).

Other Side of the Main Space: piled with our stuff

The other side of the main room is currently filled with extra stuff from the construction process, things that need to be installed (i.e. one of the old storm windows), things that will go in the workroom (i.e. the saw and ladder) and random pantry overflow (which will find a new home on shelves and cabinets in this area).

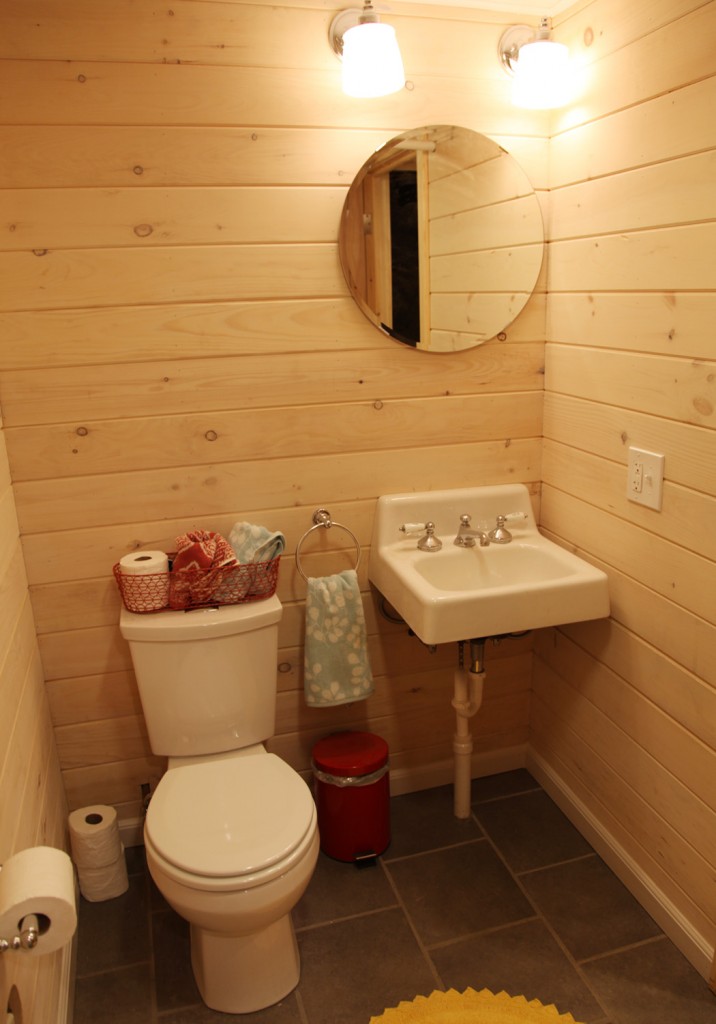
The Bathroom in desperate need of a shelf!

The bathroom is totally functional (minus a shower door). It does need shelving soon though. I also have plans for hanging an old mirror and can’t wait to bring in some colorful accessories. I am also planning on installing a burlap skirt on the sink to hide the plumbing.

Future Workbench Area

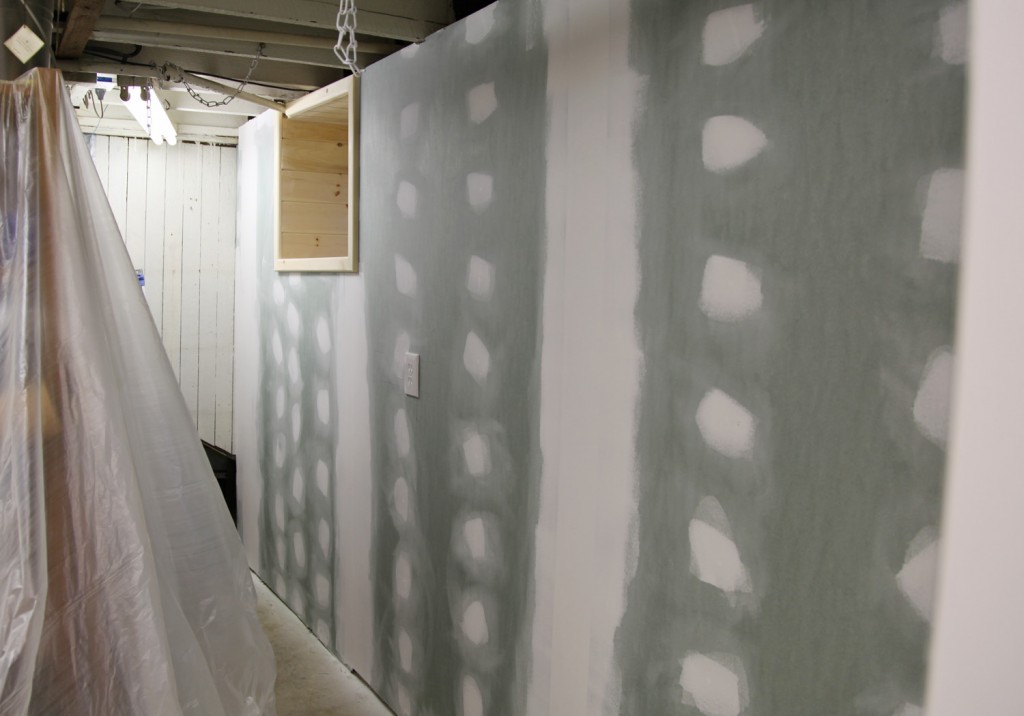
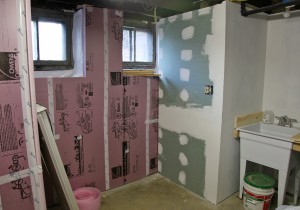
The workroom is now drywalled and I can’t wait to install our new workbench in the bay window. I had the contractors finish out the windows similiar to the main space (beadboard sides and top w/ a veneer plywood sill and wood trim). I haven’t decided on a wall color for this space yet. Definitely something cheerful!

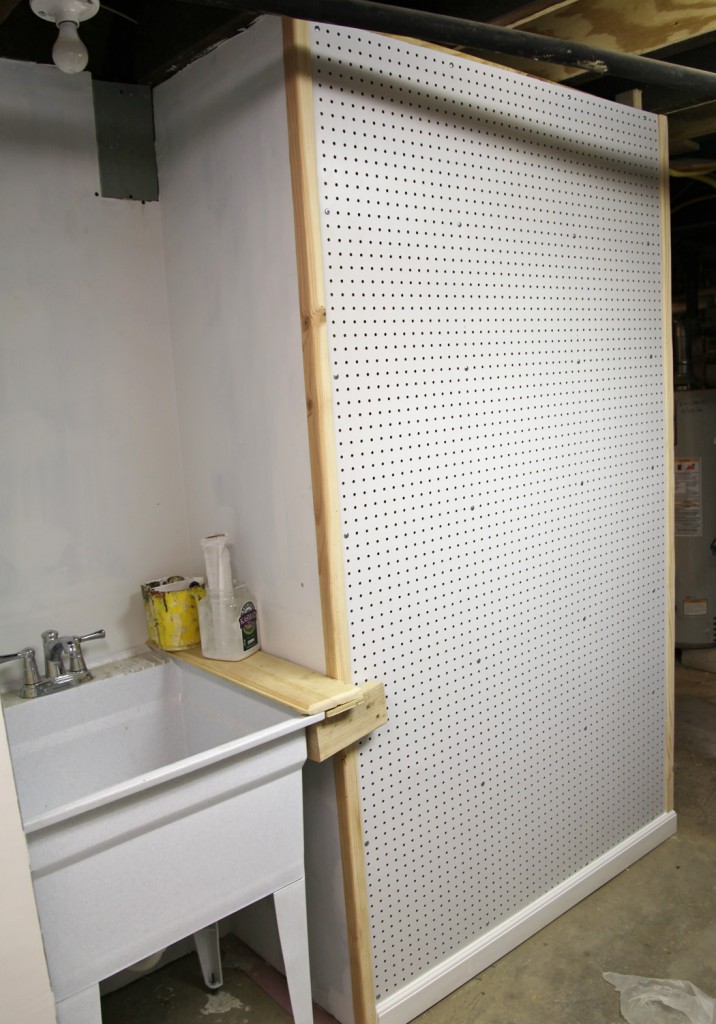
Pegboard Wall

The pegboard wall is in (it actually extends around the corner). It has a hard white finish on it that I wasn’t expecting. I definitely want to paint this a bright color. I may have to sand down the pegboard first, which I am a little bummed about (it currently has screws perfectly placed in a grid and looks so perfect). I look forward to having some of our tool out where they are easy to find. I plan on outlining some of them in permanent marker so that they can go back where they belong after using.

Workroom Shelving Wall

The Workroom shelving wall is also ready for storage (as soon as I paint). I haven’t decided whether we should reuse the Ikea shelving that we have or possibly install heavy duty metal wall shelves. I think I may put the Ikea ones in for now, since they are here and free and decide if I need to upgrade from there.

I hope everyone has a lovely weekend! My kids are super excited about hunting for eggs and it looks like the weather is going to cooperate for us!

* To see all of the posts about our basement click here.
Beadboard and Beam Basement Ceiling

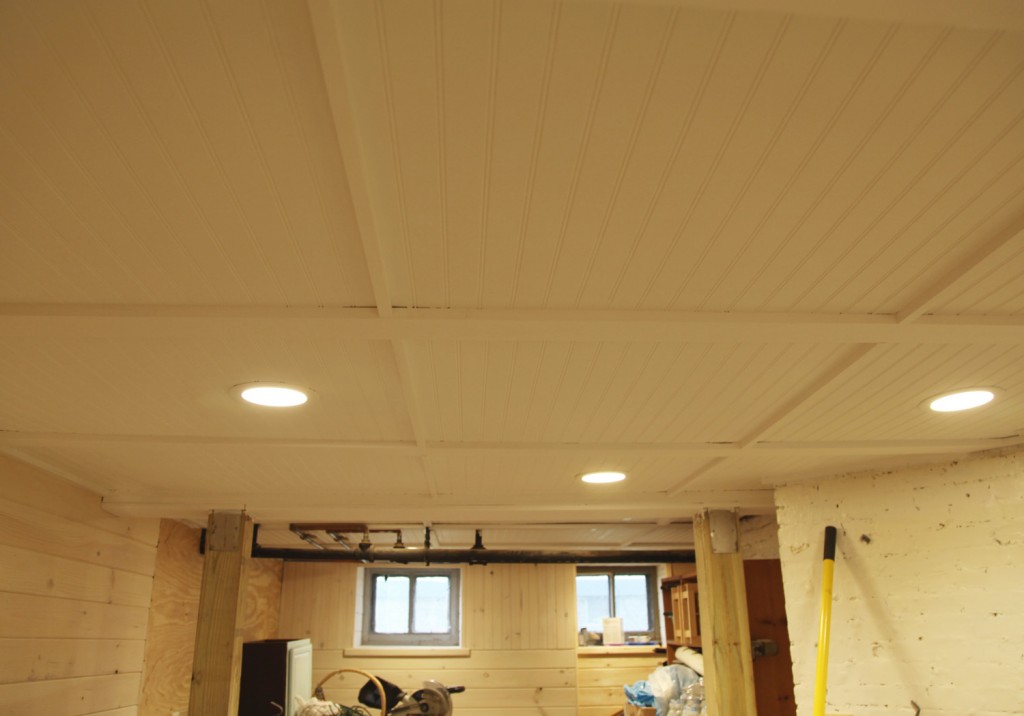
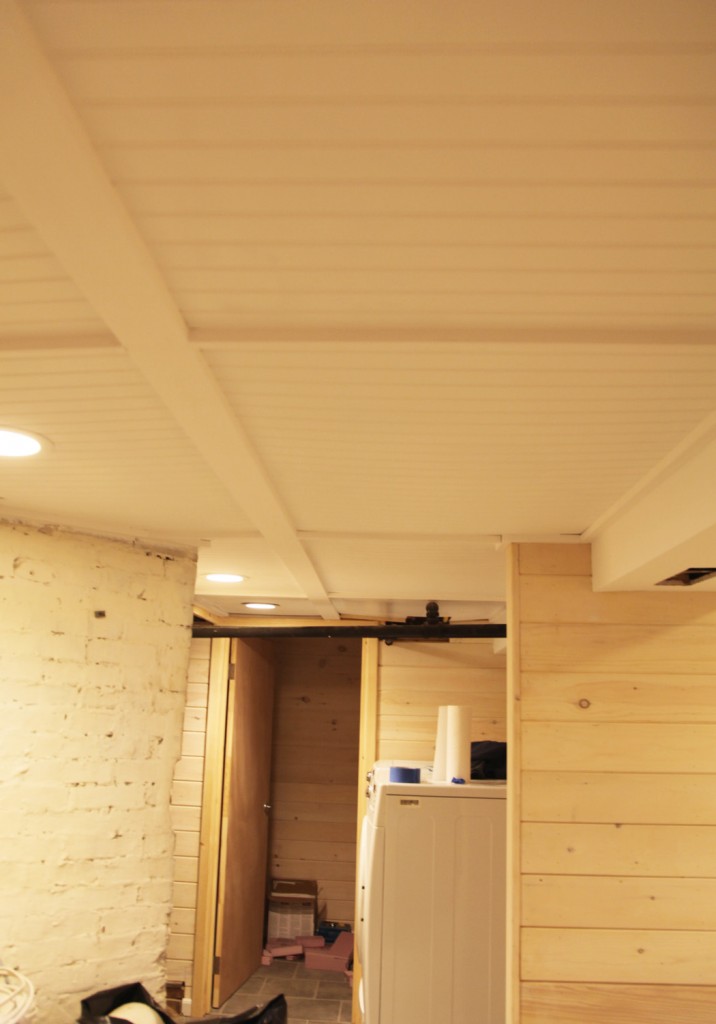
My neck (and Mr. S’s) is a little sore but the ceiling is painted! Yeah! It took a couple of coats of ceiling paint but it is finished. We used 1 coat on the beadboard panels themselves (which were already white) and 2 coats on the wood beams. Mr S. manned the paintbrush and I used the small roller. The great news about this being finished is that we are one step closer to installing carpet. We still have a fair amount of trim to paint (mostly in the windows) but most of the large surfaces are finished, which feels great.

More White Ceiling & Trim

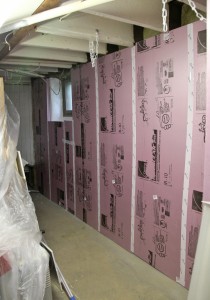
The Work Room

We also managed to clear out some space in the work room so our contractors can install drywall this week. Besides drywall they are going to relocate a few of our old florescent fixtures for the room and put them on a switch for us. We are not going to put a ceiling in here right now and I don’t want to spend more than we have to in this space, so we thought reusing the old lights in here made the most sense (at least for now).

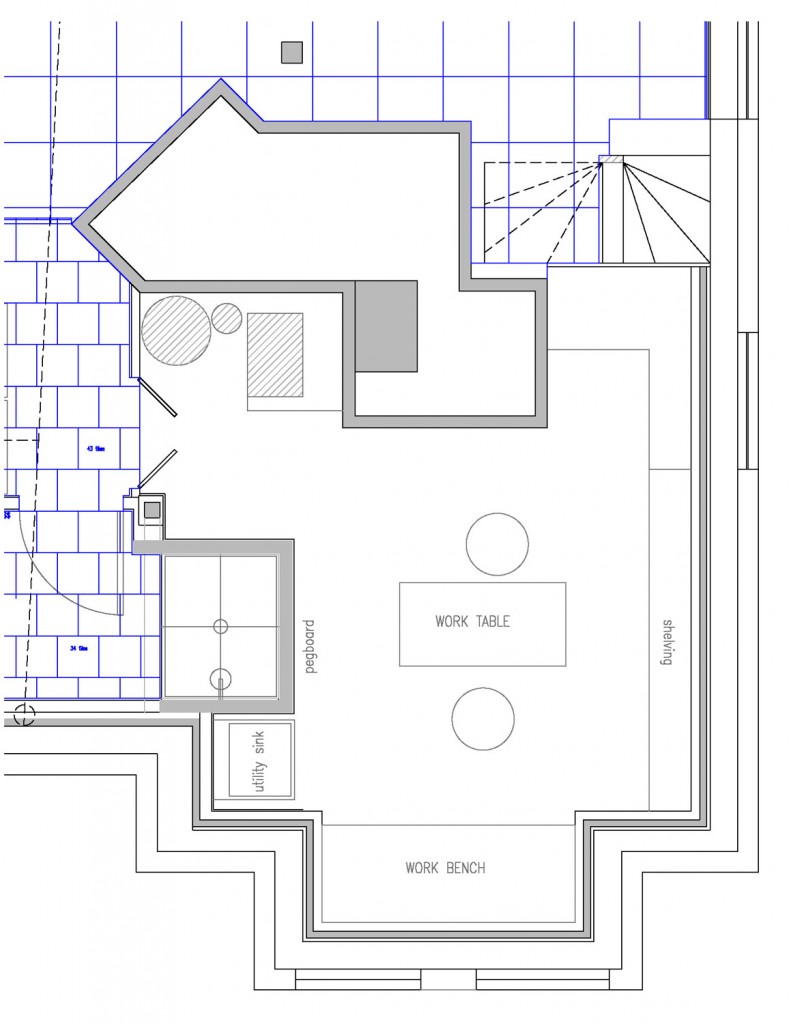
The Work Room Plan

The plan for this room is that it will be for using all of our wood working tools and for house projects. It is hard to see the space right now because we have shelves awkwardly placed in the middle of the room but there should be space for:

Front Bay Area for Work Bench

1. Work Bench: This will go in the front bay and have some open shelving below to hold some of our power tools. I actually already own the legs for this and it should be a fairly quick install.

Long Wall for Shelving

2. Long Wall of Shelves: We haven’t decided what kind (whether we will reuse our old wood ikea shelves or the old wire shelves that were there before). This will hold paint, wood & miscellaneous house parts. The old shelves were never used very efficiently, so I hope to remedy this with the new layout.

3. Peg Board: We are going to install peg board on the short wall next to the utility sink. This will be good for some of the small hand tools. I plan on painting it blue.

4. Work Table: Fingers crossed there will be enough space for a medium size work table in the middle of the room. This would be on casters so it could move around. When we do some of our bigger projects there are times that I really need some space to set out my work.

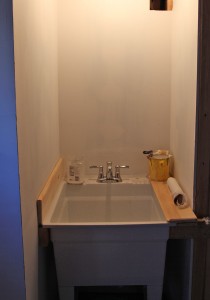
Utility Sink

5. Utility Sink: This is already installed and ready to go! I’ve already made good use of this. It is a little alcove behind the shower. I went with an inexpensive model from Home Depot. I should have upgraded to a better made model. We had to shim the front legs to get the drainage to work at the bottom of the sink. It also required lots of extra support to keep it sitting firmly.

* To see all of the posts about our basement click here.
 

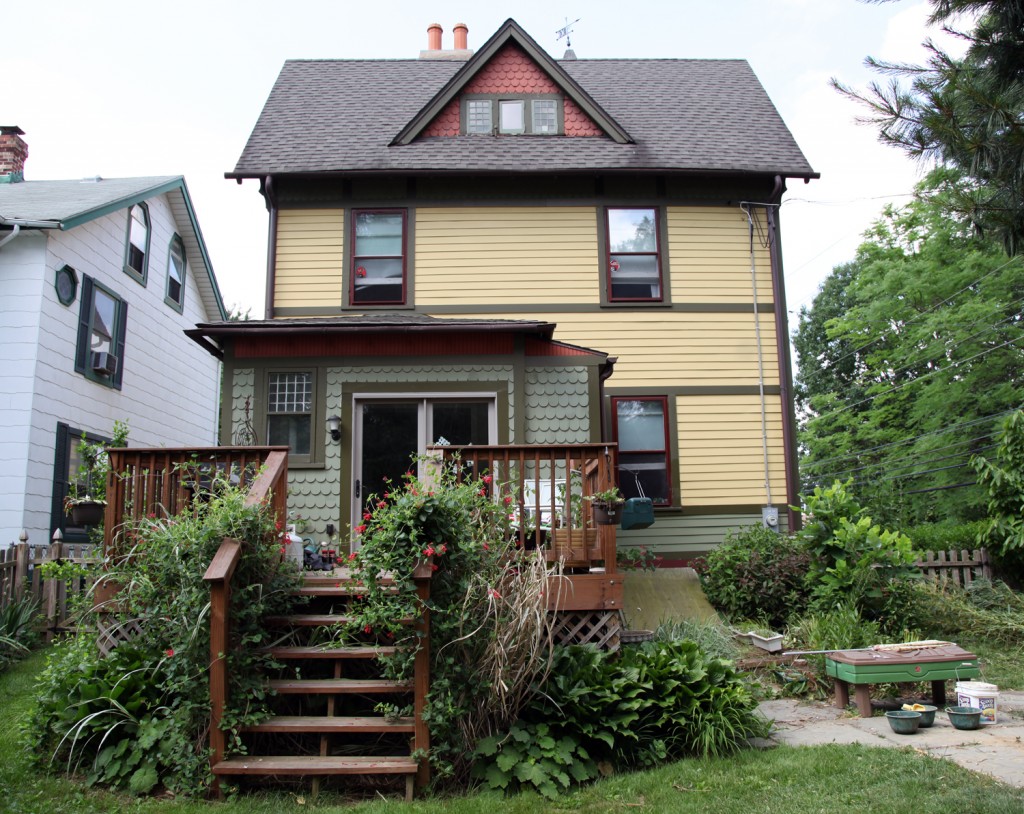
Deck from Last June

I have been talking about creating some backyard spaces for the kids for a long time (over a year now).  I decided it is time to act now! The kids LOVE being outside but are lacking a good spot to dig and play and it is becoming an issue. We now have a large hole in the grass thanks to a treasure hunt.  I am hoping to provide them with some space that they can call their own and spend some good imagination time.  Our backyard is fairly small and I don’t want to loose too much more grass since we have just enough right now to kick and hit a ball. That pretty much rules out a traditional playset.

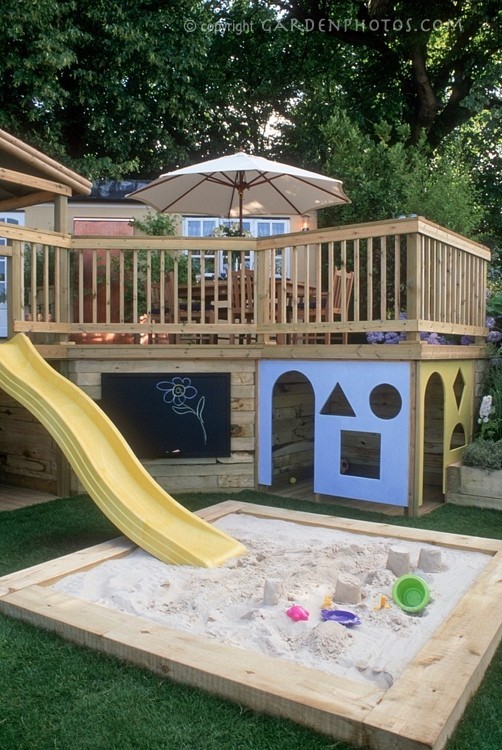
I saw this picture last year from gardenphotos.com and it really resonated with me. We have a deck that sits about 4 1/2′ off of the ground and the space underneath was totally sealed up by lattice. I don’t actually like our deck very much. It serves a useful purpose of a place for the grill, a couple of chairs and a few pots, but it doesn’t have any redeeming qualities otherwise.  I have several native honeysuckles growing on it along with a bunch of grasses and perennials to hide it as much as possible.  So the thought of altering it a little bit to make it more of a play space is very appealing.

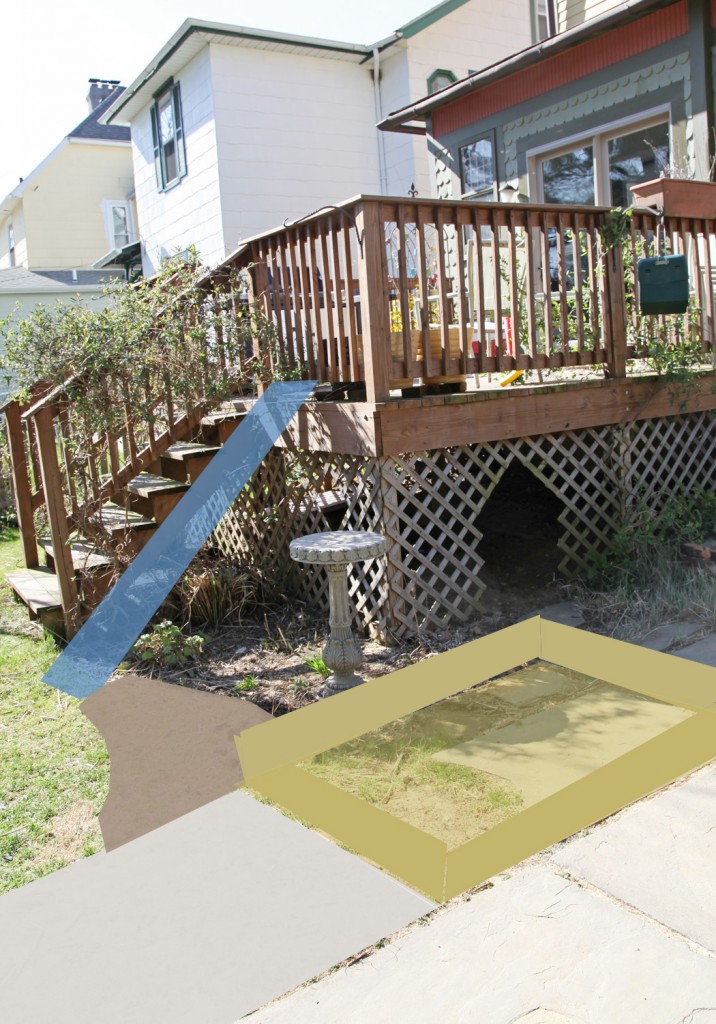
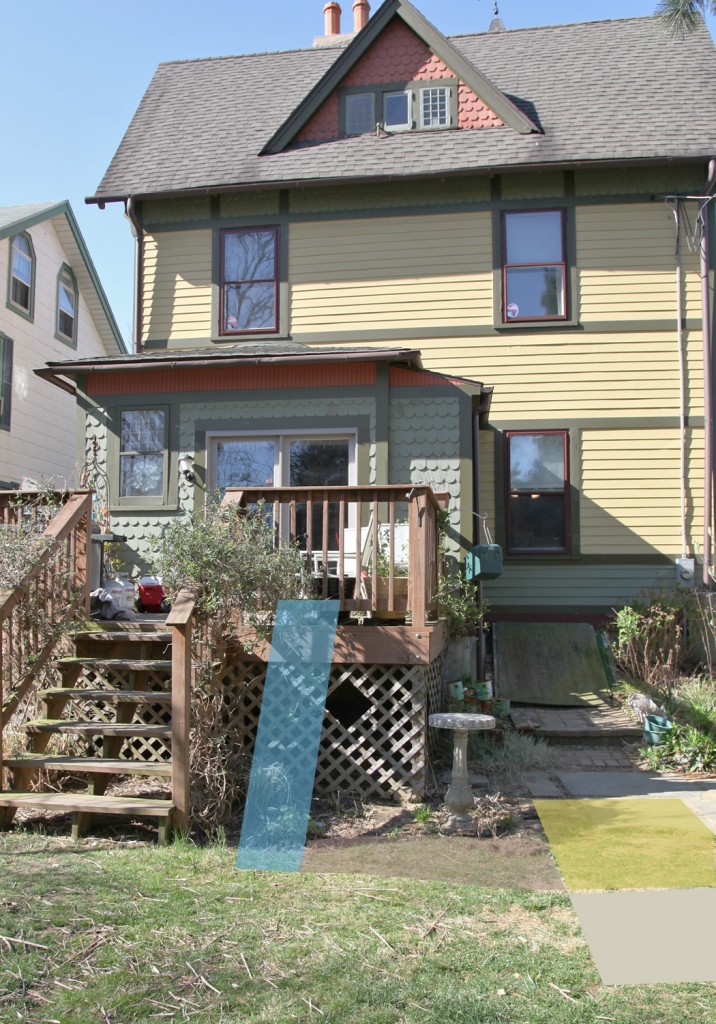
Rending of New Kids Area

The Plan

1. Fort under the Deck

On Wednesday I decided to start. I took my jigsaw and made some cuts into the lattice. We now have a door and a window. I will be adding some pine trim to reinforce the lattice and cover the rough edges. Sam can’t quite stand under there, but the kids couldn’t wait to get under there. I gave them a couple pieces of extra rigid foam from the basement to sit on. I will be building a little wooden spot on sleepers sometime soon, but I have a feeling that they will be busy digging in the dirt for a lot of the time. There is some moss under there and I might even plant a few ferns as well. I am also considering ordering some burlap to help give them some more privacy and create a door.
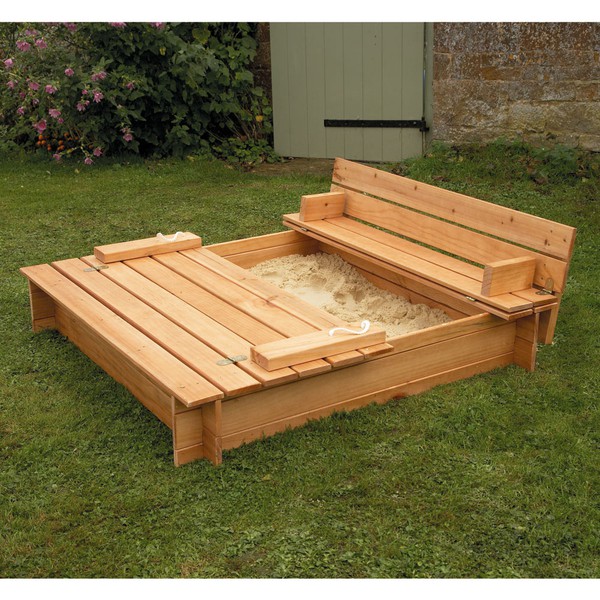
Option 1: Sandbox w/ built in cover that turns into seats.


Option 2: Sandbox w/ corner seats


2. Sandbox

The kids have been asking for a sandbox since they could talk. We used a baby pool filled with sand when they were smaller but they are too big for that now. I also want something that I can cover when not in use. I am still debating 2 options. Option 1 is really cool because it has a cover that turns into a seat. This model is only available in England. But the good news is that over on Ana White’s website someone came up with plans based on the design. Option 2 would be simpler to make but would require some sort of fabric cover.  The one advantage with this one is that I could make it a little bit bigger without having to recalculate all of the dimensions for the plan. We are planning on picking up a couple of beach umbrellas to shade it similar to the Option 2.

The sandbox will sit in between some slate stones on the patio. It may seem like a strange spot, but I like that it is really visible from the kitchen window and will be close to the table if we are sitting outside. In the future this could also easily be filled in with a planting bed or more slate.

Another Rendering of the Back Deck with Slide

3. Slide

I still have plans of installing a slide right off of the deck (I would like to attach it to the bottom rail of the guardrail). I am actually on the hunt on Craigslist and Freecycle for one. I haven’t found quite the right one at the right price, but I have hopes in the next couple of weeks of finding one.

4. Chalkboard

I haven’t decided on a location yet, but I think a chalkboard made of exterior grade plywood would be a good idea. The kids love to draw and I think this might be the answer. I just need to find the right spot to put it.

5. Plants

I temporarily moved the birdbath to the spot in the photo, but I think I will need to move it further from the kid area. I think I will be planting this area with durable perennials and grasses. So far I am leaning towards hosta in the shadier spots and some shorter grasses in between.  I will also probably put in some small stepping stones in between the sandbox and deck.

Next Steps

The good news is that all of this work is doable in small increments. Last year I had bigger plans, that never got done because they couldn’t be broken down into little projects. The kids are old enough now that they will even “help” for brief periods of time, especially if it is for them.

First on the list is reinforcing the trellis. I’ve picked up the wood and just need to do a little cutting and screwing. The total cost so far is about $9.50. Next up will be moving the piece of slate where the sandbox will go and getting the spot ready for the sandbox. I probably won’t get around to building the sandbox for  a couple of weeks but the kids are super excited, which helps keep me motivated.

I hope everyone has a good weekend! We have some painting and cleaning to do in the basement.