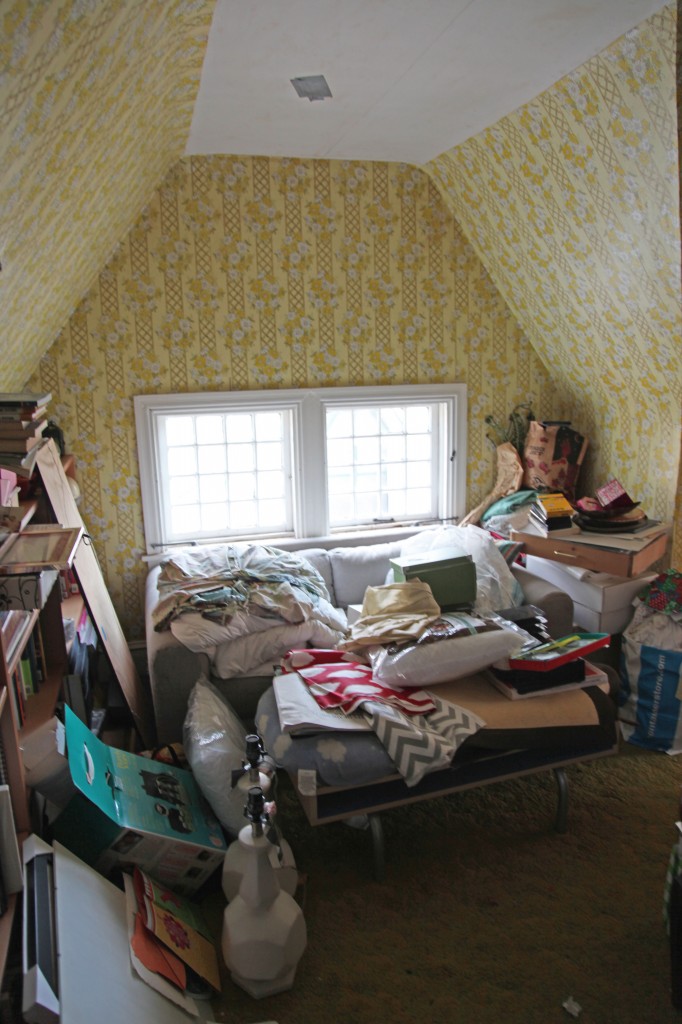
thirdfloor-hangout1

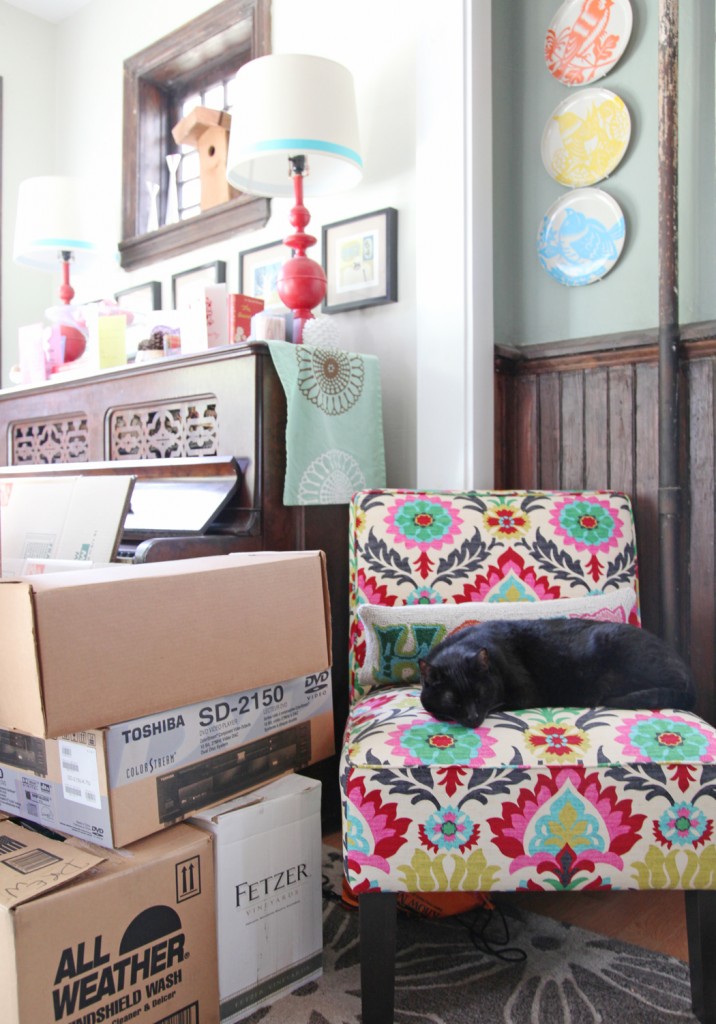
I hope everyone had a lovely weekend! We spent the majority of the time up on the Third Floor purging, boxing, moving things around and striping wallpaper. I would say that we are about 70% of the way done clearing out the space. I have given up my garage space for the foreseeable future and we have made multiple trips to Best Buy to recycle electronics and Goodwill to drop off unwanted items. I thought you would like to see how it is looking up there.

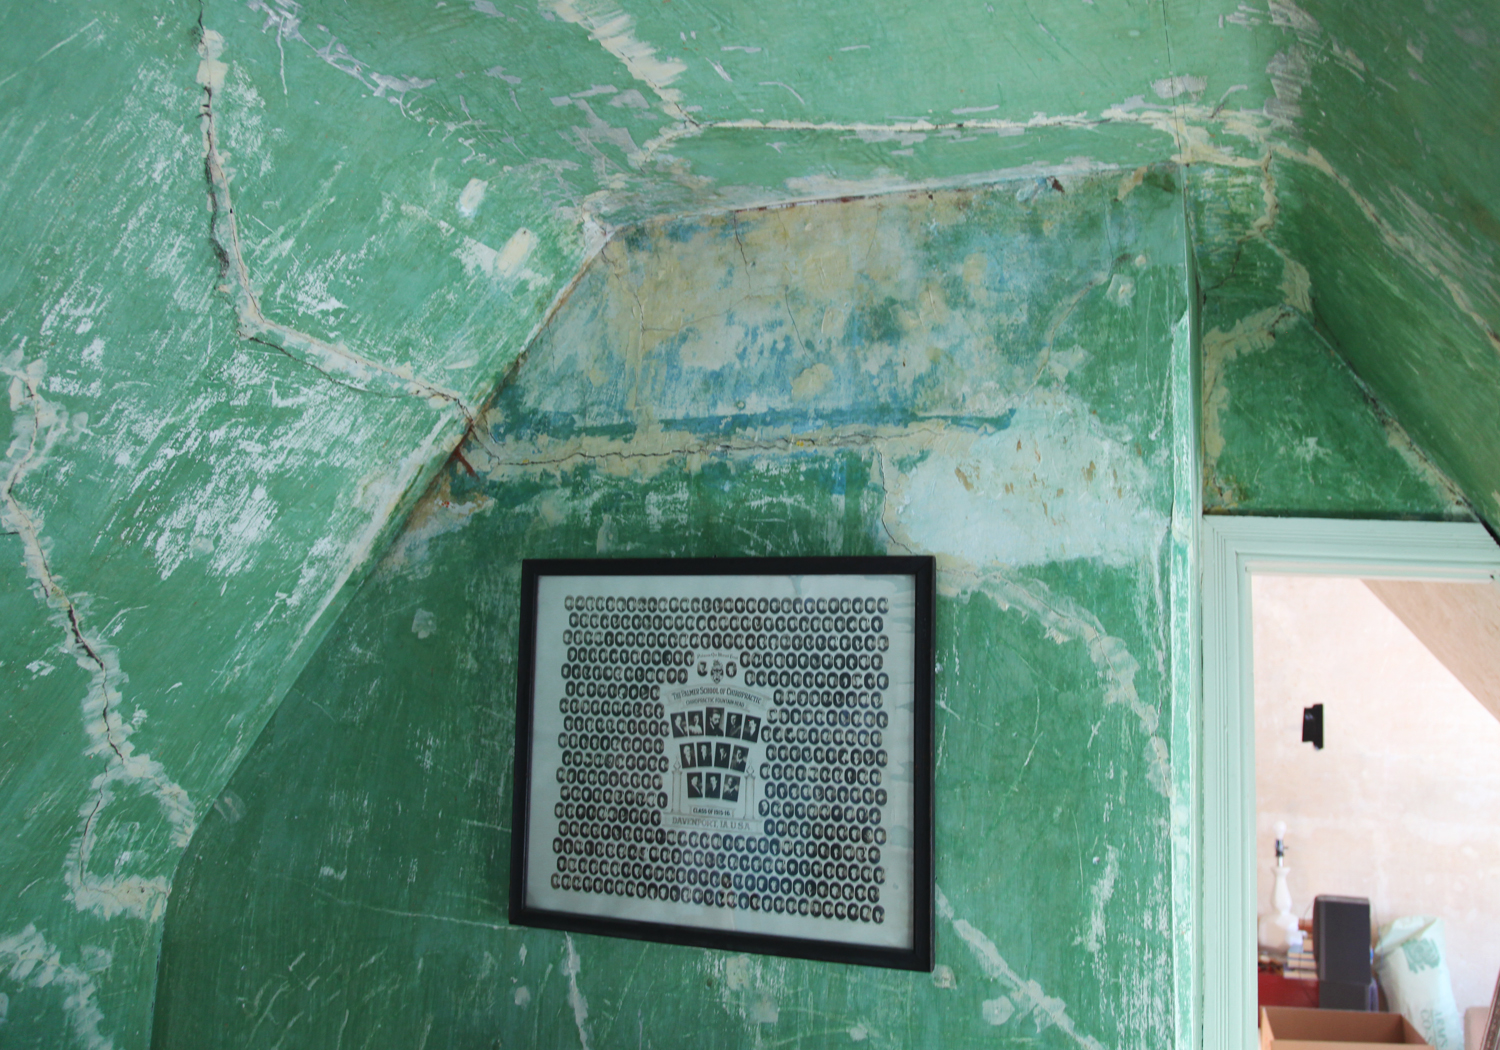
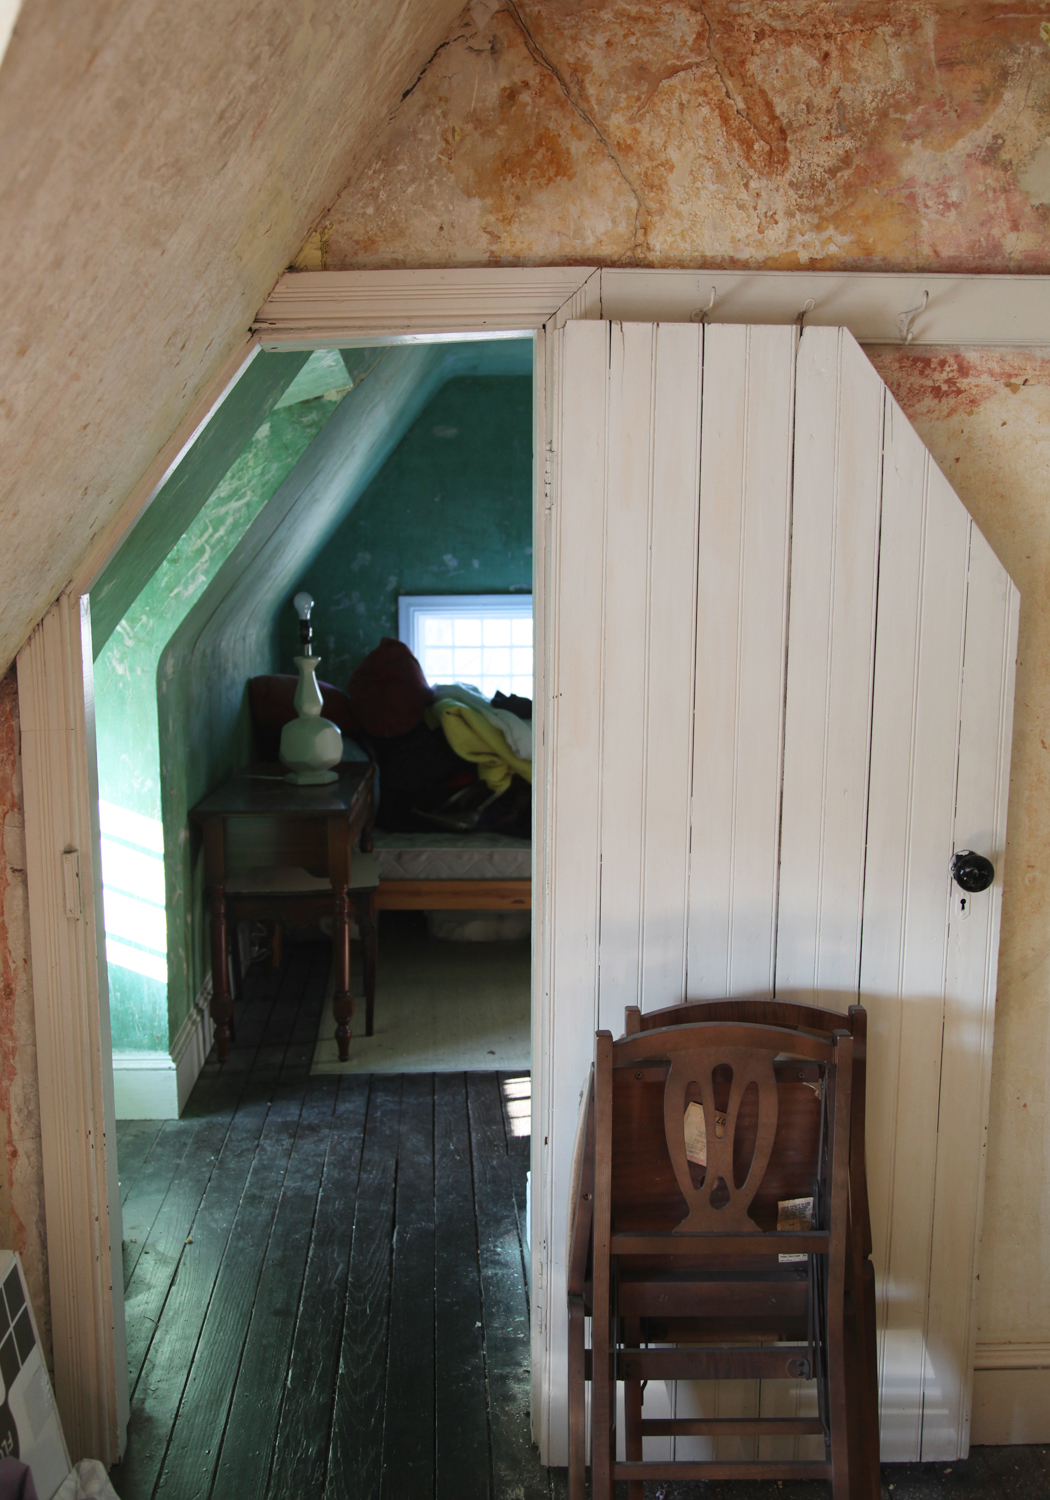
The wallpaper in the Hangout Room and in the Bedroom came off in giant sheets. It was pretty exciting. The green wall color of the bedroom was surprising. It is weirdly beautiful at the moment. We won’t be leaving it like this, but it does feel pretty surreal. The picture below is from the Palmer School of Chiropractic in Iowa from the early 1900s. The picture came with the house and the previous owner said that it was left in the house when they bought it in the 1970s. We believe that one of the former owners is in the picture. We did see on the back that it was framed in Philadelphia.  One of the interesting things about the picture is the number of women in the graduating class (at least 1/3 are women).

thirdfloor-bedroom23jpg

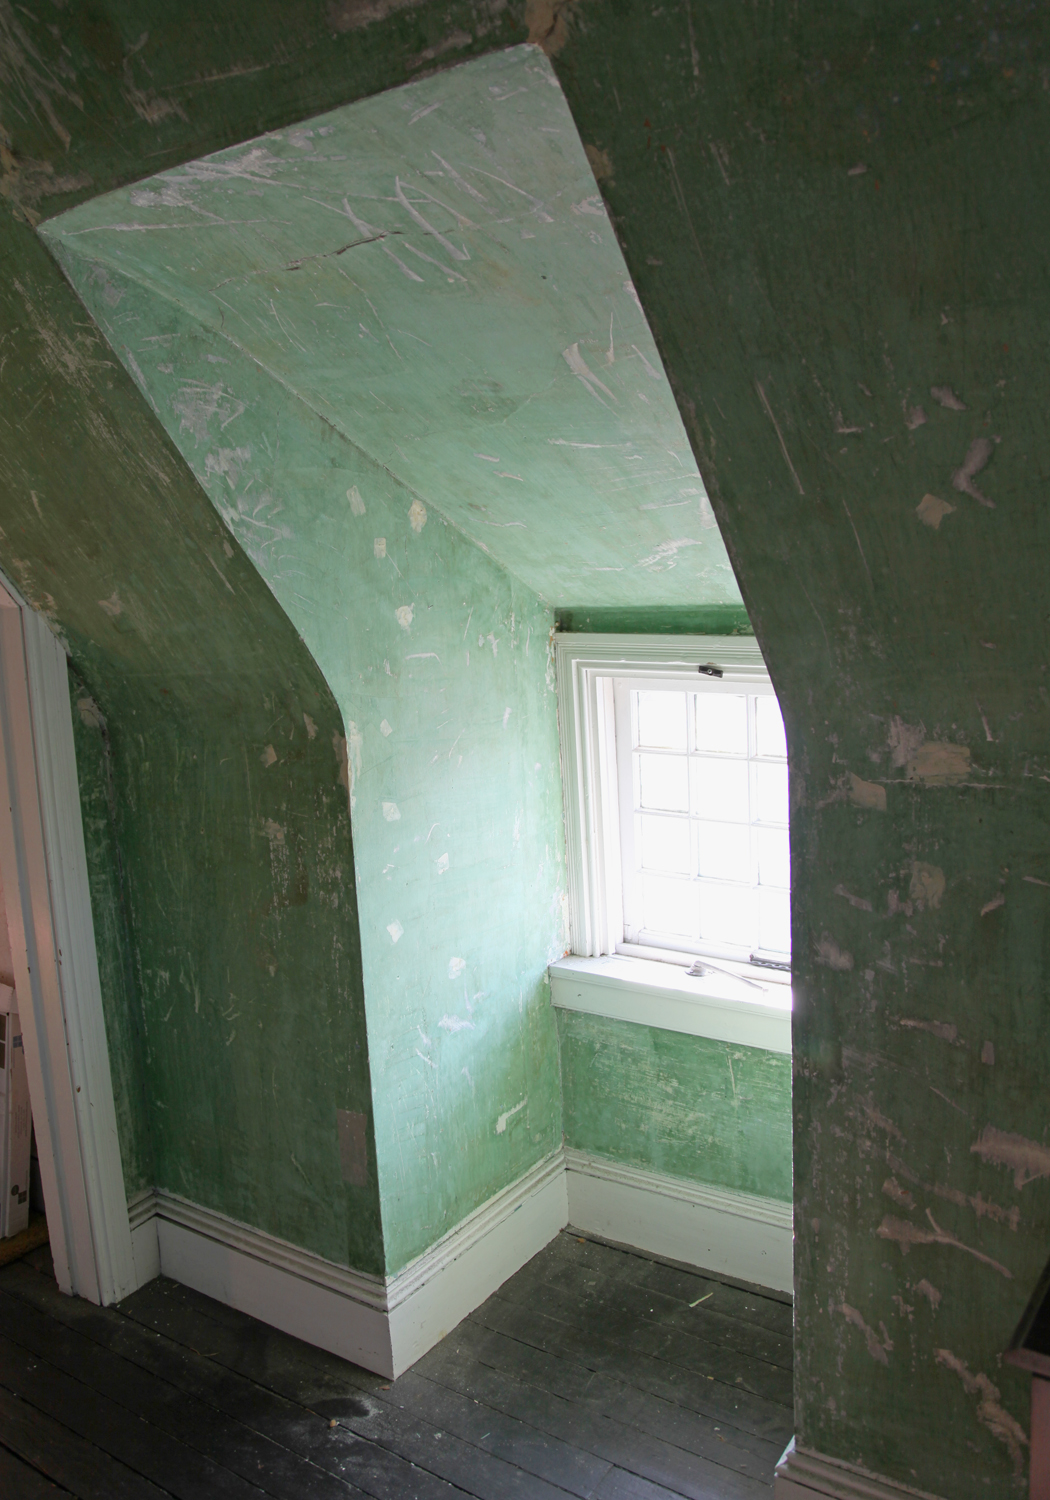
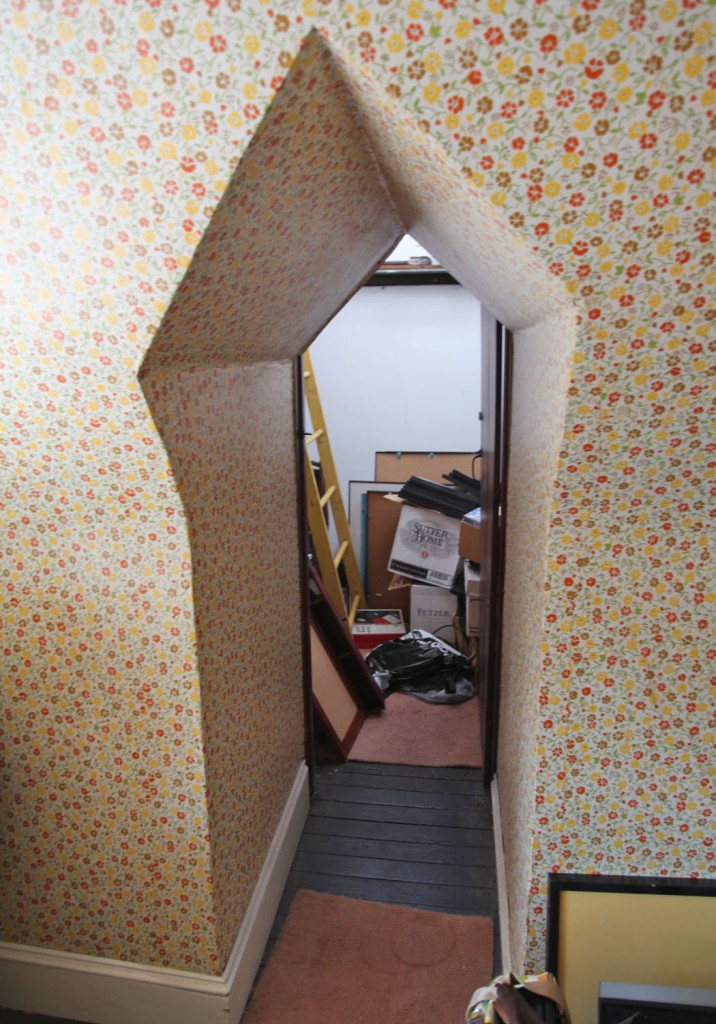
I especially love this little tiny dormer. I wish it were a little bit bigger to be functional, but it is very sweet.

thirdfloor-bedroom1

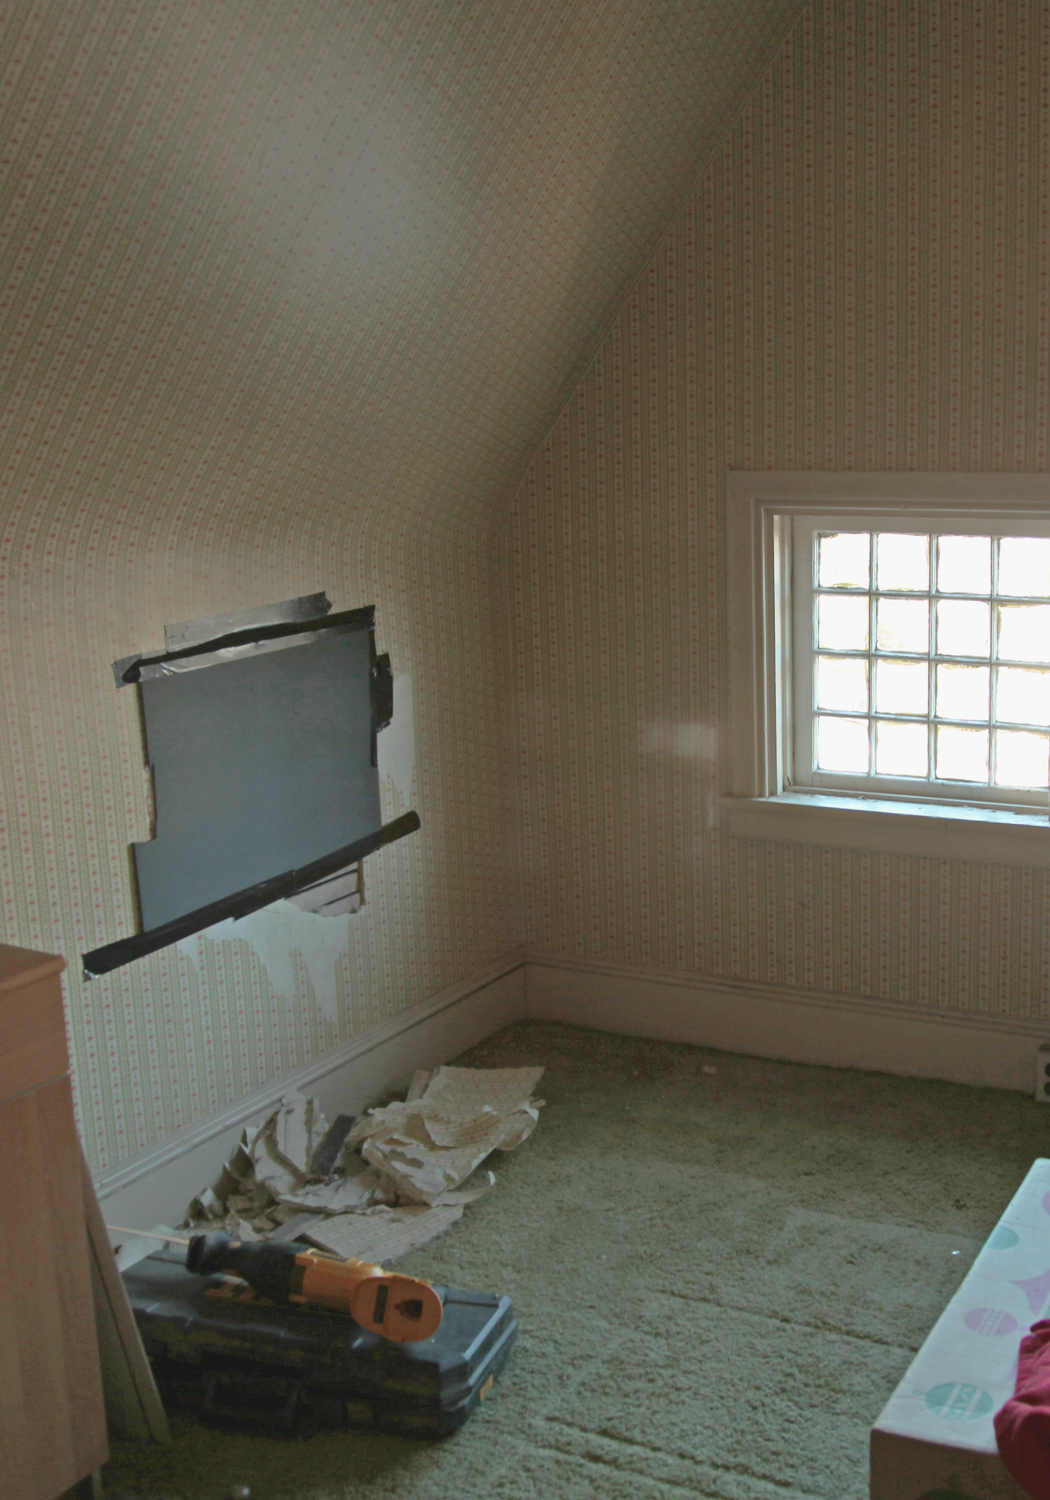
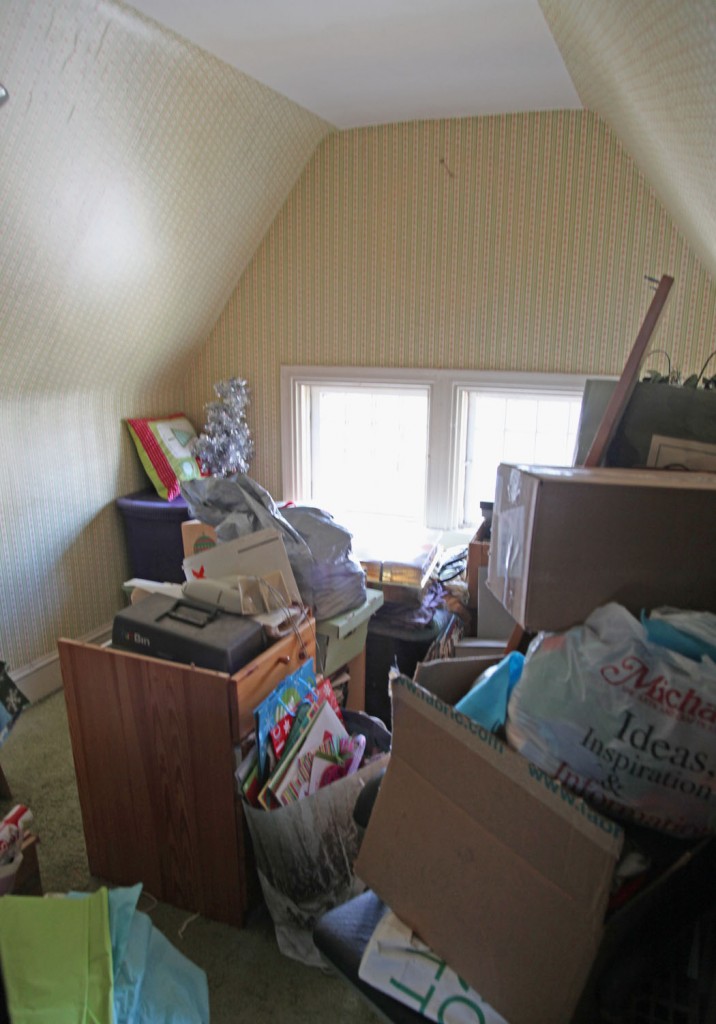
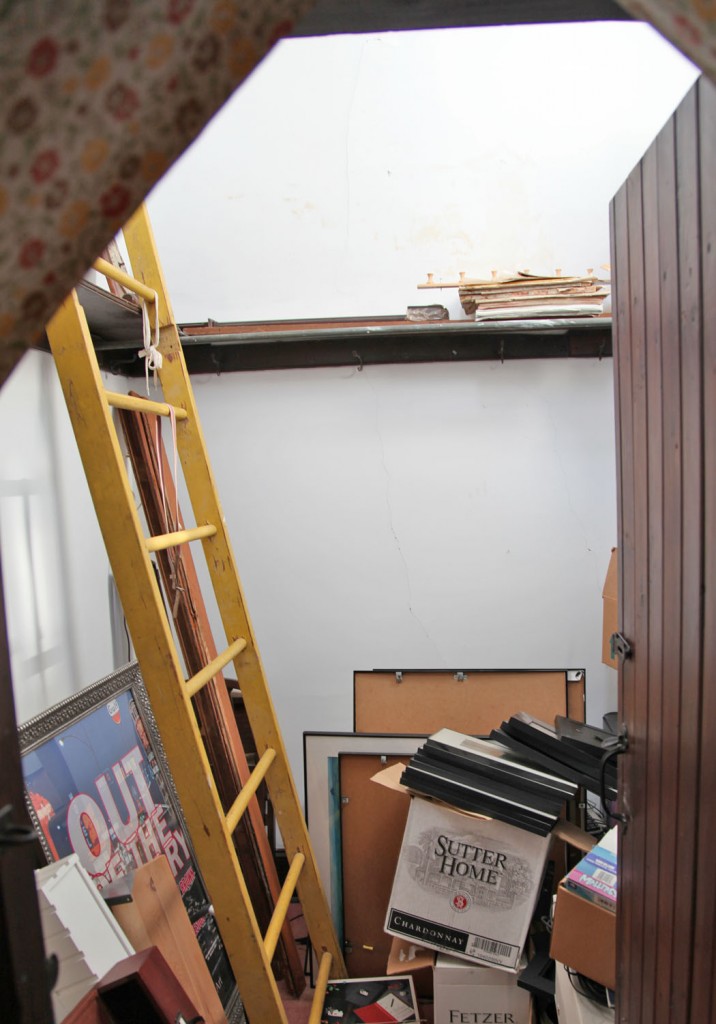
We also did a little bit of exploratory cutting, which is always exciting! We cut a large hole (now covered for the safety of the kids and the cats) in the craft room (where unfortunately the wallpaper is better adhered). This section connects to the flat roof and is above the closet in the kids room. The ceiling of the closet in the kids room is the same height of the door frame (6′-8″) so I wasn’t sure what happened above it. Well we now know that it is just open all the way up to this space. Which means when you look down you see the closet ceiling 4′ down, which is really strange and slightly unsettling. You can also see the flat roof structure beyond. It will make framing some of the built-ins extra fun!

thirdfloor-craftroom1

We did the test cuts with the sawsall. The horizontal cuts went really well since you are going parallel to the lathe. The vertical cuts did not go nearly as well. They pretty much shook the heck out of the plaster. I really want to save the curved plaster, so we will have to see how the rest of it goes. Once we start cutting some more the rooms will also have to be off limits to the kids and cats, which makes working on it that much more difficult. I’ve got a long list of contractors to call this week. Wish me luck!

3 Comments

Third Floor Inspiration

February 23, 2013 — 1 Comment

boxes1

Mr. S. has been on a mission!  He has been purging away up on the third floor for a little bit each night. And now he is joking that it is all my stuff that is left up there. Of course “my stuff” includes all of the holiday decorations, old furniture and our shared collection of books that don’t fit in our Living Room bookcases. He has actually chosen to throw away/recycle/donate a lot of old stuff (including all of his original video editing equipment). In exchange we are keeping a large portion of his cds, which will eventually go in built in bookcases up there (currently residing in the boxes above next to Spike). I do have to go through my pile of curtain rods (i.e. Pottery Barn dumpster finds from a long time ago) and several boxes of old tchotchkes from years ago. And “a few” magazine piles (which is a whole other problem).

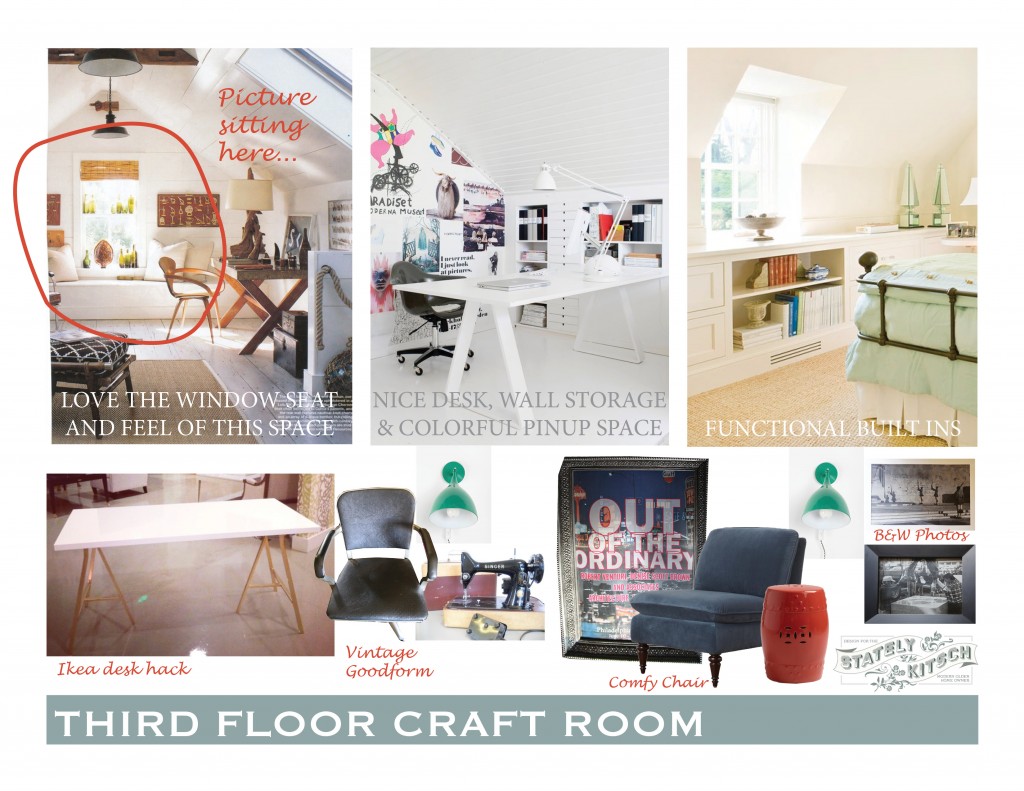
thirdfloormoodboardI thought I would show everyone a mood board for the craft room today. I call it Victorian Industrial Glam.

thirdfloor craftroom

The Victorian part comes from the house and our old 4 over 4 casement windows trim and curved plaster and well the fact that we are in an old Victorian. I am also planning on keeping the new built-ins in a similar style to the trim of the house.

goodformchair2

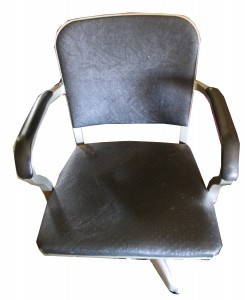
The industrial is inspired by he vintage Goodform chair that we actually bought from the previous owner. It is in need of a new softer seat and upholstery (I am thinking possibly bright faux leather) but I have always liked how it looks. We also have a couple of matching regular chairs that have been gathering dust in the garage. My pocketbook likes the idea of actually using some of our existing furniture. I think my vintage Singer sewing machine will also look nice with this and finally have a home (that is not shared by 2 little ones).

urbanoutfitters-sconce

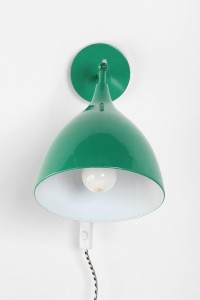
I am also really liking this industrial looking sconce from Urban Outfitters. I think a row of these mounted to the wall would be really interesting paired with grouping of Mr. S and my black and white photos.

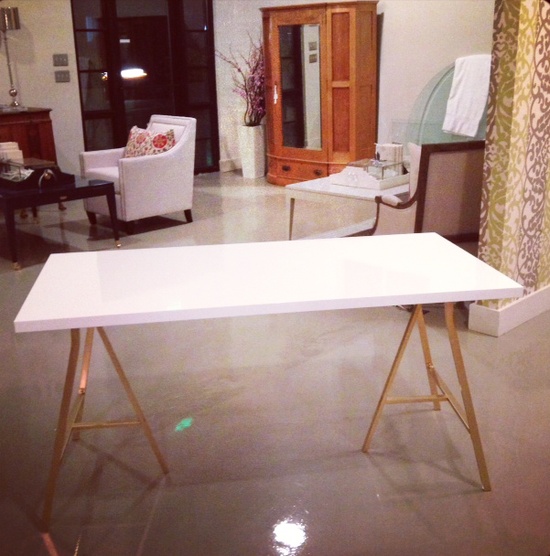
Finally the “glam” part. I’m not normally a glamorous person. Quirky and colorful, yeah that closer to home, but I really liked this Ikea Hack which are just some really inexpensive Ikea trestle legs spray painted gold. I think some mixed metal finished up here with a little bit of sparkle might be nice, especially since this room is mostly for me and sort of the opposite of the “man cave” in the basement.

What do you think?

I hope everyone has a lovely weekend. I’m off to work on purging some more stuff! Wish me luck!
1 Comment

We have been busy doing some not so glamorous or photogenic work in the last week. We have been trying to get the third floor cleared out enough that we can it insulated shortly. I wasn’t in such a hurry but my spray foam insulation guy has some openings in the next few weeks, and I don’t want to not take advantage of that.  Mr. S. even spent a good portion of Sunday up there going through stuff and purging. The last step will be giving up my garage space in the coming days to store some of vast piles of stuff while the work is done. I also need to move some of the potential Craigslist items out there. Anyone in need of some old ikea furniture? hahaha…

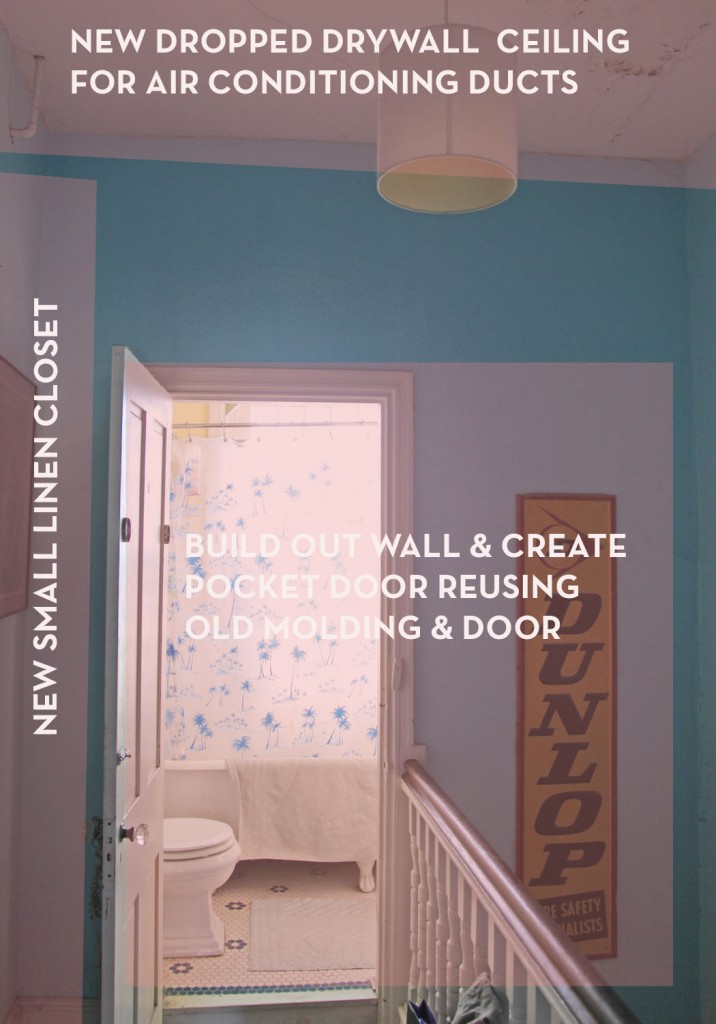
So while I hurt my back, I thought I would show you some of my inspirations for the second floor bathroom and hallway.

hall-before3

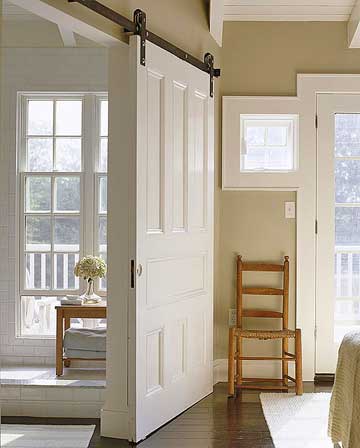
We will be adding some sort of sliding door to this room. I am conflicted between a pocket door (more historically accurate) and an exposed rail system. Doesn’t this rail look cool above? I’m a little nervous though that even if it is cool, it might not be quite right for the house. Although we do now have an extra newel post to install at the railing to allow the door to pass behind it and over the staircase.

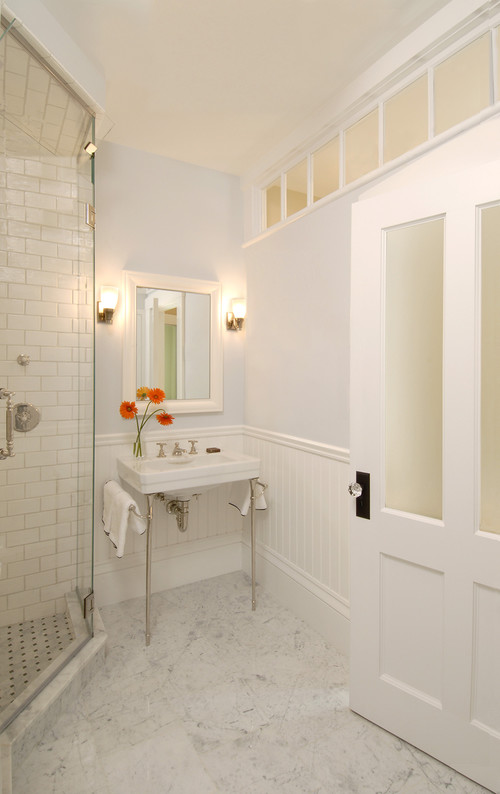
Along with this I am contemplating adding a transom window above to add some additional light. Probably not all the way across, although I think that is pretty cool. The hallway is a bit dark since the only natural light comes from the stained glass window and the surrounding rooms. So far I have not convinced Mr. S. that this is a good idea.

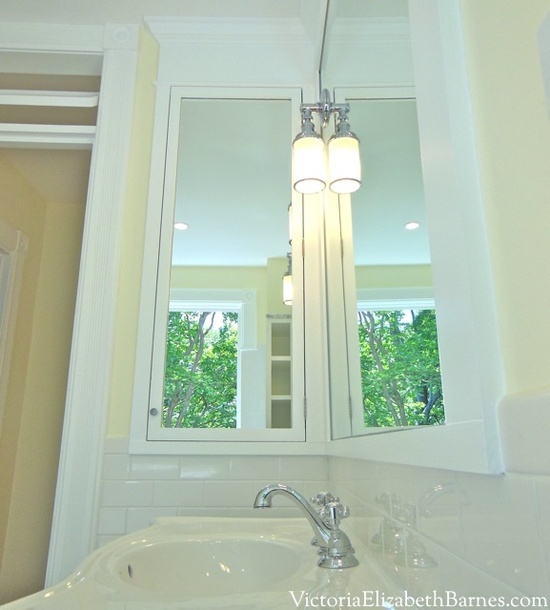
I am also in love with Victoria’s bathroom renovation (which if you haven’t seen I highly recommend). We won’t be gutting anything major here, but I really like the side medicine cabinet that her husband created. We can’t install one behind the sink since it is an outside wall, but we could put on on the side wall (behind the new sliding door).

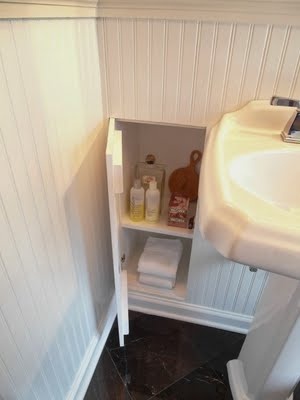
Finally I like this little recessed storage niche. I am thinking that a small one near the toilet would be perfect for extra toilet paper and other unmentionables.

11 Comments

kitchenfabric-spike

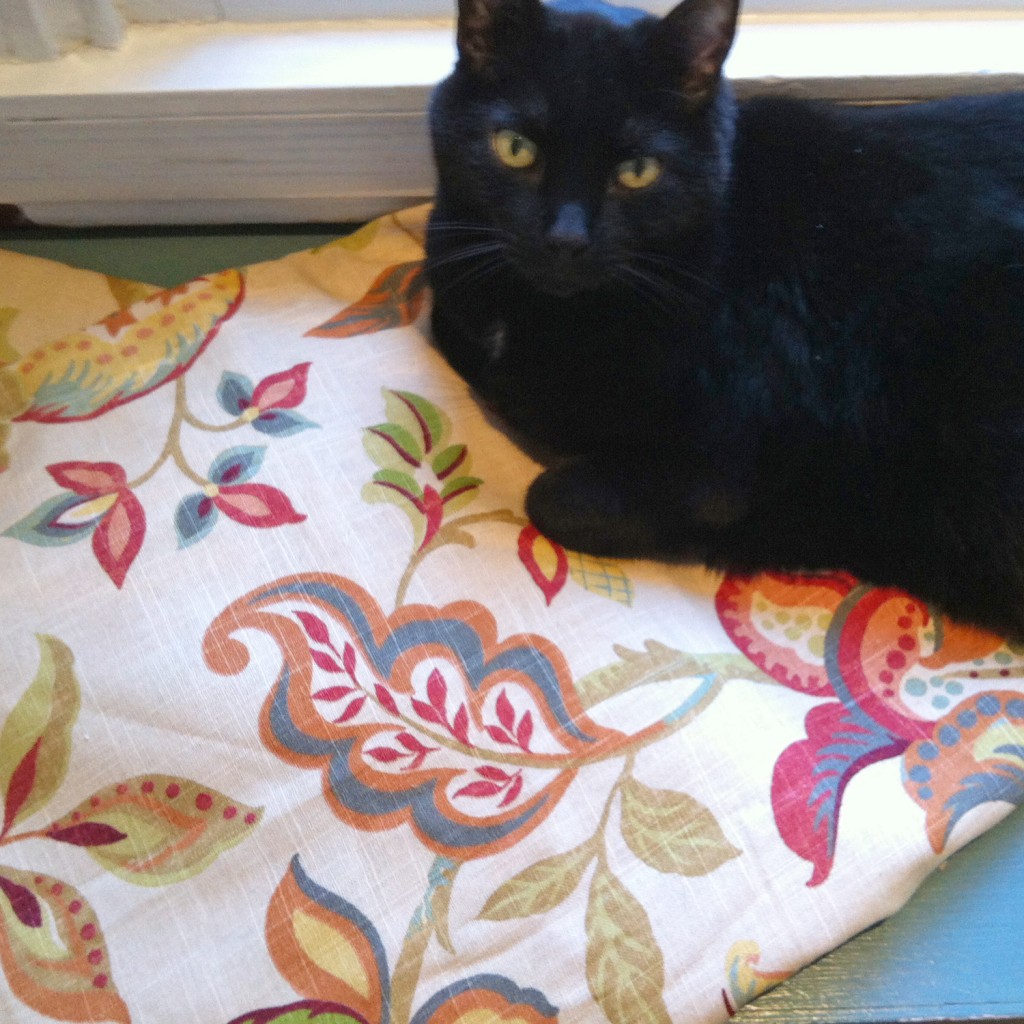
In the midst of trying to figure out all of our second and third floor plans, I was temporarily distracted by some pretty fabric. For some people it is shiny things, but for me a good pattern makes me happy and distracts me from more important endeavors (especially late at night while surfing the internets after Mr. S. has fallen asleep). I have been on a very long search for the perfect fabric for our bedroom curtains and while searching one night (specifically fabricguru.com) I came upon a nice Jacobean pattern with good potential (Richloom Kathrann Printed Linen Blend Fabric in Garden). It had a nice large size pattern, a good mix of colors and the pattern and was a nice mix of modern and pretty. The only issue was the background color. I really want a white background, to work with the future white window trim and to lighten the gray walls. By the pictures it was a bit hard to tell how far off the background color was. I stopped by JoAnn’s to see if they happen to have it in stock.

fabric-sample

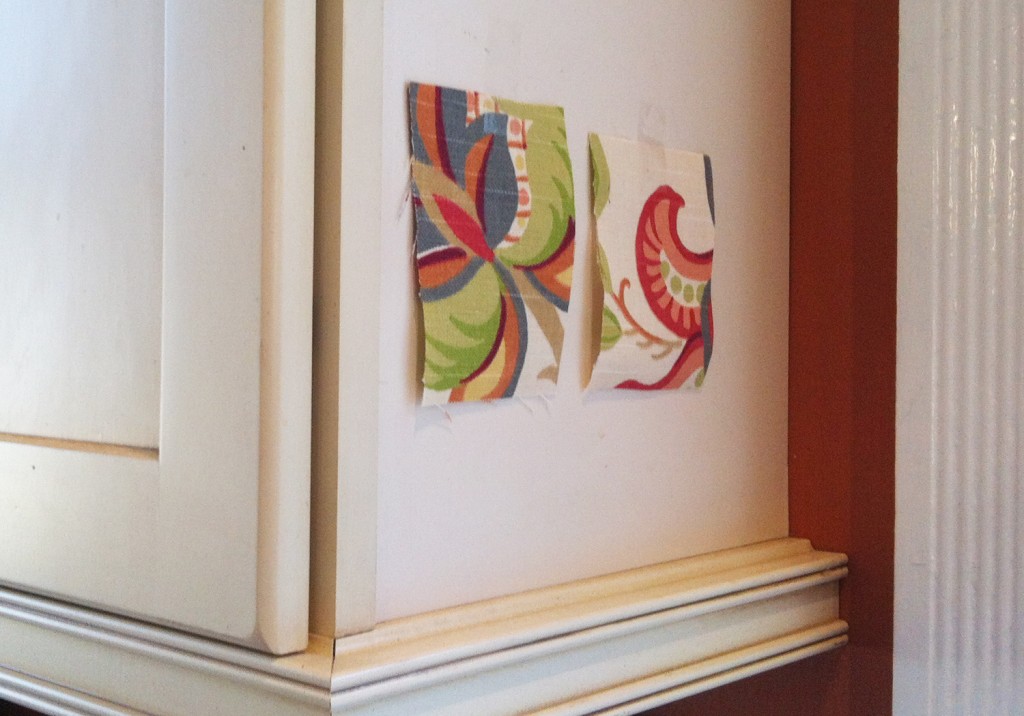
And just by chance they did have some of the fabric, so I asked very nicely for a sample and they gave me 2 to bring home. I immediately knew that it wasn’t going to work in our bedroom with the cream colored base but as soon as they were sitting in the kitchen I thought that I definitely need to use this fabric in here for some window valances. Because that is a priority right now (hahaha)!

richloom-kathrann-fabric

I ordered enough fabric for the windows with a little bit of extra for a couple of other small projects from fabricguru.com for the awesome price of about $6 a yard for 4 1/2 yards in 2 pieces (this retails in the $25-35 range). In addition to selling fabric by the yard they apparently have a lot of leftover small lots that they offer at really good discounts. Wow, I have just found a new place to spend many hours searching for the perfect fabric!

It is funny that one of the first things that I did when we bought the house was take down a lot of curtains and valances to let in the light and now I am putting them back up (of course in much nicer fabric that is not from the 1970s). I’m not quite sure to think about this development. We do have solar shades on a lot of our windows, which I do really like but they are a little ho hum looking.

kitchen-windowvalance-render

I just whipped up a rendering of what a valance might look like in here. I like it. I am considering actually making it with a solid backing and padding it slightly and using some decorative nail trim. Although if I follow something closer to my Dining Room valances, they would be easier to take down and clean. I do want to mount them inside the frame, so as to not obscure the nice trim.

What do you think? Does anyone else have a fabric obsession?

Leave a comment

bottlecapbacksplash-3

I thought it was about time I gave an update on the basement. As with so many project around here we get 95% of the way done and loose steam (Does that happen to anyone else?). That was definitely the case with the basement. We got it far enough along that it was functional and let it be. Well now I am trying to finish up before we embark on the second and third floor adventure.

The Basement To Do List:
-Add a closet below the stairs
-Finish the counter and backsplash in the wine/beverage area
-Finish up the workroom
-Add artwork and decorate
-Decide on curtains for the washer and dryer area
-Decide on furniture/shelving/storage for the pantry area

I have been working on pretty much all of these (except the last 2) and we are definitely in the home stretch. Our contractor installed the closet a couple of weeks ago (Yeah!), I just need to add trim to the door and whitewash.

pegboard1

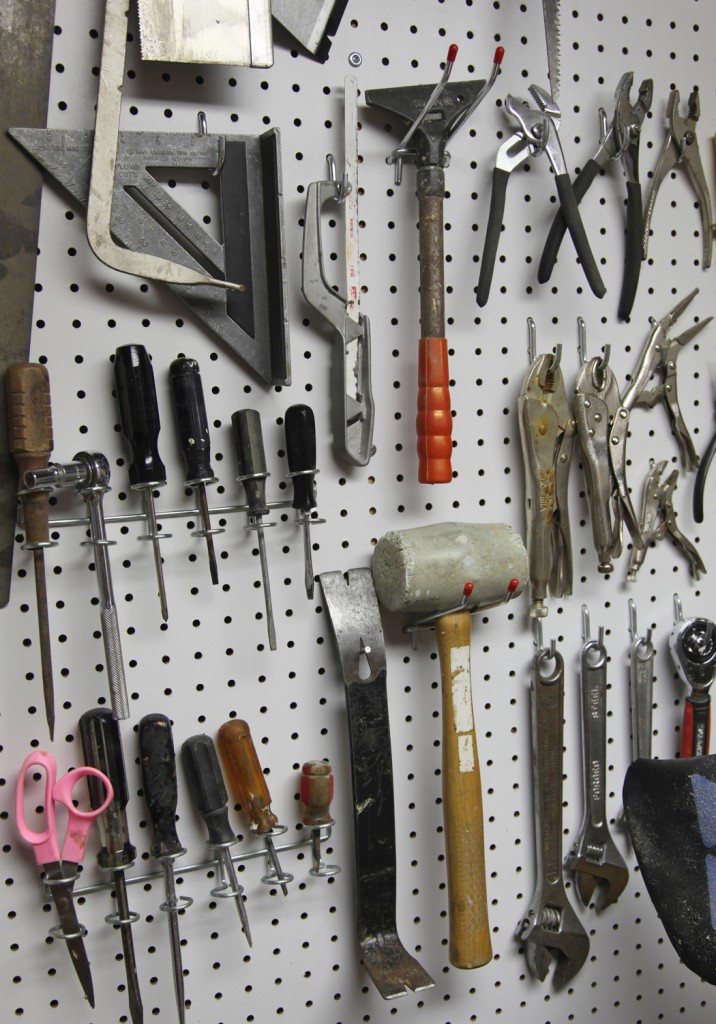
The workroom is definitely more organized and I can actually find most of our tools, although I still need to decide which table/bench to install the miter saw on. I have also started adding artwork and accessories. And for the last couple of weeks we have been concentrating on the counter and backsplash at the wine/beverage area.

winerack9-716x1024

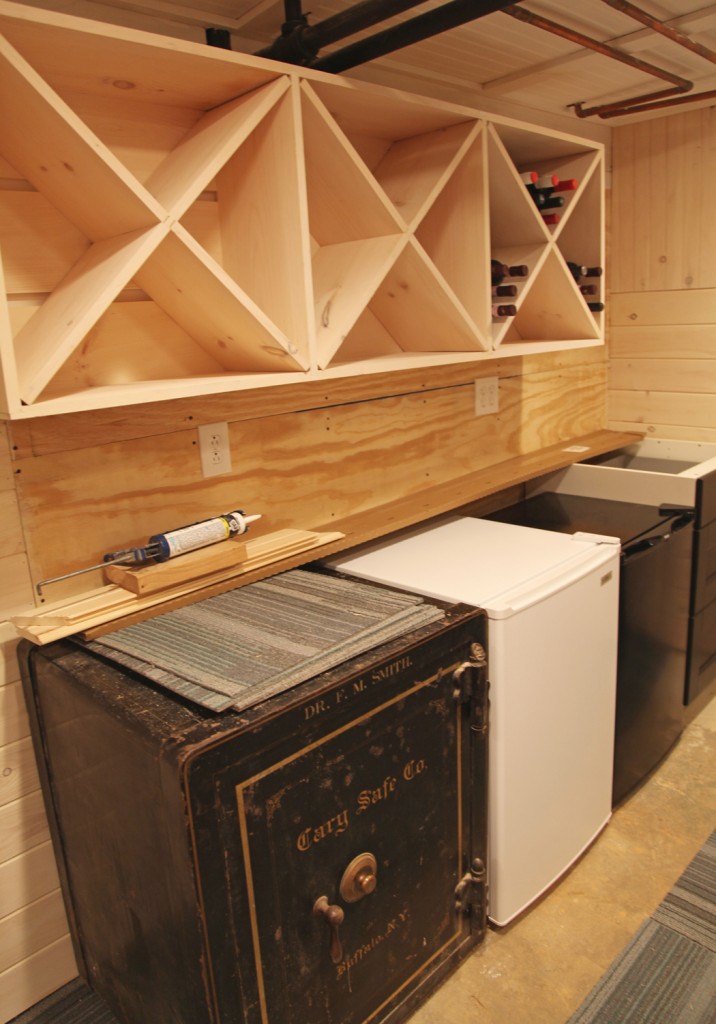
This is where we left off over the summer. We quickly put the wood counter on top with some loose wood blocking and decided to let it be (after all there was a 5 year old birthday party to prepare for). Then of course it was easier to leave it then actually finish it.

woodcounter-install

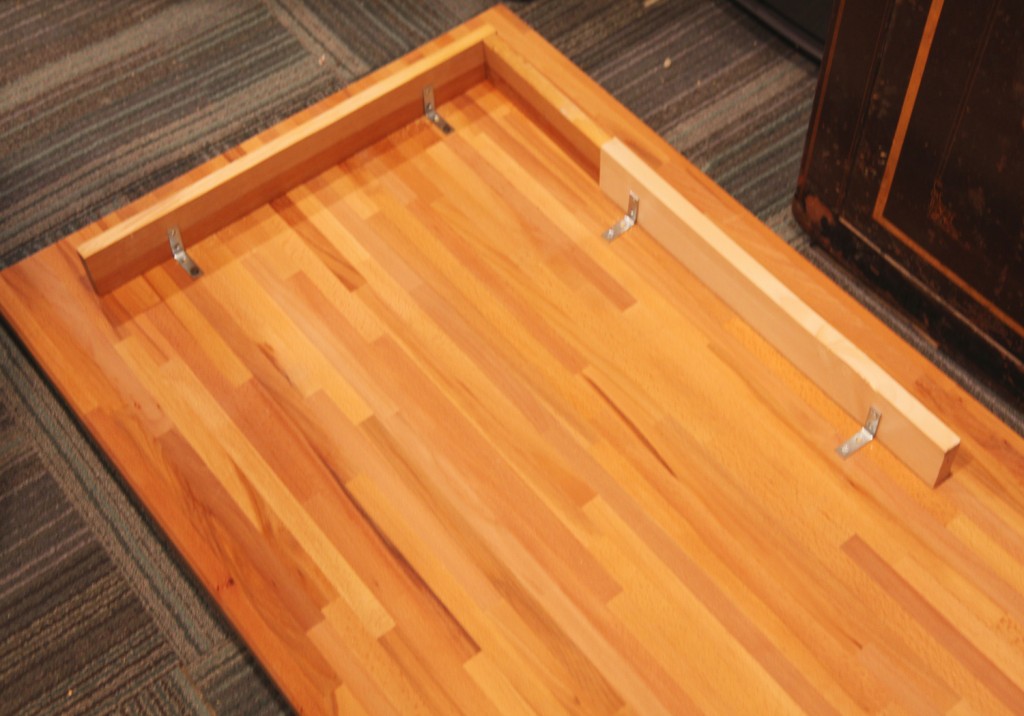
Well we finally busted out some scrap wood and used some small brackets I had on hand and put this baby in. Of course with everything in our house it was not quite that simple. We did design this area to fit the longest Ikea wood counter but the portion that needed to sit on the victorian safe needed blocking to raise it to counter height  (and of course nothing is level down here). We also added a cleat on the back wall behind the fridge and freezer while leaving a gap above them to allow air to circulate. Finally we attached it to the drawer cabinet on the end. The upper cabinet just sits on the counter, so we just had to screw it to the wall to keep it in place.

bottlecapbacksplash-2

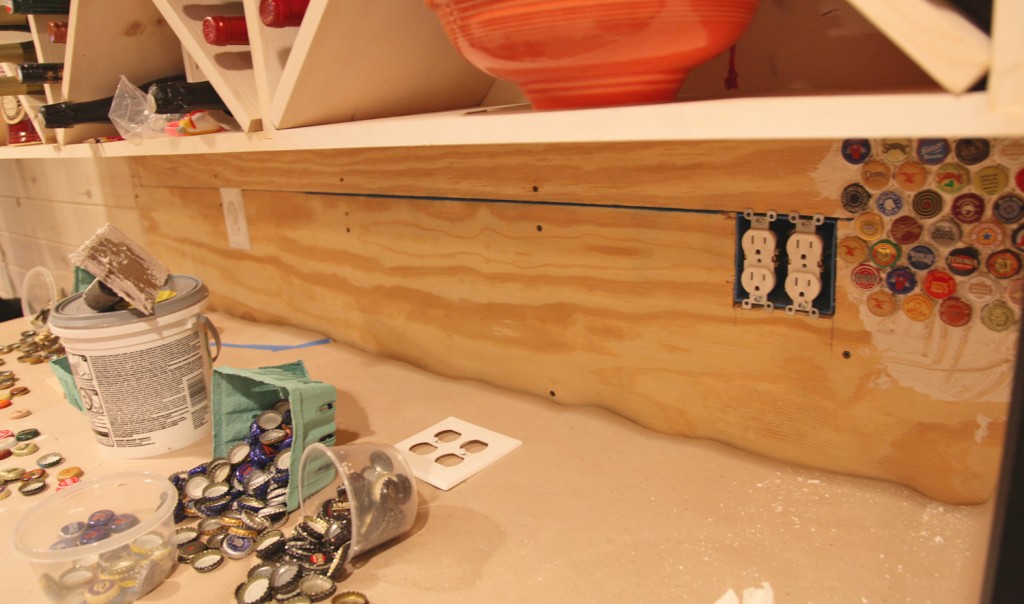
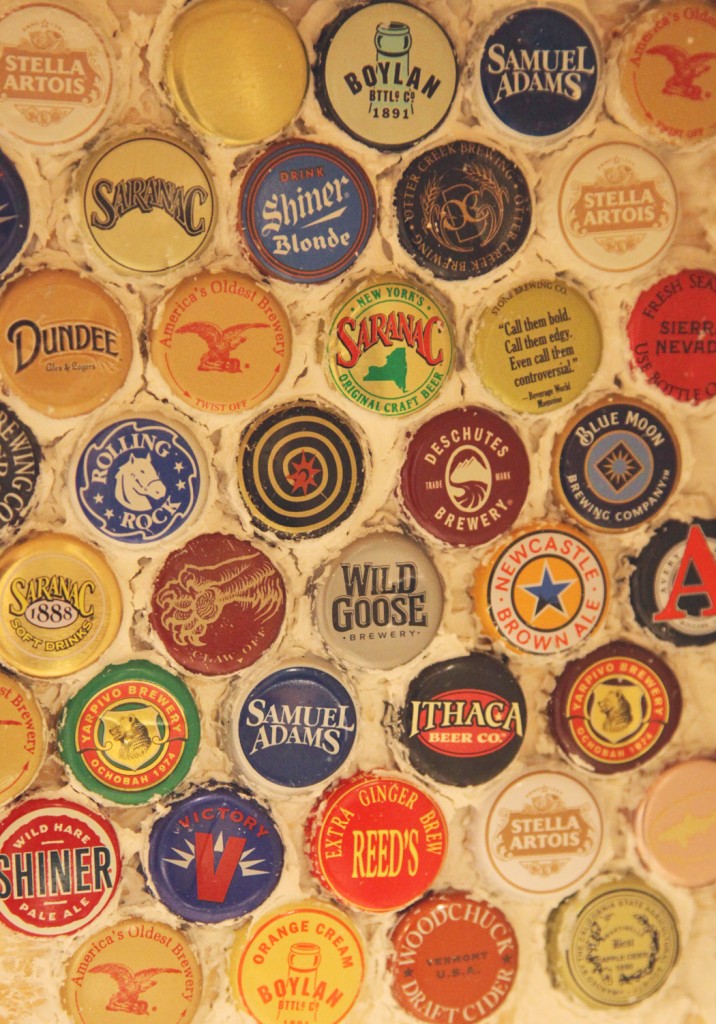
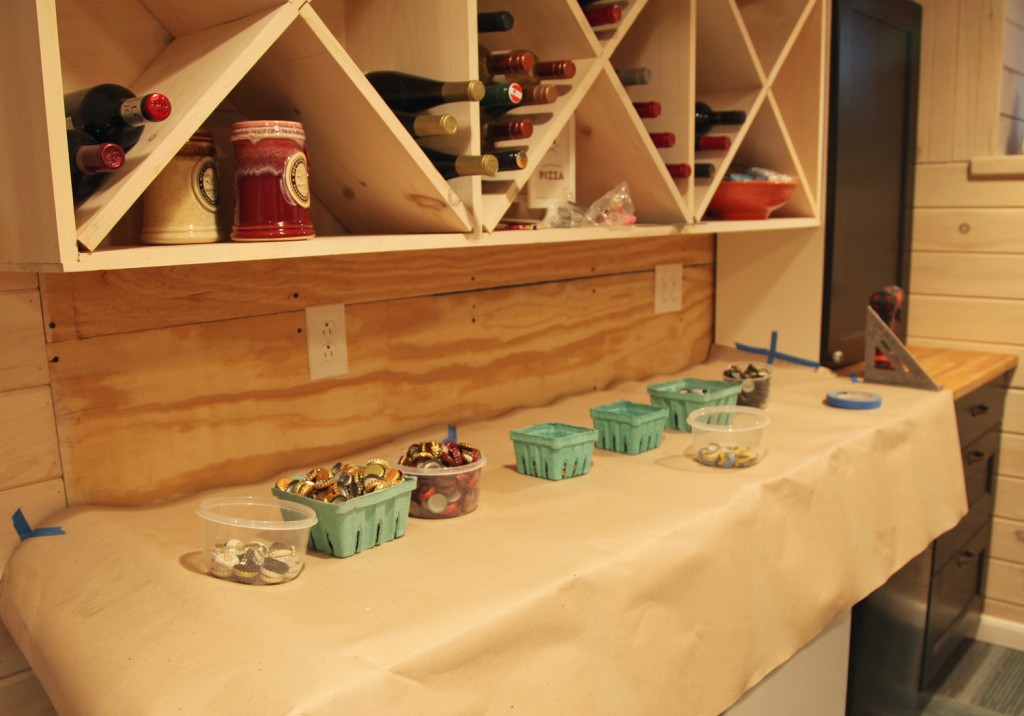
So after spending way too long messing with the counter, came the fun part. Sorting bottlecaps! We along with several of my friends and neighbors have been graciously collecting beer bottlecaps for us (I know it is a hard job but somebody needs to do it!). We have some nice ones now, although I now realize that we are still short. I am hopeful that beer drinking will continue and we will be able to finish relatively soon. We cleaned them up, sorted them by color and took out the ones that were too bent to use.

bottlecapbacksplash-1

So now where to start? I starting mixing the bottlecaps by color trying to keep a good mix. I also decided to start in the upper corner (which is less visible) to allow me to get the hang of attaching them. I decided to go with a premixed tile adhesive from Home Depot.

bottlecapbacksplash-4

After quite a bit of trial and error I determined that the best way to apply the adhesive was to put a thin coating on the wall with the trowel and then back butter the bottlecaps. This actually takes a lot of adhesive since you need to fill the cavity behind each cap. I also found out that the caps tend to slide, so I had to keep pushing them up. These took a couple of hours to set in place and by morning were nice and tight. Of course now I realize that I am only about 1/30th the way finished and this took me over an hour. Granted I think now that I have a strategy it will go quicker, but I will most likely be at this for a while. I thought it might be nice to do a little each night (although so far that hasn’t happened). If all goes well I will finish this up in about a month, unless I get some time on the weekend to work on it.  I do like how it looks and it does make me smile when I head down to grab something or do the laundry.

bottlecapbacksplash-3

The only other change I have to make, is that I was planning on using gray grout, but because of the thick white adhesive I will need to switch to a matching white grout. So drink up and wish me luck!
To see all of our basement projects click here.

4 Comments

newlogo

Hi All! Well we finally decided to go live with the new look for the blog. Mr. S. deserves most of the credit for this one (Thanks Mr. S!).  A lot of the work is actually on the back end. So in addition to a new logo and appearance the blog now has responsive design which is really cool and means that it should work well on phones and tablets too (which is 100% Mr. S.)!

The biggest change is probably the new logo. Which took lots of back and forth and I think is quite beautiful. We have also added a white background, which is departure for me but I think it work well for highlighting the content.  We also added a colorful border with different patterns that vary (because I need to have my color and pattern somewhere).

I still have a bunch of stuff to add including a new picture of me (in progress), social media links, a links page and most importantly a full house tour. Since the blog with have its 2 year anniversary at the end of the month, I hope to have all of that up and running by then.

statelykitsch-olddesign

Original Design from 2011

We have come a long way in the two years since we started. I hope you enjoy the new look!
And a special thanks to all of my readers who keep me inspired! xoxo
7 Comments

Third Floor Before Tour

February 7, 2013 — 6 Comments

thirdfloorplan3

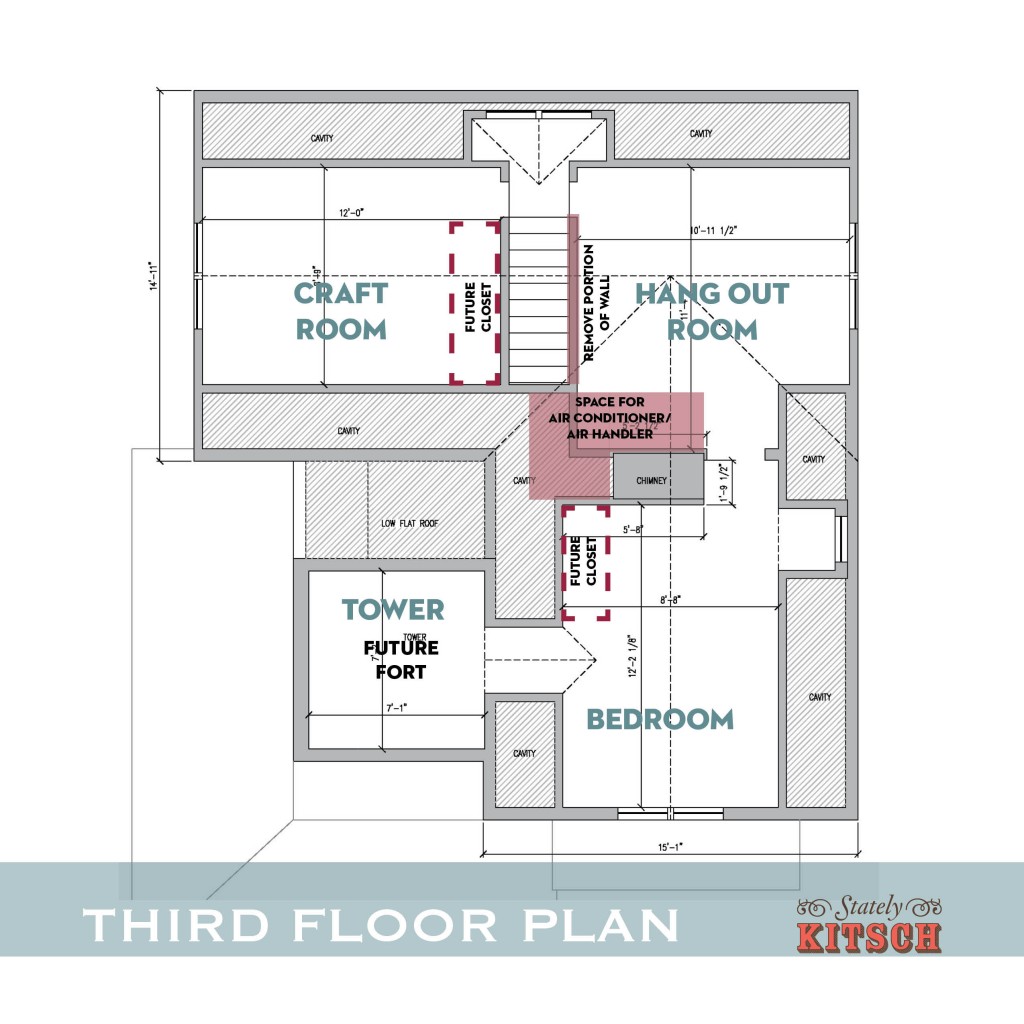
I know its been a while! Things have actually been quite busy here. My contractor has been over finishing up some long over due projects (YEAH!). More to come on that later but I thought I would give an update on part of our upstairs project. I had a spray foam insulation contractor in last week to take a look at the messy, messy third floor. As part of this I had to finally draw some accurate plans of the third floor. I found it fascinating to see how it all fits together, since there are lots of bits in the eaves that aren’t accessible and it has been hard to figure out how they connect (and dream of future storage space). I thought I would share some before pictures. Beware I don’t usually let people up here and the in case you were wondering where the 1970s went, they are alive and well up here. This floor is currently a wasteland of stuff (12 1/2 years of stuff). Please try to not judge too harshly! Some of the furniture will actually stay, but it is impossible to see it will all of the boxes and piles of stuff. It is really hard to photograph the space, but it is actually one of the reasons we bought the house. The scale is perfect for kids (if you ignore the dangers of steep steps and low old casement windows).

thirdfloor-stairs

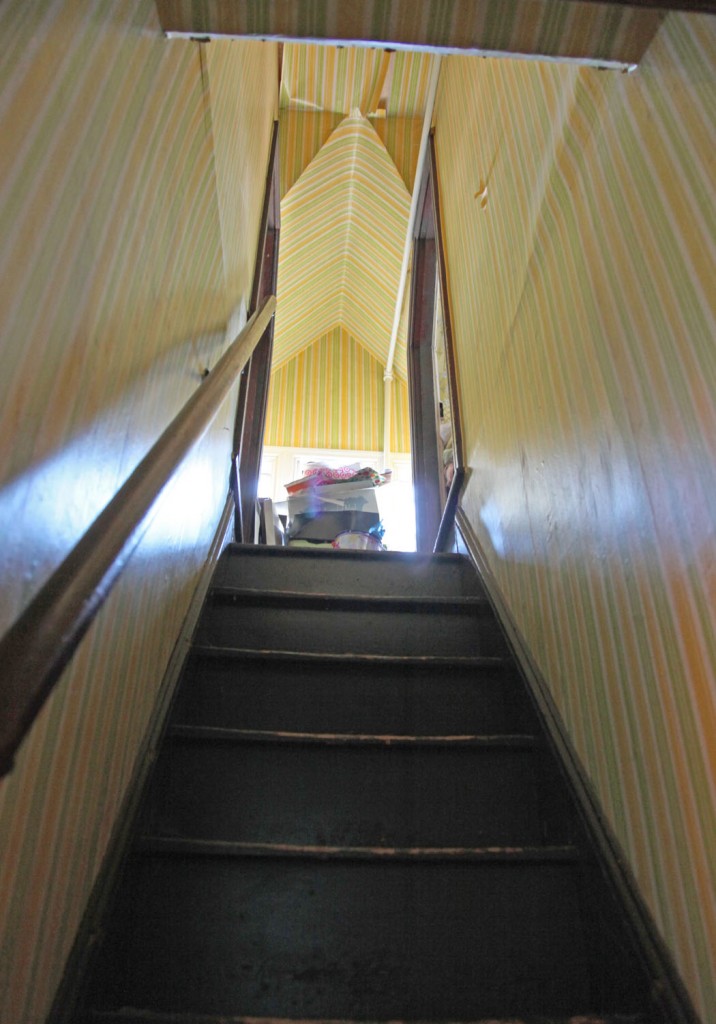
Yes, those stairs are as steep as you think they are. Brown painted pine steps that are taller then they are wide. And isn’t that wallpaper a nice complement! We are thinking about removing the wall to the right to open up the hang out space.

thirdfloor-craftroom

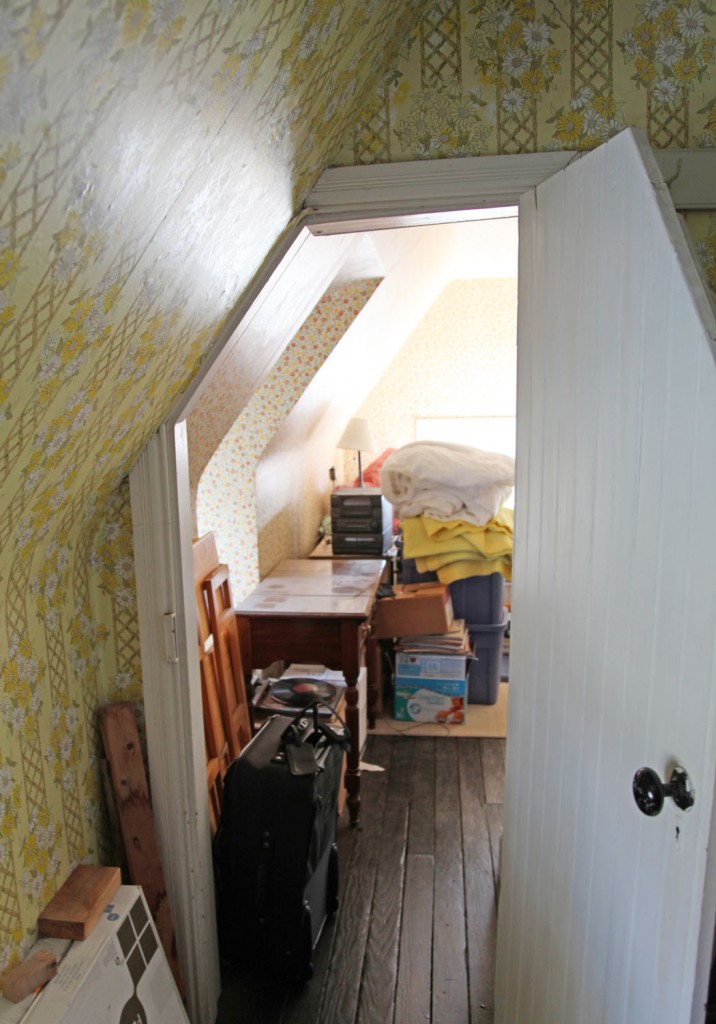
This is my future craft room. It currently holds random Christmas decorations and half finished crafts, as well as my husbands CD collection. It is the one room where the wallpaper is not crazy, although it still needs to go!

thirdfloor-hangout

This is actually not the same room as the previous photo (I know it is hard to tell). This is our future “hang out” space. I can totally picture a bunch of kids hanging out up here. We currently have a wall of low Billy bookcases on one side holding our books. I would like to replace them with built in bookcases some day.

thirdfloor-hangout2

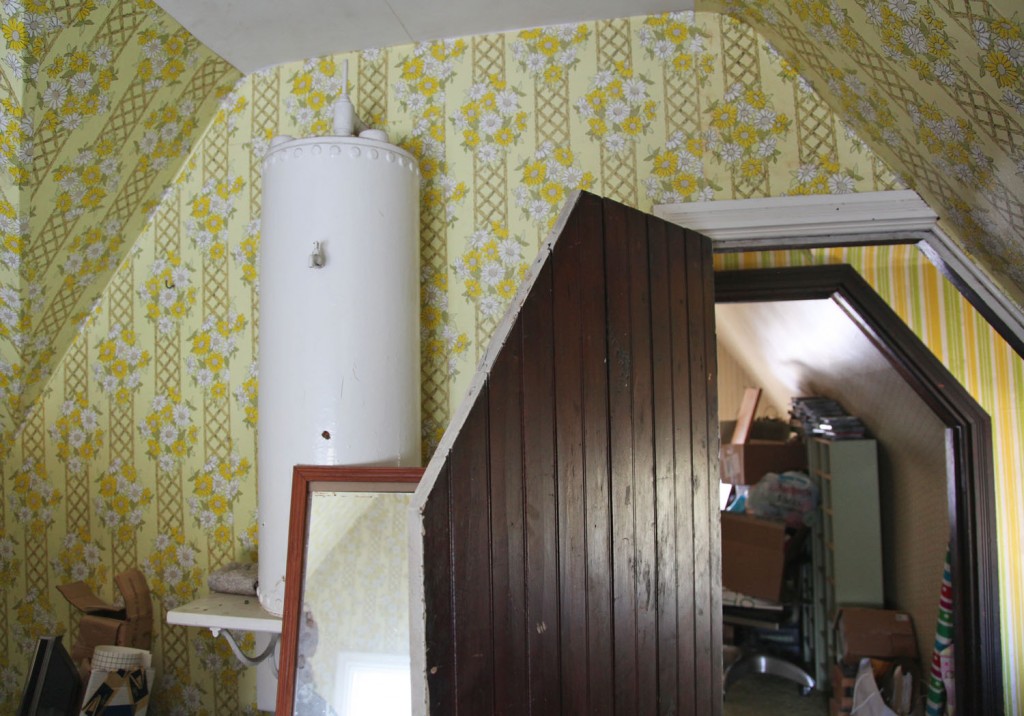
This is the wall we are looking at taking out to open the space to the stairs. Any what is that crazy thing on the wall? Well that is a Victorian expansion tank for our radiators! Crazy I know! It actually was still in use until we redid the boiler about 7 years ago and added an expansion tank down there. I think it may become garden art someday. You can also see the craft room across the way.

thirdfloor-hangout3

This is the doorway to the bedroom. I don’t have to duck but Mr. S. does.

thirdfloor-bedroom

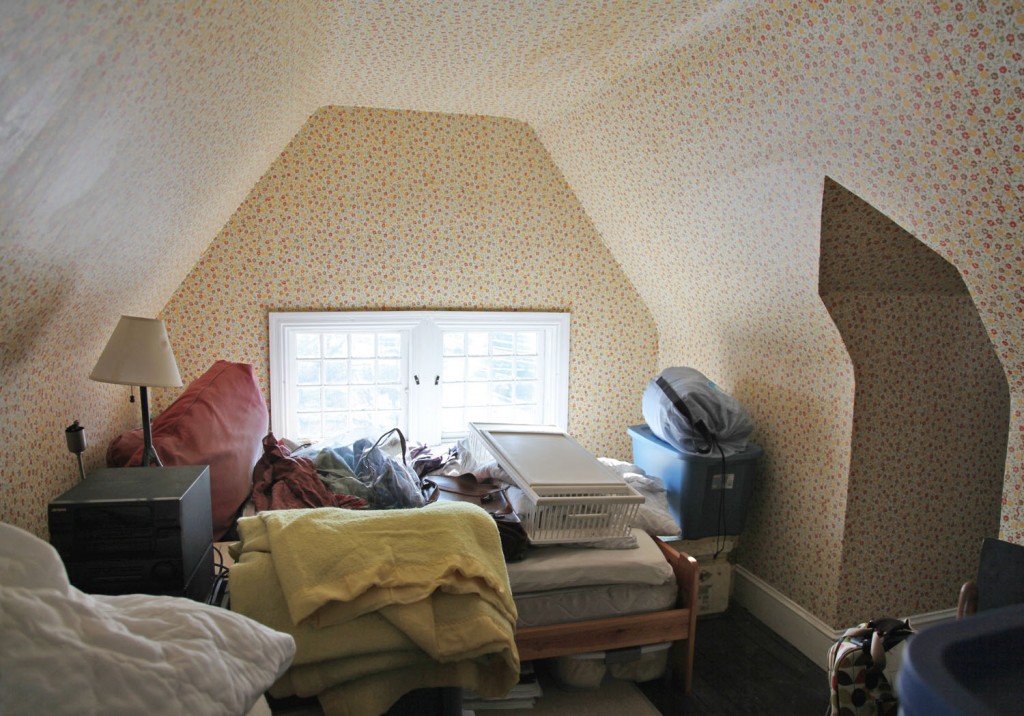
This is what we would like to use as an extra bedroom/ kids room (when they get older). There is actually a bed already here! I think a built in bed under the windows, with storage on either side, would be amazing.

thirdfloor-bedroom2

And the one space that everyone wants to see, the tower! I can just fit through this without ducking!

thirdfloor-tower1

Did I mention that we have a lot of stuff? This space is quite strange. There are no windows at eye level but the light is amazing.

thirdfloor-tower2

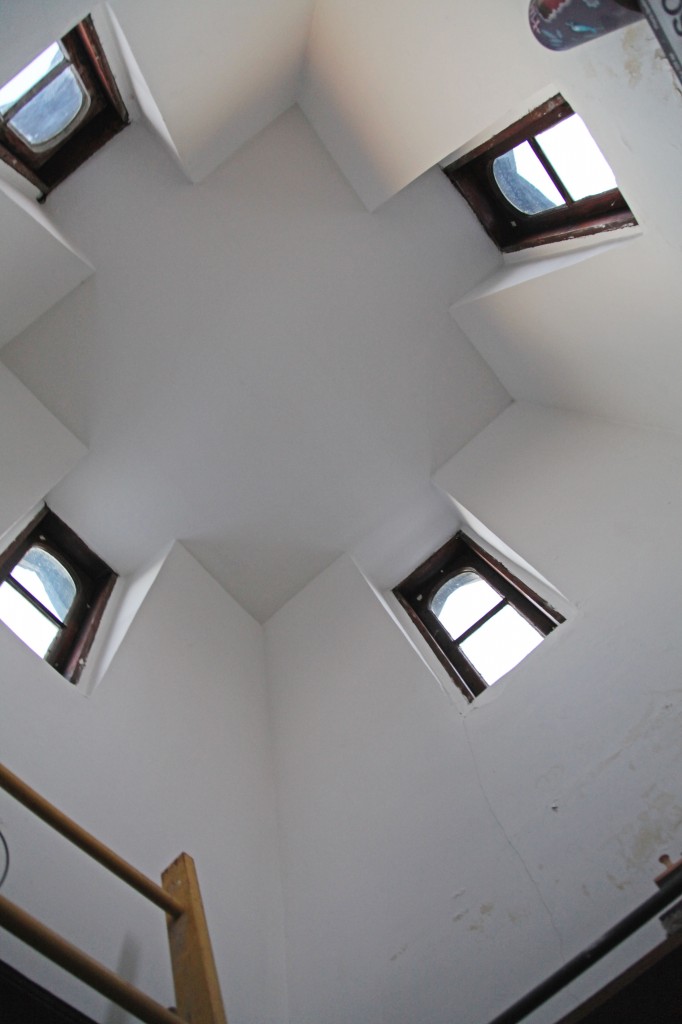
Here are the tower windows! This is where we would like to build a fort up high for the kids. This space is a little strange. They never installed the interior trim on the windows. These unfortunately need to be rebuilt, but aren’t too hard to pop out.

So there you have it! You have now seen some interesting and embarrassing photos. You can see we have years of work ahead up here, and it will get much worse before it gets better. Stay tuned for another 100 posts or so on how we go about making these spaces our own.

6 Comments

Hydrangea-winter

On Sunday we went for a family walk around Swarthmore College (aka Scott Arboretum). The kids were quite happy running around in the cold. I find it so easy to hide away in the winter but the kids are good at reminding me that fresh air is a good thing! After an hour Sam was disappointed when I told him it was time to go home. While we were there I made it our goal to find some pretty winter interest plants.

I really loved these hydrangeas. These had such a  great structural quality that I liked against the snow.

crapemyrtle-natchez-winter

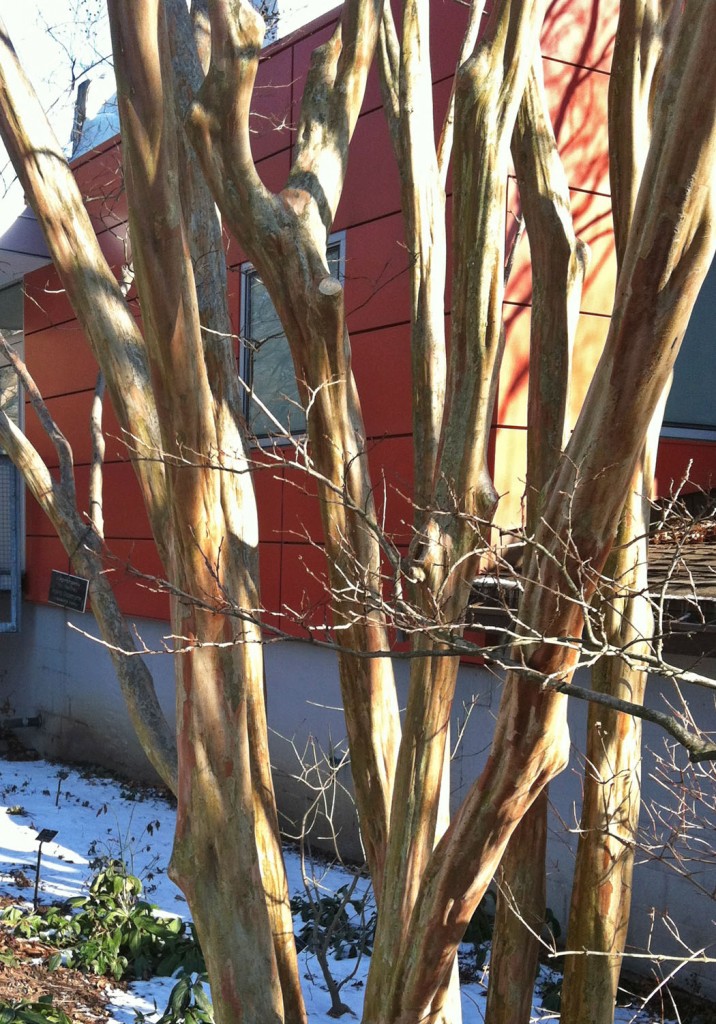
I have admired this particular crape myrtle (Natchez) on several occasions. It is quite a large specimen and has lovely white flowers at the end of the summer. This variety apparently grows to 30′, which this one must be close to. But the bark is the real show stopper as far as I am concerned. I don’t have a place in my yard for this, but if I did I would definitely pick one up.  Although maybe this might be a nice tree for the front yard. hmmmm….

groundcover-winter

This Jasminum nudiflorum low grounding shrub I don’t know what the name of this ground cover is, but it was quite lovely and was taking over quite a large area of hillside (thanks to Carolyn for identifying it).

astilbe-visionsinpink-winter

I have a few astibles in my yard, but I don’t think about them as offering winter interest. This garden made me rethink this. These are ‘Vision in Pink’, which look great considering that these flowers have been out like this for months. I suppose it is about planting several close together to get this effect.

edgeworthia2-winter

Edgeworthia is new to me. Carolyn from Carolyn’s Shade Garden wrote an excellent article about them in December. I was quite intrigued by the post, where she included this particular specimen at the College. I was happy to see it in the middle of winter. She is suppose to have a few of these for sale this spring. Again, I don’t have a place for this, but it is really quite stunning.

edgeworthia-winter

The buds are fuzzy, how cool is that!

vine-winter

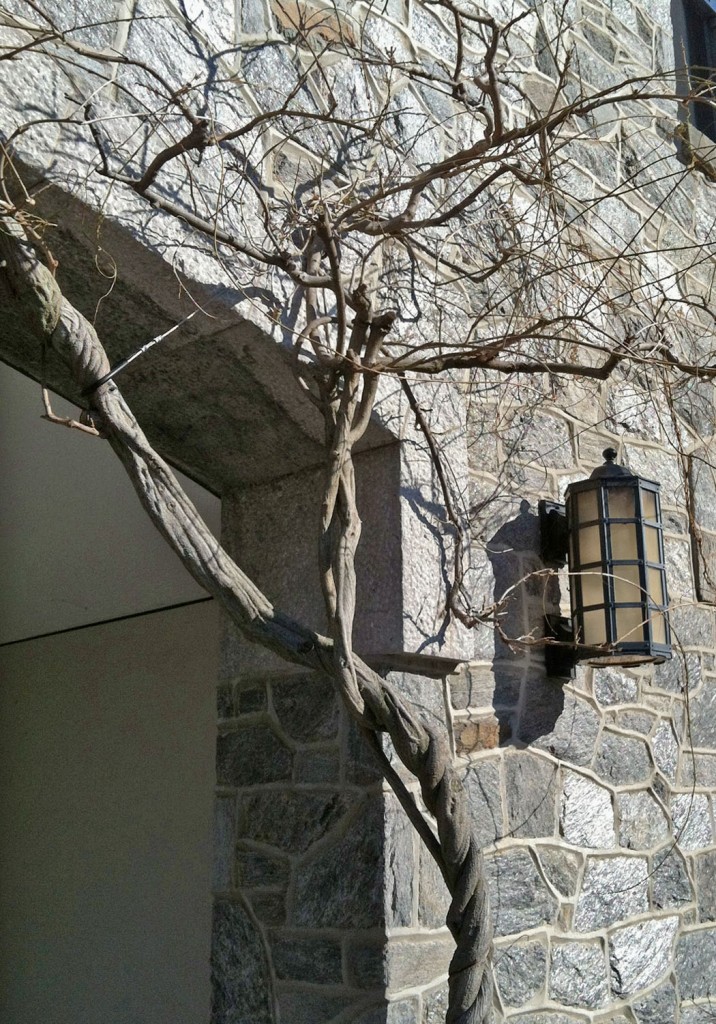
I have no idea what type of vine this is (wisteria?) but I thought the shape was stunning against the stone wall and lantern.

sammaisie-winter

Finally here are the kids playing in a sculpture. Clearly we need to have some more outdoor winter adventures!

Does anyone have any recommendations for places to go around Philly?  I was thinking that Chanticleer Garden might be fun, but it isn’t open this time of year.

2 Comments

CCG1

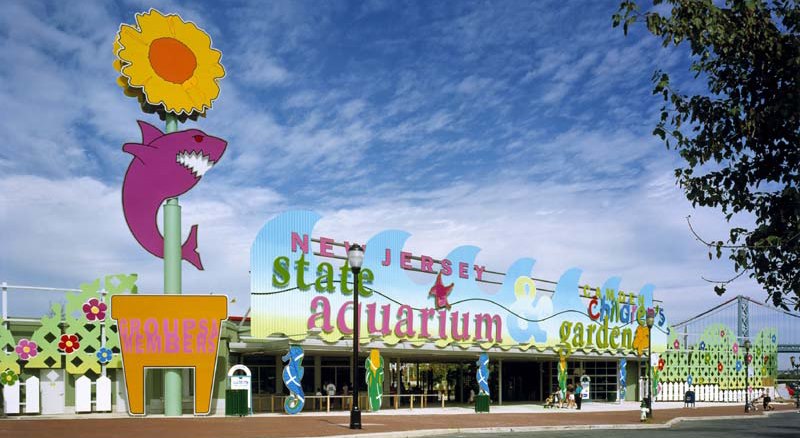
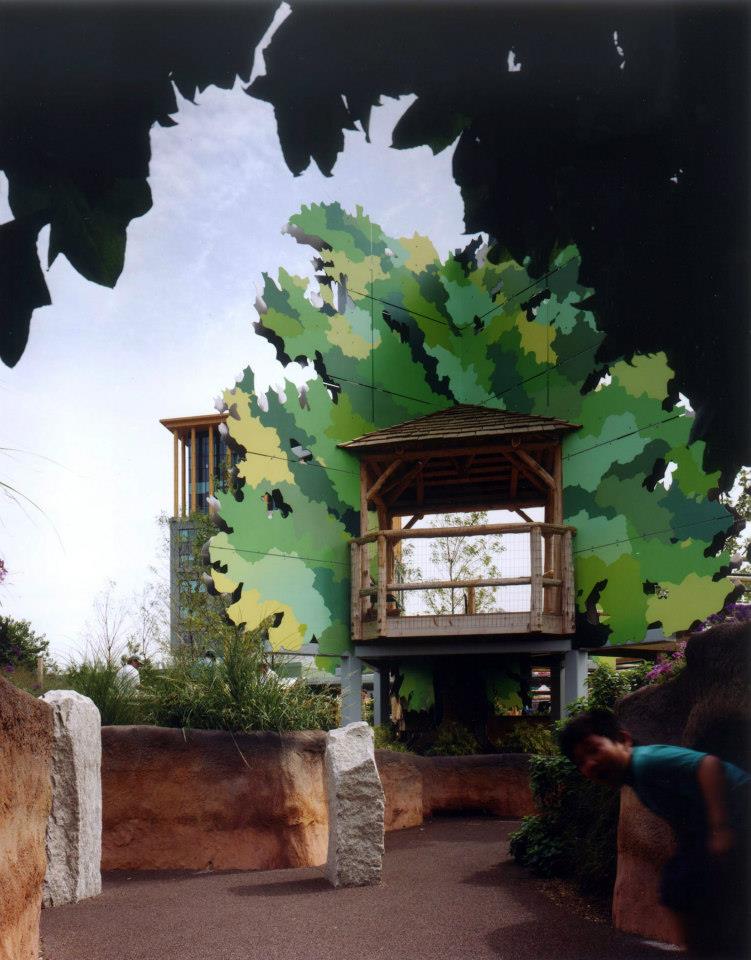
This is a little off topic, but it is important so I wanted to share. The Camden Children’s Garden is being evicted by the State of New Jersey and given two months to clear the site. So I am joining the Blogger Day of Action to Save the Camden Children’s Garden I am including some pictures from over the years  (thanks Tim). The garden was designed by Venturi, Scott Brown and Associates with Rodney Robinson Landscape Architects.

CCG5

It was one of the first projects I worked on when I start at VSBA. I only worked on it a little bit but it was such an exciting project to be involved with and I still have fond memories of the opening party. It is one of the best examples of Steve Izenour’s built work. Not only is the Children’s Garden a great place to take the family but they also do SO much great work in Camden supporting and running community gardens around the city and offering youth education, training and employment.

CCG7

Michelle Obama even highlights it in her book “American Grown”. It is a sad day that the NJ would decide to take something with such positive impact to such an under served community and destroy it.

Please consider adding your support to save the Camden Children’s Garden. Sign the petition here.

Here are some related articles:

http://articles.philly.com/2013-01-25/news/36550264_1_dinosaur-garden-camden-city-garden-club-children-s-garden

http://articles.philly.com/2013-01-28/news/36579132_1_garden-club-valerie-frick-amusement-park

http://camdenchildrensgarden.wordpress.com/category/first-lady-michelle-obamas-book/

Leave a comment

PhillSalvage10

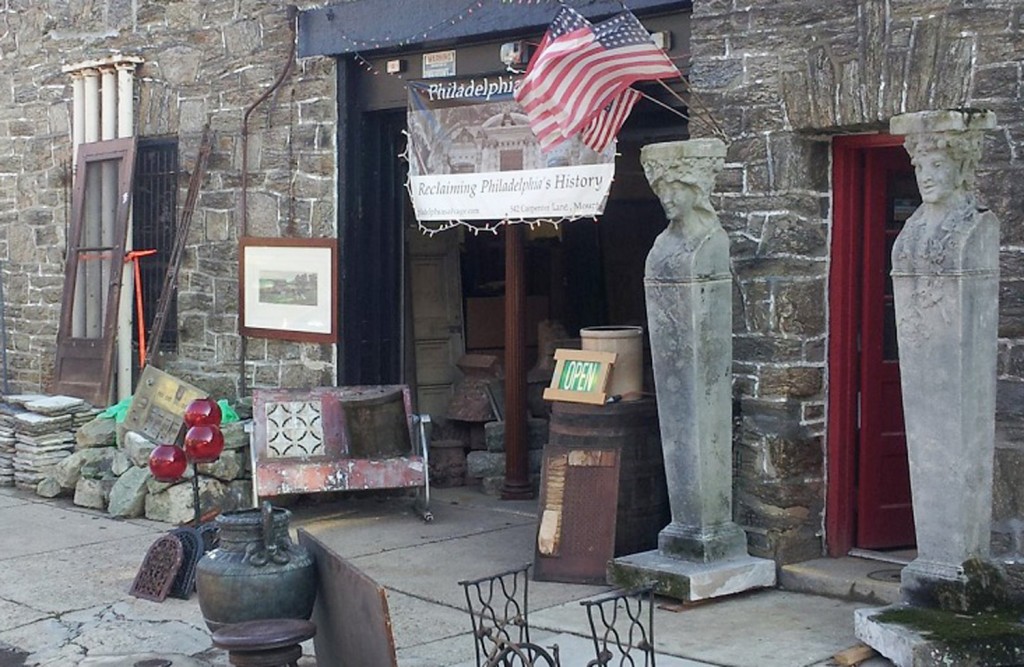
I love a good salvage place! Unfortunately most of my old haunts have disappeared over the years, so I was excited to go and visit a relatively new place. Philadelphia Salvage Company has been around for over a year and I had heard passing mention of it, but one of Mr. S’s coworkers recommended it to him so we decided a visit was in order. We packed up the family on Saturday morning and headed over. It is in West Mount Airy (across from Weavers Way), Philadelphia.

Looking at their website I was concerned that pricing would be on the high side, after all the best places are usually in sketchy neighborhoods with dusty artifacts that have been sitting around for a decade waiting for someone to take them home. Fortunately I thought that their pricing was pretty reasonable, even if their stock wasn’t as extensive as some of the other places I have been to. I was pleased with the quality of what they had too. Here are some of the items that caught my eye.

PhillySalvage9

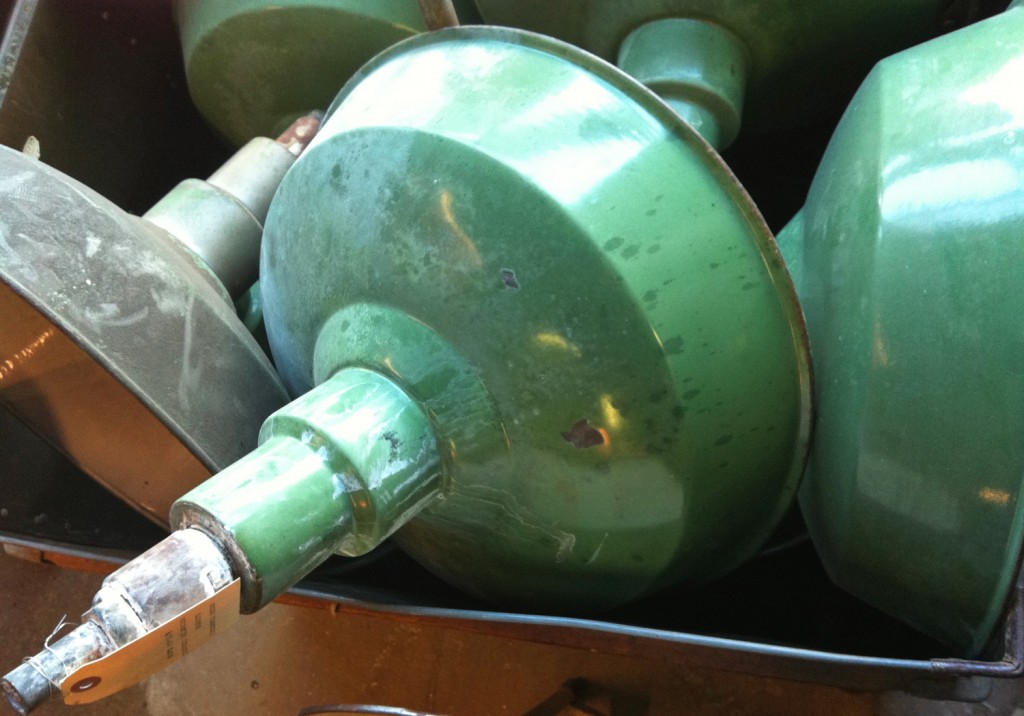
Aren’t these vintage industrial fixtures nice? They are pretty big and have a nice patina. They require rewiring, but a row of these would look great over a kitchen island. There were a whole pile that were already sold (probably for a restaurant).

PhillySalvage1

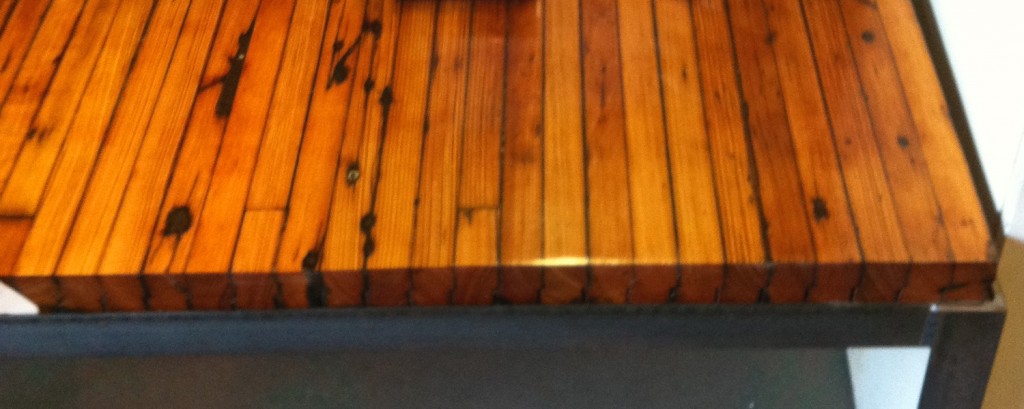
This table top is made out of an old bowling alley floor. It looks really great. They were also making a giant dining table out of the same material. One of the cool things is that they offer refinishing in addition to making furniture, which is definitely a bonus depending on what you need something for. Usually you have to lug whatever you buy to a separate place to get it worked on.

PhillySalvage2

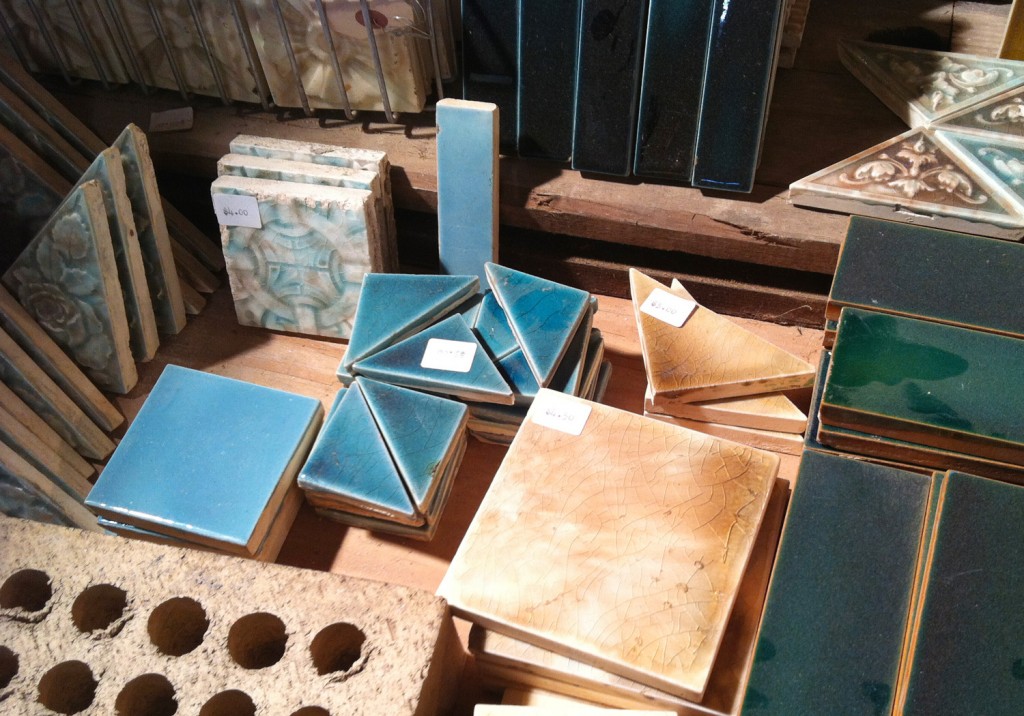
I loved their tile collection. We used similar new tile for our kitchen backsplash. The color and crackling is really quite stunning. They had also removed all of the old grout, so these are all set for installation.

PhillySalvage5

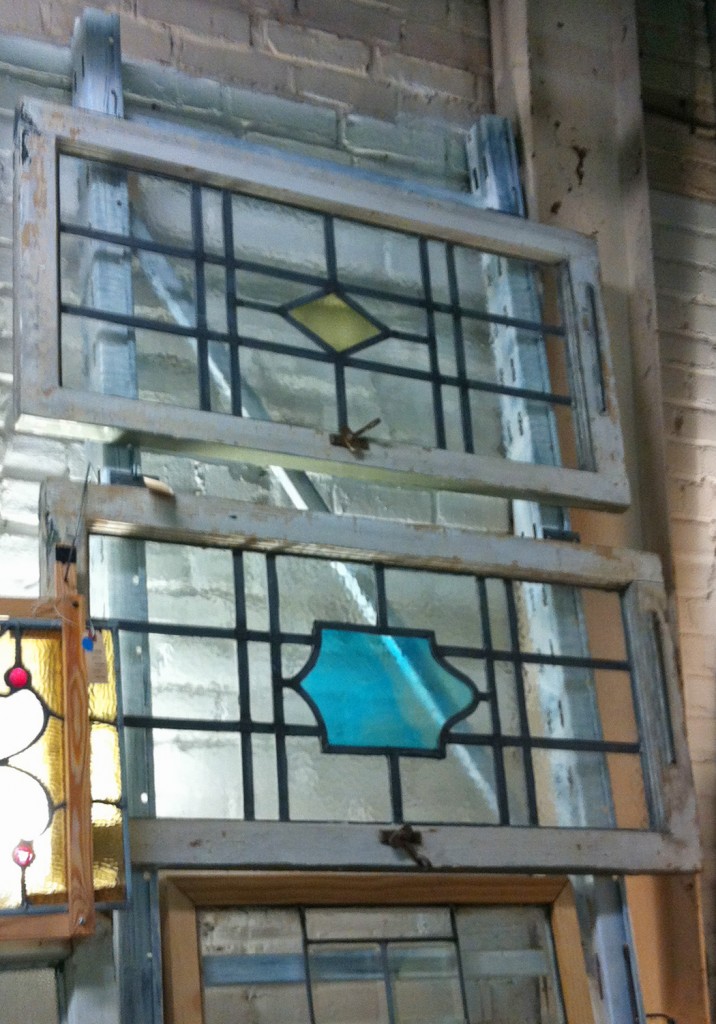
I also really liked these windows. The colors of the glass medallions were really amazing. I find a lot of stained glass too fussy for my taste, but these are a nice mix of a little pop of color in a nice geometric pattern.

PhillySalvage4

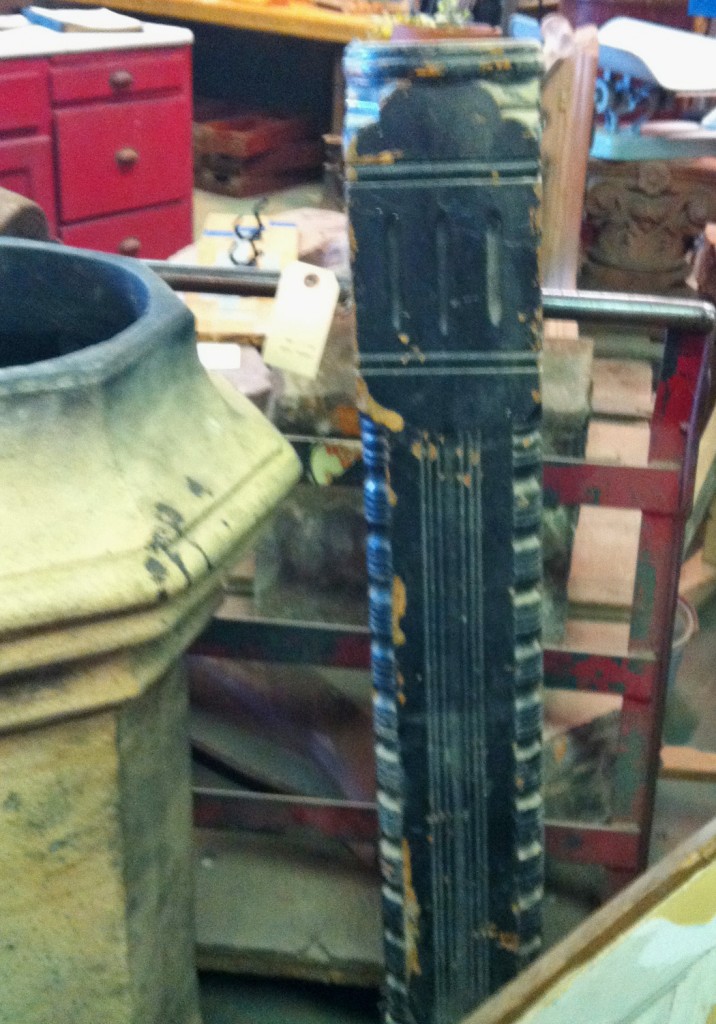
Of course I was like a kid in a candy store, so walking away empty handed was difficult. We didn’t end up buying anything while we were there, but I have since called and put 2 things on hold. One is for the house and one is for the garden. The garden one I will unveil later on, but we did choose this newel post. It is a dead on match for our newel post (which is a small miracle).  I have a bad habit of stockpiling old house parts (i.e. half of our garage loft is filled with extra house parts). So I told myself if I don’t have a place for this I shouldn’t buy it, even if the price is really good (which it was). So after I got home I was thinking about the upstairs hall and how we are going to have to cut the handrail at the bathroom wall, I thought why not use a piece of this to finish it off. Right now the rail dies into a piece of wood, and has always felt a little bit off, and I’m not sure how it was finished originally. I think if take one side of this, it will make a really nice detail.  Maybe if I can salvage one of the other sides I will add it down in the basement at the bottom of the stairs. Our contractor is actually going to be over later this week putting a closet in for us (one of those items that didn’t get finished last year).

Does anyone else love salvage stores or have any recommendations?

Leave a comment