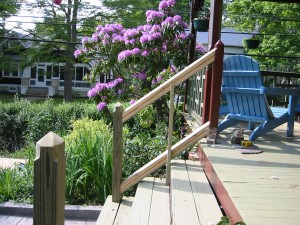
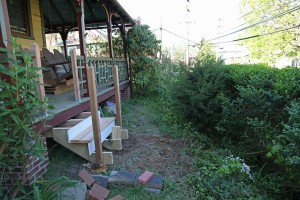
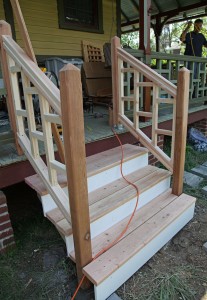
New Steps (ready for primer)

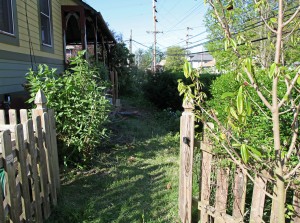
Fence Reinstalled!

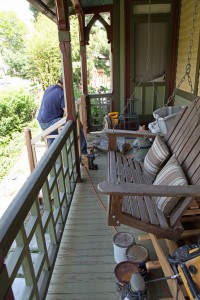
Porch Looking towards Kitchen Door from Front of House

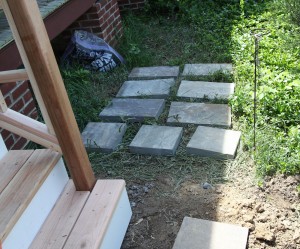
Bluestone for the Stair Landing


It is a busy day here at the Sentivan household (which I why it has taken me so long to post)! Our carpenter/neighbor and his son are working hard on the front porch and the fence guys finally showed up to replace the post and reinstall the fence and gate. Both sets of steps and the replacement wood will get a primer coat today and paint next week! I also picked up new porch floor paint and bluestone for landing at the bottom of the new stairs this morning (with my 2 little helpers, one sporting a hardhat).

Porch Floor Paint Options

Our porch faces southwest and gets beat on by the sun! The porch flooring is pine tongue and groove. We have tried several different porch floor paint options over the last 11 years. Nothing has held up very well. So we are going to try again with something new.

Original Finish: When we bought the house we had a latex primer and latex paint on the porch (in darkred). The board were only a couple of years old but the paint peeled up after only a year or so of living here. They had also primed the underside.

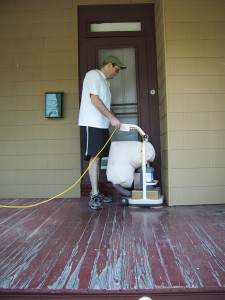
Mr S. sanding the floor in 2002 (look at that yucky old siding)!

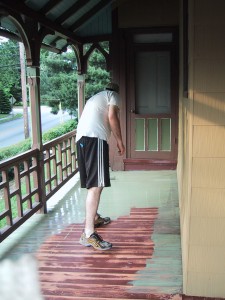
Applying the oil based porch floor paint


Try #1: After researching online, I decided to go more old school and use an oil based porch floor paint by Benjamin Moore. We completely sanded the floor back to the wood with a giant sander. Then we thinned down the oil paint with paint thinner and installed 2 coats (to help it absorb into the wood) followed by 2 regular coats. This held up for another 3 years or so.

Installing the Front Railings in 2006

Primed Porch Railings in 2006

Try #2: Next we sanded and scraped lightly and put on another coat of the oil paint.This lasted another year or so before starting to peel again. Also when we bought this paint the second time we had to buy it in quarts because the VOCs were so strong they were not allowed to sell it in larger quantities (at least according to the local Benjamin Moore store).

Try #3: It has been about 4 years since we have done anything and in addition to major paint peeling we have had a fair amount of rot. So we thought with the developments in latex paint it was time to give some another try. This time we are going with a Sherwin Williams product designed for high traffic floors called ArmorSeal Tread-Plex.  As I understand it, it is typically used on concrete floors, but was recommended by a number of painters for porch floors. It was kind of pricey but not any more than a Benjamin Moore product. This time, the porch will be patched, scraped, sanded and primed with an oil primer (to ensure adhesion to the oil paint).  Then 2 coats of the ArmorSeal will be installed. Fingers crossed we will get a longer life out of this paint!

8 Comments

Bluebells

Patch of Bluebells (after peak bloom)

Close up of Flowers

Mertensia virginica (Virginia Bluebells, Virginia Cowslip, Lungwort Oysterleaf, Roanoke Bells)


Type:
Perennial, ephemeral plant (Zones 3-9). Flowers in spring and then disappears by summer.

Light Requirements: Part Sun to Shade

Moisture/Soil: Average moisture. Neutral to slightly acidic soil.

Blooms: Mid spring. Lasts for a couple of weeks.

Leaves: Blueish-green oval shaped

Size: Height: 18″‘  Width: 6-12″

Additional Info:These are native to the eastern part of the US. I have tried to plant them in several clumps. I have move the poor things a couple of times now, so I haven’t had much self seeding yet (hopefully this year). I still need to find a plant to fill in for later in the summer and fall to take their place after they die back (maybe ferns although mine are placed in a part sun location). They would look beautiful with Bleeding Hearts (similar bloom time and habit of dying back). I planted mine from bare roots that I bought on ebay. They didn’t come up the first year so I thought they died, but sure enough the next spring the popped up!

Pros: Beautiful native plant.

Cons: It dies back quite quickly and you may forget where it is planted. Fortunately they always seem to return. They sometimes need staking.

Origin: Eastern U.S.

Varieties: I don’t know of any.

Leave a comment

New Porch Steps!

May 5, 2011 — 2 Comments

The kids watching the carpenter work

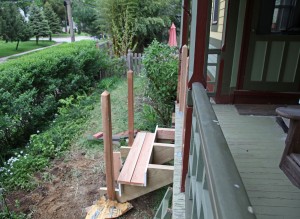
View looking towards front of the house. New Steps partially complete (concrete is still setting).

View from porch looking back towards the patio

View from side gate (near the patio) towards the front of the house

Our front porch is in need of a little love but fortunately our carpenter has come to the rescue!

The poor L-shaped porch sits out there and bakes in the southwest corner of the house. The pine floor board typically need to be painted every other year (which we are behind on) and the railings are falling in a couple of places. In addition, we really wanted to add a second set of steps to the side yard. One of the weird things about our porch/yard is that there is no easy access to this part of the yard and the porch dead ends on the kitchen door. This work has been on our list for over 2 years, so we finally broke down and hired someone else to do most of it. In the past we added handrails to the main steps and did some minor patching.

For the new stairs, they have to fit in a tight space because of the steep hill down to the street but I realized that we could just fit them and a small paved spot at the bottom. I still haven’t quite decided which material to use at the bottom. I’ve gone back and forth between brick, pavers that look like stone and using slate (similar to our patio). The stairs should make it easier to get from the kitchen to the back patio without going through the dining room and deck. I would also like to add a small kitchen garden to the one side of the steps, since it will no longer be feasible to get the lawn mover over there.

2 Comments

I love this time of year in the garden! The flowers and shrubs are starting to bloom (and some of the bulbs are still in bloom). Almost everything has at least started to make an appearance  (if not fully leaf out).  I shot some pictures on Monday of the garden. Hope you enjoy on this rainy day!

Mountain Laurel

Azalea

Hosta, Tulips & Ferns

Closeup of Hosta Leaves & Viridiflora Tulips

Virginia Bluebells


Leave a comment

Flower Bouquets

May 4, 2011 — 2 Comments

Finished Bouquets in Plastic Cups (ready to be delivered)

Sorry I have been slow to post this week. I had a ground breaking for the Science Center at Cheyney University yesterday and it is Teacher Appreciation Week at school. I signed up to make 32 bouquets for the teachers at my kids’ school. I am not particularly crafty but I decided to pretend to be Martha for a couple of hours and put them together.

Goal: Create small pretty bouquets with at least one large flower in each

Budget: $50 tops

Breakdown:
Flowers:
3 bunches of Tulips: 3 x $6.99 (at the Grocery Store)
3 bunch of Wax Flowers: 3 x $3.99 (at the Grocery Store)
Ribbon:
2 spools of ribbon (1 thick roll (3 yards) & 2 thin role (10 yards) on sale at Michaels: 2 x $1.99

Total: $37

Tulip Leaf, Tulip, Wax Flower, Tulip Leaf, Thick & Thin Ribbon

Thick ribbon temporarily attached with pin

Finished Bouquet


Instructions:
1. Buy 1 type large flower & 1 type small flower in complementary colors.

2. Buy 2 types of ribbon (1 thick & 1 thin)

3. Put all of the flowers in  a large vase or bucket

4. Cut smaller flowers into short pieces (These were about 9 inches)

5. Cut thick ribbon to about 4-6 inches (this will hold the bouquet together)

6. Cut thin ribbon to about 12″.

7. Pick out large flower and cut. I also used a leaf from each tulip to help wrap the back of the bouquet.

8. Add a couple of pieces of the smaller flower in front of large leaf.

9. Add large flower

10. Wrap with thick ribbon and fold over end. (Or you could use a rubber band underneath)

11. Pin temporarily in place.

12. Wrap with thin ribbon and tie.

13. Take out pin.

14. Place in water.

2 Comments

Lawn Before

Lawn Stage 1: Till

All tilled!

Sod added & leveled

I hope everyone enjoyed the nice weather! We spent a good part of our weekend repairing the lawn. The weather gods smiled upon us and there was free sod to be had (thank Stacey!) so we decided it was time to fix the giant ruts in the backyard from the crane before someone fell in!

Saturday morning we rented the tiller and went over the compacted areas of the backyard (okay so when I say “we” I mean I made my husband do the hard part). Sunday we made 3 trips over to Stacey’s House (who rented a sod cutter and cut in her new plant beds) and filled the truck with sod. Then we came back home, adjusted the ground as necessary, laid the sod, and filled in between the sod and the existing grass. It was a lot of work! Today I need to put down the grass seed in the bare spots.

Back Planting Bed and Missing Fence (lovely view of neighbor's garage!)

Kerria installed & all of the plants laid out

All of the plants replanted!

We are also still waiting for the fence to be reinstalled (part of our chimney contract). If we get lucky maybe this week! In the meantime, I replanted all of the plants that have been living in the compost pile for the last month waiting for the crane to be finished.

1 Comment

Although Stacey’s plant list is still in progress I thought I would share a few of the selections and some pretty pictures.

Baptisia

Shasta Daisy

Peony

Japanese Iris

Artemisia

Anemone

Autumn Joy Sedum

Poppy


Leave a comment

Composter Options

April 27, 2011 — 4 Comments

Ecomposter (71 gallon), $144

Soilsaver, $75

Compost Aerator, $20


I received a request for composter suggestions. In this case, for a smaller composting bin that looks acceptable and doesn’t take up a lot of space.

In our yard we use 2 methods of composting. For yard waste we have a big pile behind the garage. This includes mostly leaves, pine needles and grass clippings. It is not beautiful, but it is easy and it works. However, I was uncomfortable putting kitchen scraps  (fruit and veggies) in there due to the potential for attracting animals (we already have a large family of bunnies nearby).  After some searching last year we decided to go with the Ecomposter.  It is a giant ball (which I thought was really cool). I envisioned it rolling around the backyard and letting the kids play with it. It spent the winter under our pine tree, but I think once the yard is back in order I would like to reconsider rolling it around the yard. I also need to empty it soon!

There are many options to choose from on the market but it looks like a lot of them are overpriced and overly fancy. Here are a couple to consider:

Ecomposter:

I use this for kitchen waste (only fruit, veggies  & egg shells). I also add leaves occasionally from my large compost pile (brown matter) and coffee grounds. I like that it has spikes on the inside to help mix the compost while it rolls. I also like that it is completely enclosed. I bought it on sale at BJs for $99 last year (71 gallon), although it looks like it is priced at $144 and is out of stock at the moment. Amazon seems to have a similar smaller one for $100 (50 gallon).

Pros:
-Looks nice
-Completely enclosed
-It is made of recycled plastic
-Easy to turn

Cons:
-It took a couple of hours to put it together.
-The “door” can get stuck if dirt collects in the grooves.
-It can be pricey if you don’t find it on sale

The Soilsaver Compost Bin:

This is one of the least expensive composters out there and seems to do a reasonable job and has pretty good reviews. Also look around for this on sale. It looks like it should hold around 90 gallons. I would recommend getting a compost aerator for this type of set up.

Pros:
-Fully enclosed. and has a locking lid and screen
-Uses hard nylon screws & bolts that won’t rust
-Good airflow
-Easy to put together (must be placed on level ground)
– 25-yr manufacturer’s warranty

Cons:
-Can be difficult to turn the compost.

Make Your Own:

There are a number of sources online for making your own out of large plastic garbage cans. The nice thing about this is you can have these right next to your regular garbage cans (and they can even match!)

Instructions:
-Purchase plastic garbage can with locking lid
-Drill 1/4″-1/2″holes around the sides, top and bottom.
-Place garbage can on bricks or 2x4s. (alternately cut out bottom and bury the can a couple of inches)
-Add water if it gets to dry
-If it gets to slimy or wet add additional brown material (leaves or newspaper)

Things to consider with Enclosed Compost Bins:

The best set up is to fill one at least halfway up and then let it “cook” for a while. This means that you need to have 2 bins. One for cooking and one for filling. Then you empty the finished one and start over.  I am going to empty my ecomposter into my large compost pile. It has been “cooking” for the winter. There will probably be some unfinished stuff in there. I may need to consider getting a second one.

You need to get the brown/green mixture right. It looks like a 4:1 ratio minimum is ideal but a 1:1 can still work. For brown material you can use brown leaves, shredded paper (no glossy paper) and cardboard. Green material is all of the kitchen scraps and “green” leaves and grass clippings from the yard. You should also turn your compost occasionally. This helps add oxygen and speeds up the process.


4 Comments

Plant Sale at Home Depot

April 26, 2011 — 4 Comments

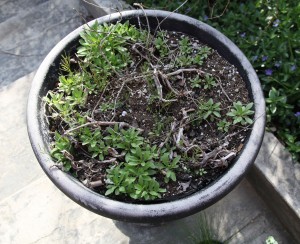
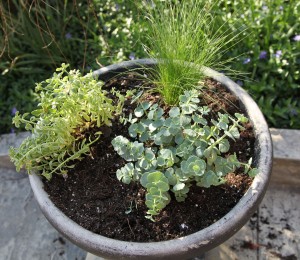
Home Depot Plants, $2.50 a piece, including 3 types of sedum and some grass

Coral Bells (Heuchera)

One of the things in life that I can’t resist is a good plant sale! I was at Home Depot today (a frequent occurrence this time of year) and I saw that the smaller (1/2 gallon) perennials were on sale for $2.50 (from $3.97). I was looking for butterscotch colored heuchera (coral bells) to add to the ones in the backyard (part shade) and fortunately they were part of the perennials on sale (yes, I did a little dance).

If you aren’t a member of the Home Depot Garden Club (free and you can join online) I recommend joining. Most of the coupons and tips are useless but I did get several plant and planter discounts that came in handy last year (including a buy one get one free tree coupon that saved my about $60 last year).

I also picked up some variegated sedums and a couple of grasses. I want to start using more perennials in my planters and these were also on my list of something to try. They are good to -40 so they should be able to stay in the planters year around (yes, less work for me) and I can infill with a few annuals.  So with about 10 minutes of work here are the front planters….

Front Planters Before

Front Planters After

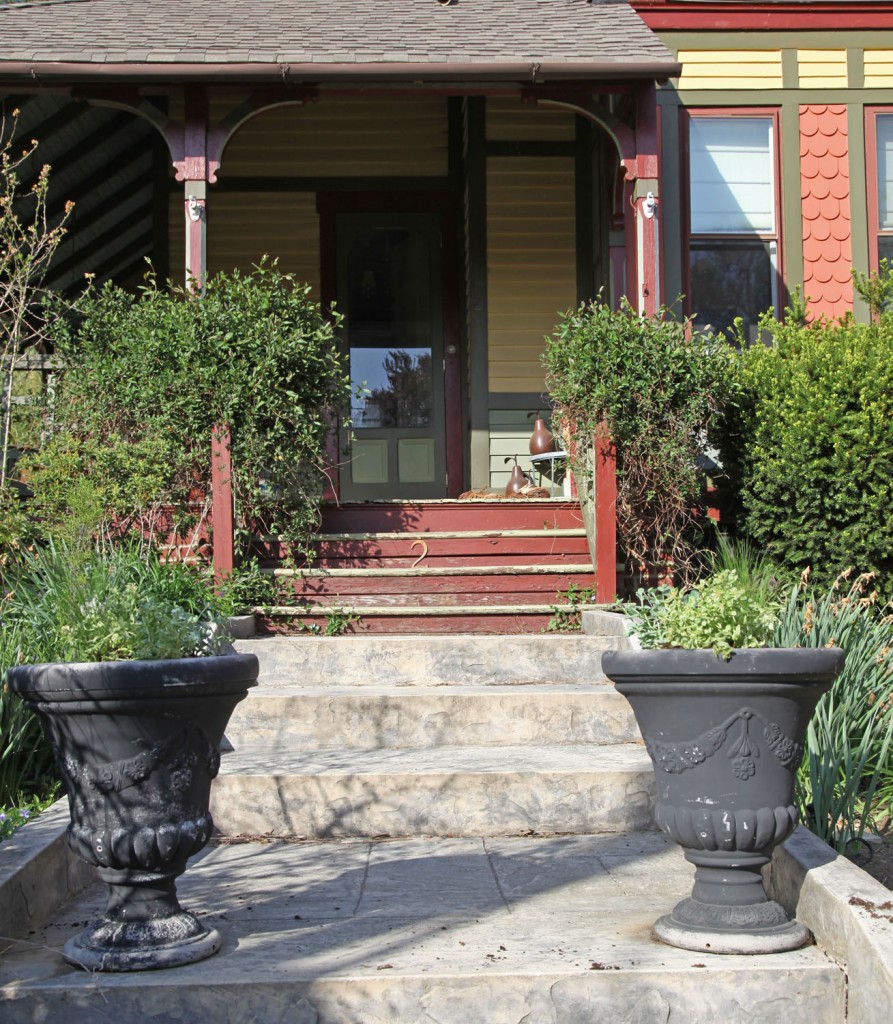
I am planning on painting them too. What do you think terracotta, red or yellow?

Planters After

4 Comments

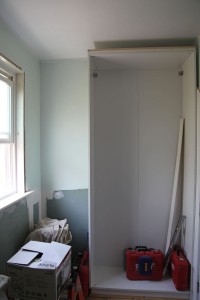
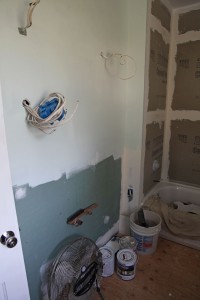
Space for toilet and Ikea Closet

New Tub & Surround

Vanity Location

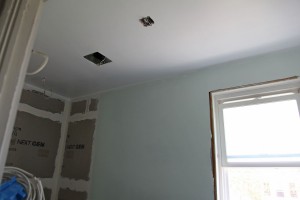
First Coat of Wall Color similar to a light beach glass

Sarah’s Bathroom is well underway! They started last week. Demolition is now complete (and there was some interesting lincrusta underneath the old tile and closet), the new drywall is all in, and a new closet is partially installed. The tile guy is due tomorrow and next week they will install all of the fixtures! If all goes well the whole thing will have taken 2 1/2 weeks.

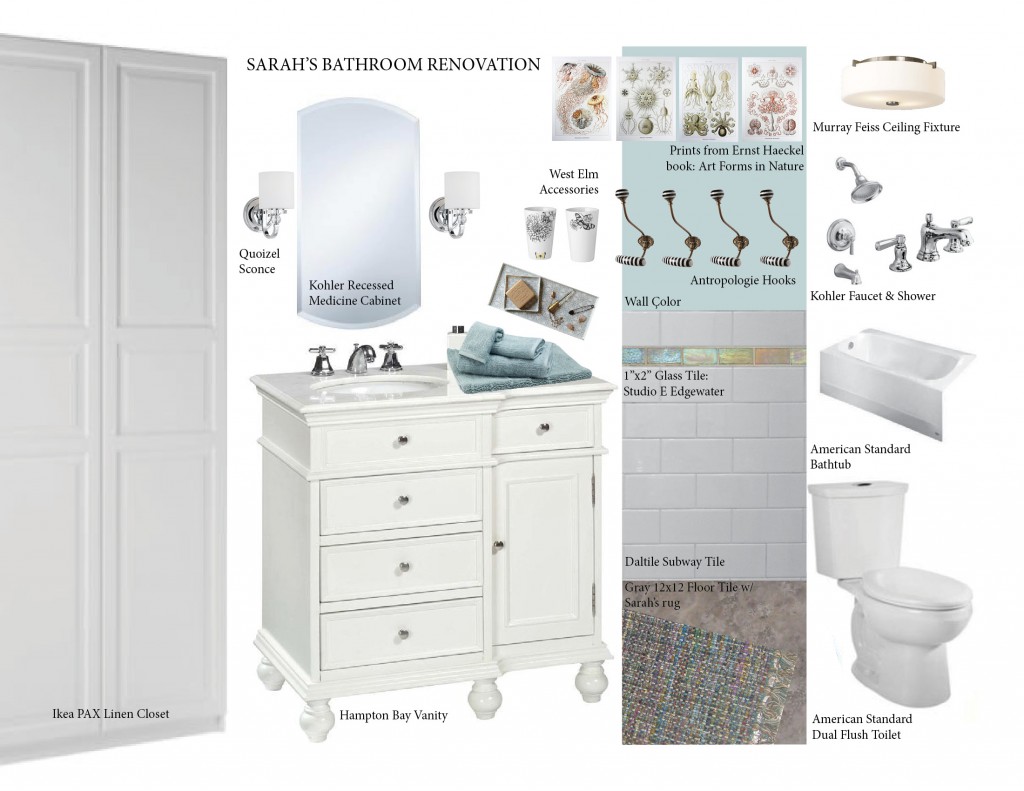
For the new closet, we went with the PAX closet system from Ikea. We were concerned about the bottom being adjacent to the tile floor and toilet so I had them raise it up on studs so that the tile base would be continuous underneath. At the top they will install crown molding to cap it off. It will then get doors installed on the front. This should really add to the storage capacity for Sarah’s family.

I  also like the wall color (I need to go double check the color). We went with a fairly light color that resembled a light beach glass. The second coat should go on today. Once the white wall tile goes up, it should be different enough to be noticeable.

For reference here is the mood board for the room:

Mood Board

Leave a comment