Basement ceiling w/ beadboard walls & door

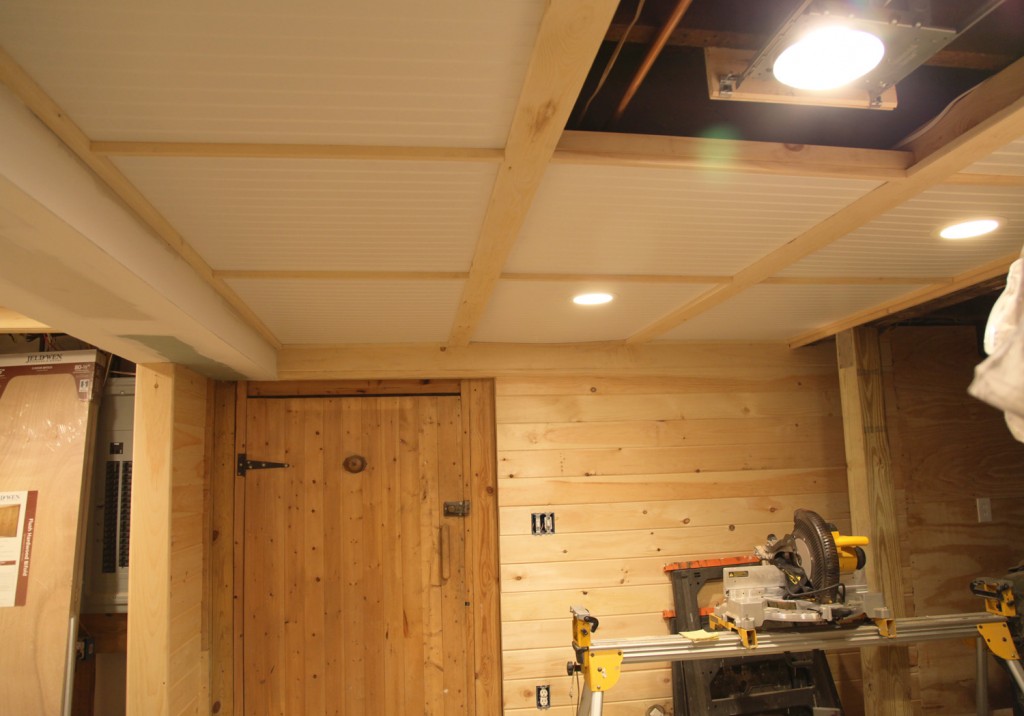
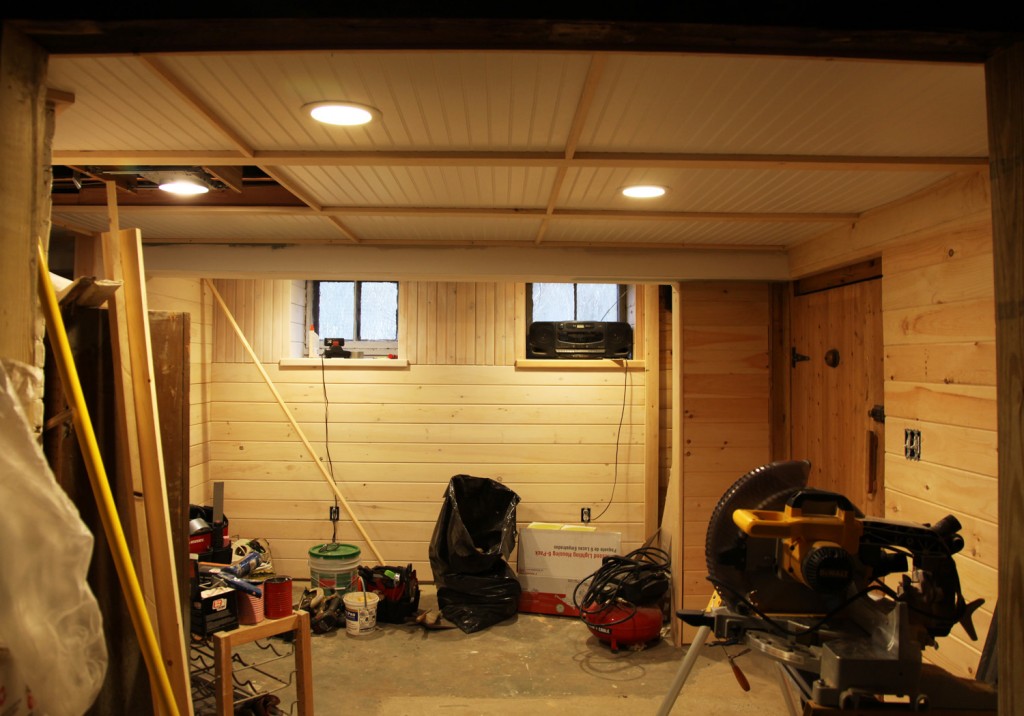
Our contractors are still moving along on the basement ceiling. There are also a few trim pieces that they are suppose to get installed for us. We hope to whitewash most of the walls this weekend and paint the door (a fun color that is yet to be determined). I am loving the new lights, the space feels a little moody, which I really like. I also like that in the middle of the day it is now bright enough with the windows and white ceiling that you don’t even need to turn on the light to walk around (which is a huge and pleasant change!).

More Basement Ceiling!

We will be painting all of the ceiling trim white and giving the beadboard panels a coat as well to make them feel less shiny and new.

Bathroom Floor Prep: Leveling and more Leveling!

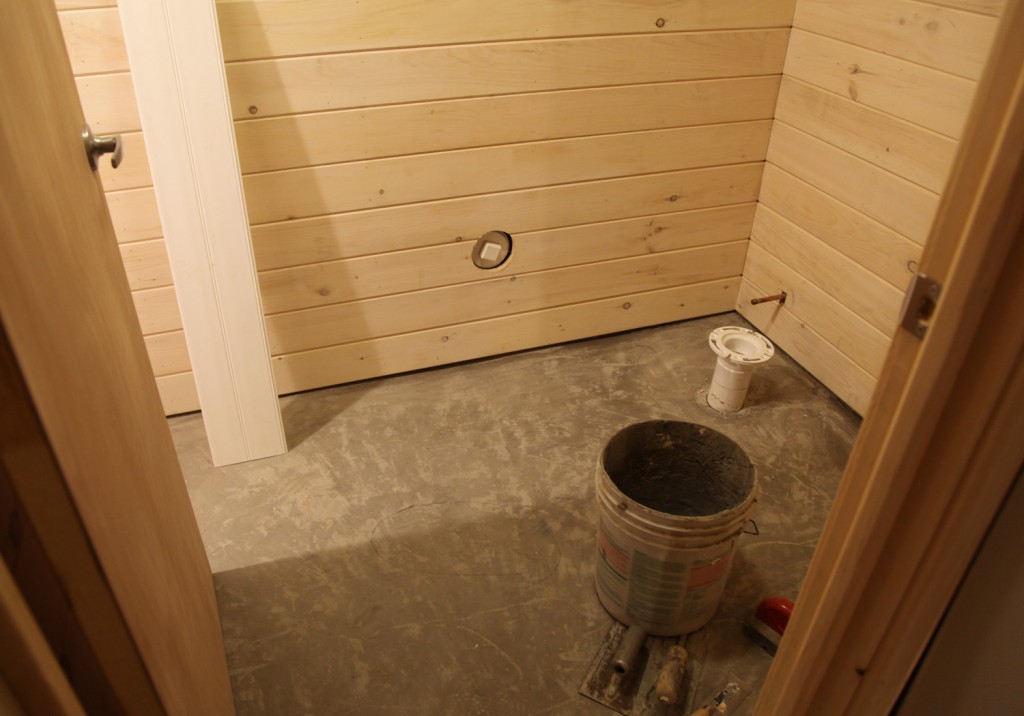
They are finishing preparing the floor for our vinyl install this weekend. We decided that we would install the vinyl tile and faux grout ourselves, to speed along the process. The floor hasn’t been leveled in the laundry area yet so we will be only doing phase 1. Next weekend we should be able to do phase 2 (and live without a washer and dryer for a few days). Floor prep is definitely not a strong suit of mine (I don’t have the patience) but it does make or break an install like vinyl, since any discrepancies in the floor tend to telegraph through (which I don’t want).

What color do you think I should paint the door? Blue maybe?

I hope everyone has a great weekend (and enjoys the beautiful weather)! 

* To see all of the posts about our basement click here.


Leave a comment

The Last of the Main Section of Beadboard went in! I love how it looks!

It was a productive day yesterday down in our basement. I did a little demolition on a couple of random old ceiling pieces that were in the way (a great way to start off the morning I might add), but the more exciting part is that they started working on ceiling in the main room. They also completed the last major wall of beadboard (there are still a few smaller areas to do).

My contractor and I went back and forth on the design for the ceiling since I wanted it to be removable to have access to all of the plumbing and electric up there. We ended up going with some extra “beams” spaced at about 3′ apart. These will have cleats to pick up the thin beadboard sheets that will make up the ceiling plane.

Another Shot of the Beadboard on the Back Wall and the Ceiling Grid

The ceiling cleats are made up of 1×1 for the wall edge and for the middle it is a 2×4 attached vertically (cut for all of the plumbing pipes) and 1×4 piece of poplar hung horizontally. I like that it is simple and effective. There will also be some pieces running perpendicular to pick up the sides of the beadboard panels about every 4′. This will also be a 1×1. The trim, cleats and boards will all be painted white when we are finished. At the light area you will need to pull down the housing to remove the panel, but they are just clipped in place, so that should be fairly easy.

A Small Section of the Beadboard Panel Ceiling is in Place!

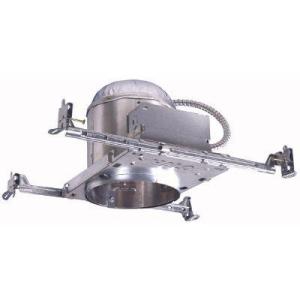
The lights are one of the most exciting parts. This is the first set of photos down there where I didn’t have to do lots of color adjustment to make up for the horrible florescent strip lights (Yeah!). The new recessed lights are made of a standard 6″ ceiling can with a special LED light bulb/housing attached. The LED downlight comes with its own cover and is reasonably priced at $29.99. The standard recessed can is about $8, so for a total of $38 you have a super efficient, good looking light. Plus the light used 9.5 watts but is the equivalent of a 65W bulb, it will last for 20 years and not get hot (which is an added bonus for a space like this).

6" Halo Recessed Housing, $46.79 for 6

EcoSmart LED Downlight, $29.99 at Home Depot

When I started researching options for the recessed lights, I wasn’t sure how the system works, but basically the LED light and cover attach to the old school screw in socket meant for an incandescent bulb inside. It is also interesting to watch the price come down on these guys. The LED light and cover where priced at $49 last year. So by next year the price will probably go down again. For a price comparision if we had gone with incandescent we would have spent about $8-10 for the cover and bulb, so we spent an extra $20 per light. We are installing about 12 of these, so I am spending an extra $240, but I won’t have to replace them until the kids are out of college (kind of strange to think about!). I will give a more full report once they are all up and running to see how bright they feel.

* To see all of the posts about our basement click here.

The weather is beautiful here today, I think it is time to get weeding!

2 Comments


Barr's Purple Crocus

With the warm weather and the 10 day forecast, I think we can safely say that winter is over and I better start moving on the garden. It rained last night and the garden is ripe for some attention. I started weeding last week and hope to get some more pulled tomorrow. I am also already thinking that it might be time for mulch since some of the soil is looking a little bare.  There is lots to look at in the garden now!

My Barr’s Purple Crocuses that I planted last fall are up. They caught me off guard because their leaves are quite small so I didn’t see them until they started blooming last week. They are suppose to be squirrel resistant (we will see!).

Daffodils

Lungwort

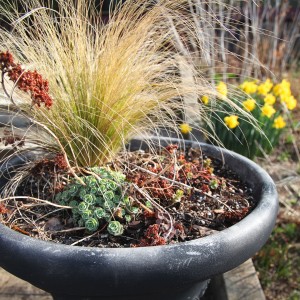
Front Planter with Sedum

My daffodils are also in full swing and will probably peak this week. I am hoping that they don’t wilt too quick with the warm weather. The lungwort (Pulmonaria Saccharata ) are a good 2-3 weeks ahead of last year.

Additionally a LOT of my plants have sprouted. With the mild winter it is looking good for most of plants surviving (if not thriving).

Goals for the garden in the next week: weed, mulch, pull out the ivy in the hedge, pull out miscellaneous vinca and pachysandra. It is a little wet today and I don’t feel like getting to soggy, but I am hoping by tomorrow I can really get in there with the kids (who really enjoy pulling out the weeds).

What is blooming in your yard?

*This is my first time joining the monthly Bloom Day at Carol’s May Dreams Gardens. It is quite interesting to see what is blooming in other people’s gardens all around the world!  I recommend stopping by  Carol’s May Dreams Gardens to see the list of all of this month’s participants.

5 Comments

Shower all Grouted!

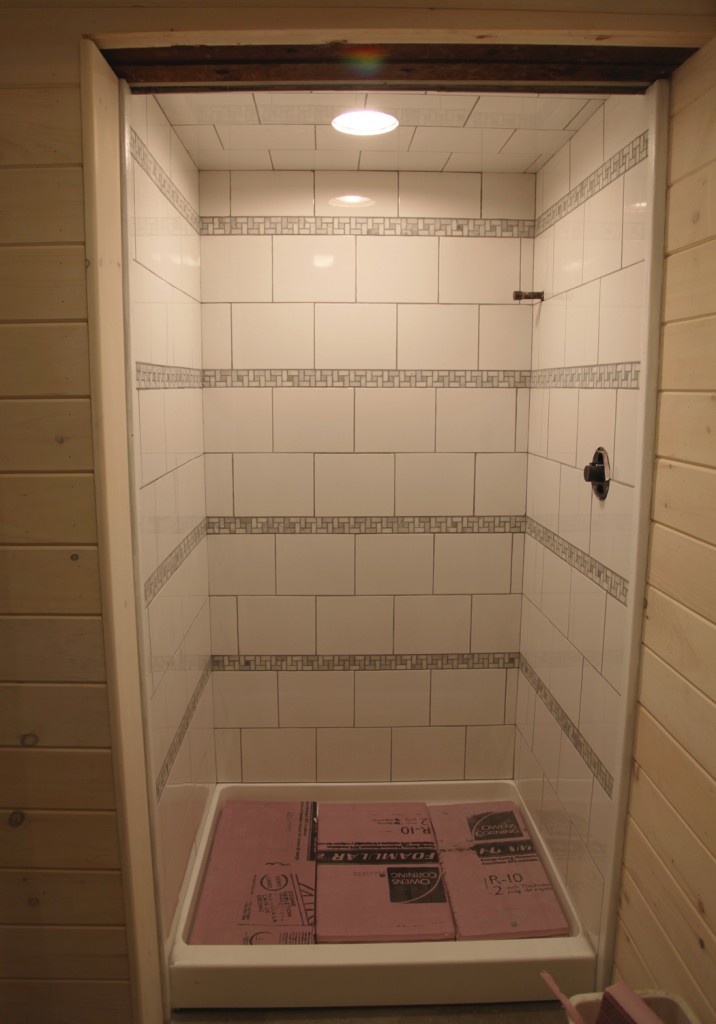
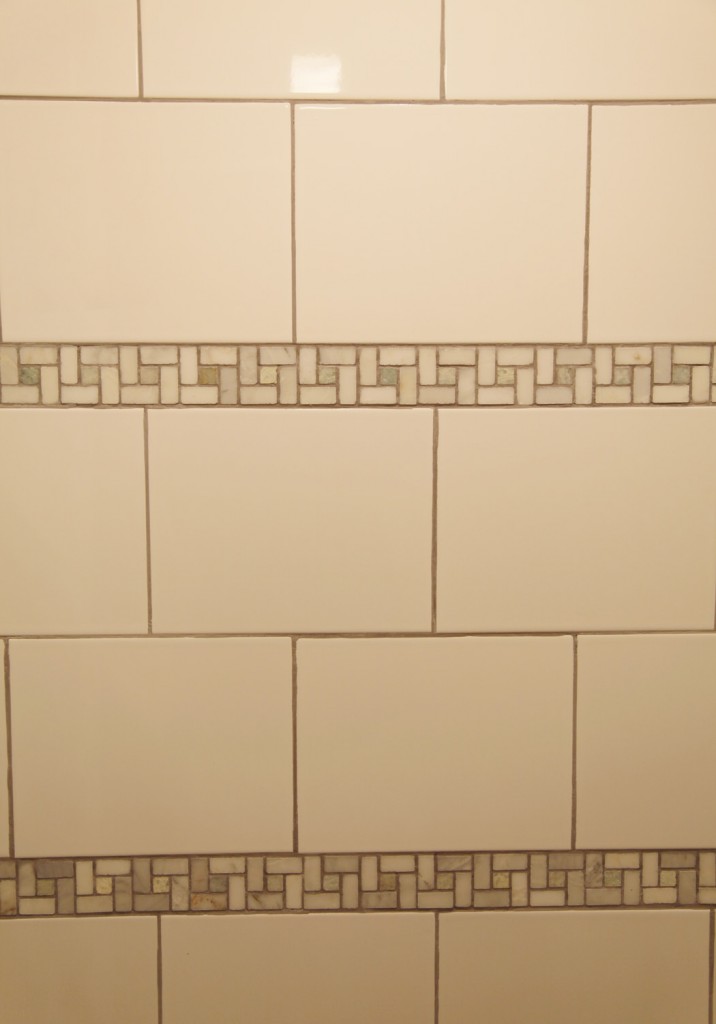
So we got our hands a little dirty this weekend and grouted the shower! My hands are now totally dry and cracked to prove I have had a busy weekend. I have grouted before although this was my first time grouting with gray grout and on multiple surfaces. I was a little rusty and a few of the joints aren’t perfect, but overall I am very happy with the results. I am in love with the gray grout with the stone stripes! The gray grout really brought out their color of the marble.  This ended up taking up a good bit of time this weekend, but I am very relieved to have this part of the bathroom finished. It still needs a little bit of caulk around the bottom and side seams, but we are otherwise ready for final plumbing (not counting the floor in the bathroom).

The Making of a Shower!

Close up of Tile

I will spare you all the ins and outs of grouting, since it has been documented many times by professionals but time wise I ended up spending about 3 hours getting excess thin set mortar out of the joints. I haven’t had to do this step before but I think because the mortar ended up being thicker than normal to accommodate the stone accent tile, we ended up with a good bit that had to be taken out. After some trial and error, I ended up using a combination of a utility knife, screwdriver and wooden bbq skewer. Then after cleaning everything off again with a sponge I spent about 6 hours grouting and cleaning up (in 2 sessions). I am sure if you are a professional you could do it in about half that time, but alas I am not! I even had a little “helper” for part of the clean up.

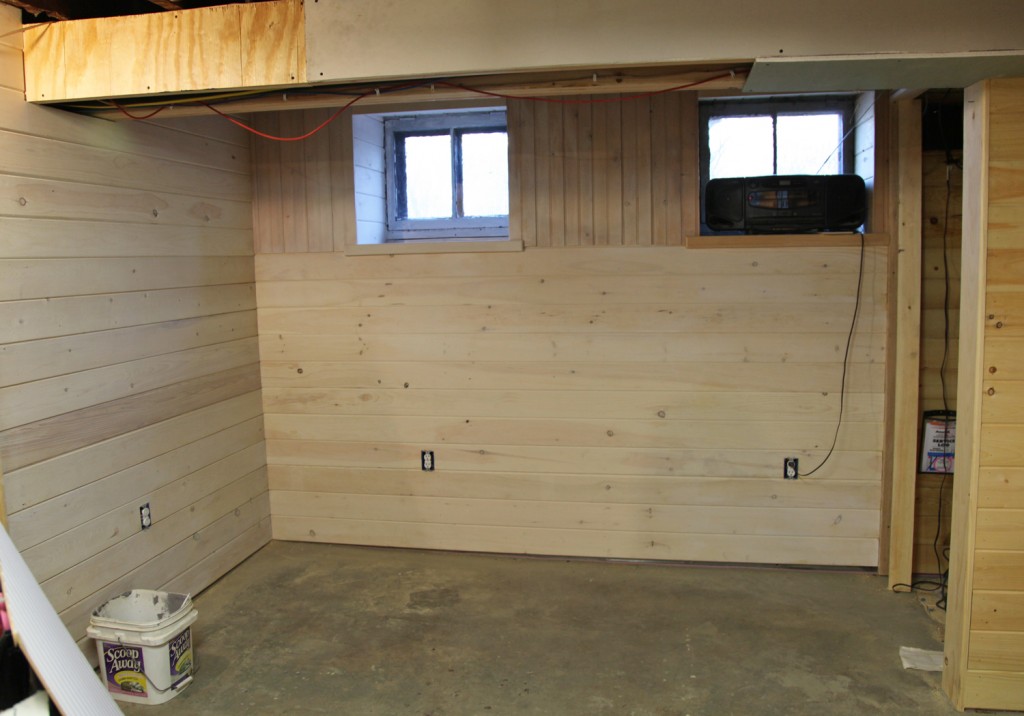
Main Room partially whitewashed!

We also did some more whitewashing and Drew cleaned out one of the windows (which has had dead ivy in between the storm and window for longer than I would care to mention).

Was anyone else productive this weekend?

* To see all of the posts about our basement click here.

1 Comment

I had a lovely day at the Philly Flower Show yesterday with a good friend! It was packed as usual, and it takes a certain amount of perseverance to make it through. We got their just as it opened to try and avoid some of the crowds. I enjoyed my mini-Hawaiian vacation, although as usual I am much more interested in the plant and garden trends for our region. So I thought I would highlight a few of my favorite things from the show, things you could incorporate into your home garden.
Pitcher Plant
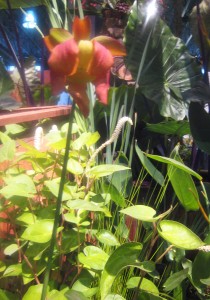
Another Pitcher Plant

Still another Pitcher Plant!

1. Pitcher Plants (Sarracenia):

You have to love a carnivorous plant! I have always been fascinated by venus flytraps but the idea of having a perennial plant in my yard that could eat bugs, sounds very enticing and amazingly beautiful at the same time. I saw several different varieties of  pitcher plants at 4 different exhibits this year. Once I got home I decided to do a little research. I looked them up and found out that only the Purple Pitcher Plant is native in this vicinity (and can grow all the way up in Canada), but there are several other varieties native to the southeast and there a number of hybrids available if you know where to look. Plant Delights from North Carolina carry an extensive collection and have an interesting article about them.  These perennials prefer moist acidic soils (picture marshes). I don’t think I have a place suitable for these lovely plants, but maybe you do.
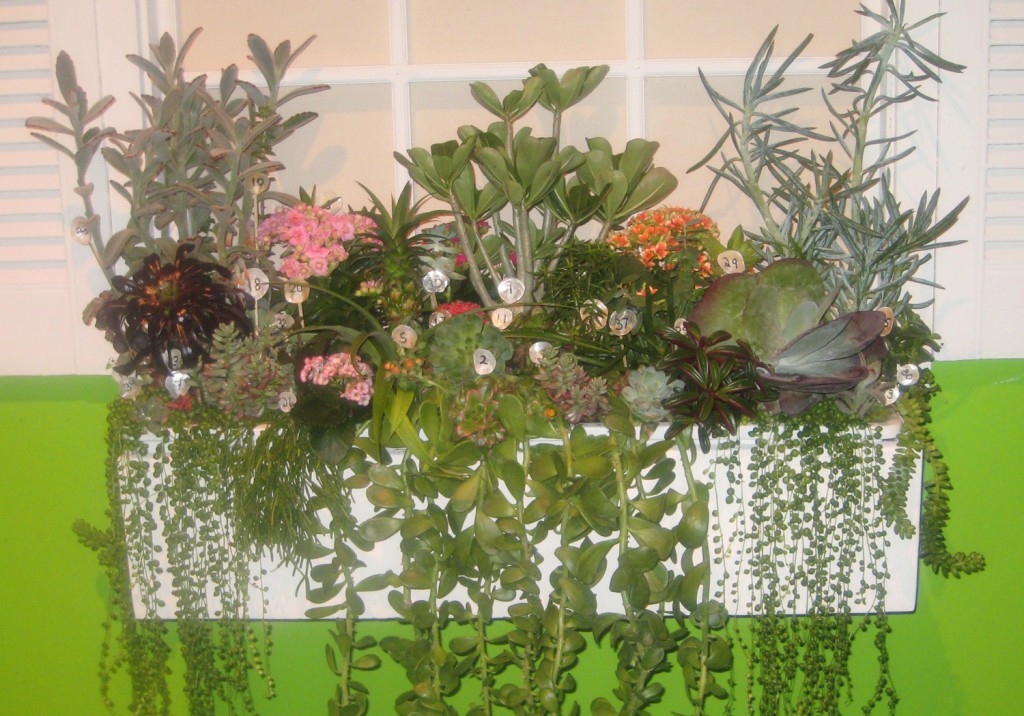
Beautiful Window Box by Watershed-Radnor Middle School. Varieties include: 1. Adenium Obesum, 2. Aeonium Haworthii, 3. Aeonium 'Zwartkop', 4. Anacampseros Rufescens Variegata, 5. Ananas Comosus, 6.-10. Crassulas, 11. Echeveria 'Ramillette', 12. Echeveria 'Perle von Nurnberg', 15. Graptopetalum Paraguayense, 16. X Graptoveria 'Debbie', Gymnocalycium Mihanovichii, 18.-23. Kalanchoes, 25. Peperomia Graveolens, 26. Rhipsalis Clavata, 27. Sedum Adolphii, 28. Sedum Clavatum, 29. Sedum Hernandezii, 30. Sedum Kamtschaticum Floriferum 'Weihenstephaner Gold', 31. Sedum Morganianum, 32. Sedum x Rubrotinctum, 33. Sempervivum SP, 34. Senecio Rowleyanus, 35. Senecio Serpens, 36. Talinum Calycinum, 37. Wikstroemia UVA-URSI, 38. X Graptoveria 'Debbie', 39. Echeveria 'Lola'
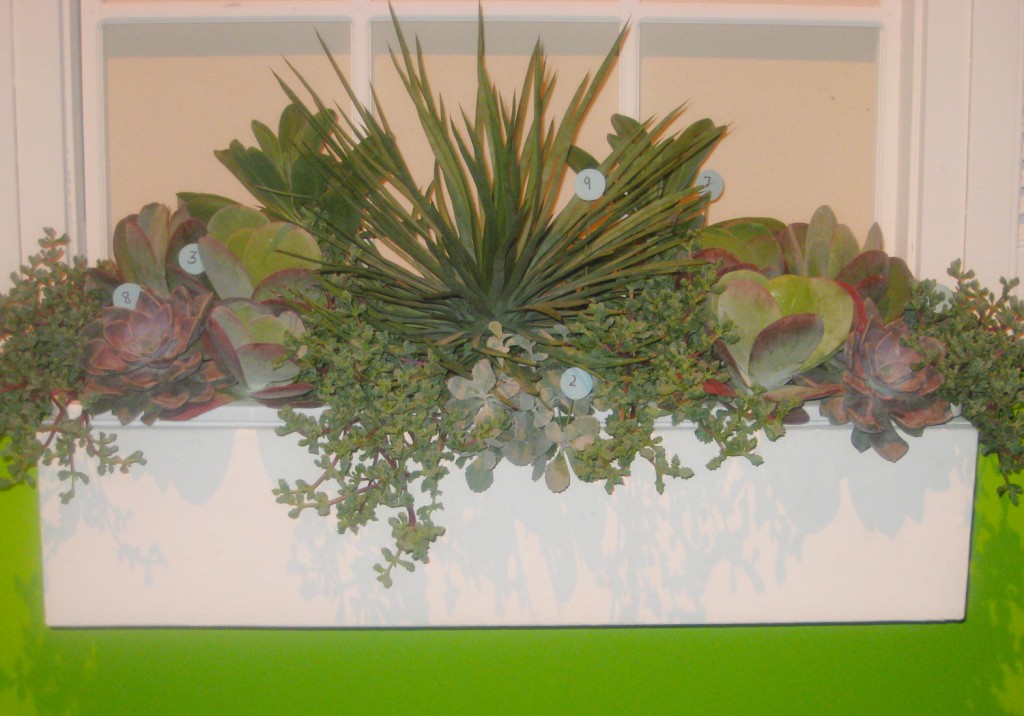
Window Box by Marano Gardens Group. Varieties include: 1. Aloe 'Silver Ridge', 2. Kalanchoe Pumila, 3. Kalanchoe Thyrsiflora, 4. Lampranthus Deltoides, 5. Sedum 'Burrito', 6. Sedum Makinoi 'Variegatum', 7. Senecio SP, 8. X Graptoveria 'Debbie', 9. Yucca Whipple

2. Succulents for Container Gardening

I found this trend very on point! As people are becoming more conscious of their water usage, finding ways to create beautiful gardens without having to water them regularly, makes lots of sense. Last year I started putting a few succulents (i.e. sedums) in some my containers. I was also just discussing this very idea with my neighbor last week for some window boxes for her second floor windows, that face due south. These examples from the Flower Show do a lovely job of choosing plants that prefer dry conditions and placing them in window boxes (of course they were going with a slightly more Hawaiian feel but no reason these can’t be adapted for our climate). I would gladly take either of these home, and I think I will have to try a few of these plants out! The one downside to most of these is that most of these plants are tender and would require an indoor location for the colder months. But the big upside is that you don’t have to worry about watering them daily in the hot sun. I also like the addition of the Yucca in the second box. This is something, depending on the location that you might even be able to leave out year around. I planted a very similar yucca in my garden last year. Also for inexpensive tender succulents I recommend Ikea. The small plants are usually $1.99 and 2.99, so you won’t feel too bad if they don’t make it! Stay tuned for later this spring when I will see what I can put together using more readily available plants!
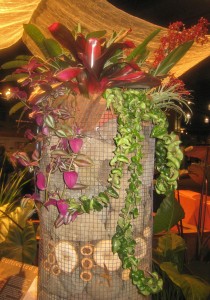
Wood, Stone & Chicken Wire Column
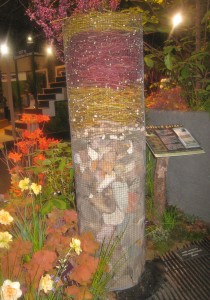
Red & Yellow Dogwood Branches
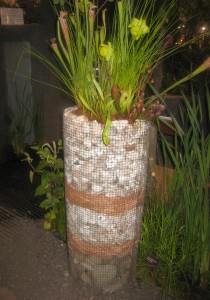
Oyster shells &Â twigs w/ Pitcher Plant

3. Tall Sculptural Elements

I like the idea of adding permanent architectural elements to the landscape and I absolutely fell in love with these columns that were created by the students at Penn State Temple Ambler (who always put together a beautiful exhibit, sorry about getting your name wrong). I asked how these were constructed and they used cardboard sonotubes in the middle (not so good for a permanent display, but I think with a little tweaking you could create something similar). I was thinking maybe a concrete base with a post attachment. Then you could use a pressure treated post as the main support on the inside.  You could also use the sonotube (which is meant to have concrete poured into it) and just go ahead a pour a tall concrete column with a footing and then install the chickenwire around it. I really like the idea of using different natural material (particularly things from your local site) and creating some unique textures. I also like that they have made planters out of some of the tops. I think it could be interesting to add some pocket up the column as well to hold plants too.

I also picked up a few small things at the show including a new pair of pruners. So stay tuned as I start to put them to use in the garden!

I hope everyone has a great weekend! We will be grouting the basement shower. Yeah!

*Here is my post from last year’s show.


2 Comments

In Progress Shower Tile

It is slow going here this week. The shower tile is taking a LONG time. It does look nice, but I am getting impatient! I am sort of regretting not just doing it ourselves (not that we have the time).  I think the large tiles, although a good deal, are not helping because so many of them need to be cut. Also the two different depths of tile is making it more difficult as well.  I am also looking forward to them installing the final light, which will be an LED wet rated fixture/cover. The ceiling will also be tiled.

Beadboard Ceiling with our New Fan/Heater/Light

I also forgot to show you our new fan/heater/light. I ended up going with “Whisper Warm” by Panasonic, $251. They had a similar but uglier model at Home Depot but it didn’t have very good reviews. This one had pretty good reviews for being quiet and producing a good amount of heat. I also like that it does not stick down as far as a lot of the models I looked at. We used the heat and fan while we were painting down there this weekend, and so far so good. I guess I won’t really know until I take my first hot shower, but I have my fingers crossed that it will work out well.

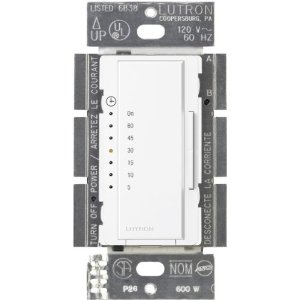
Lutron Timer Switch

I also bought a fancy timer switch by Lutron for the fan. With this swith I can set the time I want it to run and when I leave it will automatically turn off for me.  I thought this was a worthwhile $32.50 investment, since I would hate to leave the fan accidentally going all day. Lutron makes lots of lighting and electric controls and I use them quite often on large scale projects, so I feel good about using them. I think my contractor thought it was a little over the top, but oh well. We didn’t have a fan before, so this should be an upgrade!

* To see all of the posts about our basement click here.

1 Comment

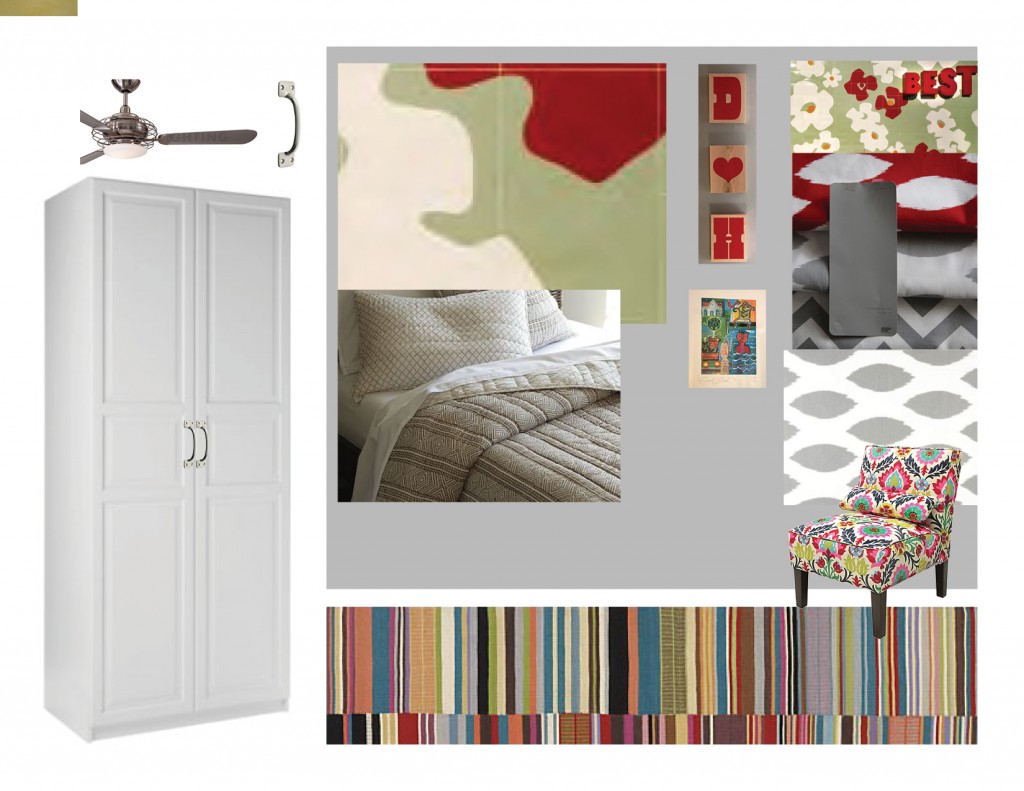
Armless Chair in Desert Flower for the Master Bedroom, $329

Yesterday, like most days, I took a quick look to see what  One Kings Lane  had in stock and instantly fell in love. If you are not familiar with OKL, they are an online sale site that sells housewares in different categories for a limited time.  Often the popular items sell out almost immediately.  So for the first time in a while I felt the urge to buy something from them! So I called Mr. S. to see if he was okay with this chair and I bought it. I am normally the person that over analyzes every purchase looking for the perfect item so this was a bit of a departure for me. I think it will look great in our Master Bedroom (which is currently on hold while we finish the basement).  Maybe I felt the urge to pick this up after choosing off white walls in the basement. My inner kitsch is coming out! I am hoping it is as lovely in person.

In Progress Mood Board for the Master Bedroom

2 Comments

White Ceiling & Partial Whitewash on the Walls

Our contractors finished the beadboard on the walls and ceiling in the bathroom for us on Friday so we could prime and paint the bathroom over the weekend. We decided to paint the ceiling white and whitewashed the walls. Think subtle!  It is quite hard to see the whitewash clearly in the photos.

Whitewash applied to Beadboard Walls

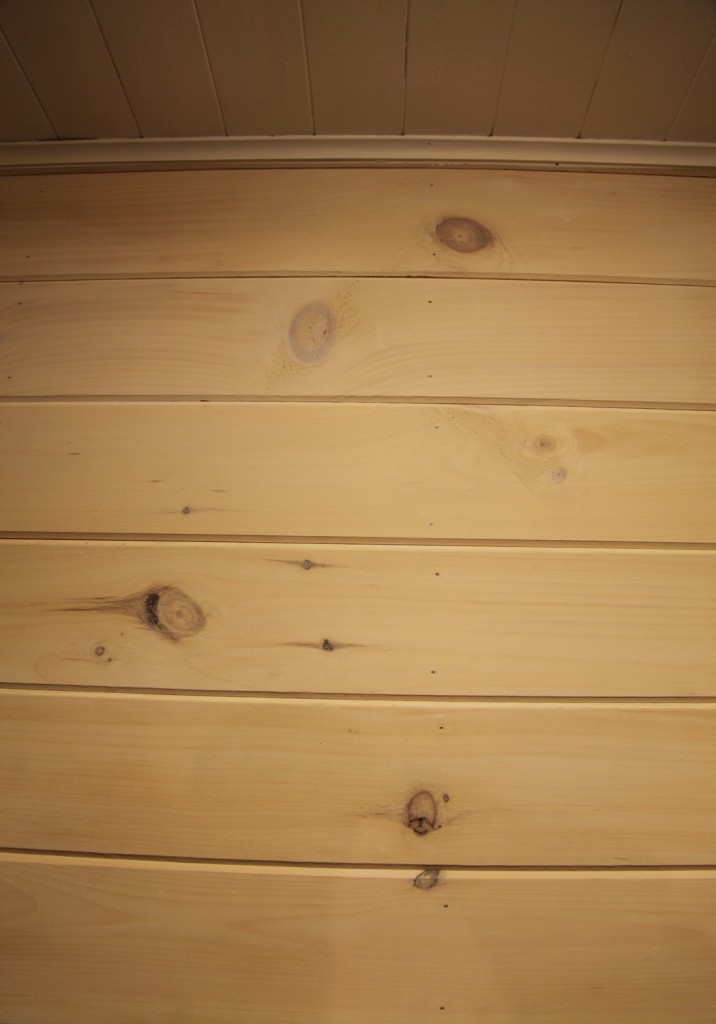
Why whitewash? Well we are spending quite a bit of money to give the basement a nice rustic/ Victorian back of house feel with all of the beadboard. It seems like a shame (and lots of work) to cover up all of the pine wood grain with several coats of paint. We did decide on the ceiling we would try and maximize the brightness and go opaque white, but after some testing we decided to go with a whitewash (about 1/2 paint 1/2 water) for the walls. The color is actually a light tan (hard to read in the photos) because we wanted a slightly softer color. I also experimented with a blue, but the blue whitewash looked really strange, so we decided to stick with the neutral wall color and use color elsewhere. This is a pretty big departure from my normal preference of using lots of color on the walls, but given that these are small, short spaces it is probably for the best.

Paint & Primer: For the primer I went with a new product (at least for me), Kilz Clean Start. We used 2 coats for the ceiling to minimize any wood grain and knots. Then we used 1 coat of the Behr Premium Plus Ultra Ceiling Paint. For the walls I used a 50/50mix of Behr Premium Plus Ultra Flat Enamel in White Truffle and water.  The other nice thing is that the primer and paint are low VOC, so no smelly fumes which is great for those of us painting in the space and for our little ones nearby.  For the ceiling I used my favorite painting tool, a small roller (perfect for getting between the low hanging pipes) and a small angled brush for the edges. For the walls we just used a medium size paint brush, and it went on quite quickly which was another bonus.

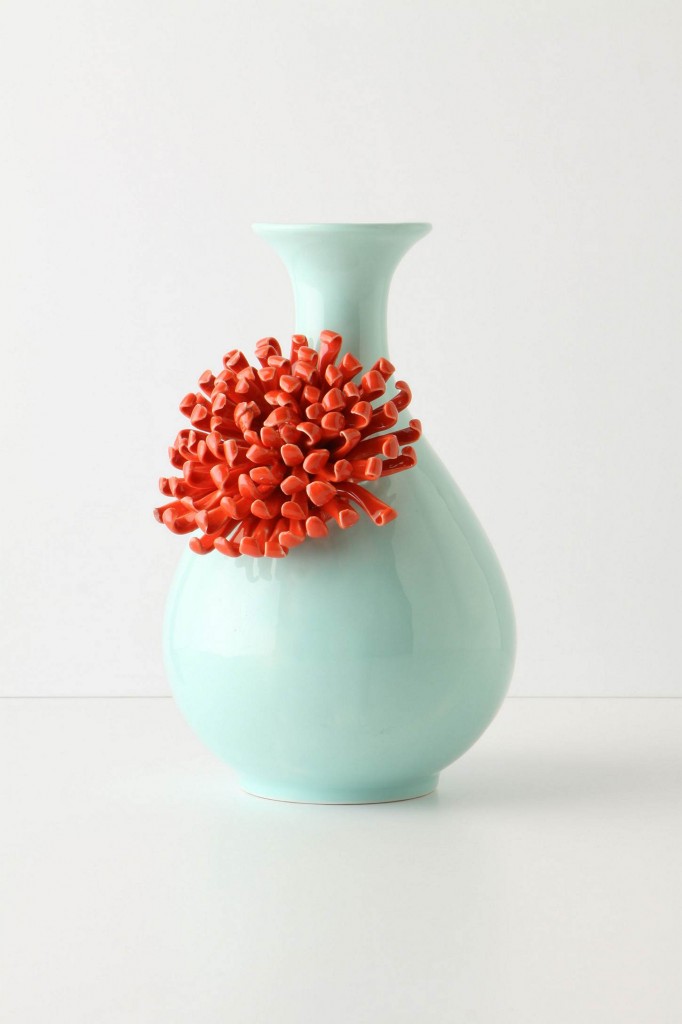
Curvy Chrysantemum Vase, $28

Speaking of Color I did buy a beautiful vase for the bathroom (now I just need a shelf to put it on).

They are starting to install the tile for the shower today (so far so good). Hopefully  I will have an update tomorrow.

* To see all of the posts about our basement click here.


3 Comments

Maisie is 3!

March 5, 2012 — 1 Comment

My girl at birth, first birthday, second birthday and third birthday

The last few days have been filled with family, friends and cake! Maisie now thinks that birthdays last for several days and involve multiple parties! We feel blessed that we have a healthy and happy big girl! We are no longer allowed to refer to her as a “baby” and she is very proud to be a “big girl”.

Maisie with her Foofa Cake

She requested a chocolate Foofa (from Yo Gabba Gabba) cake and is now in love with mermaids and ponies.

*I will be back later with an update on the basement.

1 Comment

Main Space progress

It is a little crazy around here! We are busy getting ready for Maisie’s birthday and it was picture day today for the kids too. Meanwhile the basement is still chugging along. The guys have been here quite a bit and it is starting to show. I was starting to get impatient while they were busy doing the electric (and not making much progress on the walls), but yesterday they cranked out quite a bit of beadboard and plywood (and a little bit of wallboard). Now they are almost done with all of the electric, except for the lighting/ceiling. It is quite hard to get decent photos right now with the hodgepodge of lights and supplies scattered around.
Looking towards the bathroom

New Shower w/ Light

Utility Sink Area w/ Drywall

Sink/Toilet Wall

The bathroom is almost completely walled out too. The backerboard is in for the shower. They have started blocking the joists above for the ceiling. They have to put our giant exhaust fan in today and then they should be able to put the ceiling in. If all goes well we will be able to paint the bathroom this weekend, which would feel awesome!

* To see all of the posts about our basement click here.

Leave a comment