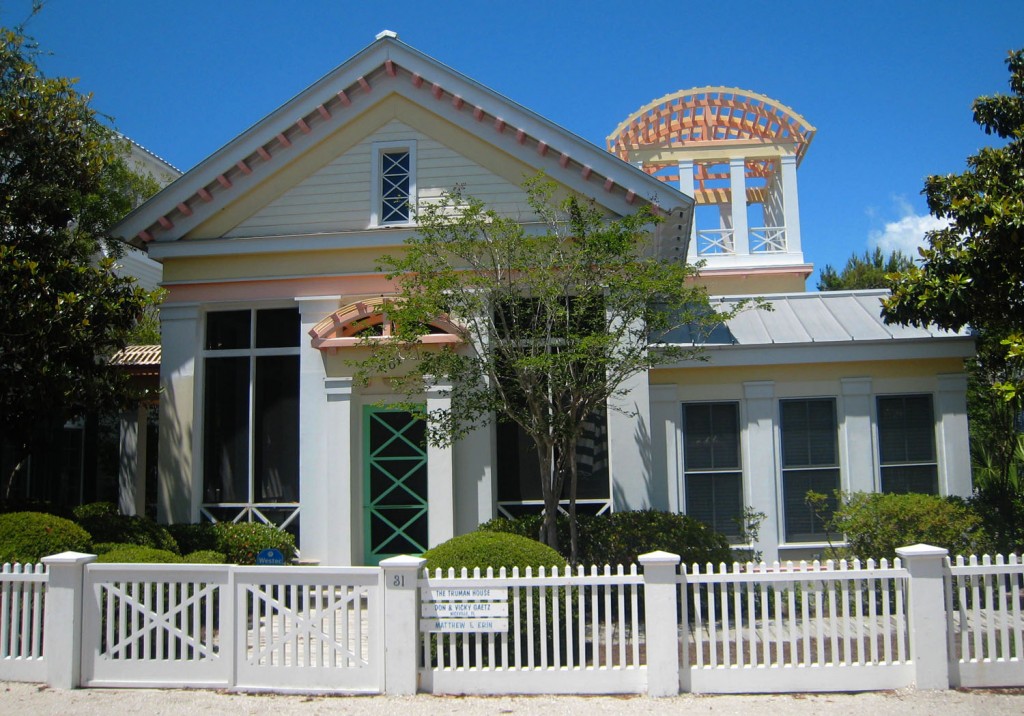
We had a lovely vacation on the Florida panhandle, but this morning was pretty painful, after a week off and an hour time change (okay, I will stop complaining now). I have a ton of pictures to go through but I thought I would start out with a few of my favorites from our trip. Seaside and Water Color Inn & Resort are filled with lovely white beaches with lots of picturesque cottages, all beautifully planned out in “perfect” little communities (Seaside was where they filmed “The Truman Show” after all) . I was ready to move in (except for the prices and that you are in the middle of nowhere). The kids had a great time making sandcastles, “swimming” (I mean floating around the pool on inner-tubes), fishing and kayaking.

Sam's Drawing of Our Trip including swimming pools, fish, a crab and him wearing goggles

I will be back later this week with some cottage pictures, details and paint colors to inspire.

1 Comment

Guess where we are?

April 20, 2012 — Leave a comment

Sorry I haven’t posted much this week. We are enjoying some rest and relaxation in the sun!

Can anyone guess where we are? This house was featured prominently in a movie a few years ago? (And no we aren’t actually staying in this house).

I have been busy taking lots of photos of interesting houses that I will be sharing next week.

Hope everyone has a great weekend!

Leave a comment

I don’t get to read nearly as much as I would like to, but I have decided that I need to make an exception. I have had 2 recommendations to read Bringing Home Nature by Douglas Tallamy in the last couple of  weeks. A good friend of mine just heard him speak and was really inspired. Then I was reading a post on Carolyn’s Shade Garden about her Native Woodlands  last week in which she linked back to this post about planting an oak tree. Carolyn’s post on growing her own native woodlands was really inspiring (not that I have a woodland) so when I saw that she mentioned the same book as her inspiration I felt I compelled to order it. Douglas Tallamy is the Chair of Entomology and Wildlife Ecology at the University of Delaware, and has his own native garden/woodland right near here.


Sample Page showing Joe Pye Weed (a favorite of mine) & Some Butterflies

I haven’t finished the book yet, but so far he makes a very compelling case for including native plants in your landscape where ever possible, even if you don’t have space for growing an oak tree or woodland. I will write up a more complete review shortly, but in the meantime I am using this inspiration for picking out a few small ornamental trees for our side yard.

Does anyone else have any good gardening books to recommend? Anything that might have changed your view on how or what to plant?

2 Comments

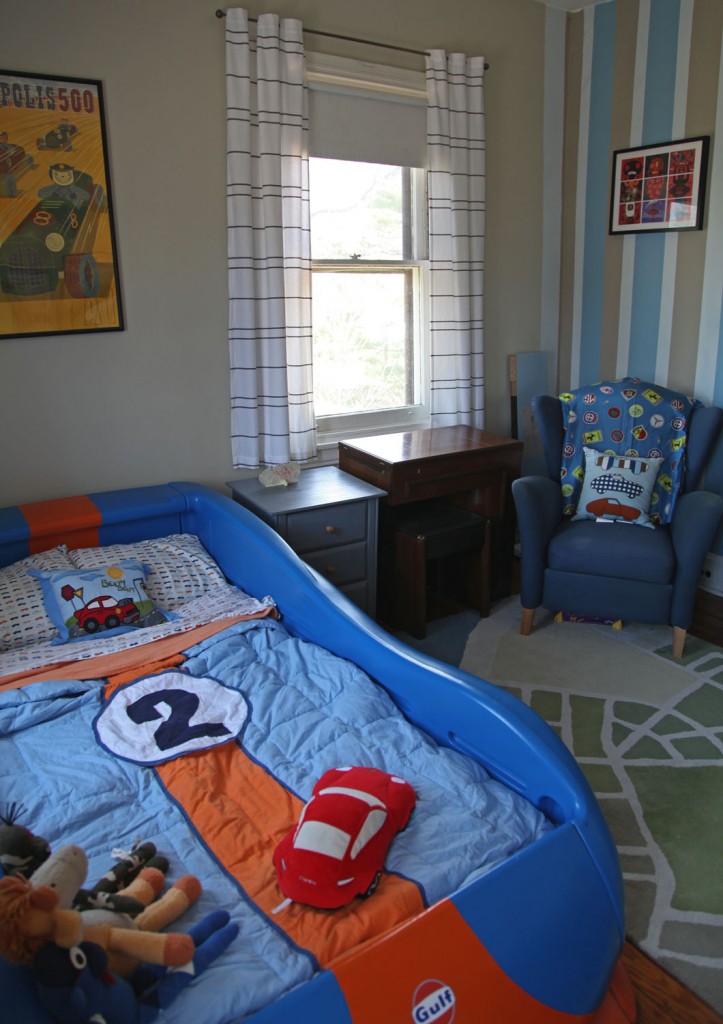
Sam's Car Bed & Room Before

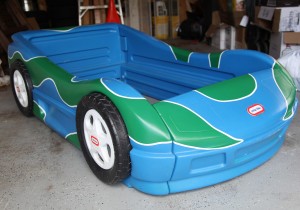
My daughter has been requesting a car bed for quite a while now, so we thought it was time to get on that. This is not a surprise of course since we come from a long line of car people. Fortunately we are a couple steps closer to giving my littlest one the bed of her dreams. Sam has had a car bed for a while and they both love it. I am not usually in favor of giant pieces of plastic decorating the house, but this is an area where I have given in to make the kids and my inner child happy. The two are sharing a room now (it was their idea) so we needed a strategy that would still leave some space in there for moving around.

I measured and re-measured and decided that another twin size version was out of the question if we wanted to be able to open and close the door. Good thing Little Tykes makes a toddler size (it uses a crib size mattress). So like Sam’s bed I started scoping out toddler car beds on Craig’s List. It took a little while to find one not too far away and at a good price but we finally have it, assembled and all.

Option 1: Pink Pig Le Mans Porsche 917

Option 2: Hippie Le Mans Porsche 917

Sam’s car is based on the Gulf Livery Design for the LeMans Porsche 917, probably the most famous race car paint scheme. We originally really wanted to use the Pink Pig design but that would require painting the entire car bed pink first. Little Tykes does actually make a pink version, but only in a twin size. I was a little sad when we had to give up on this option. However we thought we could work with the Hippie design. We decided that we would leave the car blue and add the green pattern with white pin striping. We thought it was a fitting choice since it lives just down the road at the Simeone Automotive Museum (which by the way is an amazing place and well worth the trip).

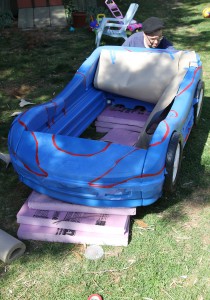
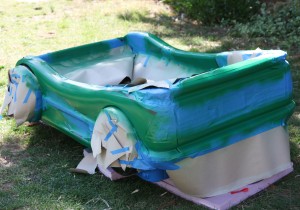
Partially Masked

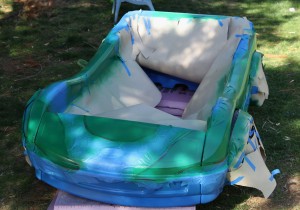
First Coat of Paint

First Coat of Paint

The process of painting involves lots of masking and some spray paint that is suitable for plastic. For masking tape we actually used electrical tape because it is more flexible for making curves. It worked really well! Unfortunately we didn’t have any newsprint so we used some rosin paper that we had in the basement. It was too thick and a pain to work with. Otherwise it is pretty straight forward. 2 coats of paint later and it was done. We then took off the tape and let it dry for 24 hours in the garage.

Hippie Car Bed w/ Pin-Striping

Rear of Car Bed

Next we decided that it definitely needed the white pin-striping between the two colors. We ended up using regular vinyl pin striping from the auto parts store (1/4″ wide to be exact). We used almost 2 40′ rolls, but at about $5 a roll, it was a good investment. It took Mr. S. about 1 1/2 hours to carefully place it and burnish it.

So far we have spent about $60 for the project, $40 for the car bed, $10 for the pin-striping and $6 for the spray paint (one can is plenty for the small bed) and $4 for the electrical tape.

There is still quite a lot to do. We need to do some rearranging of furniture in the bedroom and move some stuff into the playroom (Maisie’s old room).  I also need to make a bedspread with a big #3 on it and some interesting green patterning to match the frame. Not sure when it will be finished, but the girl is getting pretty impatient for her bed, so stay tuned.


3 Comments

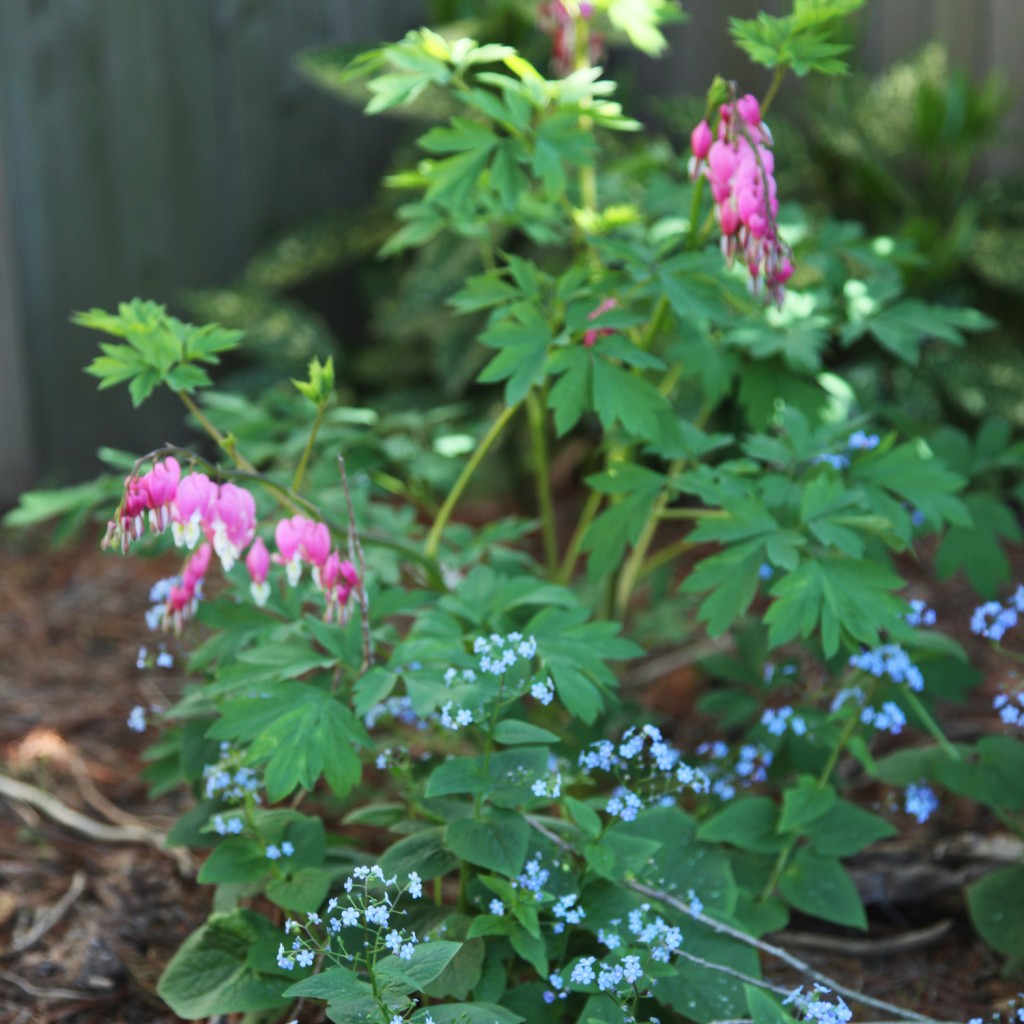
Bleeding Hearts w/ Brunnera

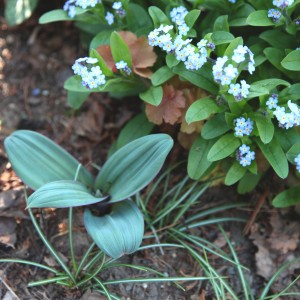
We are still in the heart of the spring time blue and purple time of my garden thanks to the forget-me-nots, brunnera, Virginia bluebells,  pulmeneria, violets and chionodoxa. Once the weather warms there will be a lot more orange, but for now the cool colors are in control. There are little spots of pink thanks to my bleeding hearts which look lovely against the cool colors surrounding them.

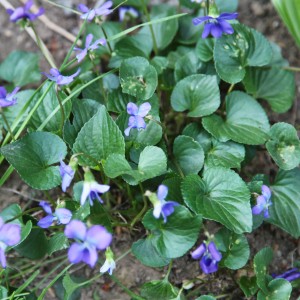
Violets

Columbine

I have a soft spot for violets. Their delicate flowers and a sign of spring to me. All of mine are rescues from the lawn and have since self seeded (they are one of the first things that I planted in my beds). They look lovely now but will most likely be eaten later in the summer by the bunnies. I am okay with this since they are good about reappearing again, and since I prefer the bunnies to eat these over some of my other plants.

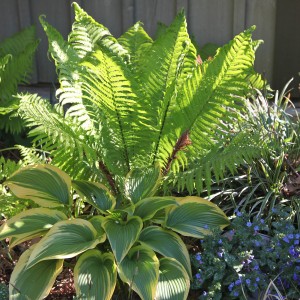
Ostrich Fern w/ Hosta

Variegated Solomon seal

The hostas, ferns and Solomon seal are also almost all out as well. The Ostrich ferns have arisen out of no where and are looking very tall and straight. The weather has been extremely dry for this time of year so it feels like some of the growth has slowed and with no rain in the forecast for another week, I am not quite sure what that will mean for the plants. I did water some of the newer plants on Sunday, and it looks like I will need to give everything another drink soon. The plants are use to lost of moisture this time of year, so I am concerned about what this will mean as late spring and summer approach.

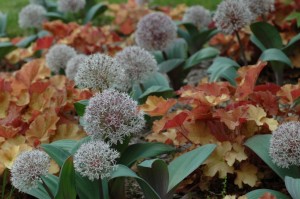
Allium Karataviense Sprouting

My Allium ‘Karataviense’  have started sprouting. I was inspired to plant these by this picture from Tovah at Plantswise:

Alium 'Karataviense' with Caramel heuchera (coral bells)

Since I already had a bunch of the heuchera caramel I decided to add the allium. What I am surprised at so far is how beautiful the leaves are on the ‘Karataviense’. Most alliums do not have particularly impressive leaves, in fact the leaves often disappear by the time that they bloom but these leaves have purple edges and striping. I can’t wait to see how they look once they are flowering. Here is the link back to my rendering in the fall of how I hoped that they would look.

What is blooming in your garden right now?

Leave a comment

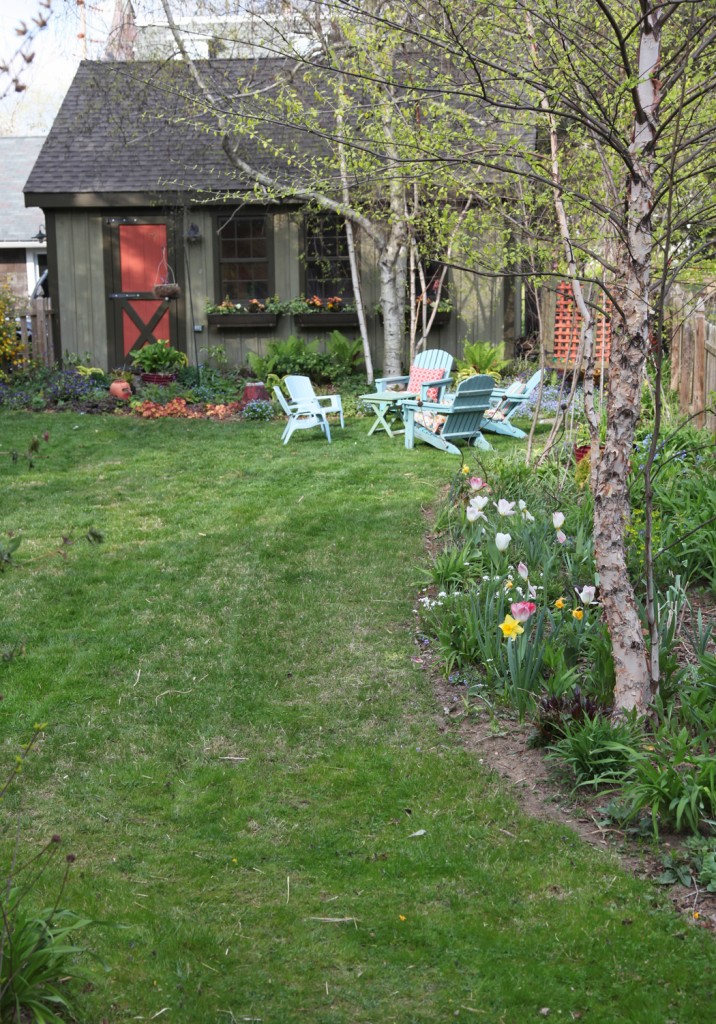
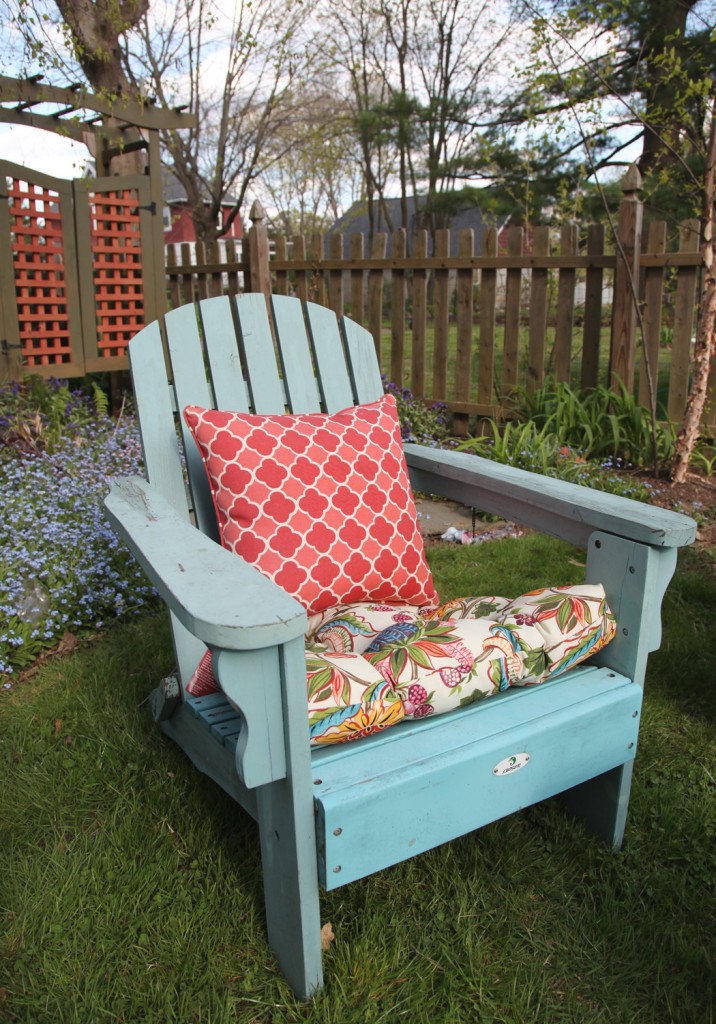
Backyard this week w/ new chair cushions

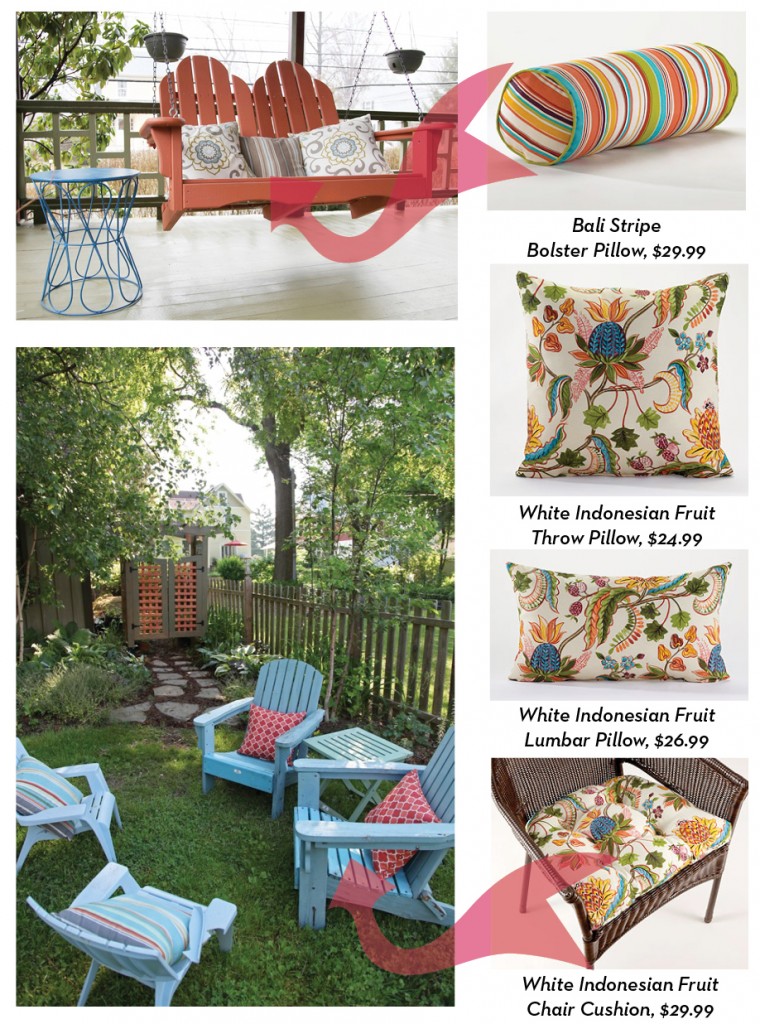
I have been admiring the tropical style White Indonesian Chair Cushions from World Market since February. I decided that it was time to order them (I found a free shipping coupon).  Here was my original inspiration:

In the end I decided that ordering the seat cushions was my biggest priority since we don’t have any for the Adirondack chairs at the moment, and they could definitely use something to soften them up (in addition to a paint job). I also ordered one lumbar pillow to see if I wanted to use it anywhere else.

New Outdoor Chair Cushion

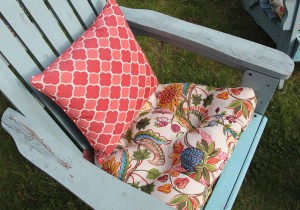
New Chair Cushion Close Up

So far I am loving them! They make the chair much more comfortable and they look great. It hasn’t rained much since I put them in, so we will see how they hold up. If I could get my shed cleared out I would store them in there when we weren’t using them.

Beach Umbrella, World Market $14.99

As part of our future sandbox area I also ordered a pair of beach umbrellas to keep the kids out of the sun. They just arrived last night, so I haven’t had them out yet but I am hoping to put them directly in the sandbox, although I may need to install a small piece of PVC pipe to keep them in place.

What do you think? Too much color?

2 Comments

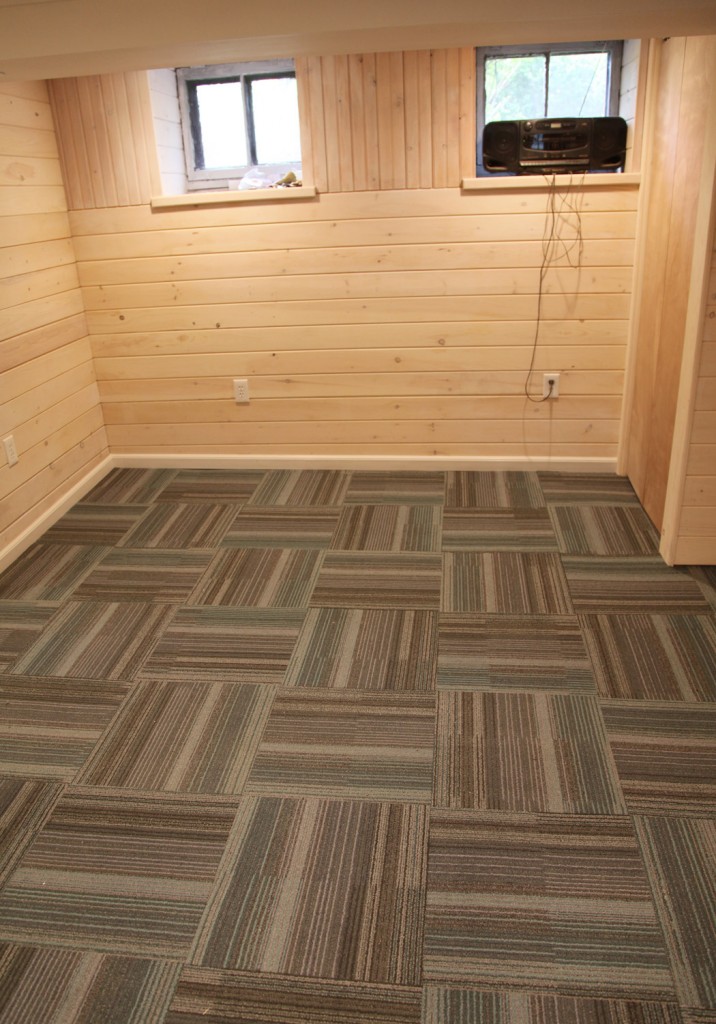
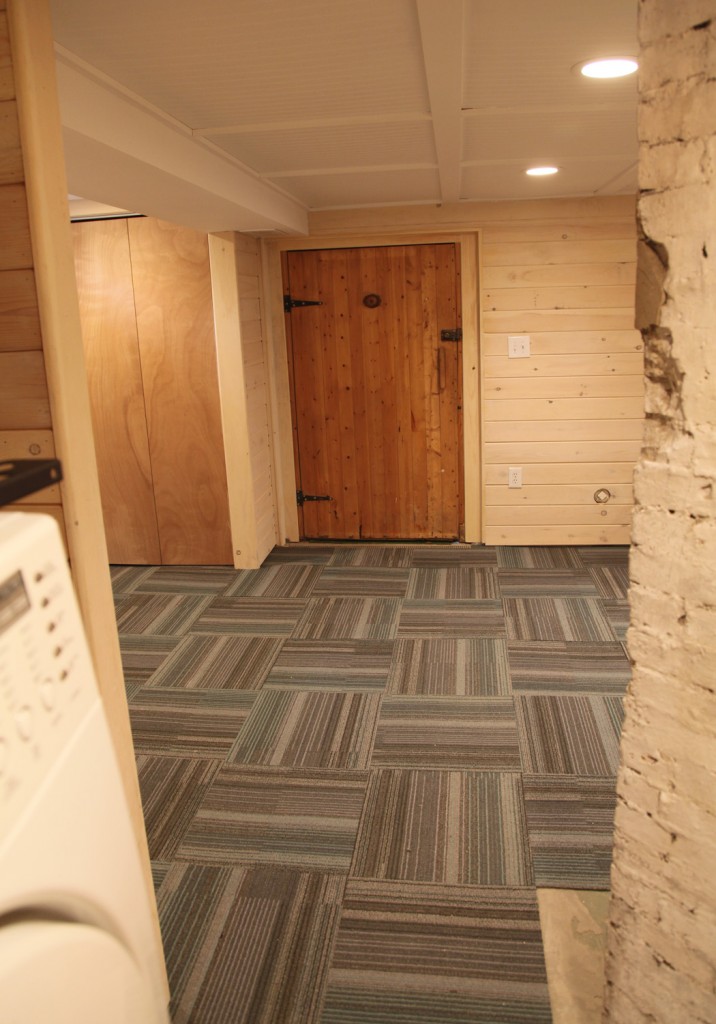
Carpet Tile Installed in Main Basement Space

I hope everyone had a lovely weekend. We spent a good part of the weekend trying to catch up on EVERYTHING. I don’t think we succeeded but we did manage to get a few things done. The taxes are ready, there is carpet tile in part of the basement, I have dug out the area for the sandbox and Maisie’s long overdue car bed is painted and pinstriped. Unfortunately the list is still pretty long. The good news is that the kids are stocked up on candy, LOVE Easter Egg hunts and are generally a happy pair.

Back to the carpet tile! I decided to start on the larger of the two main spaces in the basement (i.e. the one that wasn’t full of stuff). There is still trim to paint and things to do, but I REALLY wanted the space to start feeling more finished so I went ahead with the install.

Carpet Tile Samples

I bought this carpet tile (which is remnants and seconds from larger orders) for $.69 sf from an online store called Carpet USA (with $99 shipping). The deal was by far the best option I found. I wrote about the exciting adventure of picking it up a while ago. Previously I had pulled several pieces out to check out the pattern and to see how it was going to sit on the concrete floor. When pulling out some more pieces, there were definitely a few that had imperfections (which I knew could happen). Mostly it meant a darker color yarn was visible in a spot or two. There was one that had a loose piece of yarn sticking up. I decided to put those to the side and use them in less conspicuous places if at all since I bought some extra.

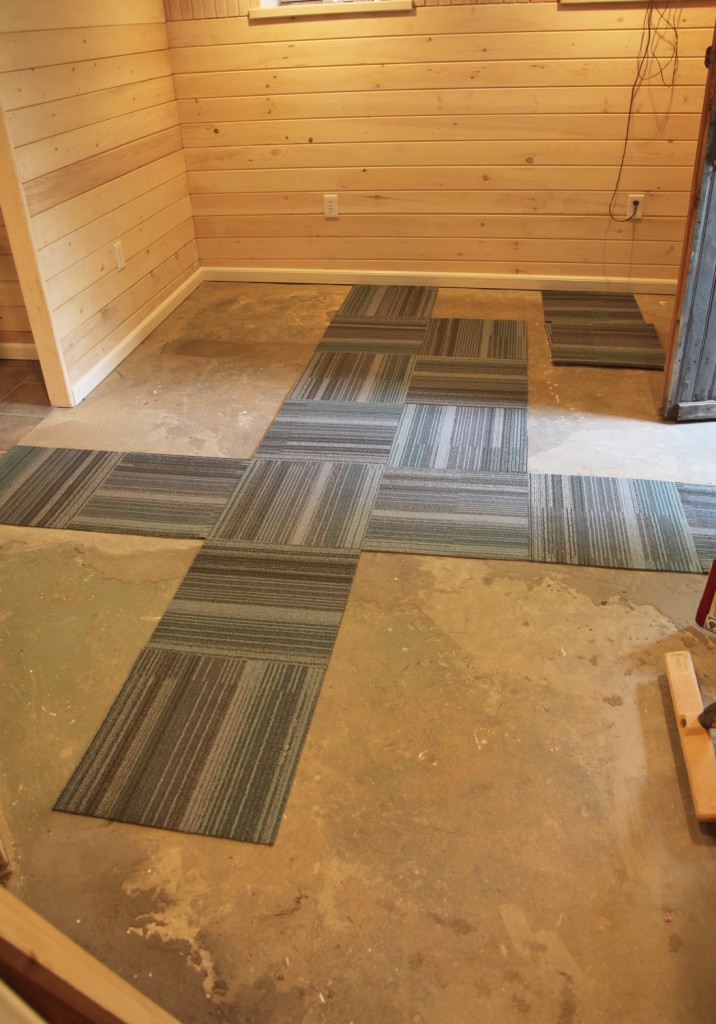
Laying Out The Carpet Tile Pattern

Laying Out the Carpet Tile

I started out by laying out a row of carpet tiles in each direction in a cross pattern to determine the best layout (I had done a rough layout in autocad, but for the actual installation this is actually easier, because you can fuss with it to find the best areas to cut the tiles). I decided that I wanted a full tile where the carpet tile meets the vinyl tile in the laundry area and I thought I would start with a full row on the perpendicular window wall. This meant some cutting on the walls perpendicular to the window wall for the doorways and closet.

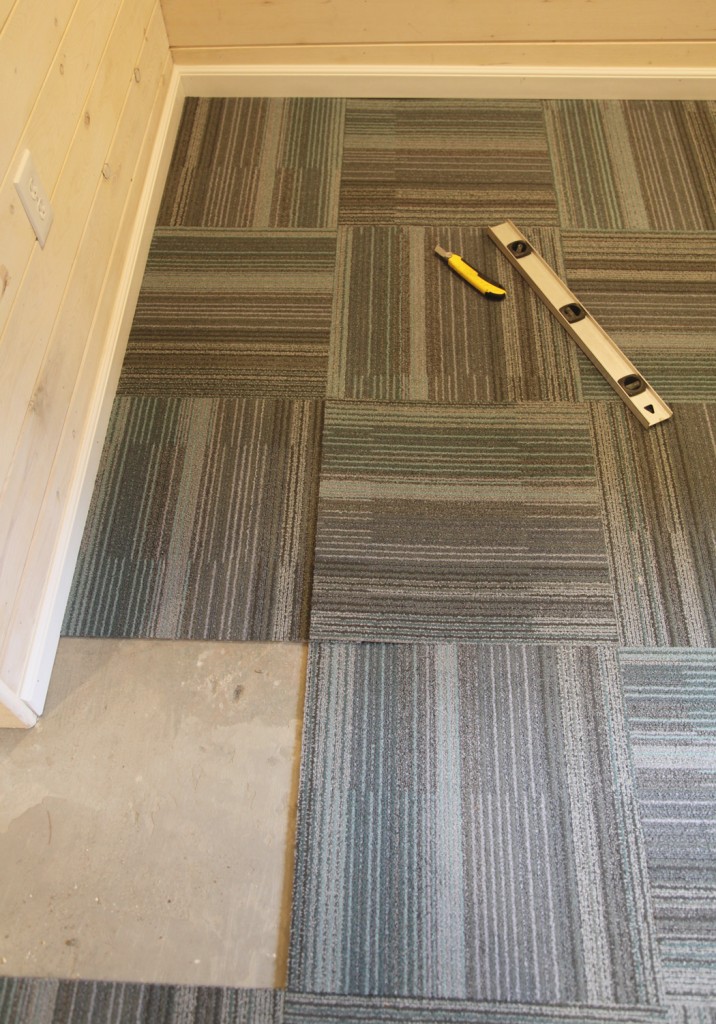
Cutting the Carpet Tile

Cutting the Carpet Tile

I still had left over utility blades from cutting the vinyl tile, so I just used these. I found that the blades get dull even quicker with carpet tile than with the vinyl tile.  To cut them I put the carpet tile I wanted to cut under the adjacent full carpet tile. Then I just cut along that line following the edge of the adjacent carpet tile. This worked really well for the straight cuts. For the cuts around the doorways I lined the carpet tile up with the wall and used my metal level as a straight edge and cut one side and then the other. I downside to the carpet tile is that you can’t mark it like you can with tile. This worked pretty well, just took a little bit of tile (and a bunch of blades).

Carpet Tile in Place (now I need to decide what color to paint the door)

Gluing The Carpet Tile

The carpet place had said that we wouldn’t need to glue the carpet tile down or attach them together. I wasn’t so sure since when I have used FLOR in the past they give you stickers to hold everything together and I have found that you definitely need these.  But I had my samples out for a while and I noticed that these stayed together very well without anything. They are thinner than the FLOR tile but somehow whatever the rubbery substance that is on the bottom they stay put.  In our installation we are going wall to wall so I figured that it would help hold everything together. So now that it is down, they feel very secure, but at the same time I can pick one up easily and put it back in place with a problem, which is GREAT!

As you can see the carpet install went pretty well. Now I need to decide what color to paint the door. I was going to go with blue, but with the carpet tile I think I might need to pick a different color. I also need to install beadboard on the closet door to make it less noticeable.

* To see all of the posts about our basement click here.


5 Comments

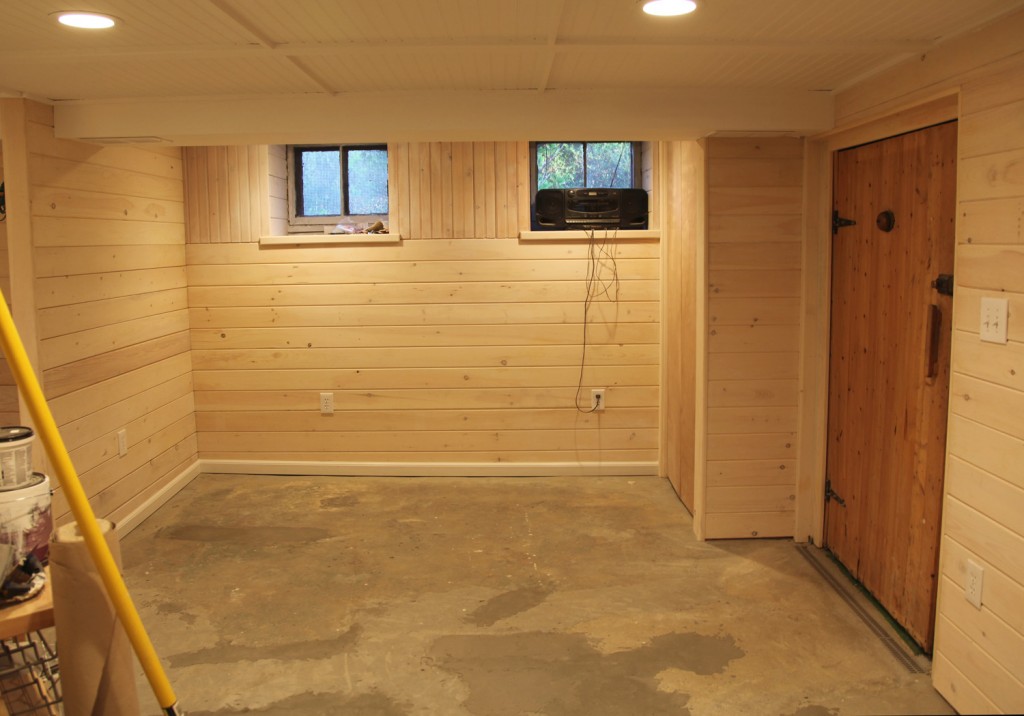
Main Space in the Basement: Waiting for trim paint & carpet

We have reached a major milestone in the basement. The contractors are done, they have taken out all of their stuff and left us to finish up. They will actually be back in a couple of weeks to finish some baseboard trim and a few other small items, but it is strange to have basement back. I suddenly can do laundry whenever I want! Of course this doesn’t mean we are done, we still have lots of painting to do, carpet to install and decorating but we can at least move forward on the cosmetic stuff, which is a big deal. If all goes well we will get at least part of the carpet in this weekend, along with some trim painting. I thought I would give you a quick update of where we are right now.

As you can see part of the basement is looking pretty cleaned out (this is where they were storing a lot of their stuff). Of course all of our basement does not look like this, since we do have our fair share of stuff (which needs to be organized).

Other Side of the Main Space: piled with our stuff

The other side of the main room is currently filled with extra stuff from the construction process, things that need to be installed (i.e. one of the old storm windows), things that will go in the workroom (i.e. the saw and ladder) and random pantry overflow (which will find a new home on shelves and cabinets in this area).
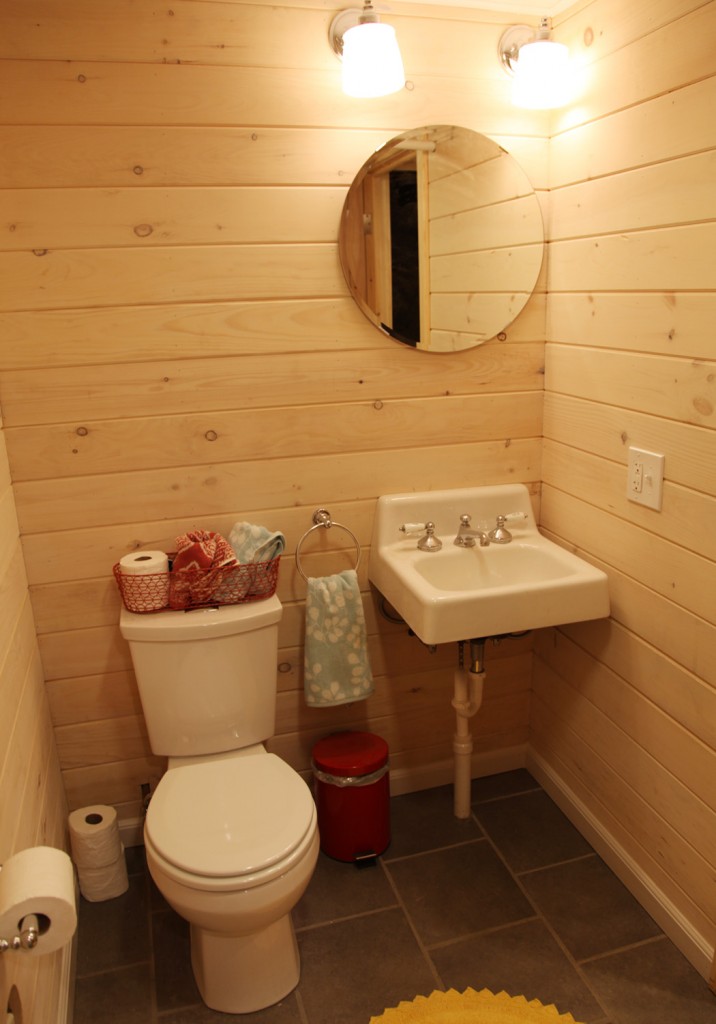
The Bathroom in desperate need of a shelf!

The bathroom is totally functional (minus a shower door). It does need shelving soon though. I also have plans for hanging an old mirror and can’t wait to bring in some colorful accessories. I am also planning on installing a burlap skirt on the sink to hide the plumbing.
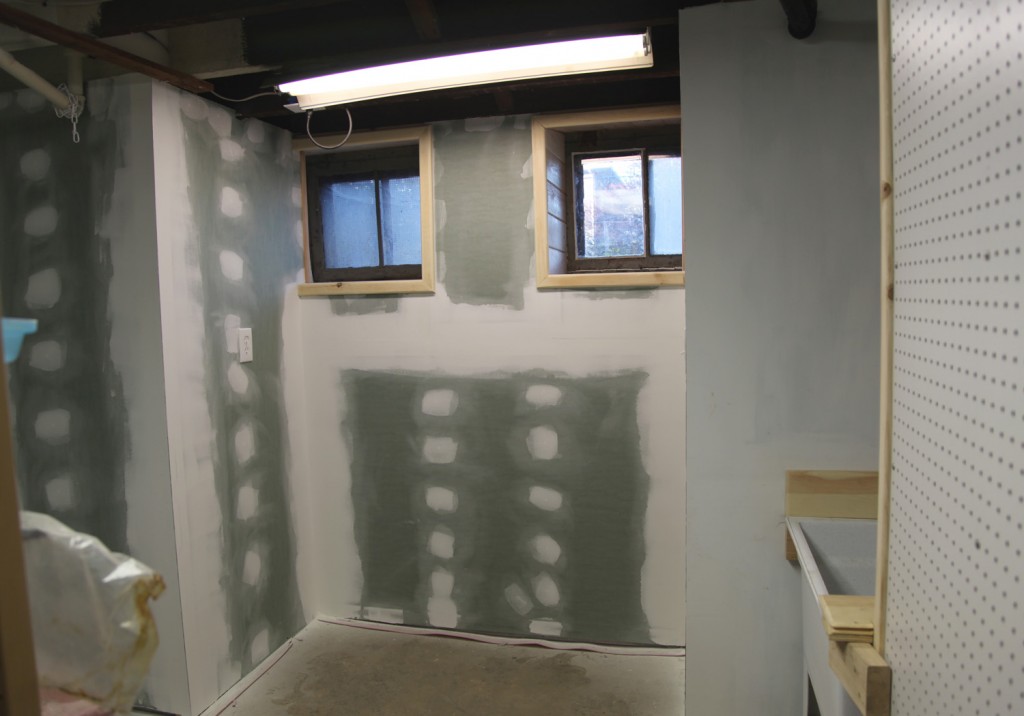
Future Workbench Area

The workroom is now drywalled and I can’t wait to install our new workbench in the bay window. I had the contractors finish out the windows similiar to the main space (beadboard sides and top w/ a veneer plywood sill and wood trim). I haven’t decided on a wall color for this space yet. Definitely something cheerful!
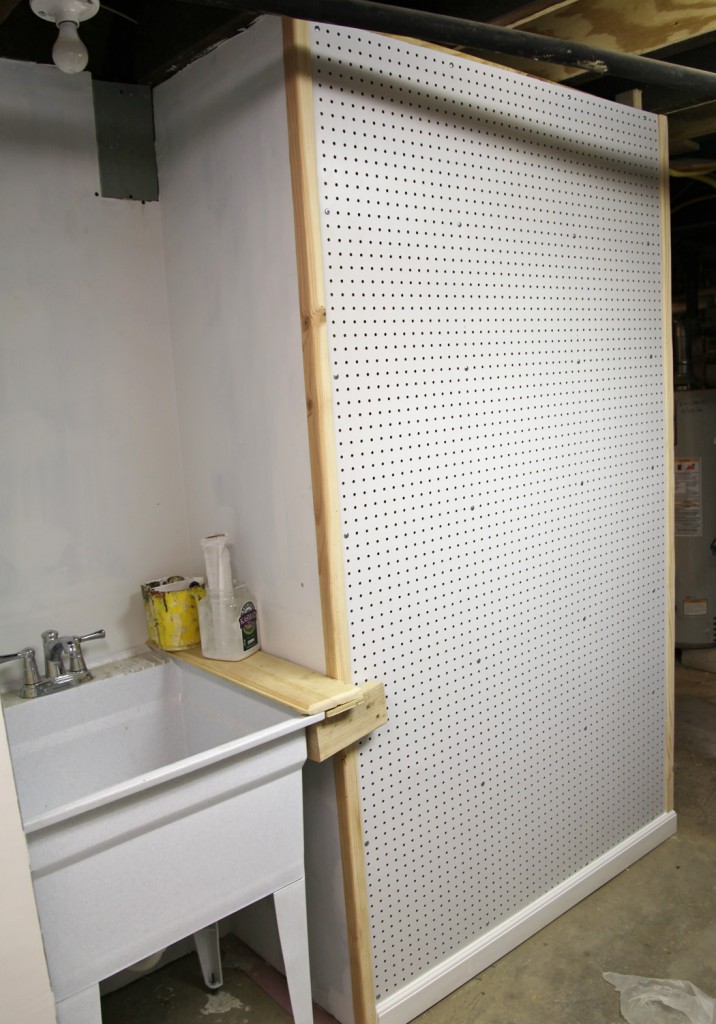
Pegboard Wall

The pegboard wall is in (it actually extends around the corner). It has a hard white finish on it that I wasn’t expecting. I definitely want to paint this a bright color. I may have to sand down the pegboard first, which I am a little bummed about (it currently has screws perfectly placed in a grid and looks so perfect). I look forward to having some of our tool out where they are easy to find. I plan on outlining some of them in permanent marker so that they can go back where they belong after using.
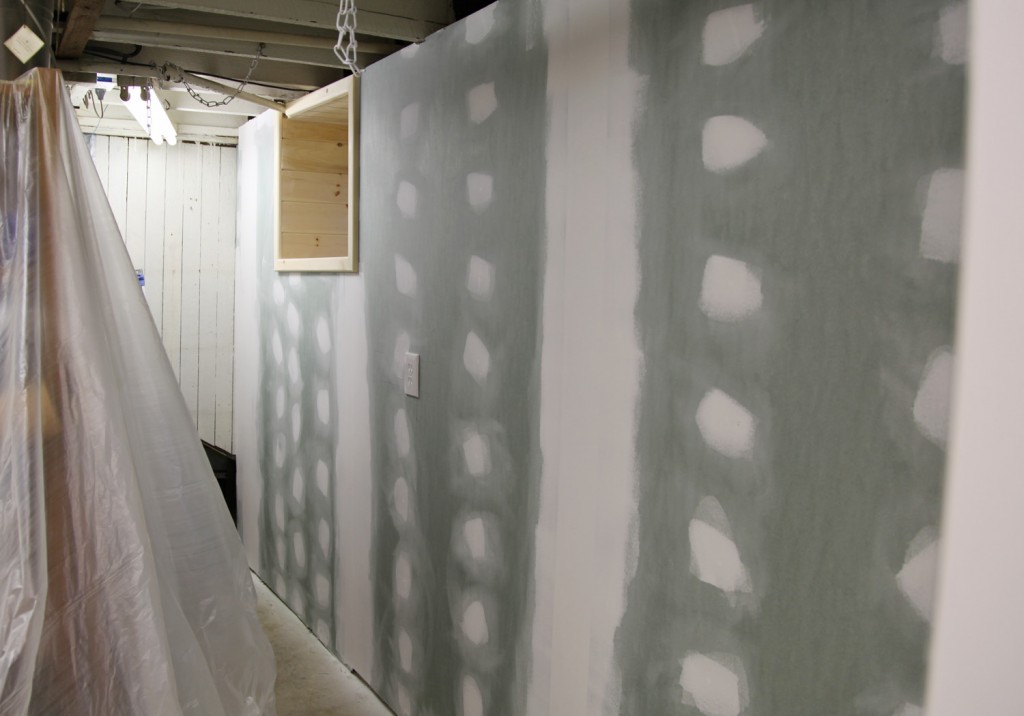
Workroom Shelving Wall

The Workroom shelving wall is also ready for storage (as soon as I paint). I haven’t decided whether we should reuse the Ikea shelving that we have or possibly install heavy duty metal wall shelves. I think I may put the Ikea ones in for now, since they are here and free and decide if I need to upgrade from there.

I hope everyone has a lovely weekend! My kids are super excited about hunting for eggs and it looks like the weather is going to cooperate for us!

* To see all of the posts about our basement click here.

Leave a comment

Shade Garden with the Yellow Blooming Kerria Japonica

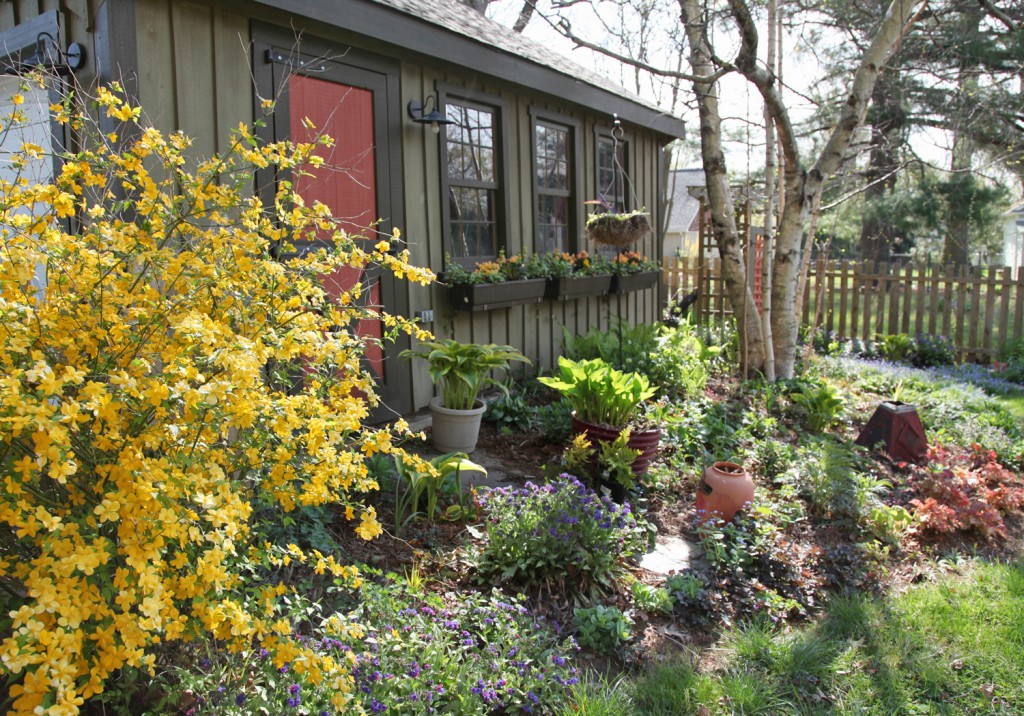
It has been another exciting week in the garden. The weather has been chilly (okay, seasonally appropriate) so I haven’t spent as much time as I would like outside. Fortunately it is warmer today, so I hope to get some more garden chores done. My Kerria bushes are in full bloom and looking lovely! They will require a good trim after the bloom, but I love that they are near the back and side gate, so they can welcome everyone in.

Virginia Bluebells

Bleeding Heart

My Virginia Bluebells are up and blooming. They are stealth plants, they arrive out of nowhere, pop up quickly, bloom for a bit and then disappear until next spring. I do love them though! The trick is remembering where they are since they are hiding for a good part of the year and I am always trying to fill the space. I think I may try moving a few to a more shady area under the cedar tree. I think that they would be a nice contrast to the bleeding hearts, which I love for their long lasting drooping blooms.

Flaming Purissima Tulip

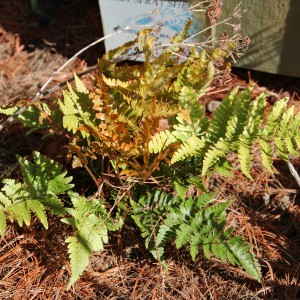
Autumn Fern

The Flaming Purissima that I planted in the front yard are all done blooming but the ones in the back are still in their prime, looking lovely mixed with the daffodils. I also planted 3 Autumn Ferns this week (from Home Depot). I had admired them at the Philly Flower Show earlier this spring and was excited to see them at HD for a reasonable price. Hopefully they will do well in their new home by our shed.

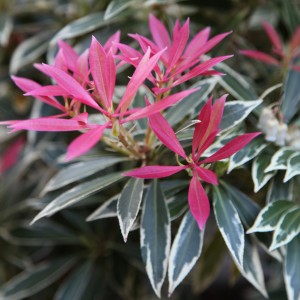
Variegated Pieris

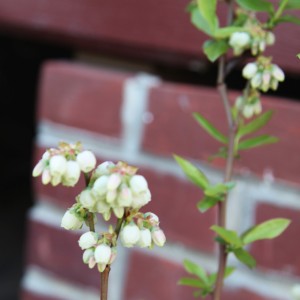
Blueberry Bush

In the side garden (which needs a LOT of love) I planted a variegated Pieris last fall (on sale from HD). I put it in quite late and without too much thought except that I thought it would be nice to add a little more evergreen texture on the slope. So far it has rewarded me with the splendid magenta-red color (I have to go look up the exact variety). I also planted 2 blueberry bushes in the same area (on either side of the new steps). They now have buds (which will become blueberries). I had been reluctant to plant blueberries because I had heard that they were difficult to grow, but so far they have had lovely red leaves in the fall and some nice white buds. We will see who gets the berries first this year, the birds or the kids. This area is suppose to be our new veggie area, with a raised bed. I just need to get in gear and put it in (which requires cutting down the pre-made kit). I also need to decide if I want to battle the pachysandra  that has taken over here. I hate it, but it is somewhat useful on the hillside that is difficult to access.

What is blooming in your yard right now?

Leave a comment

1. Columbine

2. Columbine

I am not above shopping for perennials at Home Depot. I live only a couple of miles from one and sometimes it is hard to argue with the prices. So I was over there yesterday and thought I would show you my picks of what they currently have available. I also recommend joining their Gardening Club for some good coupons (they are currently offering $5 off a $50 purchase). The larger plants are $5.98 (but they often run specials for less) and the smaller ones were $3.98.

1. & 2. Columbines: I LOVE columbines. HD has them in several colors (although I think the purple ones are my favorite). They are native to the US do well in my sunny and part shade planting beds, they have lovely delicate leaves all season and product beautiful flowers in the spring. Mine have also self seeded (in a good way) around my beds. You can also try planting from seed for a larger impact.

3. Woodland Phlox

4. Tickseed

3. Woodland Phlox: I don’t have any of this but I am considering picking some up. They prefer part shade and I have been admiring some in a local garden for the last couple of weeks. These will also self seed in woodland setting. It is nice to see this native at HD. This is another one that I believe does well from seed if you are interested in planting a lot.

4. Tickseed (Coreopsis): I have several varieties planted in a sunny bed by my driveway. Once established they spread slowly forming a small mat area and bloom in late spring/early summer for me. Mine are in a dry condition and don’t seem to mind.

5. Dianthus

6. Dianthus

5. & 6. Dianthus: I was a slow convert to Dianthus. These are sometimes also sold as annuals, but the ones I have photographed have a lovely bluegreen leaf which I quite like. I planted several last year in the same dry sunny bed as my tickseed. Now I have a lovely small mat of the bluegreen leaves, which are a nice contrast to the other foliage. These will bloom in the summer and also are quite durable. HD had 4 or 5 varieties with flowers ranging from light pink to fuchsia to almost red. I am considering a few of #5 for my front sunny because I like the petite bluegreen foliage and I look at the flowers as an added bonus.

7. Lithodora

7. Lithodora (Grace Ward): This plant is relatively new to me. I looked it up and it looks like it has good possibilities as a low ground cover in a sun to part sun condition. According to what I read this will be an evergreen, which is great. It sounds like it can be a little aggressive, but I have a couple of sloped spots that this guy might work in. The bright blue flowers are quite small but very bright blue (which I always like).

Does anyone else have any recommendations?

Leave a comment