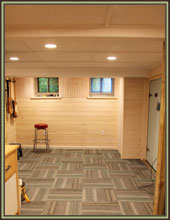
It was a productive day yesterday down in our basement. I did a little demolition on a couple of random old ceiling pieces that were in the way (a great way to start off the morning I might add), but the more exciting part is that they started working on ceiling in the main room. They also completed the last major wall of beadboard (there are still a few smaller areas to do).
My contractor and I went back and forth on the design for the ceiling since I wanted it to be removable to have access to all of the plumbing and electric up there. We ended up going with some extra “beams” spaced at about 3′ apart. These will have cleats to pick up the thin beadboard sheets that will make up the ceiling plane.
The ceiling cleats are made up of 1×1 for the wall edge and for the middle it is a 2×4 attached vertically (cut for all of the plumbing pipes) and 1×4 piece of poplar hung horizontally. I like that it is simple and effective. There will also be some pieces running perpendicular to pick up the sides of the beadboard panels about every 4′. This will also be a 1×1. The trim, cleats and boards will all be painted white when we are finished. At the light area you will need to pull down the housing to remove the panel, but they are just clipped in place, so that should be fairly easy.
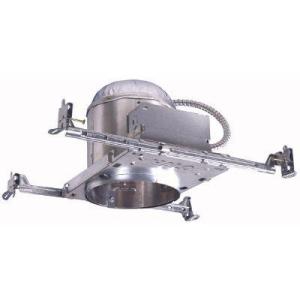
The lights are one of the most exciting parts. This is the first set of photos down there where I didn’t have to do lots of color adjustment to make up for the horrible florescent strip lights (Yeah!). The new recessed lights are made of a standard 6″ ceiling can with a special LED light bulb/housing attached. The LED downlight comes with its own cover and is reasonably priced at $29.99. The standard recessed can is about $8, so for a total of $38 you have a super efficient, good looking light. Plus the light used 9.5 watts but is the equivalent of a 65W bulb, it will last for 20 years and not get hot (which is an added bonus for a space like this).
When I started researching options for the recessed lights, I wasn’t sure how the system works, but basically the LED light and cover attach to the old school screw in socket meant for an incandescent bulb inside. It is also interesting to watch the price come down on these guys. The LED light and cover where priced at $49 last year. So by next year the price will probably go down again. For a price comparision if we had gone with incandescent we would have spent about $8-10 for the cover and bulb, so we spent an extra $20 per light. We are installing about 12 of these, so I am spending an extra $240, but I won’t have to replace them until the kids are out of college (kind of strange to think about!). I will give a more full report once they are all up and running to see how bright they feel.
* To see all of the posts about our basement click here.
The weather is beautiful here today, I think it is time to get weeding!






I love your beadboard ceiling. We are in the middle of finishing our basement and need a suspended ceiling for the reasons most do, access to pipes, etc. Could you let me know how expensive yours turned out to be? I don’t need the dollar amount, just something like “3 times more than the basic contractor grade drop ceiling”, etc. Thanks and love your project and blog
Hi Eric and welcome! I’m not a 100% sure since we were buying things for different parts of the basement and having them installed simultaneously, but I would say that the material cost is not that much more than a medium grade suspended ceiling (maybe and extra 30% or so). I think the real cost is in the labor. Laying out the long sides was pretty straight forward, but the cross pieces need to be notched to sit on the long pieces and then routed and/or cut on the table saw to allow for a slot for the beadboard panel. And then the beadboard pieces need to be cut for each section. Nothing was straight in our basement, so lots of tweaking was required. So if you are handy and patient, I think it is totally worth it. I still need to post up some more details. I will try and do that this week.