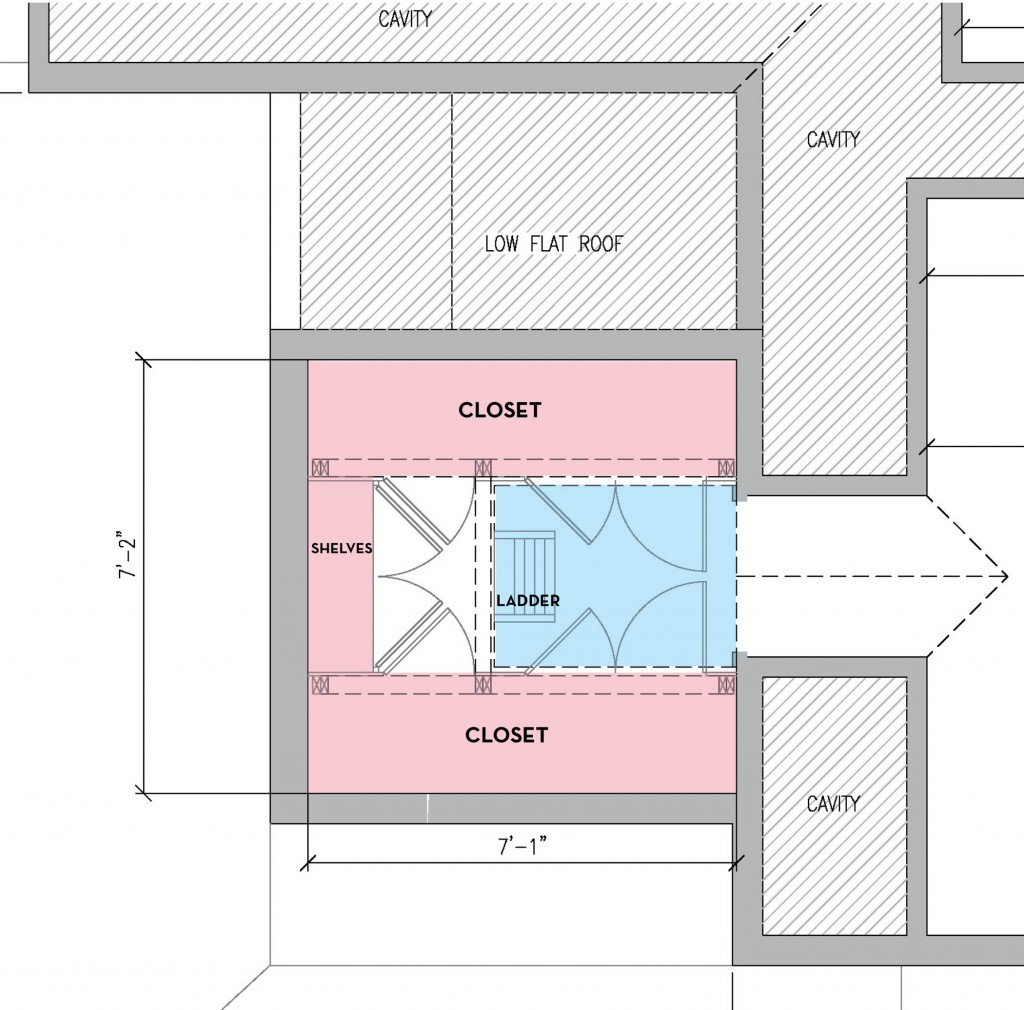
Hi All! I hope everyone is staying warm and safe! We are going a little stir crazy here. 2 snow days and 1 delayed opening this week alone. Fortunately, we have only lost a few branches and have kept power. Fingers crossed that the storm headed this way on Sunday will be small! 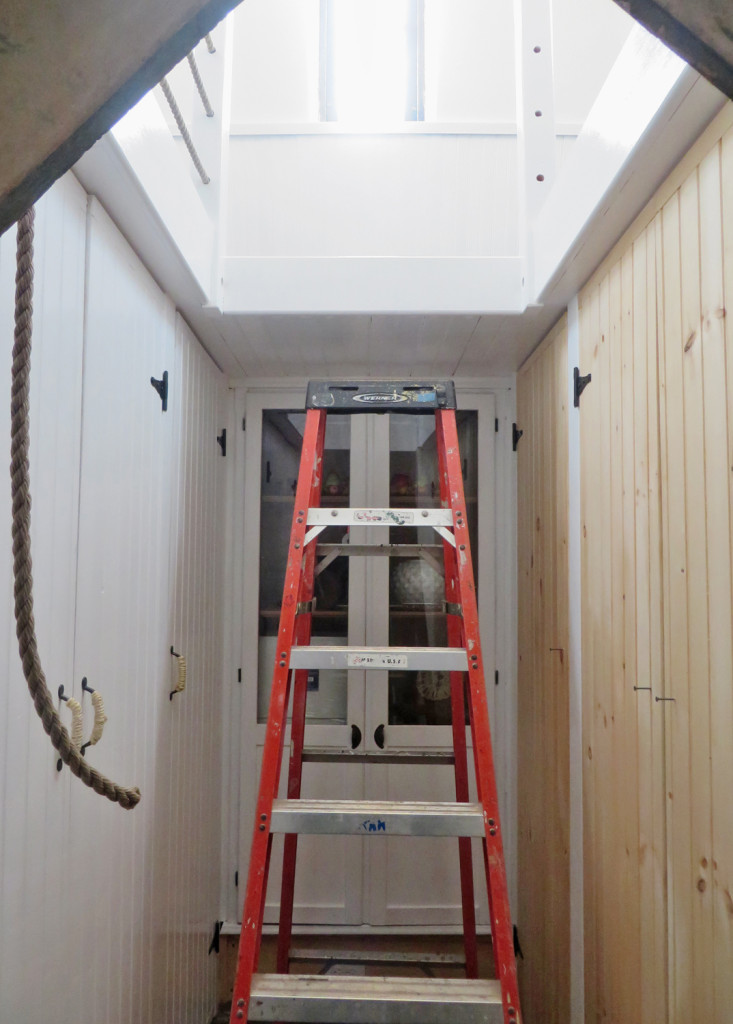 In all of this mess, we did manage to do a lot of painting over the weekend (while Grandma and Grandpa came to visit) and our contractor was here on Tuesday putting in the rest of the doors. Mr. S. was very excited to start filling the shelves (behind the doors on the left). They are pretty much full now with plastic bins of baby clothes, boxes of cds, suitcases and all sorts of random stuff that came in from the garage. After months of putting stuff out in the garage it is a relief to bring things back into the house! And the good news is that once Mr. S’s office is complete, a good portion of this stuff will leave this closet. The doors on the right hide our clothing rod. This will store our out of season coats and clothes. I’ve also started moving smaller random house stuff like vases and lamp shades into the cabinet at the back. I hope to move all of my random decorations that I am not using into that cabinet.
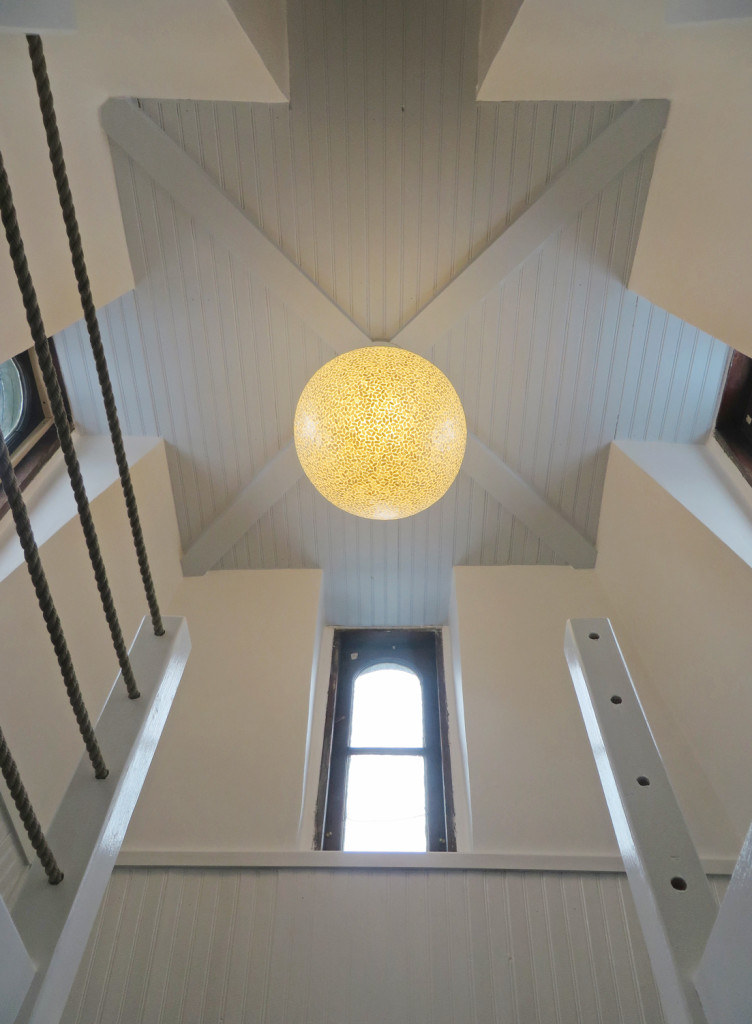
 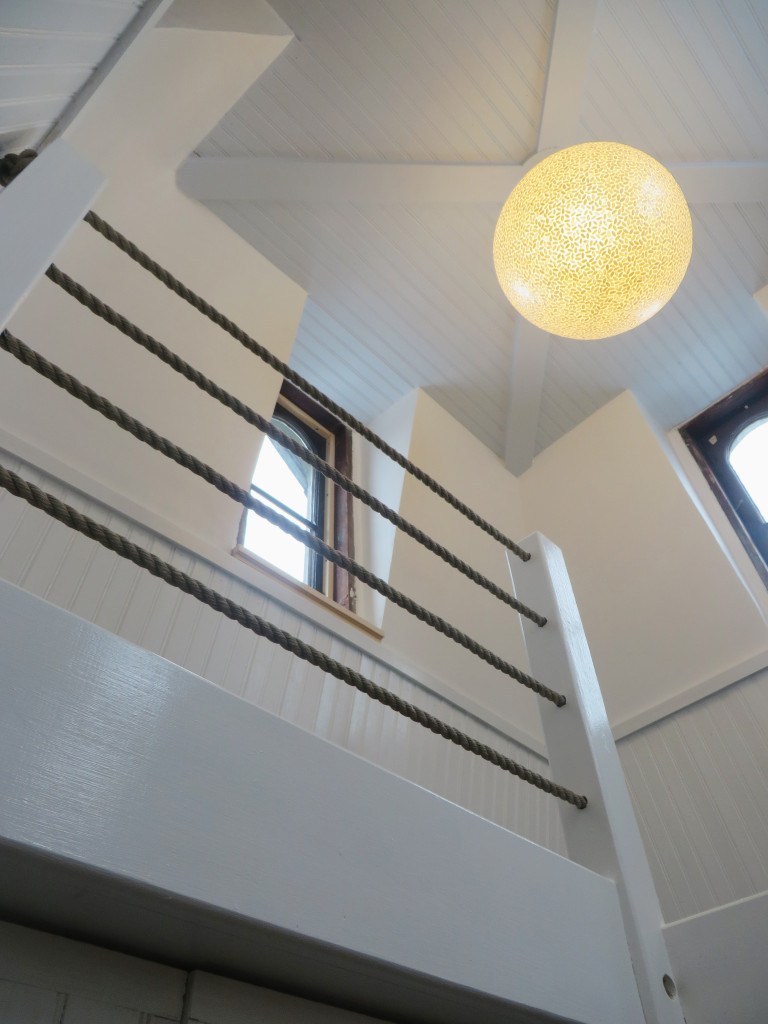 The fort portion of the tower is almost complete. The ceiling, walls, wainscot and trim is all painted. 1 side of the rope guardrail is in and 1 of the 4 windows is reglazed and installed. We still need a ladder and to cut the carpet tile to fit the floor and finish the window trim and stain it all too match. Meanwhile the light fixture is in and I am in love! It is made of rice shaped seashell pieces and resin. It has a really nice warm glow (with a warm LED Cree light bulb installed).
  We are still debating whether to put beanbags or just pillow up in the space. We will have to try it out this weekend and see what we think. Mr. S. now jokes that this will be the most complete room in the house! Considering it is only 7′-2″x7′-2″ it should be. Stay warm and safe! I’m going to go put a sweater on and try to keep warm!
Archives For -Tower
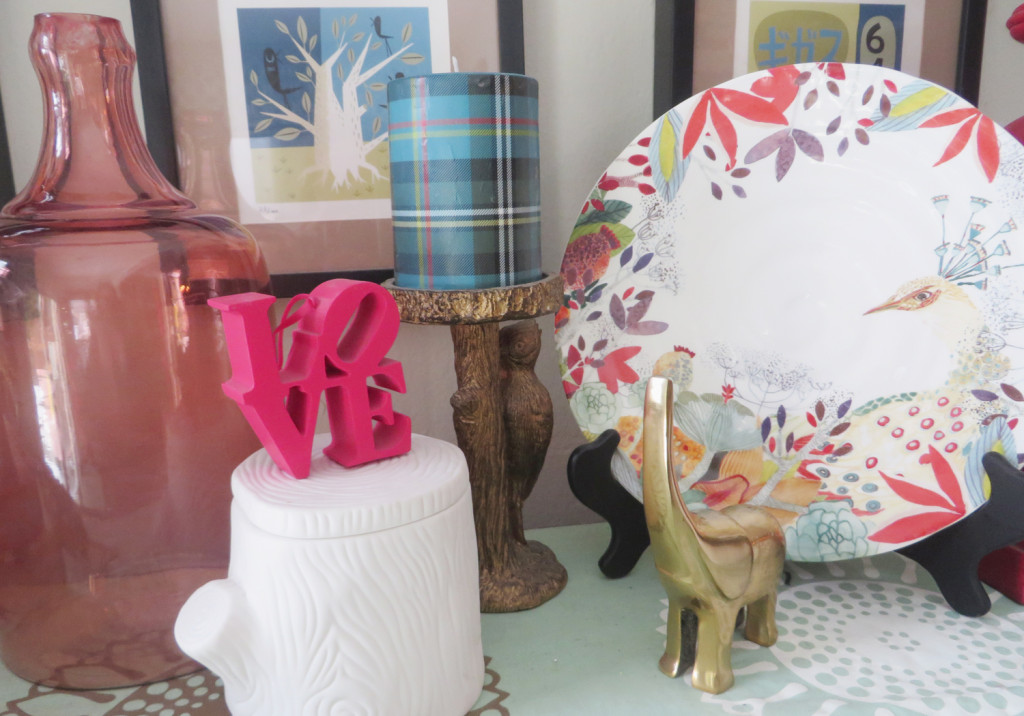 Things have slowed down up on the third floor (I guess that is what happens when it there isn’t a contractor here to keep things going and you have to go to work). So I will distract you with pretty pink things instead! I have been trying to keep the top of the piano looking seasonal since it is the first thing I see when I come in. I bought a couple of new plates from Anthropologie this week. I was looking for knobs for the tower (always nice to come up with an excuse for going) and I was nearby. Of course I visited the clearance section and I found that a couple of the plates that I had admired in the fall were on clearance. I also found some knobs on clearance, so I justified buying the pretty plates. The colors are really great with our Dining Room so I am quite pleased. I am considering hanging a mix of plates in the kitchen and I think a couple of peacocks would fit right in!
 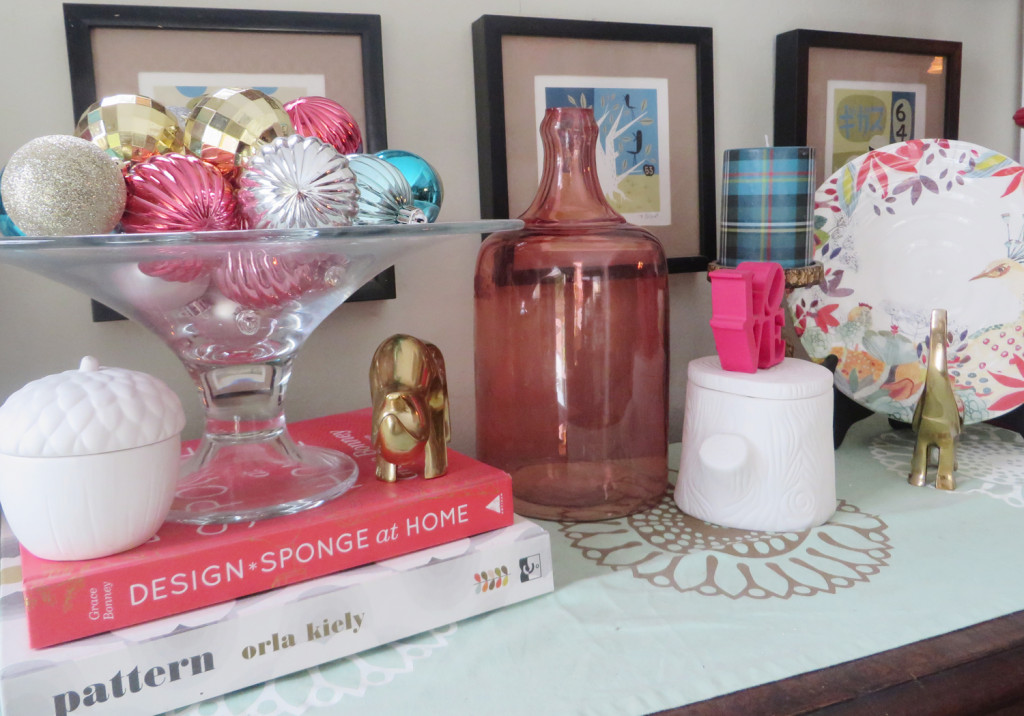 I reused Christmas ornaments like I did last year in my bowl. Then I added the gold animals I bought at Target a while back and a pink jug that I bought on super clearance last year.
 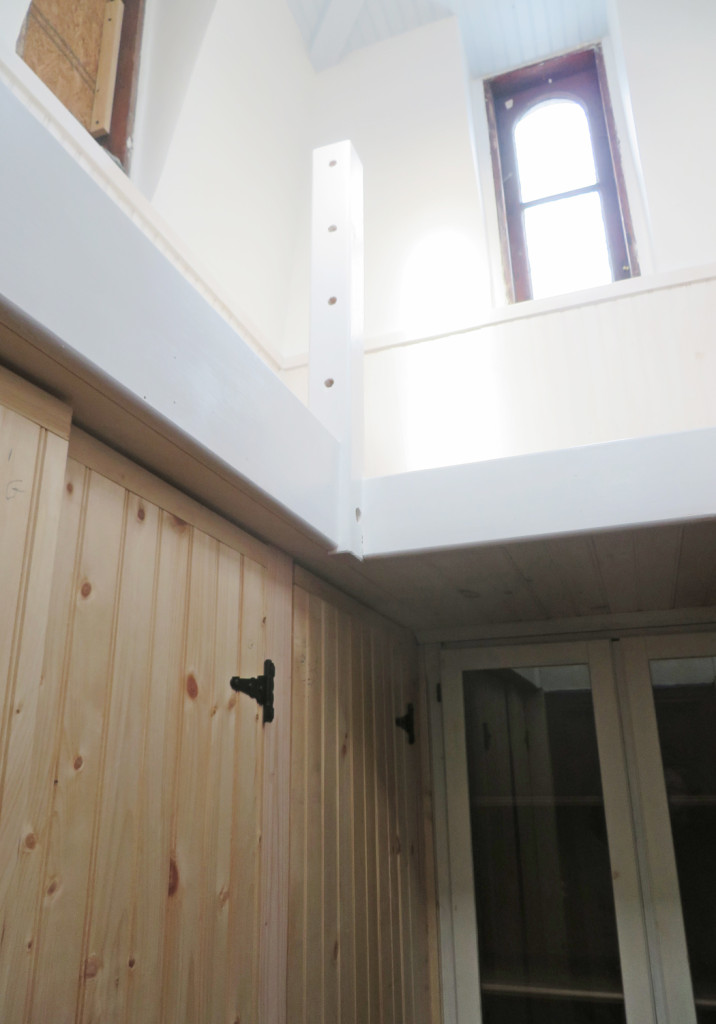 Of course I can’t leave without giving you a little sneak peak of the tower. We have been painting a little each night, but it is kind of slow for such a small space since it is hard to fit more than one person up in the loft without touching any wet paint. In fact I have paint in my hair right now! The good news is that we just have the lower wainscot and a last coat on the posts to do up there. Our contractor was here yesterday and installed 3 of the 6 beadboard doors! Our plan is to paint those up this weekend! That also means that I can bring in some of the many bins filling up the garage!
 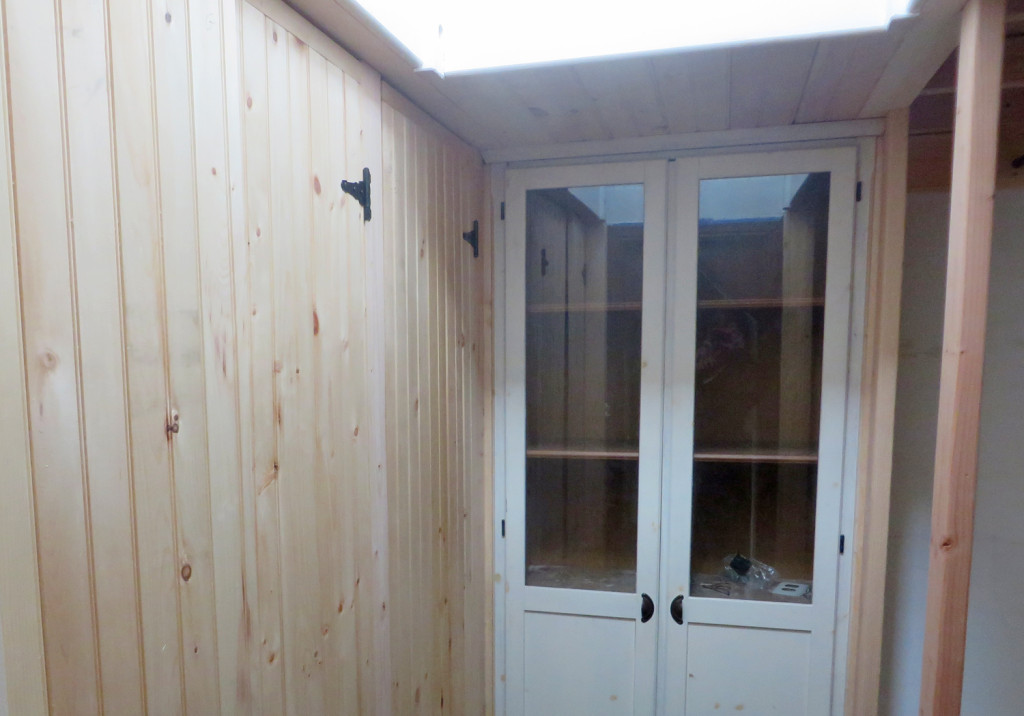 Did I mention how hard this space is to photograph? In person it is pretty cool though. It looks like a ship’s cabin. If all goes well this will actually get wrapped up in the next 2 weeks (fingers crossed).
 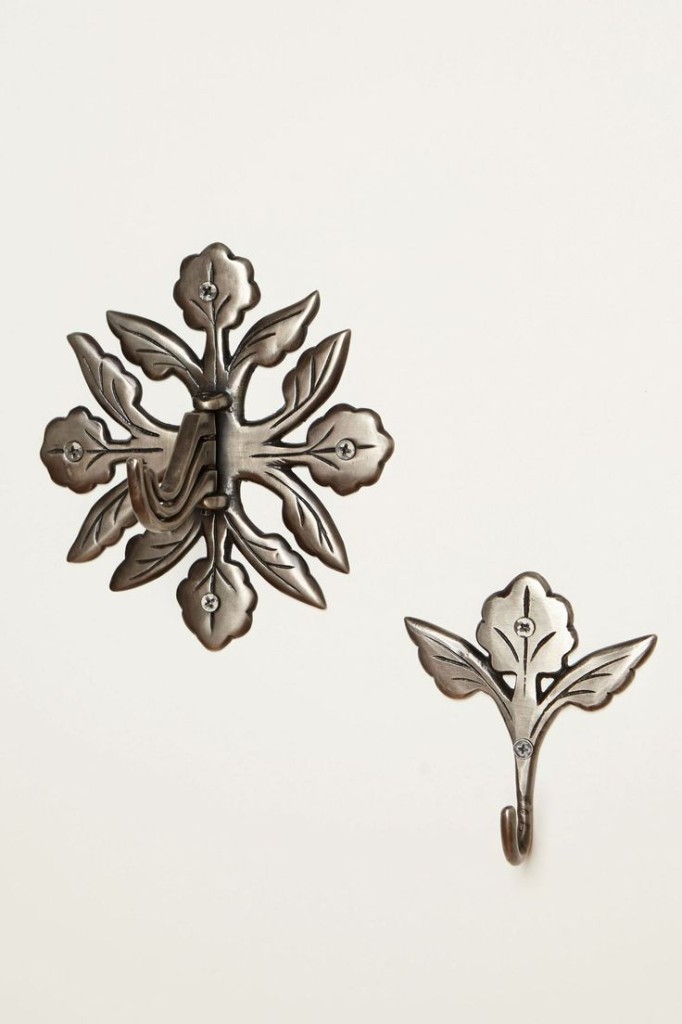 I will leave you with the cutest flower hooks at Anthropologie. I bought the small one not realizing that they were on sale. Now I wish I had bought more at $2.95 for the small one and $7.95 for the large. I hope everyone has a great weekend!
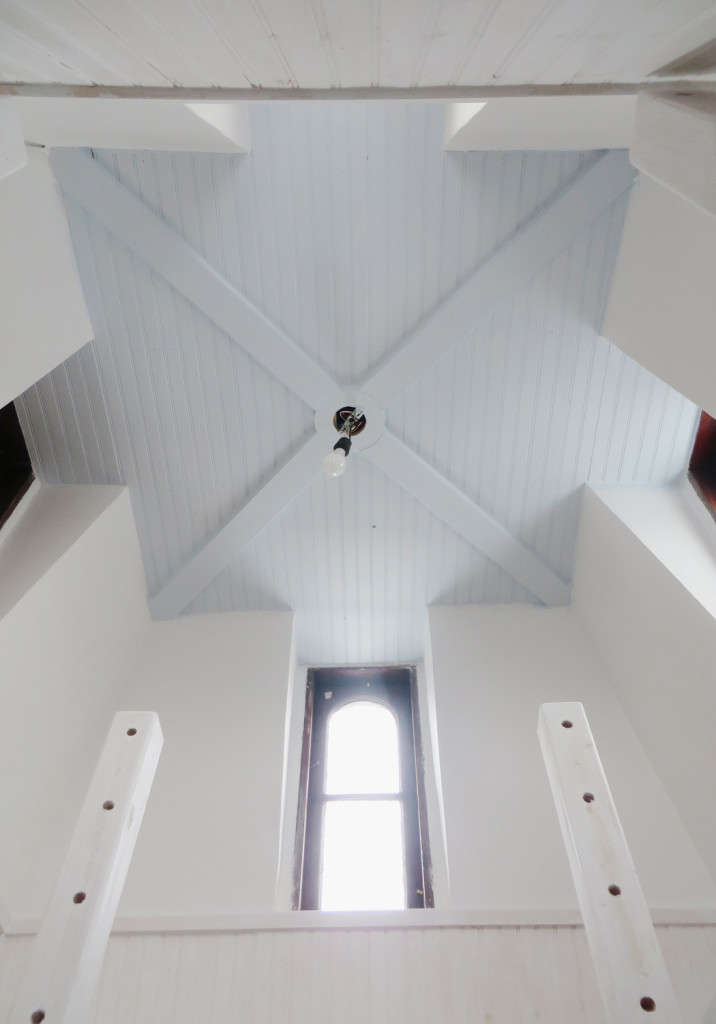 Work is still moving along over here! Our contractors finished the ceiling in the tower and the fort is almost ready. We managed to prime everything and paint the ceiling over the weekend and we have nightly homework this week to finish painting the walls and trim. He is schedule to come back over later in the week to install the light fixture and the rope guardrail (in case you were wondering what the holes in the posts were for). We are going to leave the windows stained (at least for now). They need a A LOT of work, so once they are fixed up they may not be in a condition suitable for leaving unpainted, but we thought it is worth a shot. They have never had stops, a sill or casing, so we will be installing those in a little bit (in a matching dark stain). The interior storms will also have a dark brown frame. I am loving the ceiling. We used the thin beadboard that comes in packs from Home Depot. We were covering up a BIG hole, so we installed blocking for the light fixture and for something for the middle of the beadboard to attach to. Then we installed 1×4 diagonally with a circular piece in the middle. The circular piece was a happy accident, since we didn’t take into account the size of the cover plate for the light fixture we had to add that at the last minute. I am really liking the nautical feel.
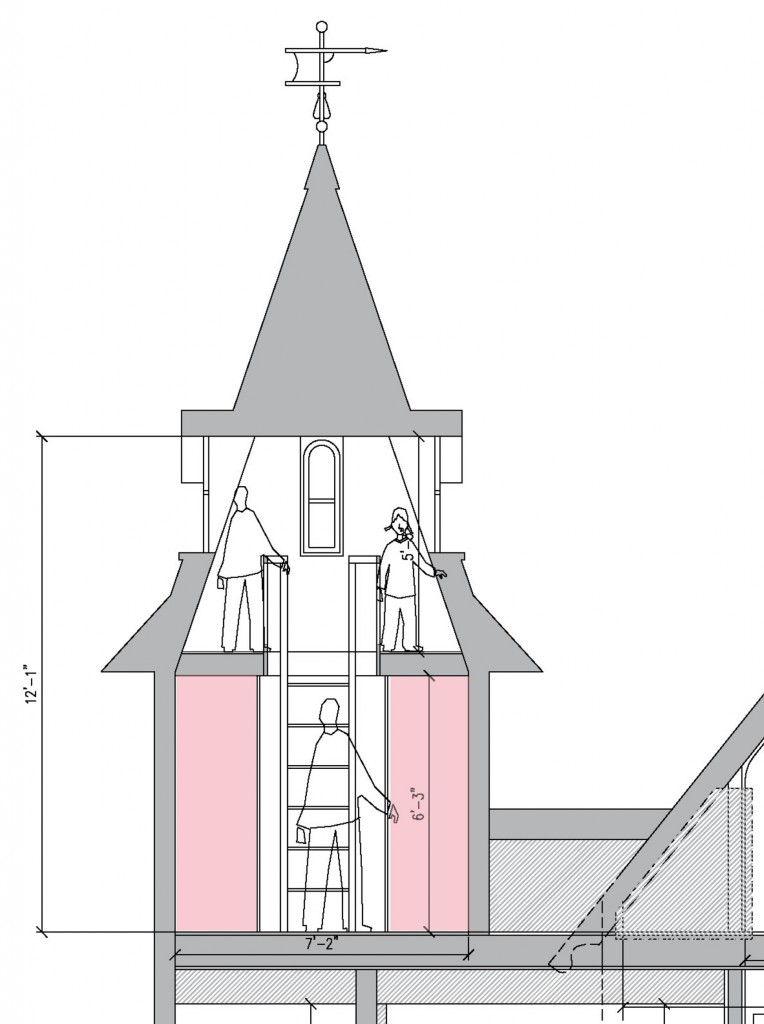
 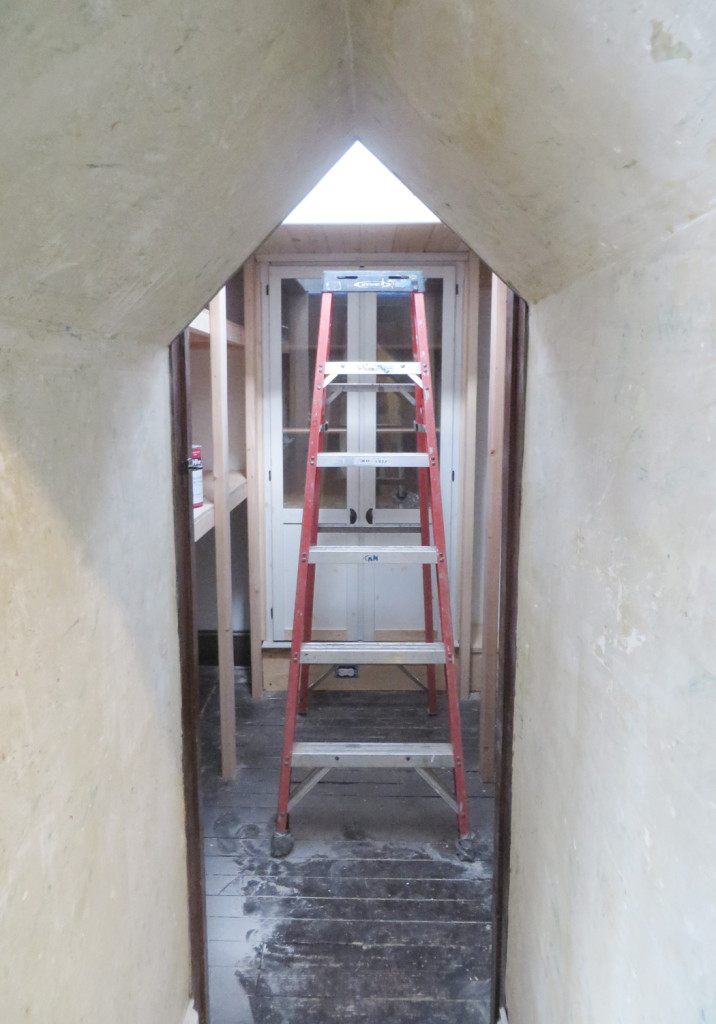 It is such a hard room to take a photo in (13′ tall by 7′-2″ by 7′-3″). This is view from the adjoining bedroom. The cabinet at the back is our old Ikea shelving unit from our bedroom. Our contractor cut it down by 6″ so it would fit. One of my favorite things is when you walk through this narrow passage way there is such a bright light coming in but you can’t see where it is from at first.
 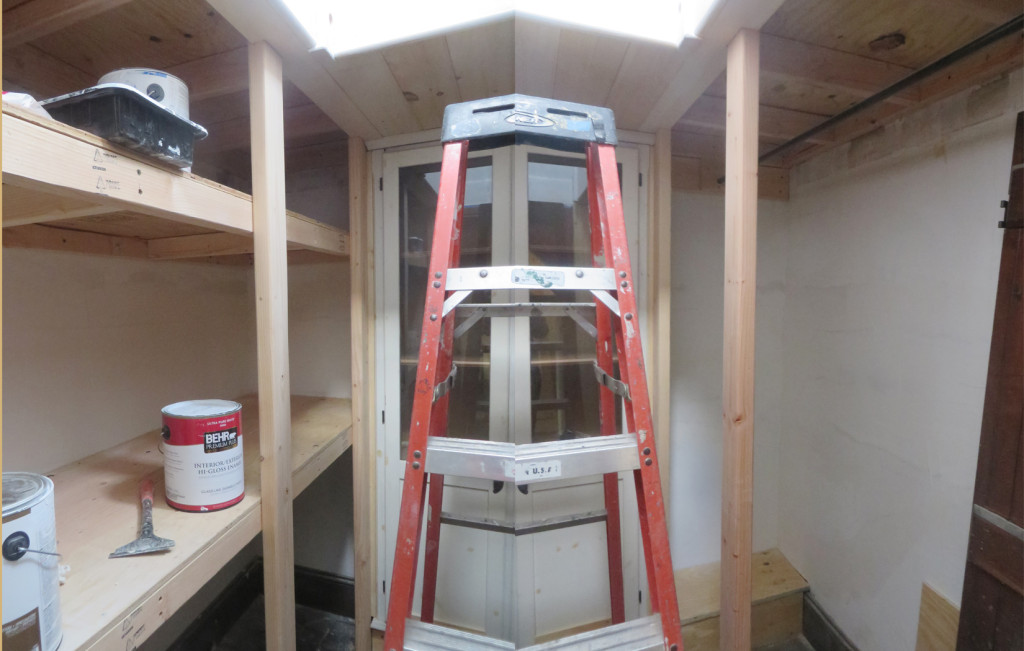 The doors for the closets on either side will be beadboard (sense a theme?). They will hide the shelves on the one side and the clothing rod on the other side. We are also working on finalizing the design for the ladder. I think it is going to be pretty awesome. So the one random old thing in this space is the clothing rod, which is actually an original gas pipe. It was in this space when we moved in and I am pretty sure it has been a clothing rod since the house was built (I wonder what year clothing rods were invented). It has a really thin diameter, but it is super sturdy. I was glad that we could reuse it. I also have a piece of wood with old hooks that will be going back behind the rod as well.
  I am pretty sure that my contractor thinks I have lost my mind, making the third floor closet one of the prettiest rooms in the house.I think it is going to be pretty cool when it is finished, and if the kids don’t like it I think Mr. S. is going to move in.
We are Snow Day #2 here (14″ of snow), and everyone is going a little crazy. I’m looking forward to some school tomorrow. I have a lot to jam into the end of the week! Without further ado here are some progress photos of the third floor. 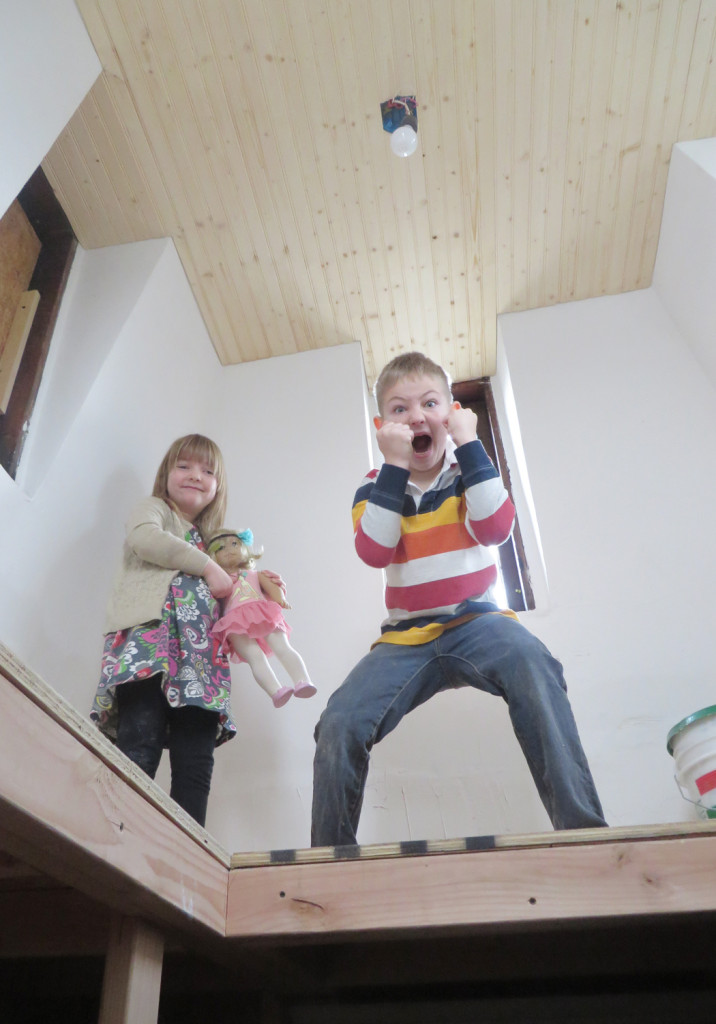 Do you think someone is excited for his tower fort? It is still a work in progress, but the kids have had a chance to check it out now. Plus the ceiling is beadboarded and most of the wall repair is complete. There is still a long list of stuff to complete, but I’m not sure how long these two will wait. Of course Mr. S. and I have also checked it out and think it would make a pretty nice hangout spot for us too.
 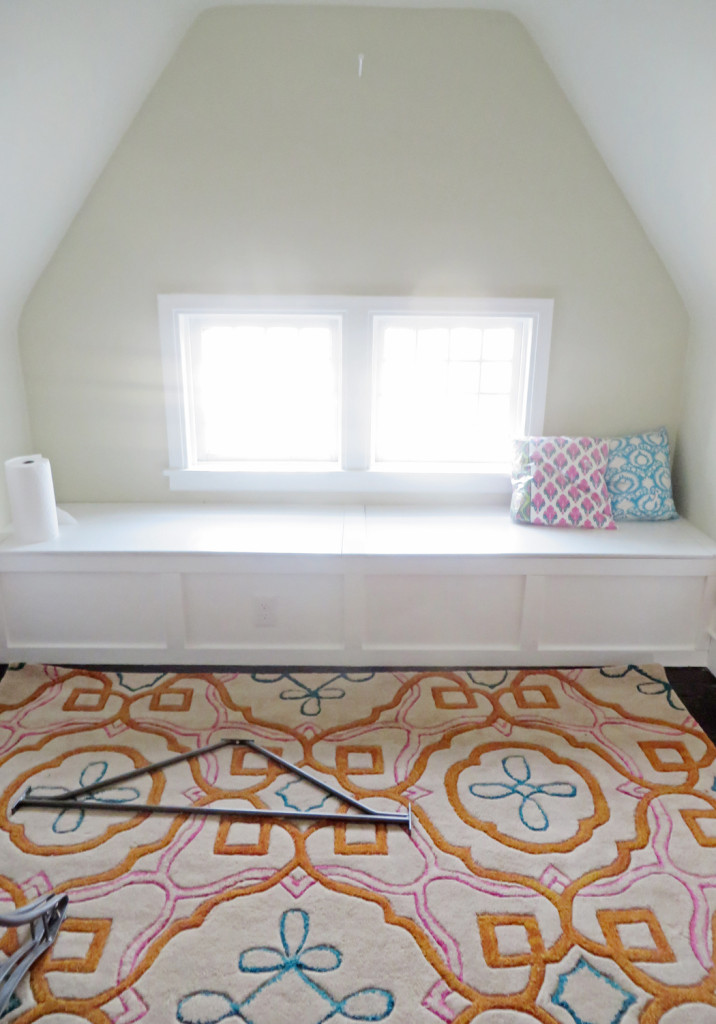 Of course I shouldn’t be claiming anyone’s space since the Craft Room/Studio is officially open for business. As always there is still quite a bit to be done, wallpaper to hang, shelves to build and LOTS of organizing. But, I have spent a lot of time up there in the last few days, and even in the cold weather it is feeling quite toasty. We managed to finish the painting on Saturday, which meant that we could bring in the furniture on Sunday.
 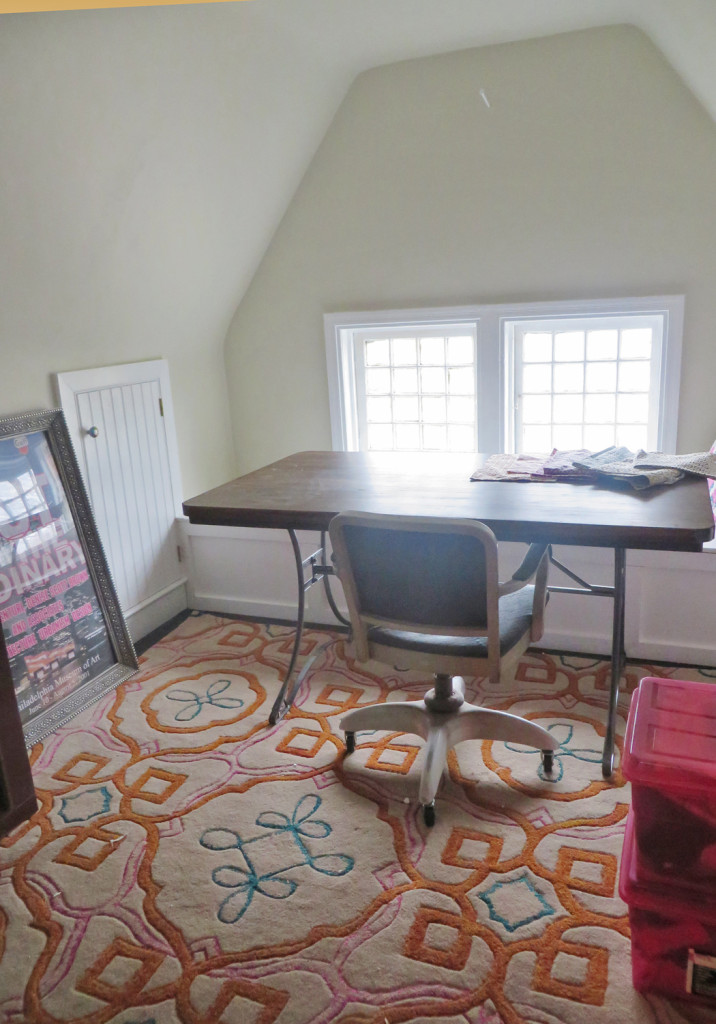 It is difficult to get a good photo of any of the spaces up on the third floor. But the space feel cozy but not too small. The new trestle table is great. It is the Jackson Table from World Market. It is just the right size and looks like it should hold up well. I may put some extra clear coat on the top since the finish looks like it might not be the most durable.
 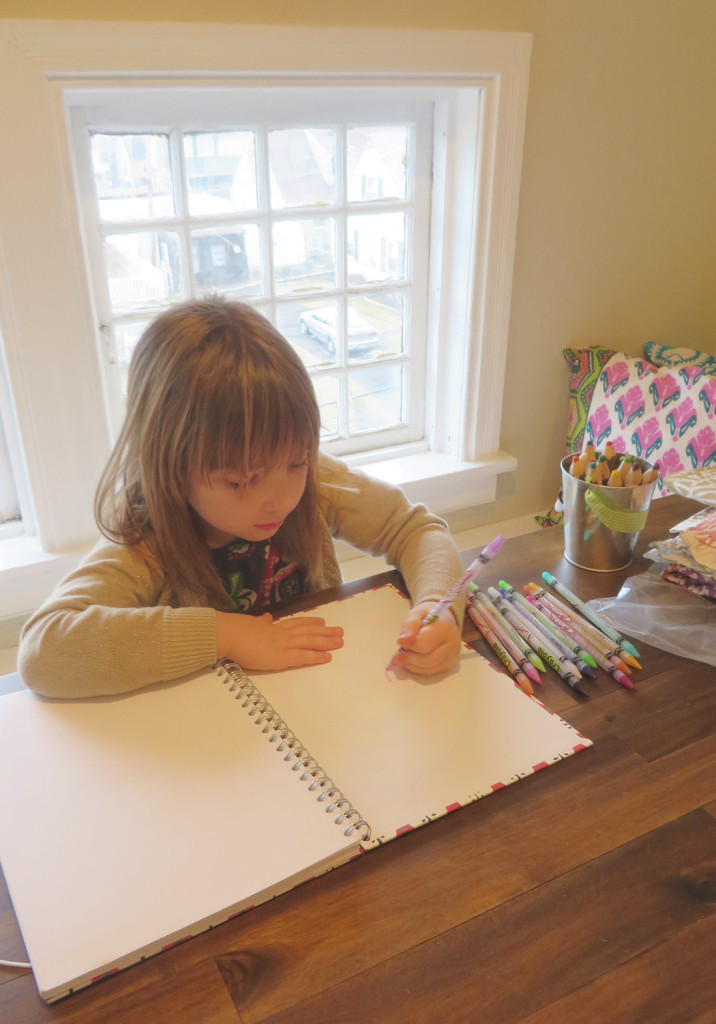 As soon as the furniture was in the kids asked where their art supplies were so they could get started. I got out new notebooks for both kids (Thanks Ikea!).
 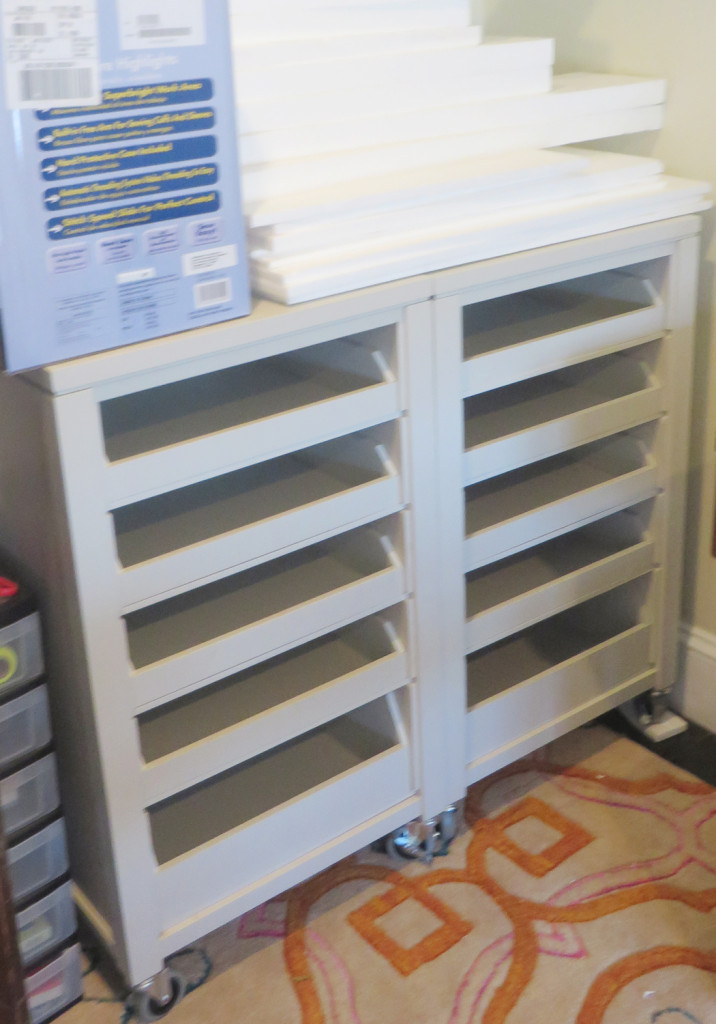 My own art and craft supplies will be stored in these 2 beauties! I bought these Martha Stewart Craft Carts on clearance a couple of months ago in Sharky Gray, but they are still available for $129 each with free shipping in several other colors. They came in 2 HEAVY boxes each and I’m not sure whether they would actually make it down the stairs in 1 piece, now that they are assembled (I guess I can never move). I’ve had my supplies scattered around in multiple locations for years, so this is a pretty exciting development for me! I even started going through some of my sewing supplies which includes several boxes from my grandmother’s stash. Sewing will probably be the first major projects in here, as I have curtains to make for the Master Bedroom and cushions for in here.
 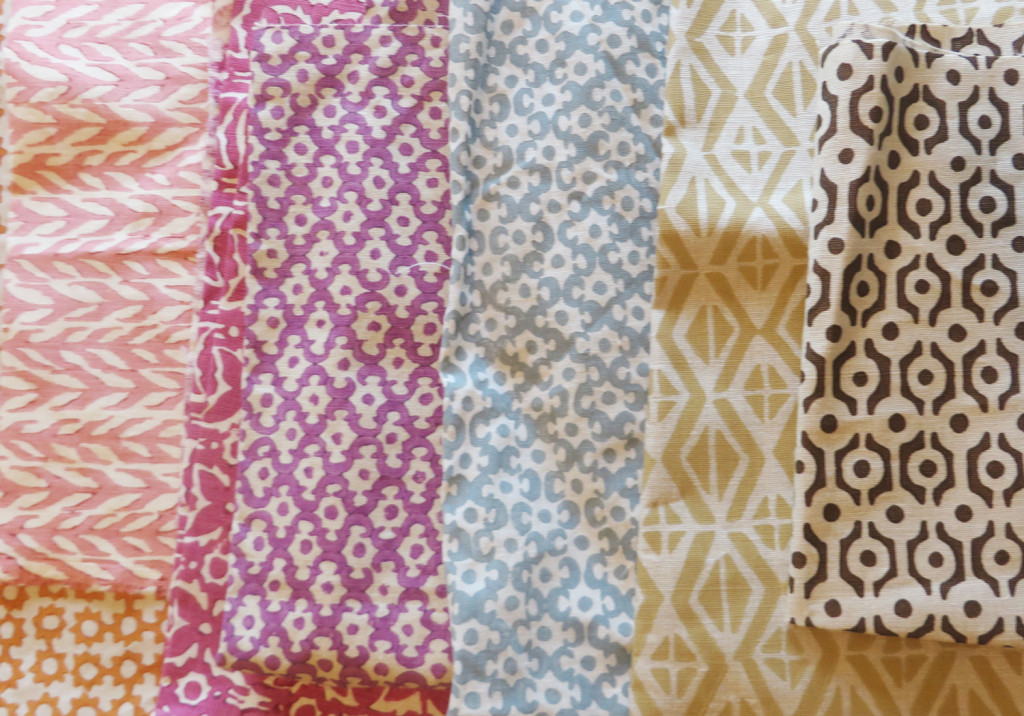 I bought some fabric at the Galbraith and Paul annual showroom sale in December. They make such beautiful block patterns! Normally their prices are quite steep, but they sell smaller remnants by the pound. Needless to say it was crazy fighting it out with a bunch of other designers, but I came home with these beauties that I am planning on using for pillows for the space.
 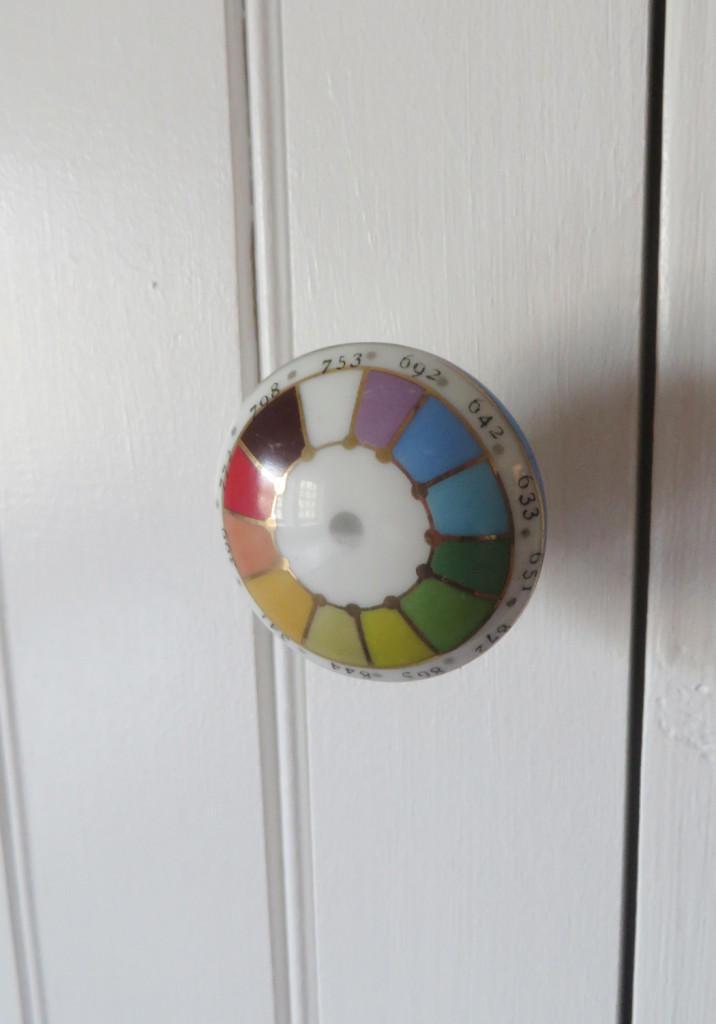 Finally, I thought I would show you the knobs for the storage spaces in the eaves. I bought these on clearance at Anthropologie a couple of years ago. They only had 3 which I quickly snapped up for $3.99, not knowing what I would use them for. I think it is my happiest accident in the space! I have more to show, but of course the space has already been filled up with boxes from around the house, just waiting to be sorted. Next up I thought I would share a couple of fun finds from my grandma’s sewing stash. I hope everyone is staying warm! It is quite cold here with no end in sight.
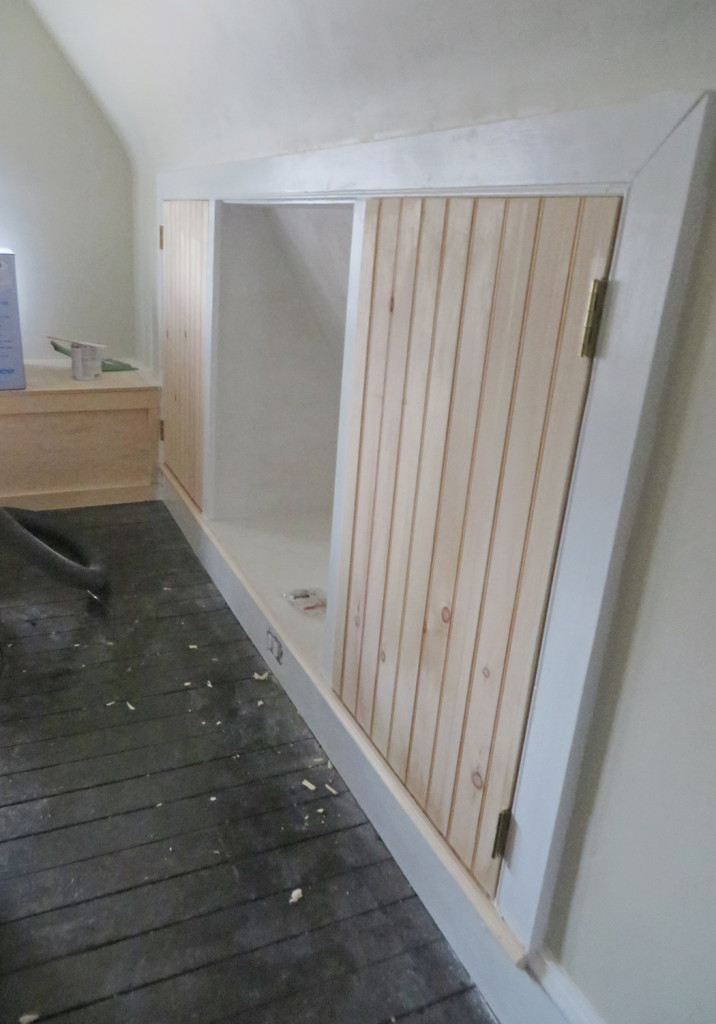 Another quick update here! Our Craft Room is getting closer to being finished. The cabinet beadboard doors are in, and all that is left in construction world are 2 shelves and lots of paint. The doors are designed very similar to the ones I did for the basement. They also match the original doors to this room (which I why I chose to use them). There will be some additional ones as we work our way through the third floor, since we have several more eave spaces that I want access to.
 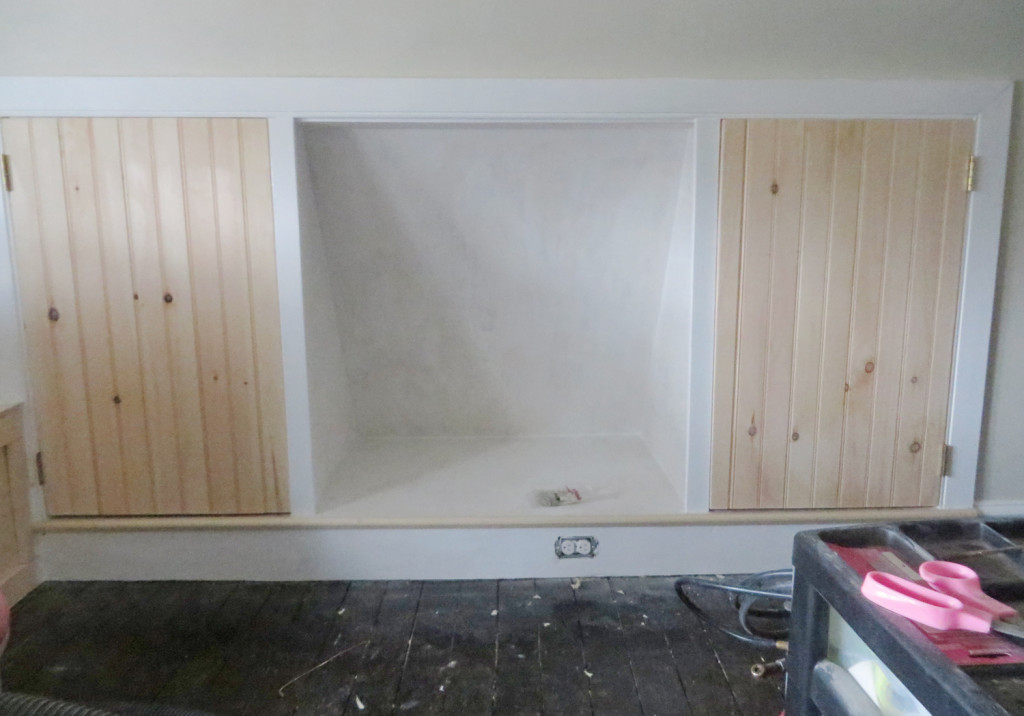 In an ideal world I will have the room painted and start putting furniture in by the end of the weekend. Now it is time to see how optimistic I am being (fingers crossed).
 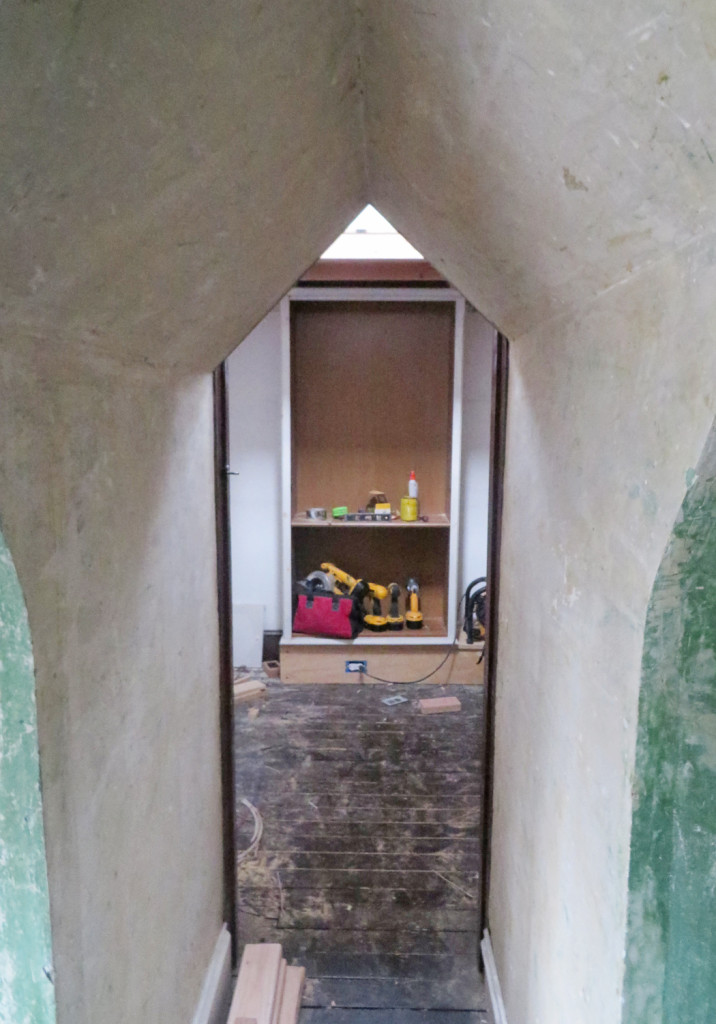 In the meantime our contractor has been busy in the tower. The loft is in (although we still need to add some extra posts) and he has installed one of our old Ikea shelving units from our bedroom. He had to cut 6″ off the bottom to make it fit (over a boxed out AC duct). I’m excited to use something that I had sitting in the garage. The plan is to line either side with some light framing and closet doors.
 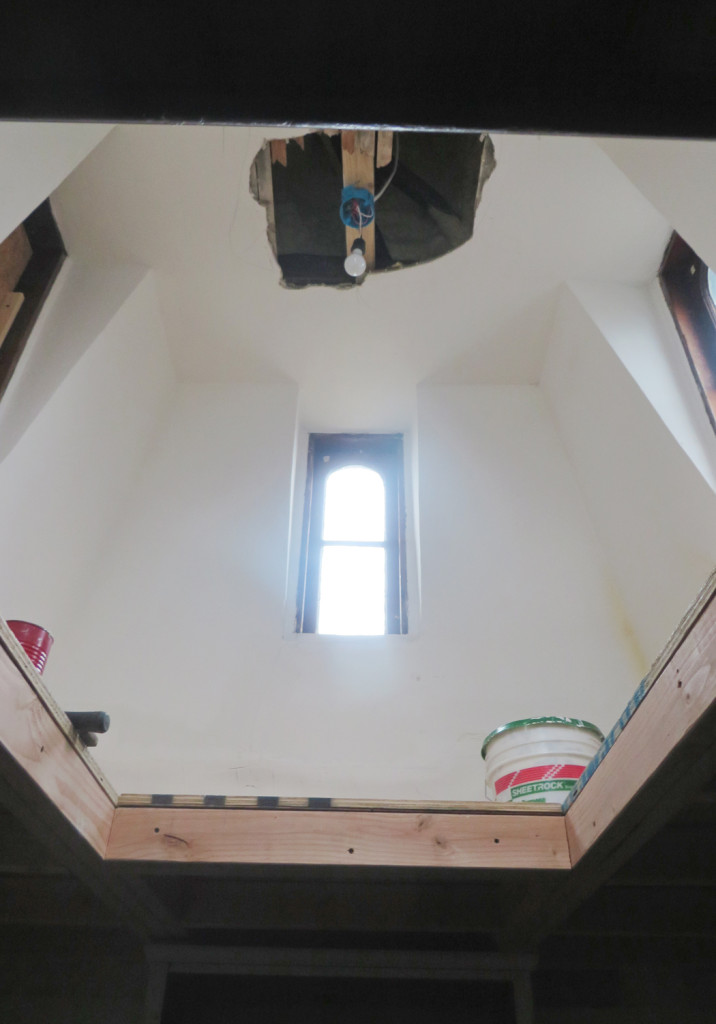 He is going to work some more on the ceiling today. Mr. S. and I are SUPER excited for this space! The kids keep asking to go up and check out the fort. Since it is still a bit of work in progress, we haven’t let them up there yet (although Mr. S. tested it out when the weren’t there and gave it a thumbs up). Also for the first time last night we were able to flip a switch and have light, which was amazing! For years we would literally use a flashlight at night to come up to the third floor to get something. Now we have lights in all of the rooms up here. Sometimes it is the small things!
Next up is the ceiling in the tower! Can you tell I’m excited?
Thought I would show you a quick update of the tower (from about 15 minutes ago). My contractor had a free day in his schedule this week, so I had him get started on the framing for the tower room/closet/fort. There is a lot to do, but it is pretty darn exciting to see the framing go up! It will be slower going after today, but I am an excited girl (and I know a couple of little ones who will be impatiently waiting for their fort to be finished).
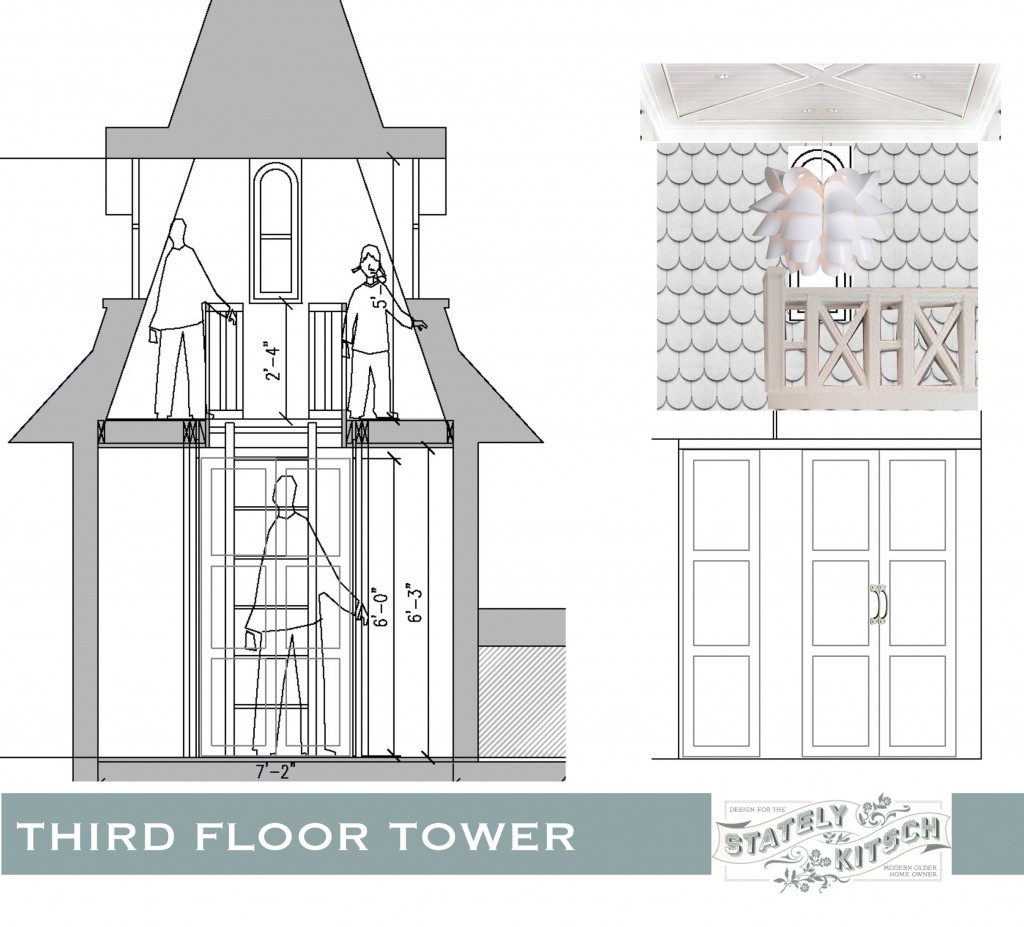
Well it is Friday afternoon and I am finally getting this together. I have been doing quite a bit of thinking about the design for the tower. When I design I like to look at the space, draw it up, look at the space some more, look around for products/ review standard size cabinets, spend too much time looking on Pinterest and then go back to drawing. It usually serves me well to take breaks and come back. I often come up with my best ideas while I am laying in bed just before nodding off. I like to visual the space in my head (yes I am a design junky).
I am liking the mix of materials in the collage above. It will inevitably be impossible to photograph but it should look pretty cool.
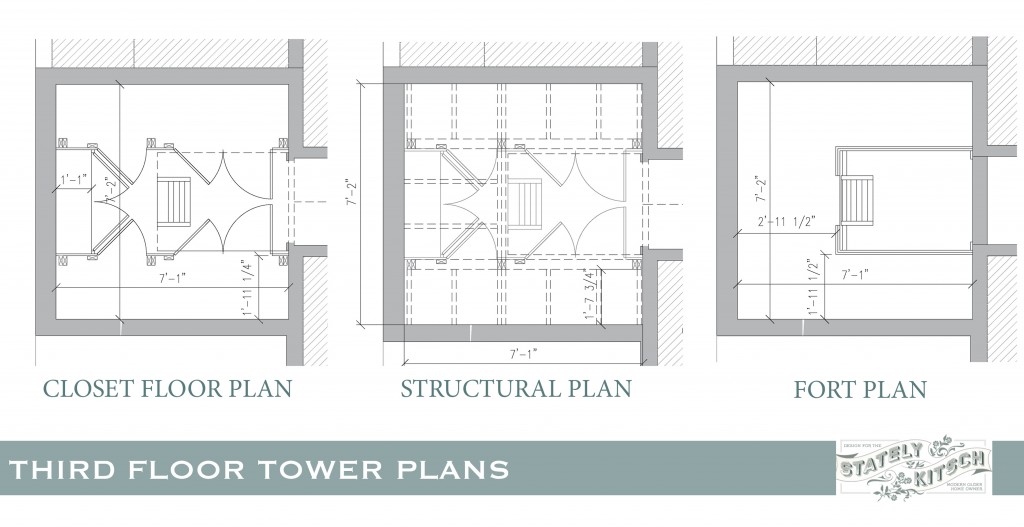
To pin down the design, I drew up a basic structural plan. I needed to get an idea of where we would put in columns and floor joists for the tower. The columns will interfere with the closet space a little bit, but we only need 6. The majority of the joists will tie into the walls. I will install a board that will attach to the wall joists and then use joist hangers off of that to hold the floor joists. It is fairly similar to a deck design. I haven’t decided how I am going to finish the ceiling of the closets, but I am planning on cladding the beat up plaster with the thin plank material and a 1×4 board at the top to attach the clothes rod to. I figure some of the final details will have to get figured out as we go.
As part of this I needed to decide whether we were going to install doors on the closets or just use curtains. Ultimately we decided that we really want doors. Maybe I will regret that, but I like the idea of having doors that kids and pets can’t get into very easily. I am planning on using this area to store out of season clothes and storage bins that hold the kids baby clothes. At the back of the tower the closet will be narrower and have shelves, which I would like to use for some of my knick-knacks.
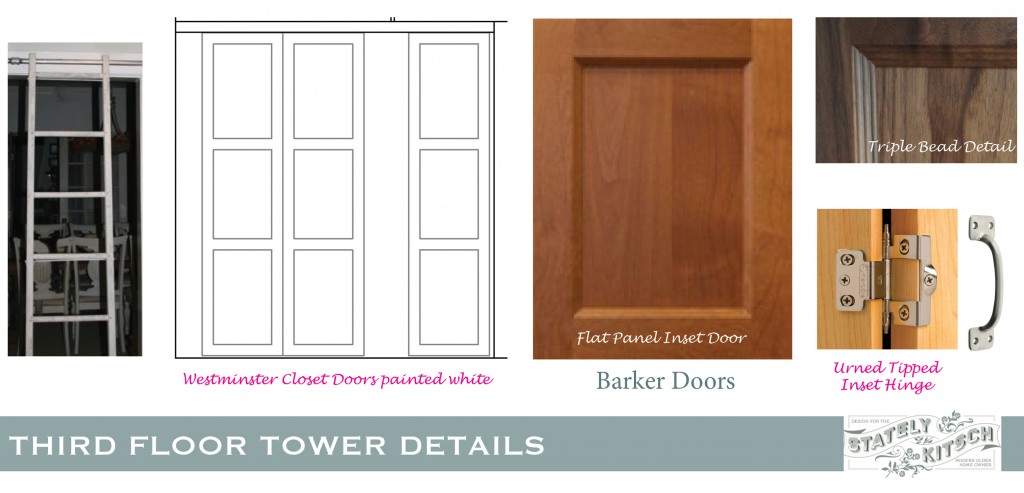
The next question was what kind of doors and were we going to DIY them. I thought about just making simple beadboard doors, which would actually match what is up there now, but after a lot of debate and reading this post from Sawdust Girl about making doors, I decided that it would make sense to buy doors, especially after I discovered Barker Door. They offer custom American made doors in a bunch of materials and finishes. They have good reviews and a pretty quick turn around. If I could stay at 72″ high the price per door was reasonable. This meant that the top couple of inches of the closet wall will have a trim piece, but considering that saves $70 a door, I am willing to make that compromise. After looking at their options and prices I have decided on the Westminster door style which is a flat inset panel door w/ a nice triple bead detail. I am going to go with the alder frame and mdf panel. These should paint beautifully and be nice and sturdy. I have been debating whether the doors should be fully inset or overlaid. Overlay doors are much more forgiving, but I really prefer the look of the inset. Again Sawdust girl laid it all out for me. I am thinking that I may wait and order the doors after I have the frames up, so I can make sure that everything is the correct dimension and Barker door allows you to order down to 1/16″. I am also considering their doors for the Ikea closets for the Master Bedroom.
I am off to take care of my sick little one. I hope everyone has a lovely weekend!
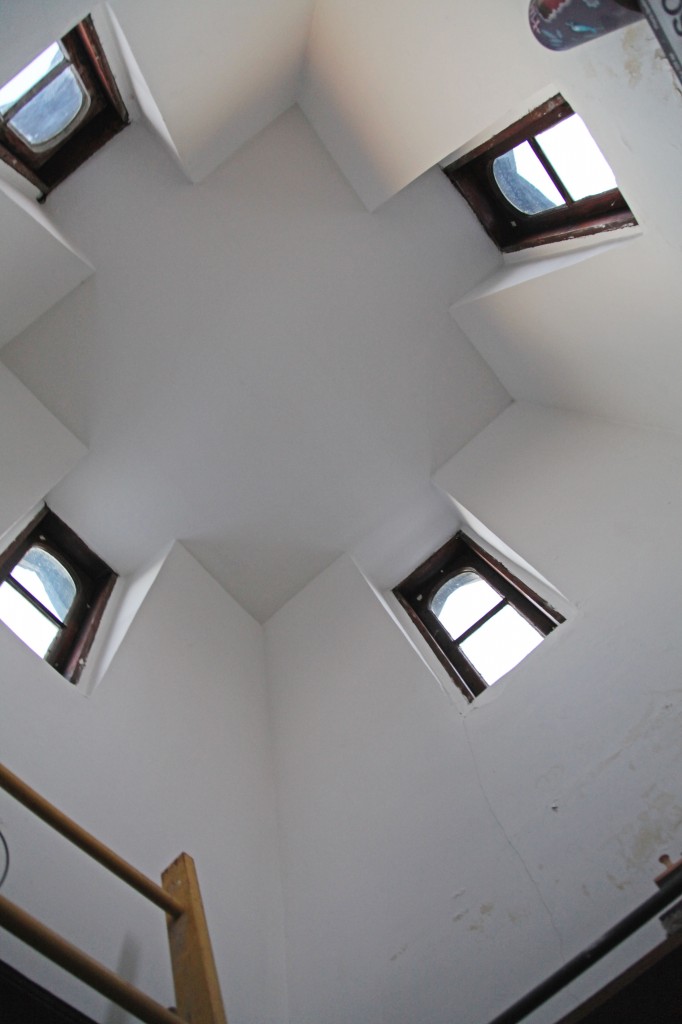
We had some amazing spring time weather over the weekend! Actual sustained blue skies, without the winter winds! We managed to open the windows in the third floor to try and air out from the sprayfoam. We also started planning for work in the tower. I’m not sure if this should really be the first priority, but it is definitely the most interesting. One of the reasons we bought the house was because it had a tower, but it has been totally unusable (at least until now). Isn’t that how all rational people choose their houses?
For years I have be imaging the space with a second story fort (even before kids) so that you could actually see out the windows. We also thought it would be really cool to clad the inside with half round cedar shingles (imagine the tower being inside out) and a beadboard ceiling to hide the new giant hole. But beyond that, it has always been a long away fantasy. Well now we are actually working on making it happen! Part of the rational is that we need to have the windows worked on, and wouldn’t it be easier to do that if there was platform up there to access them? And well why we are at, should we go ahead and put some closet space below (which will come in handy when we are working on the master bedroom and have to give up our closets temporarily). Besides the kids keep asking when their fort is going to be finished.
The Game Plan
Over the weekend Mr. S. got out the blue tape and started marking closet locations on the floor.  The room is 7′-2″x7′-1″, far from spacious. How can we retain the interesting double height space while actually getting usable closet space and hang out space? How can we install a ladder and closet doors and make them both work?
After lots of noodling this is what I came up with. It is funny that even with all of the years I have been doing this a little blue tape and standing in the space is an important step. At first I thought I would make the closet on the left deep. Then we realized that it closed in the room too much and wouldn’t allow for good access to the corners. Once I stepped it back to a shelving depth, it felt right and meant we could get doors in everywhere. We are in luck that a standard walk in closet is 7′ wide (2′ on each side for hanging and 3′ in the middle). The area in blue is the portion that will remain double height. The area that isn’t colored will have loft above but not have closet space. The ladder will be on a track and move to allow for full access to the closets.
The kids (drawn to approximate current heights) should have enough space to look out the windows and curl up with some beanbag chairs on the wider end. Mr. S. says he might even want to claim the space for himself.
The Details
I have been trying to find details to work in the space. It has been a bit of a struggle. The ladder was the first thing on the list. I really like the library ladders but the cost is more than I want to spend (several hundred dollars just for the kit that you have to assemble), especially since I don’t need a long run of track just 3′.
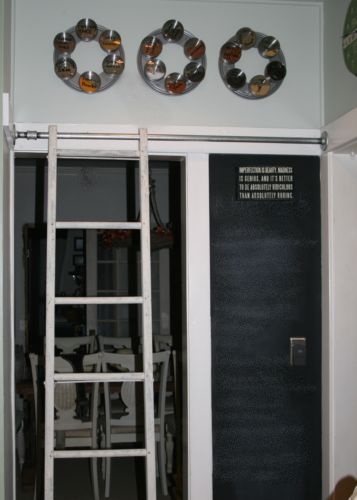
Then I found this DIY ladder from DIY Show Off. They used a vintage ladder, but we could do the same thing with a DIY ladder made with 2x4s and 1x4s. The trick is using 3/4″ galvanized pipe and cutting a slightly larger hole in the top of the ladder.
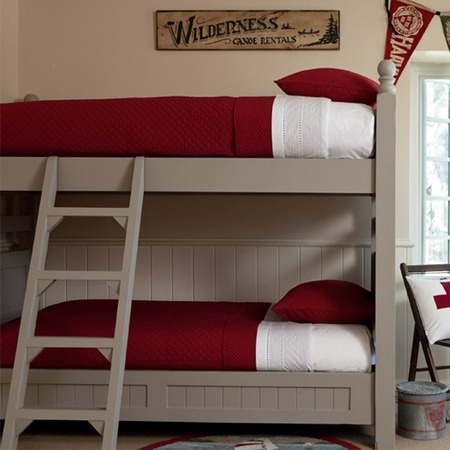
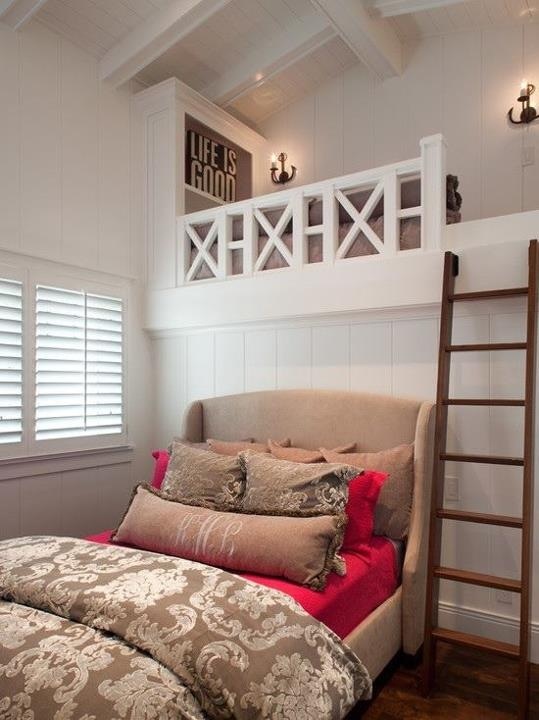
After spending way too long looking at bunkbed ladders, I came across this one (originally from Joss & Main of all places). I like the added triangles to give the ladder a little extra support.
I haven’t totally worked out the railings for up there, but I do want a fair amount of height and coverage. I like this railing above (source not identified). So I imagine I will design something similar.
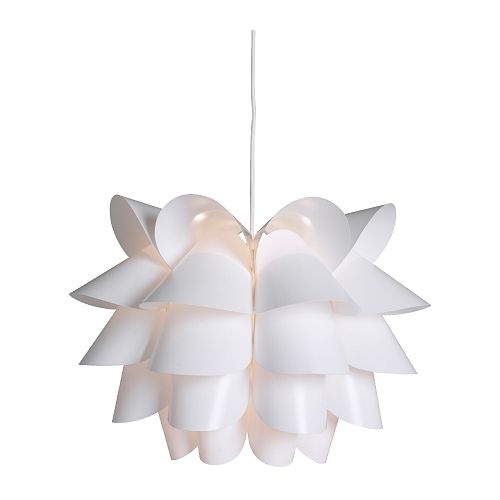
I am also leaning towards this light from Ikea. We need something that is suitable for little kids hands, but provides a nice soft light. I also want something with a little style. At $24.99 I think we may have a winner. I also think it will be a nice contrast to the more traditional style of most of the room.
There is still a lot to figure out and detail, but I think we have a good direction, so I will be plugging away on refining it.
In the meantime if you want to see what is currently inspiring me for our third floor you can peak at my third floor pinterest page.


