Archives For OUR HOME

aircompressor-portercable2

Dear Contractor,

Are you going to be late? Just give me a call (preferably not way after we were suppose to meet).

Are you not going to make it this week because of a delay? Just give me a call. In fact you can even text me if you don’t want to talk.

Do you not want to do the job? Just let me know and I will move on. I understand.

Is there a problem with the design? Please call me before you decide to just do whatever. Usually I drew it a specific way for a reason. I do actually know what I am talking about (even though I am a girl).

Do we need to spend more money and/or time on something because of some unforeseen condition? Really just give it to me straight up. I can take it!

What do you get in return? I will stay out of your way while you are doing your work. I won’t get upset when tell me that something isn’t going as planned. In fact I will work with you to come up with a solution. Trust me, I have plenty of other things to worry about. And as an added bonus I might actually recommend you.

P.S. I don’t recommend gossiping about your clients while in a crowded restaurant. It is a small world. We can hear you.

2 Comments

hallway-progress1

We are mostly better here in the Sentivan household. The kids are back at school and I will be heading to work shortly. I’m still not quite feeling myself and have been drinking copious amounts of ginger ale. I had hoped to have a bigger post for you this morning, but well it isn’t going to happen. I should have some good stuff for you shortly though, our contractor is suppose to start working in the next couple of days to move our bedroom door and prepare for the electrical conduit. I also have an AC contractor coming over on Wednesday to take a look. I think I am most excited about that, since lining up that work and figuring out where the ducts go, will have a big impact on everything else.

IMG_0998

As you can see Mr. S’s fingers got a little itchy and he couldn’t help but remove a little bit of plaster over the weekend. The portion on the left at the corner was really loose. On the right there was a crack at the top and I asked him to go across so we could figure out where the studs are located. I was hoping to use the space between 2 studs in the linen closet for added depth. Unfortunately the next stud is right in the middle, so that is a no go as that would require taking out the plaster on the bedroom side another 18″ or so, which I don’t really want to do. On the hallway side this whole wall will be loosing its plaster in order to move the door and reconfigure.

Please stay tuned!

Leave a comment

Second Floor Update

March 26, 2013 — 6 Comments

hall-before-glass

We are slowing making progress here. We are in the midst of a stomach bug epidemic, so life has been moving a little more slowly than usual.  The contractor was just here to go over moving the master bedroom door, discuss options for the bathroom door and the handrail and show him the plans for the electric. Mr. S. and I also managed to start clearing out our bedroom in preparation for moving the door over the weekend. That was actually quite therapeutic, and it feels good to get a good bit of clutter out of the space. Of course our playroom and garage are almost full and we still have one closet in our bedroom that will require emptying and demolishing. I am thinking that we may be installing our bedroom closets piecemeal so that we can continue to function. The alternate option is to empty out the space and work like mad for a couple of weeks. Currently that seems unlikely as there are a number of trades to coordinate. Which reminds me that I have a delinquent roofer to get a hold of.

bathroom-elevation

I thought I would show you my drawings for the bathroom wall since there isn’t a lot in actual progress to see.  In the picture above I threw in a couple of stained glass windows to see what I thought of adding them to the space. Of course this project cannot continue without some sort of scope creep! Since we are going to be working on this wall I thought it would be nice to add some light into the corridor from the bathroom. Well then we need windows. And well if we are going to add glass, why not add stained glass?

I think my contractor thought I was a little crazy, although he should know how I work. He did think my linen closet was ridiculously small (hey, I don’t have one, so any closet no matter how small is an upgrade).

Industrial-Barn-Door-Hardware1

I think I have decided in favor of exposed barn door hardware over a hidden pocket door. This one from Rustica Hardware is in a dark bronze finish which I like. The wheel are actually wood, which I think is pretty cool. I will be pairing this with a more traditionally styled Victorian Pull.

pottedflowerpocketdoorhardware

This potted flower bronze pull is from Charleston Hardware Company. It has the daisies which are always a favorite of mine. We will have to use some sort of latch to lock it, since the door isn’t thick enough for a locking mechanism.

ceilingfan-acquabronze

On the ceiling in the hall we are going more industrial again. I had been eying a different ceiling fan but I saw this one (Acqua Ceiling Fan II in Textured Bronze) for a great price on Joss & Main and decided to go ahead and order it. The whole unit rotates in addition to the wood blades. Overall this space is going to be a bit more eclectic and industrial then some of our other spaces in the house. Our first floor tends to stick much closer to the Victorian feel, but upstairs I think it is okay to have a little fun. I’m sure some future owner will abhor by choices, but I am liking the direction. And frankly most of my choices could be changed to something more traditional fairly easily.

What do you think? Have I lost my mind? Am I headed toward some sort of Victorian Steampunk craziness?

6 Comments

tower1

Well it is Friday afternoon and I am finally getting this together. I have been doing quite a bit of thinking about the design for the tower. When I design I like to look at the space, draw it up, look at the space some more, look around for products/ review standard size cabinets, spend too much time looking on Pinterest and then go back to drawing. It usually serves me well to take breaks and come back. I often come up with my best ideas while I am laying in bed just before nodding off. I like to visual the space in my head (yes I am a design junky).

I am liking the mix of materials in the collage above. It will inevitably be impossible to photograph but it should look pretty cool.

tower2

To pin down the design, I drew up a basic structural plan. I needed to get an idea of where we would put in columns and floor joists for the tower. The columns will interfere with the closet space a little bit, but we only need 6. The majority of the joists will tie into the walls. I will install a board that will attach to the wall joists and then use joist hangers off of that to hold the floor joists. It is fairly similar to a deck design.  I haven’t decided how I am going to finish the ceiling of the closets, but I am planning on cladding the beat up plaster with the thin plank material and a 1×4 board at the top to attach the clothes rod to. I figure some of the final details will have to get figured out as we go.

As part of this I needed to decide whether we were going to install doors on the closets or just use curtains. Ultimately we decided that we really want doors. Maybe I will regret that, but I like the idea of having doors that kids and pets can’t get into very easily. I am planning on using this area to store out of season clothes and storage bins that hold the kids baby clothes. At the back of the tower the closet will be narrower and have shelves, which I would like to use for some of my knick-knacks.

tower3

The next question was what kind of doors and were we going to DIY them. I thought about just making simple beadboard doors, which would actually match what is up there now, but after a lot of debate and reading this post from Sawdust Girl about making doors, I decided that it would make sense to buy doors, especially after I discovered Barker Door. They offer custom American made doors in a bunch of materials and finishes. They have good reviews and a pretty quick turn around. If I could stay at 72″ high the price per door was reasonable. This meant that the top couple of inches of the closet wall will have a trim piece, but considering that saves $70 a door, I am willing to make that compromise. After looking at their options and prices I have decided on the Westminster door style which is a flat inset panel door w/ a nice triple bead detail. I am going to go with the alder frame and mdf panel. These should paint beautifully and be nice and sturdy. I have been debating whether the doors should be fully inset or overlaid. Overlay doors  are much more forgiving, but I really prefer the look of the inset. Again Sawdust girl laid it all out for me. I am thinking that I may wait and order the doors after I have the frames up, so  I can make sure that everything is the correct dimension and Barker door allows you to order down to 1/16″. I am also considering their doors for the Ikea closets for the Master Bedroom.

I am off to take care of my sick little one. I hope everyone has a lovely weekend!

Leave a comment

masterbed-moodboard2

I am on a Jacobean fabric kick! I was going to write about where I am headed on closet doors for the third floor tower, but I got distracted and thought I would show you my latest find. I have been stalking fabric again on Fabricguru.com. And they do have some pretty good deals, if you have the patience to sift through fabric pictures, since they don’t usually give you the fabric’s name. Granted these curtains won’t be installed for months, since we will be a construction zone until then. But I saw it and decided to pick up the fabric now, especially since I have been on the hunt for way too many months.

breamoreWonderland3

The fabric is Braemore Wonderland in Pearl. I have actually pinned this fabric twice on my fabrics board on Pinterest (once as a close up and once in a bigger repeat). There are several reasons I like this fabric. First is the scale. It is hard to understand in the picture but the pattern is huge!

braemorewonderlandpillow

from Lily on Blue on Etsy (no longer available)

I think it is easier to understand on this pillow. The second thing I like are the funky leaf patterns. I think that the fabric will play well with my giant Best Panels that will be installed behind the bed.  The third thing is the color palette. It works really well with the crazy striped rug, particularly the yellow and oranges. It doesn’t have a white background like I wanted, but it does have a white highlight which I think is important to work with the white trim in the room.

breamoreWonderlandchair-sarahrichardson

The third reason is that Mr. S. liked it and agreed it would work well in our bedroom. I held up a picture of it on the ipad next to the window and he gave me the thumbs up. And how could I say no after I found out that Sarah Richardson likes it. The picture above is from her Sarah 101: Premiere Episode. She is really a master with color and pattern!

So the downside is the price. I need about 18 yards of fabric, so price is pretty important. When I first started looking at fabric I really wanted to use a Premier Print fabric, in large part because of the affordability. The cheapest I had found Wonderland for about $30 a yard at OnlineFabricStore. Which wouldn’t be SO bad if I were only buying a few yards. At fabric guru they had 2 lots this week of this fabric. Just to make it confusing 1 lot was listed as Braemore (no pattern name) and one lot was listed as Kaufmann. The 2 totaled just about the right amount. Apparently it is fairly common for the different brands to have some of the same fabric listed under different names. I haven’t seen this particular fabric ever listed under Kaufmann before, but I suppose it is possible. The pictures online looked identical. We will see if there is any variation between the two when they get here. I ended up paying just over $12 a yard for 18 yards including shipping, which I think it a pretty sweet deal. The fabric shipped this morning and I can’t wait to see it.

Has anyone scored any good fabric deals lately?

2 Comments

aircompressor-portercable2

I am generally a big fan of power tools (heck, I am a master of the compound miter saw). So you think I wouldn’t get nervous using a new one. Well, you would be wrong! For my birthday last July, Mr. S. bought me a compressor and 3 pack of nail guns. Isn’t he the best! The box has been sitting unopened in the basement for months as I gathered the courage to actually use them. In my defense we haven’t actually been working on anything requiring nailing, but I certainly haven’t gone out of my way to actually making use of them. In fact the box had been sitting there long enough, that it had acquired a pile of stuff on top (please tell me that happens to other people too?).

Well this week I am going to be helping out one of my clients, and I could really use a nail gun to speed up installing some trim. So I decided it was time to face my fear and try it out, and trim out the door to the basement closet (another long overdue project).  While the rest of the family was upstairs and I was waiting for some laundry I cut open the box. Everything was packaged neatly and I went to work reading and re-reading the instructions. The compressor totally freaks me out (I guess anything that could blow up should do that). I made sure I understood how to pull the release valve and what pressure the dial should be set at. Then I unboxed the brad nailer. I picked it up. It was so cool! I read through all the parts and practiced unlocking and locking the trigger and installing the nails. Okay maybe this isn’t so scary after all.

So after a break and putting everything in place, I set up the compressor and plugged it in. I HATE the noise when the compressor starts up. It is so loud and powerful! I turned the adjuster knob and watched the pressure fill up in less than 2 minutes. I actually set the pressure too high and had to quickly lower it so I didn’t exceed the recommended range.

With the compressor set I decided it was now or never. I carefully plugged in my gun. The air whooshed out but I managed to click it in on the second try. Next up is putting in the nails. That was pretty straightforward! I very carefully released the trigger switch and put my trim in place. I pushed the nozzle (I’m not sure if that is what you call it) and pressed. It is actually really quiet. Phew, it worked! The nail didn’t go in as much as I wanted so I adjusted the depth gauge. The second one went in perfect! Awesome!

basement-doortrim2

Within 5 minutes I was done putting the trim on the door. That would have easily taken over an hour by hand, and not worked as well! As I went I started to come up with a strategy for installing this thin trim.

basement-doortrim1

I started with the bottom piece with 2 nails. Next I lined up one of the verticals. I nailed it a couple of inches from the bottom corner, making sure it was tight to the bottom trim. Then I nailed the other vertical the same way. Next I installed the top horizontal piece with 2 nails (after roughly checking that the verticals would align). Finally I connected the top of the 2 verticals near the top creating a tight joint and added a couple of extra nails in the middle for good measure. It worked surprisingly well. The nice thing about these nails is that once one is in, it stay tighter than with a traditional nail (so you don’t have to hold the trim very tightly).
basement-doortrim3

When I installed the same trim on the bathroom door (before the nail gun), it was really sloppy. Above you can see one of the corners on the bathroom door after I filled the holes. Not so nice! Granted I don’t stand this close to the door very often, but definitely not nearly as professional looking.

I am now actually excited now about using my new set. I know it will be really helpful on the third floor (once we get to trim). That reminds me there are some trim pieces around the house that need some help. Let me at them!

4 Comments

Tower Design Part 1

March 12, 2013 — 4 Comments

thirdfloor tower2

We had some amazing spring time weather over the weekend! Actual sustained blue skies, without the winter winds! We managed to open the windows in the third floor to try and air out from the sprayfoam. We also started planning for work in the tower. I’m not sure if this should really be the first priority, but it is definitely the most interesting. One of the reasons we bought the house was because it had a tower, but it has been totally unusable (at least until now). Isn’t that how all rational people choose their houses?

For years I have be imaging the space with a second story fort (even before kids) so that you could actually see out the windows. We also thought it would be really cool to clad the inside with half round cedar shingles (imagine the tower being inside out) and a beadboard ceiling to hide the new giant hole. But beyond that, it has always been a long away fantasy. Well now we are actually working on making it happen! Part of the rational is that we need to have the windows worked on, and wouldn’t it be easier to do that if there was platform up there to access them? And well why we are at, should we go ahead and put some closet space below (which will come in handy when we are working on the master bedroom and have to give up our closets temporarily). Besides the kids keep asking when their fort is going to be finished.

The Game Plan

Over the weekend Mr. S. got out the blue tape and started marking closet locations on the floor.  The room is 7′-2″x7′-1″,  far from spacious. How can we retain the interesting double height space while actually getting usable closet space and hang out space? How can we install a ladder and closet doors and make them both work?

towerplan1a

After lots of noodling this is what I came up with. It is funny that even with all of the years I have been doing this a little blue tape and standing in the space is an important step. At first I thought I would make the closet on the left deep. Then we realized that it closed in the room too much and wouldn’t allow for good access to the corners. Once I stepped it back to a shelving depth, it felt right and meant we could get doors in everywhere. We are in luck that a standard walk in closet is 7′ wide (2′ on each side for hanging and 3′ in the middle). The area in blue is the portion that will remain double height. The area that isn’t colored will have loft above but not have closet space. The ladder will be on a track and move to allow for full access to the closets.

towerplan2a

The kids (drawn to approximate current heights) should have enough space to look out the windows and curl up with some beanbag chairs on the wider end. Mr. S. says he might even want to claim the space for himself.

The Details

I have been trying to find details to work in the space. It has been a bit of a struggle. The ladder was the first thing on the list. I really like the library ladders but the cost is more than I want to spend (several hundred dollars just for the kit that you have to assemble), especially since I don’t need a long run of track just 3′.

diyslidingladder

Then I found this DIY ladder from DIY Show Off. They used a vintage ladder, but we could do the same thing with a DIY ladder made with 2x4s and 1x4s. The trick is using 3/4″ galvanized pipe and cutting a slightly larger hole in the top of the ladder.

ladder-trianglesupports

After spending way too long looking at bunkbed ladders, I came across this one (originally from Joss & Main of all places).  I like the added triangles to give the ladder a little extra support.

loftinspiration

I haven’t totally worked out the railings for up there, but I do want a fair amount of height and coverage. I like this railing above (source not identified). So I imagine I will design something similar.

knappa-ikealight

I am also leaning towards this light from Ikea. We need something that is suitable for little kids hands, but provides a nice soft light. I also want something with a little style. At $24.99 I think we may have a winner. I also think it will be a nice contrast to the more traditional style of most of the room.

There is still a lot to figure out and detail, but I think we have a good direction, so I will be plugging away on refining it.

In the meantime if you want to see what is currently inspiring me for our third floor you can peak at my third floor pinterest page.

4 Comments

It’s FOAMTASTIC!

March 7, 2013 — 6 Comments
sprayfoam-1

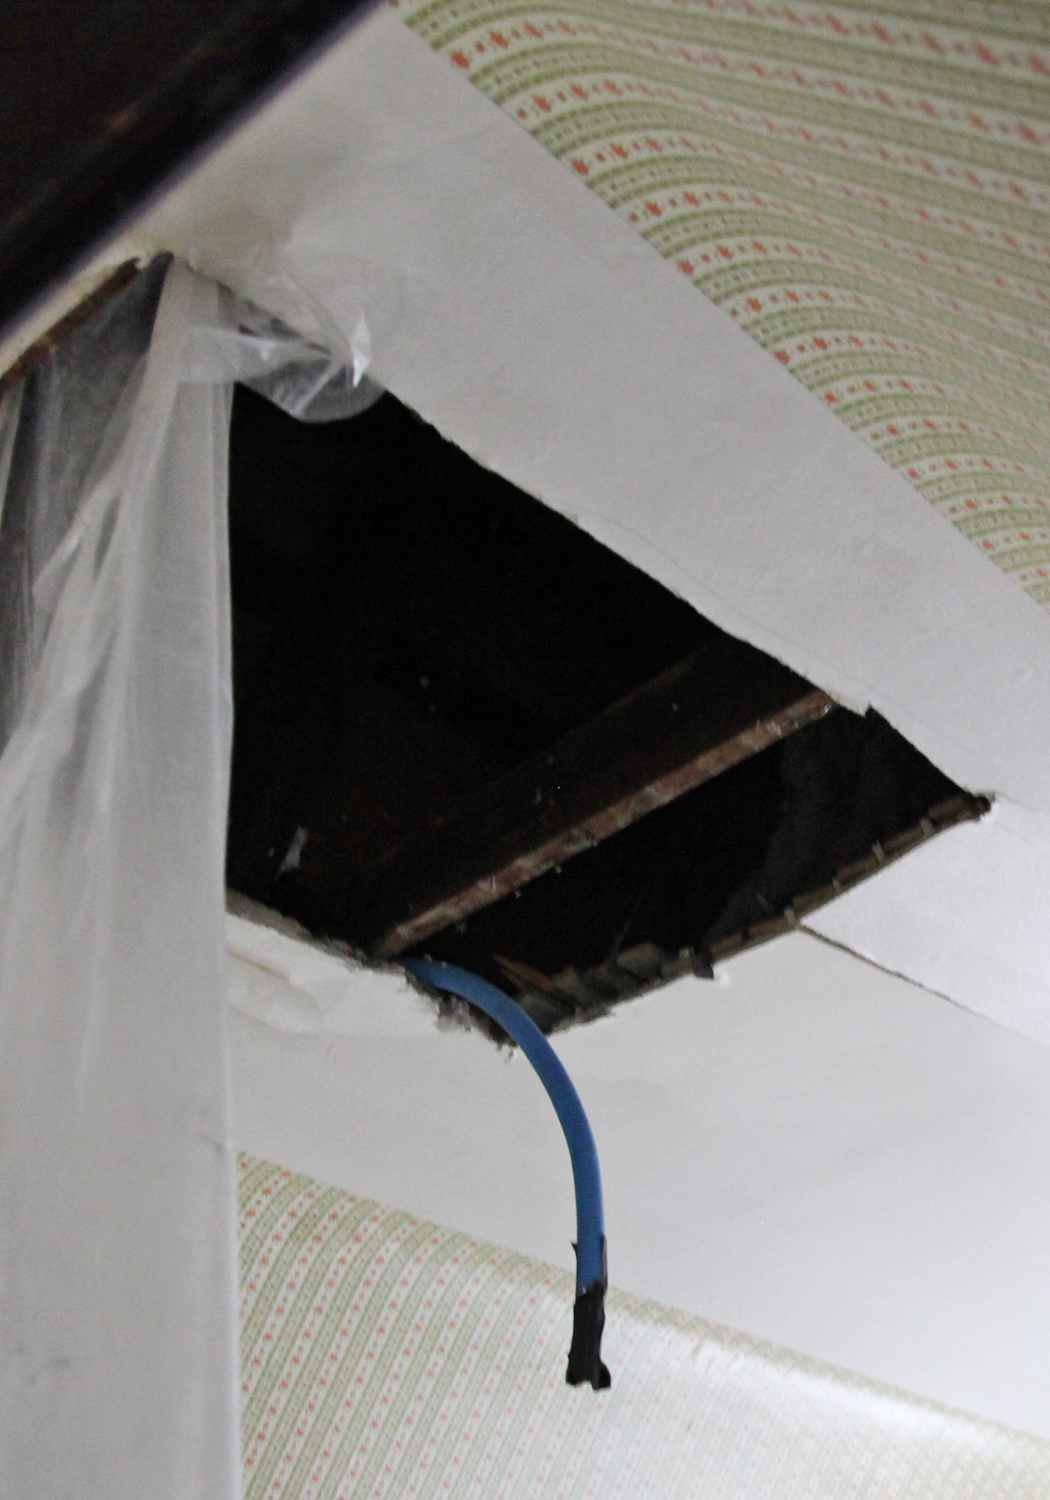
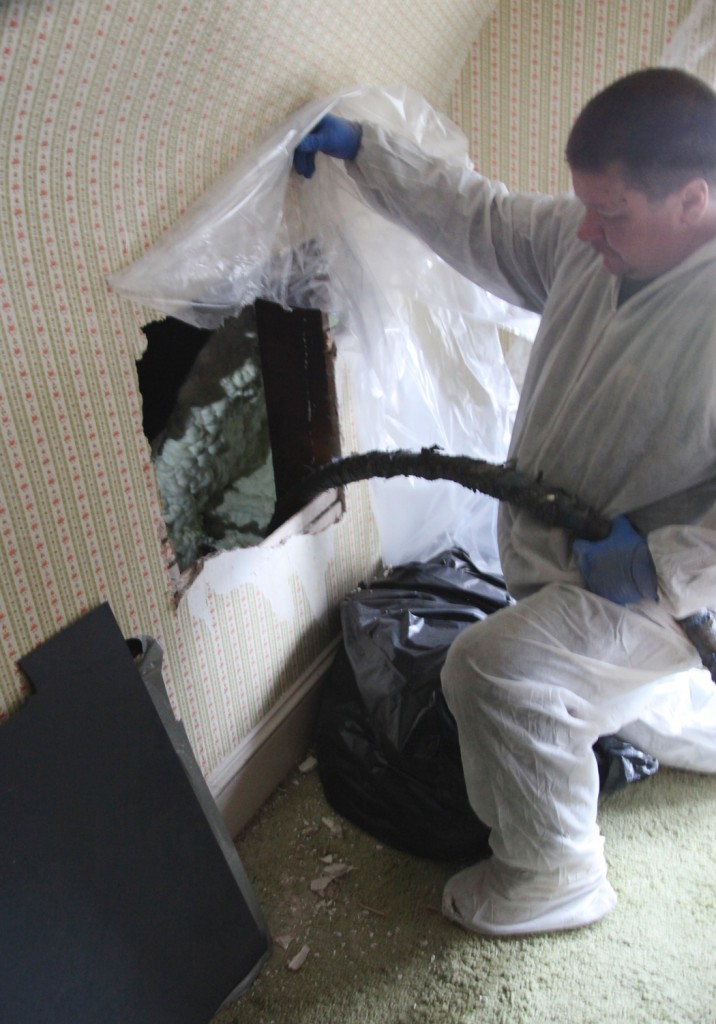
Foam hose going from the truck to our third floor.

It’s done!  The third floor is officially insulated with open cell spray foam insulation! It has been pretty brutal here the last week getting the third floor ready and dealing with some last minute coordination (and lots of contractors), which included me driving back and forth from my office more times then I want to count. I am already out of sequence from my to do list but I think we may actually be ahead of schedule (and when does that ever happen?).

sprayfoam-2

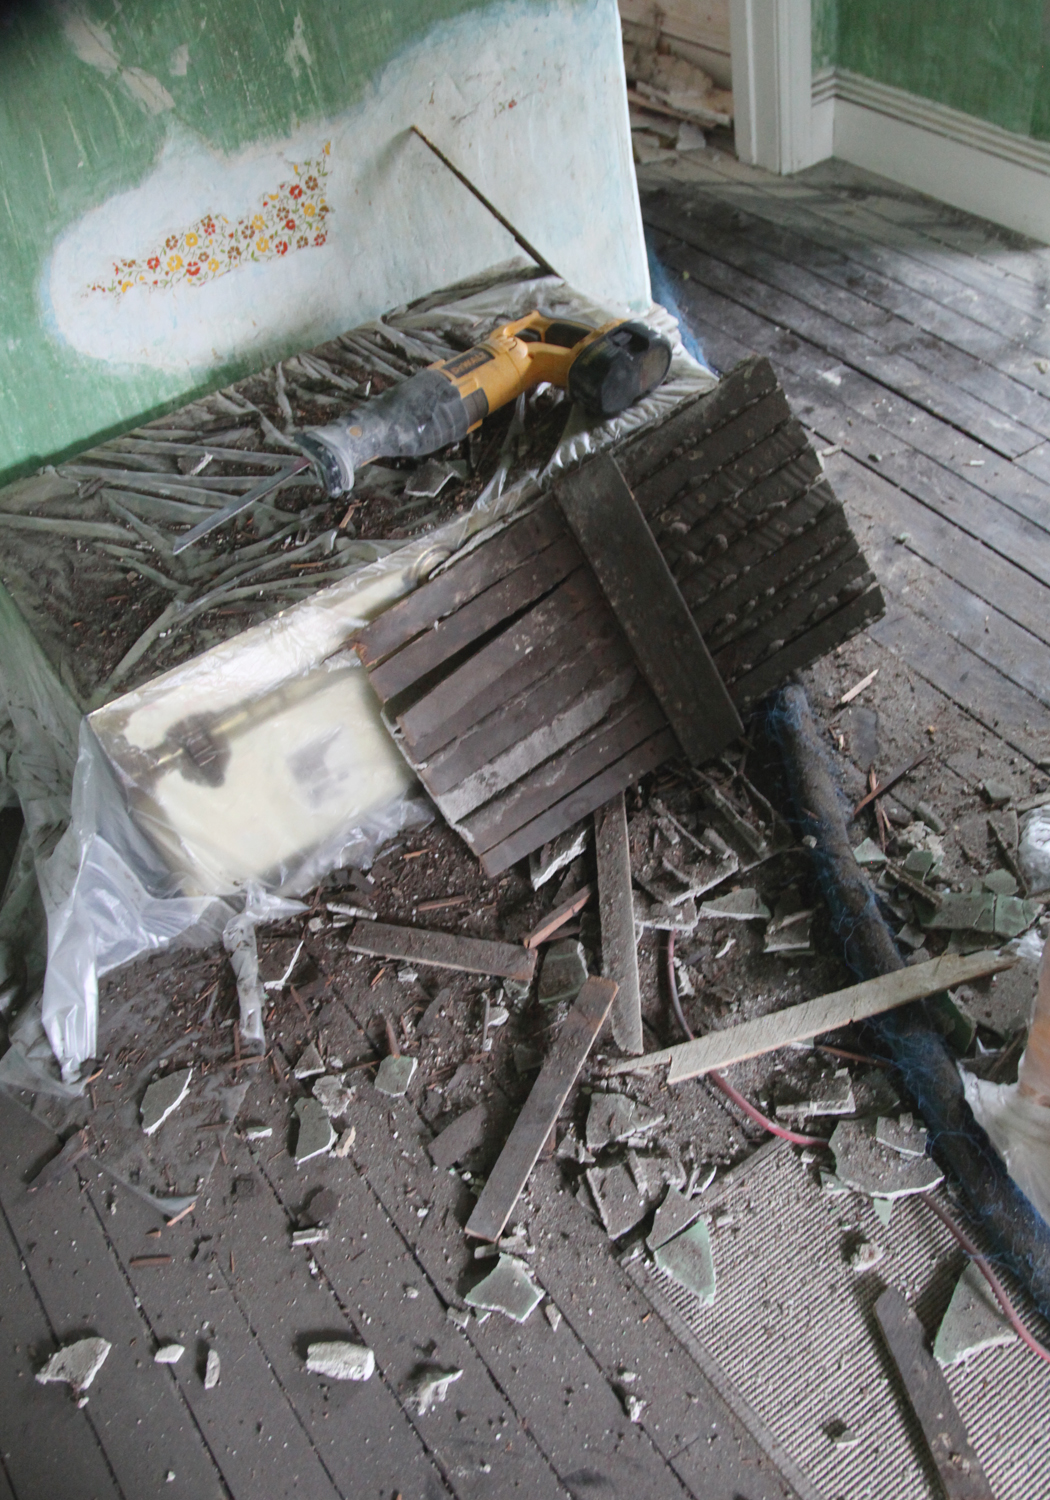
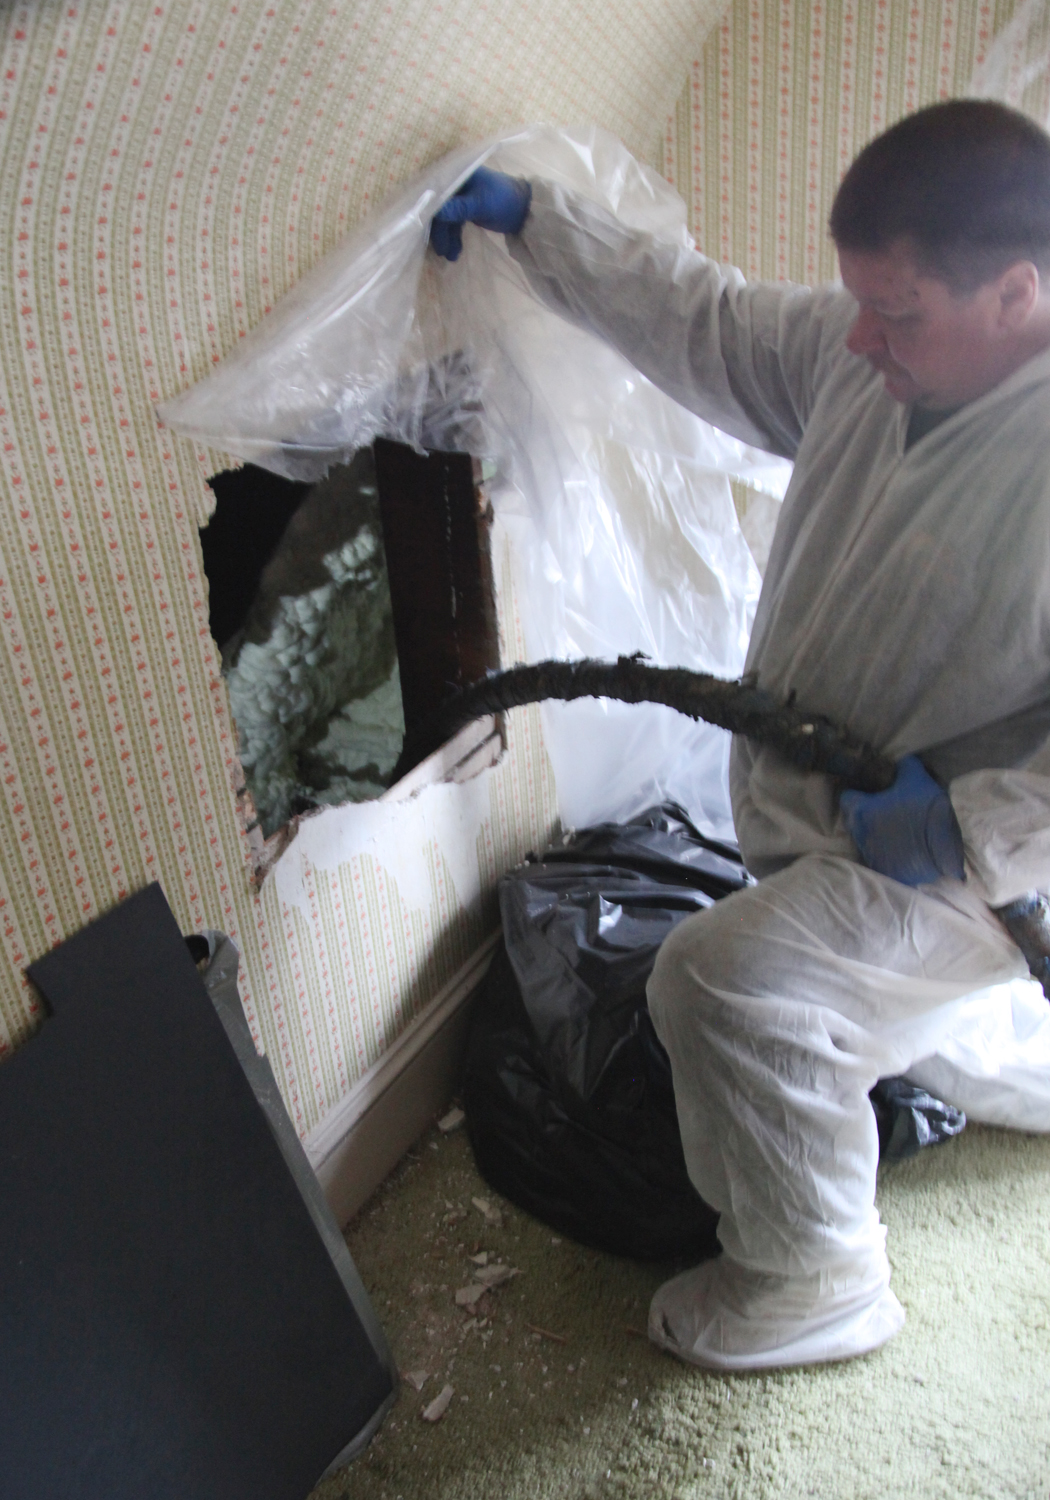
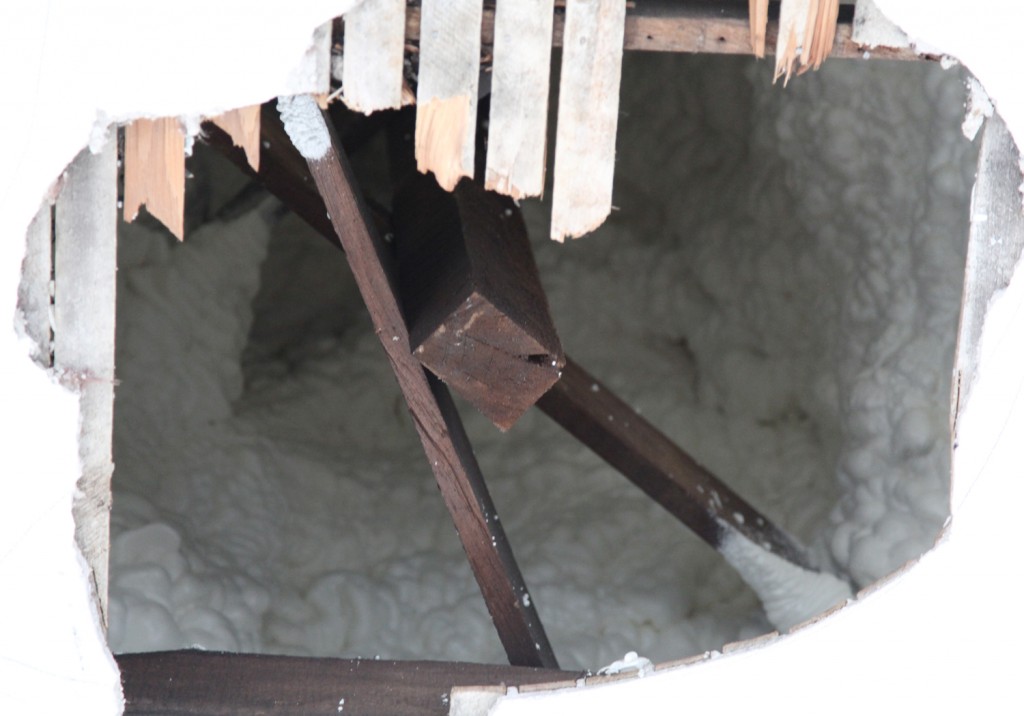
Plaster and lathe from one of the ceiling access holes (before clean up).

So while the cold, rainy windy weather beat down on our little house yesterday, the contractors moved ahead and installed all of the insulation. And I have to say it was pretty rough. We cut a few holes in the plaster but decided to let them cut the rest (mistake #1). They were hot to move, so I finally relented and let them cut. While, the majority of our plaster is fine, the areas around the holes are extremely rough and not particularly well thought out (i.e. not always adjacent to studs to allow for new patches). I should of had my regular contractor cut them, or waited a couple of weeks for us to finish it. The advantage I thought was that they know where the holes need to go. Fortunately the curves are well preserved even if the areas around the ceilings access holes look pretty terrible at the moment. The reality is that I will have to do some extra work on the plaster, but at least that is one step closer to actually making the space useable.

sprayfoam-3

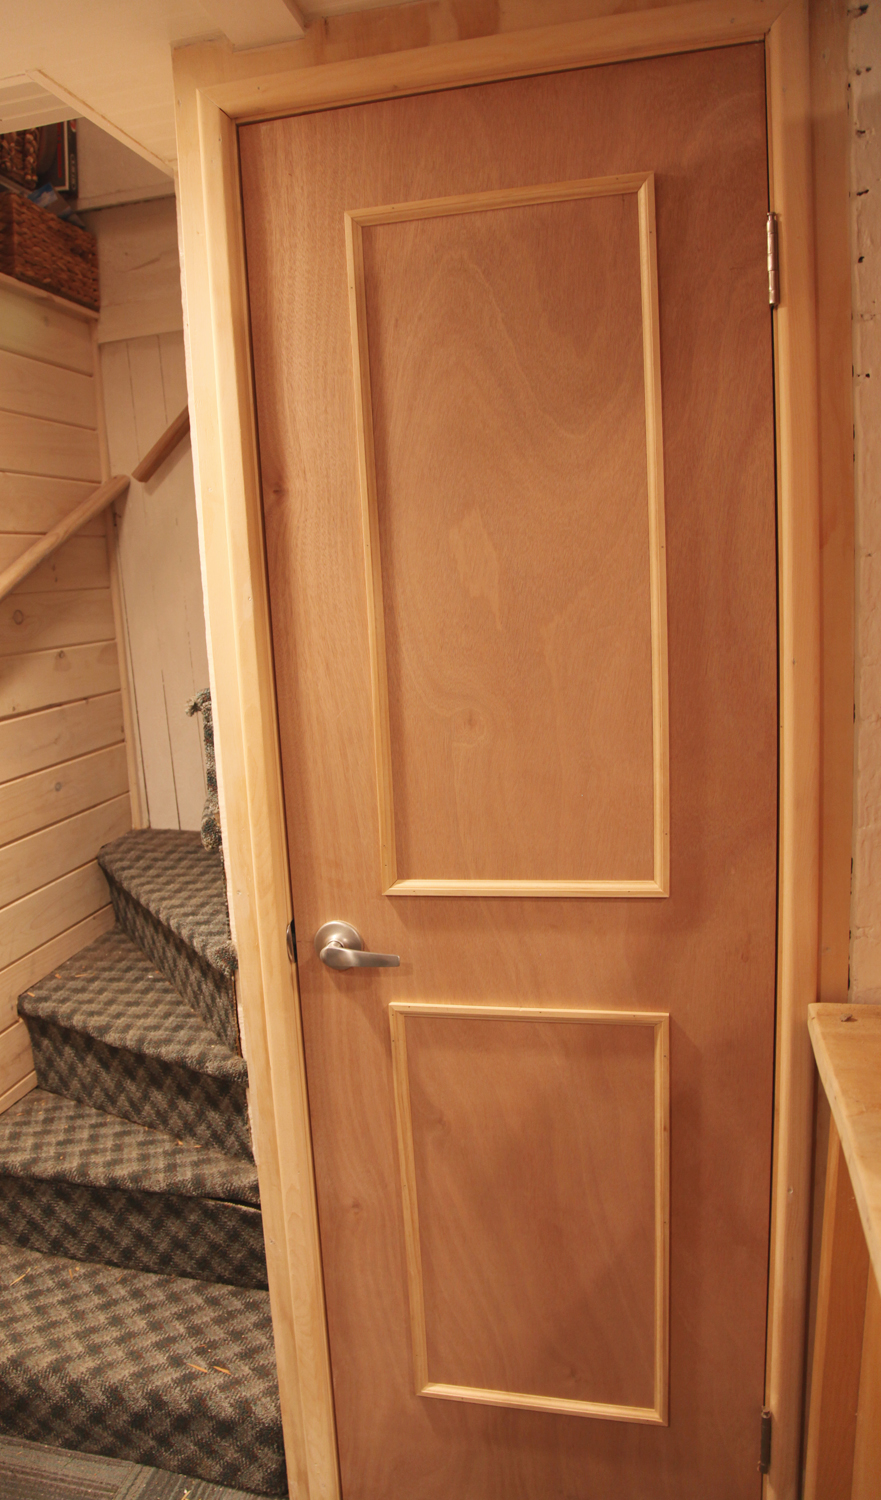
We had our electrician come over the weekend to discuss a plan for getting power up to the third floor for the new air conditioning air handling unit. I think we have a good plan (which incorporates moving our bedroom door over). The one important issue became how would we get power from the side wall up to the ceiling after the insulation was installed. Fortunately our electrician had a plan. He said to pick up some Smurf conduit. What is this you ask? It is thin blue corrugated flexible electrical conduit that could be placed ahead of time so that they could spray around it and leave us a path to run electric after the insulation! Fortunately the big boxes sell it in rolls of 100′. Of course the plan also included the insulation guys cutting holes and then giving us time to run the conduit.

Mistake #2 was letting them start to cut holes in the afternoon before they start spraying, with no wiggle room. Needless to say they didn’t finish! In fact they were only halfway done on Tuesday night. Mr. S and I managed to lay 4 of the 6 pieces that we needed (and just needed the insulation guys to move the conduit into the correct hole in the ceiling.

sprayfoam-4

When they showed up yesterday they were all set to start insulating at the same time they were still cutting holes. hmmm…not so much time to lay conduit. So after calling the boss and talking to them multiple times they agreed to put in the last 2 pieces.

The foam insulation installation actually went fine. It is one guys job to climb into the small cavities and spray the foam. Needless to say this is not a job I would want! He sprayed all of the eave areas and all of the top of the attic by crawling (mostly on his back) for long distances and periods of time. He definitely deserves props for doing that!

sprayfoam-7

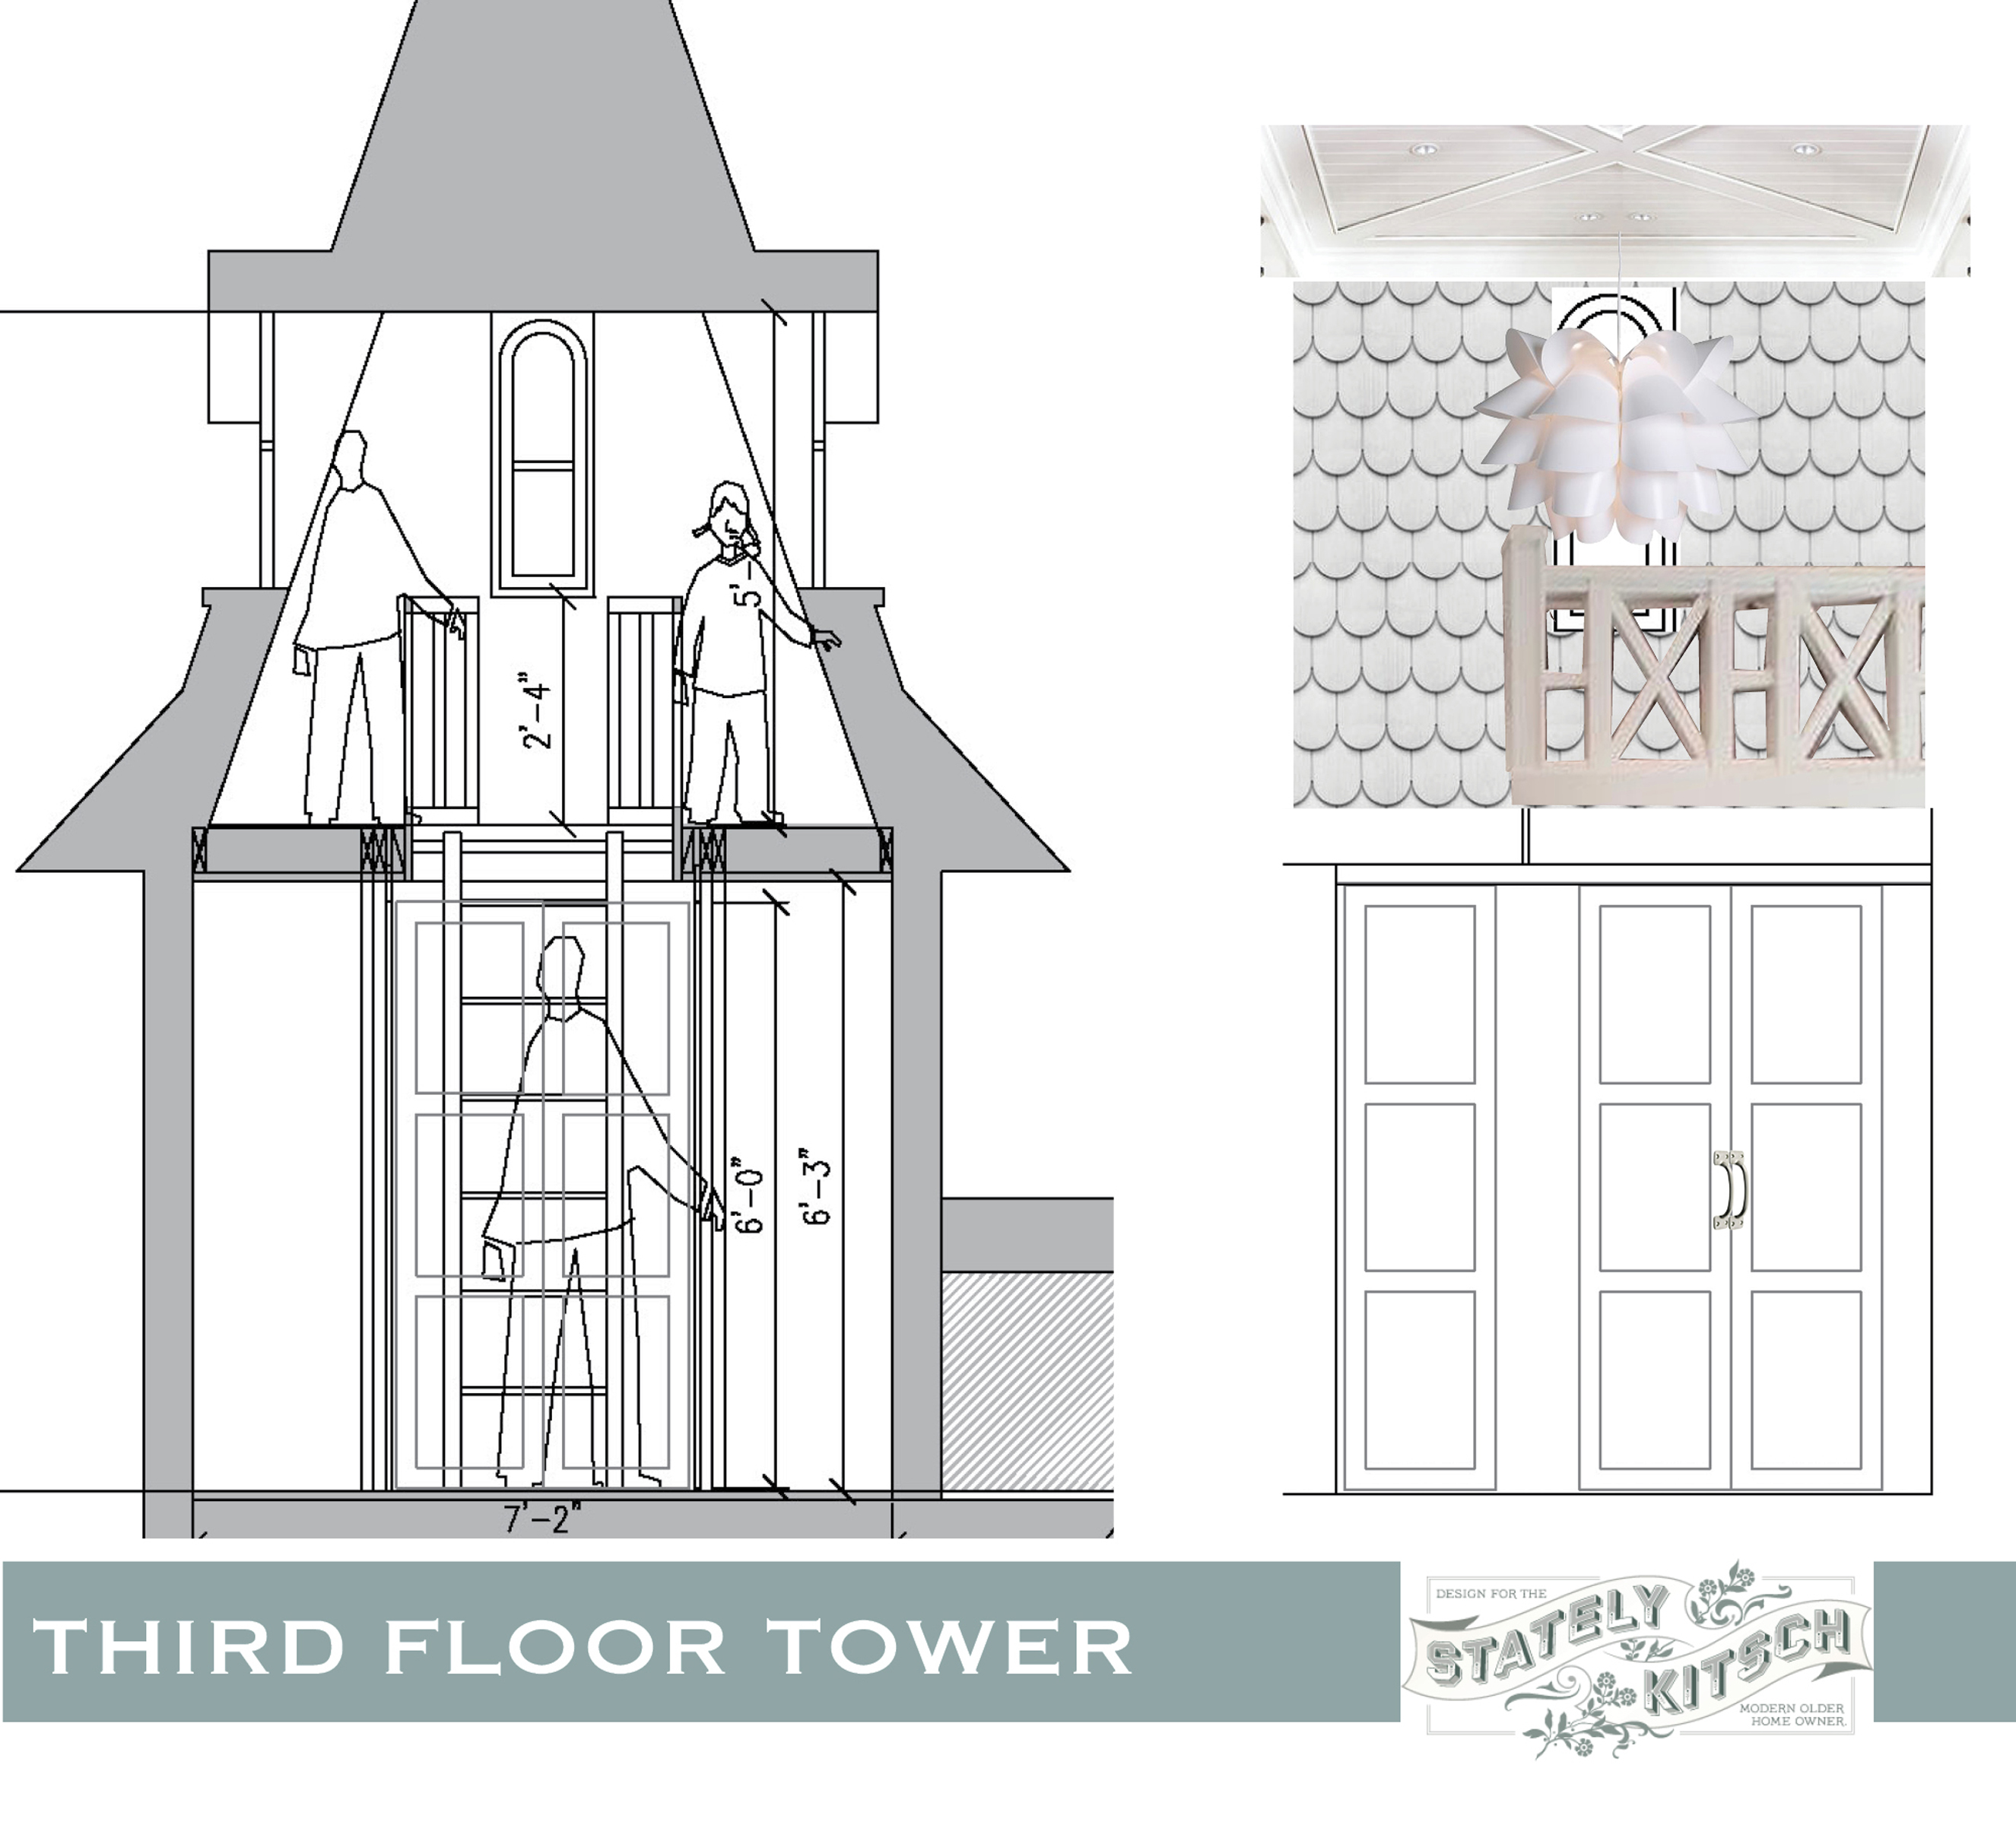
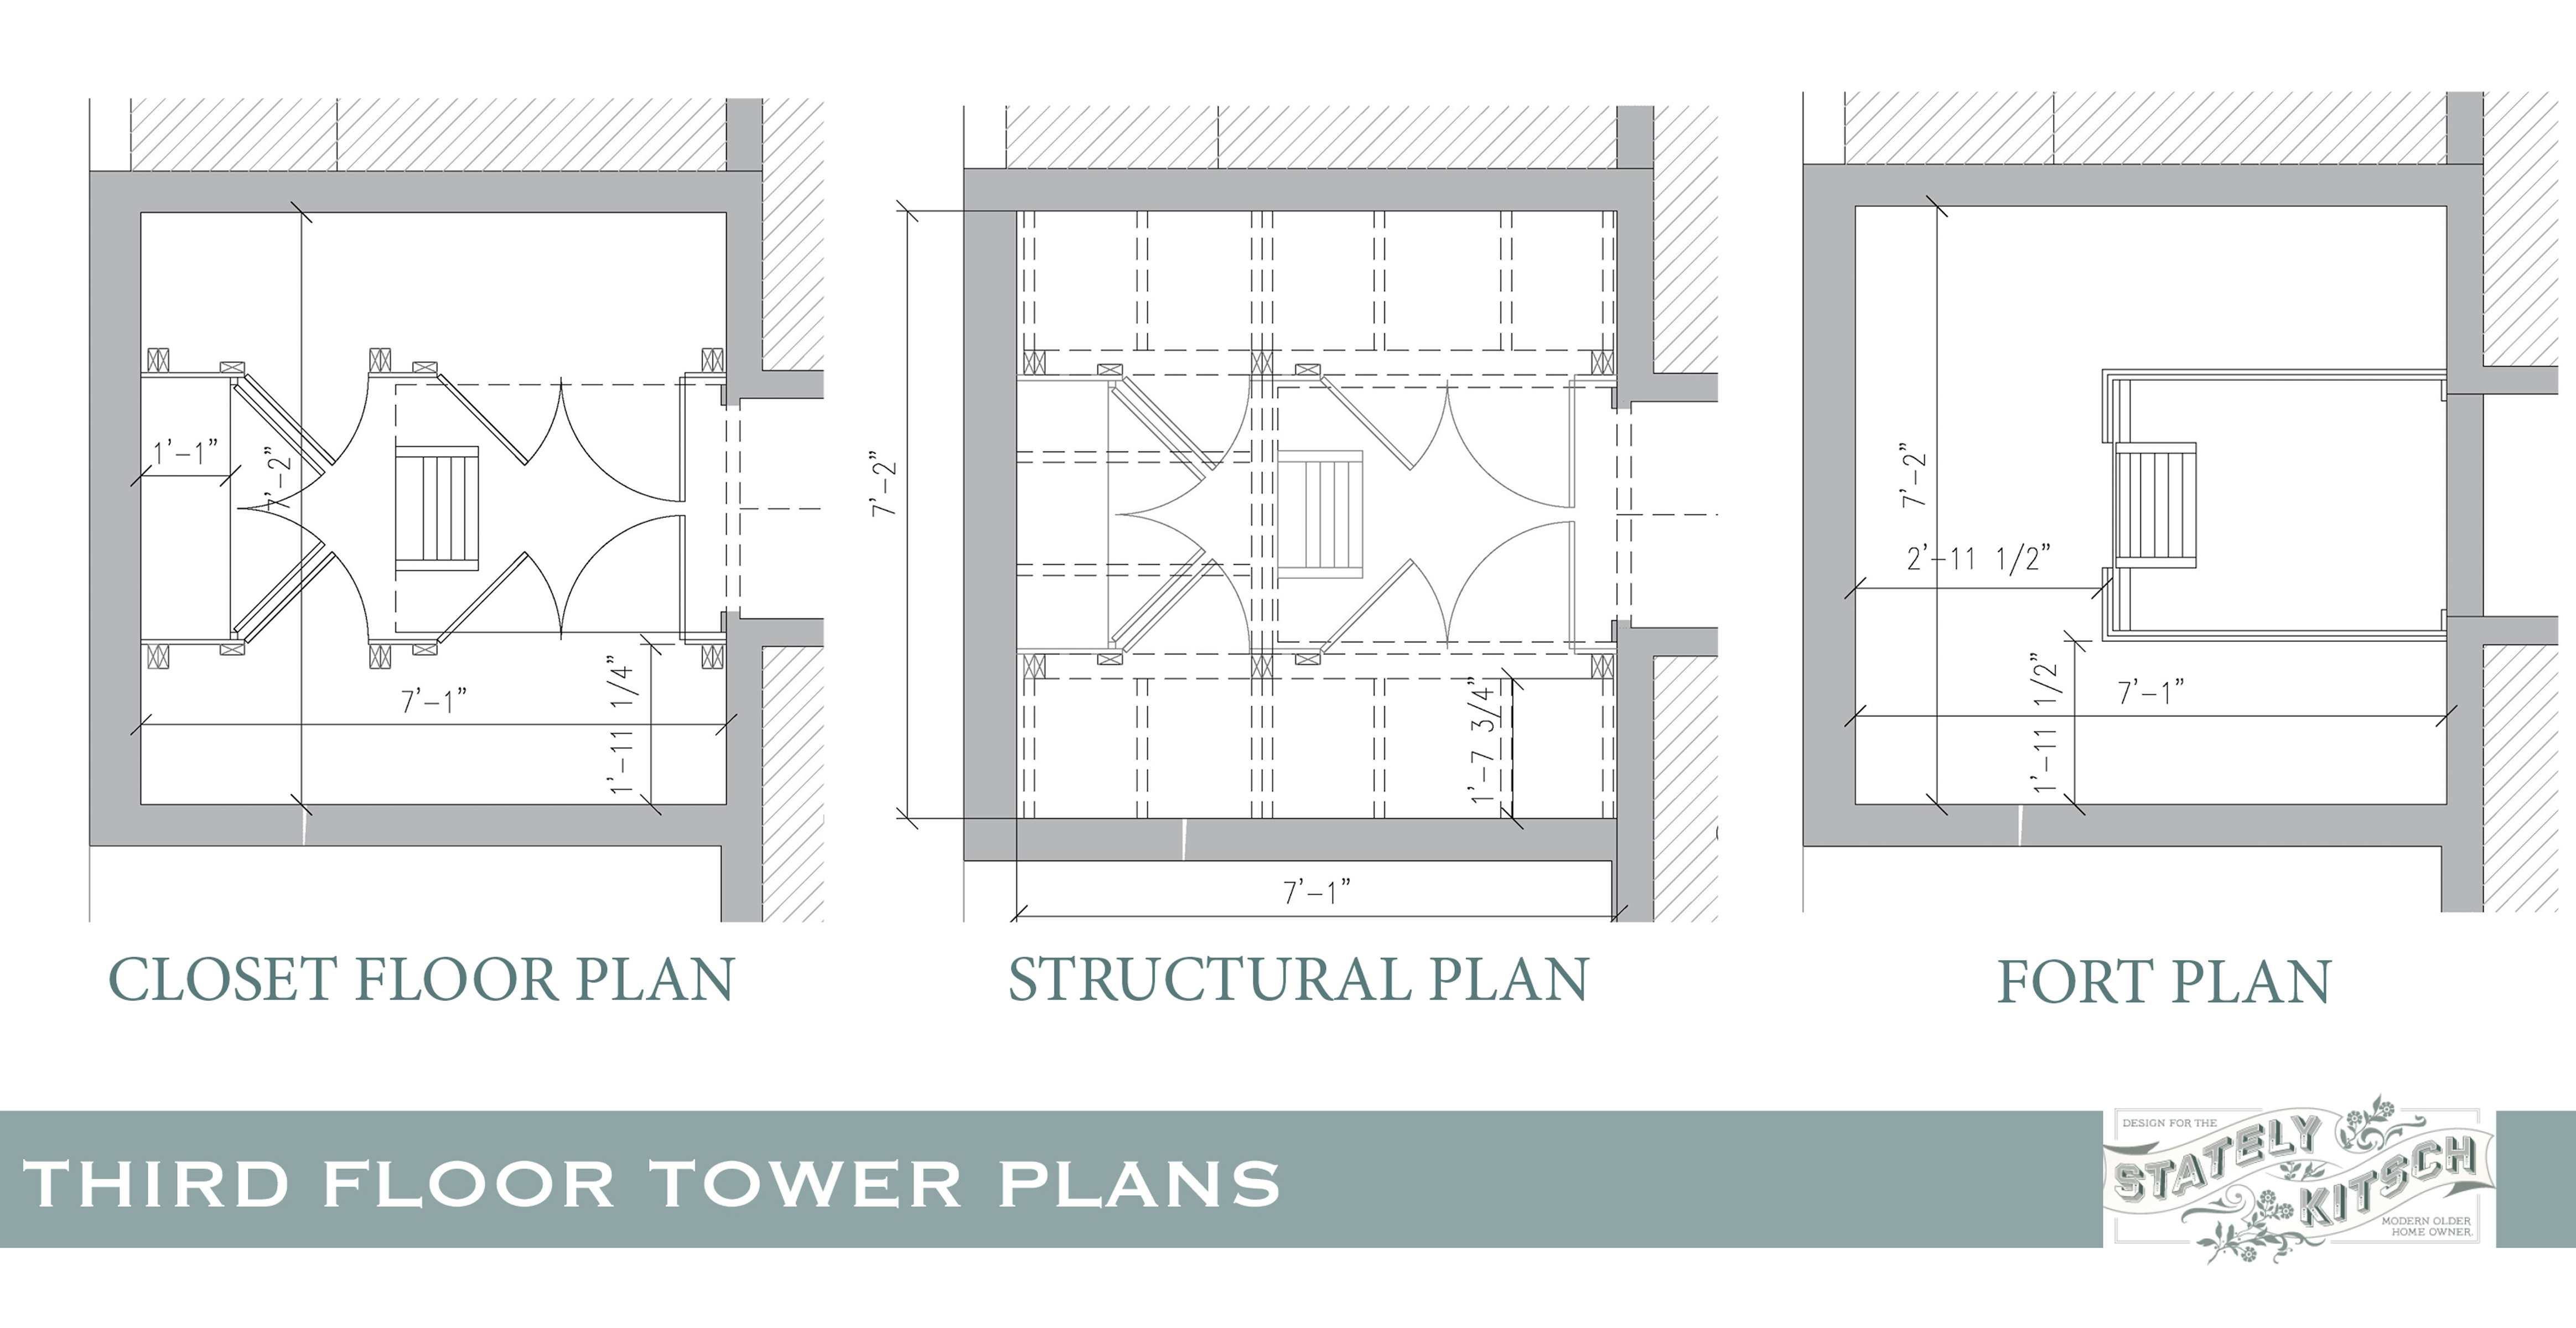
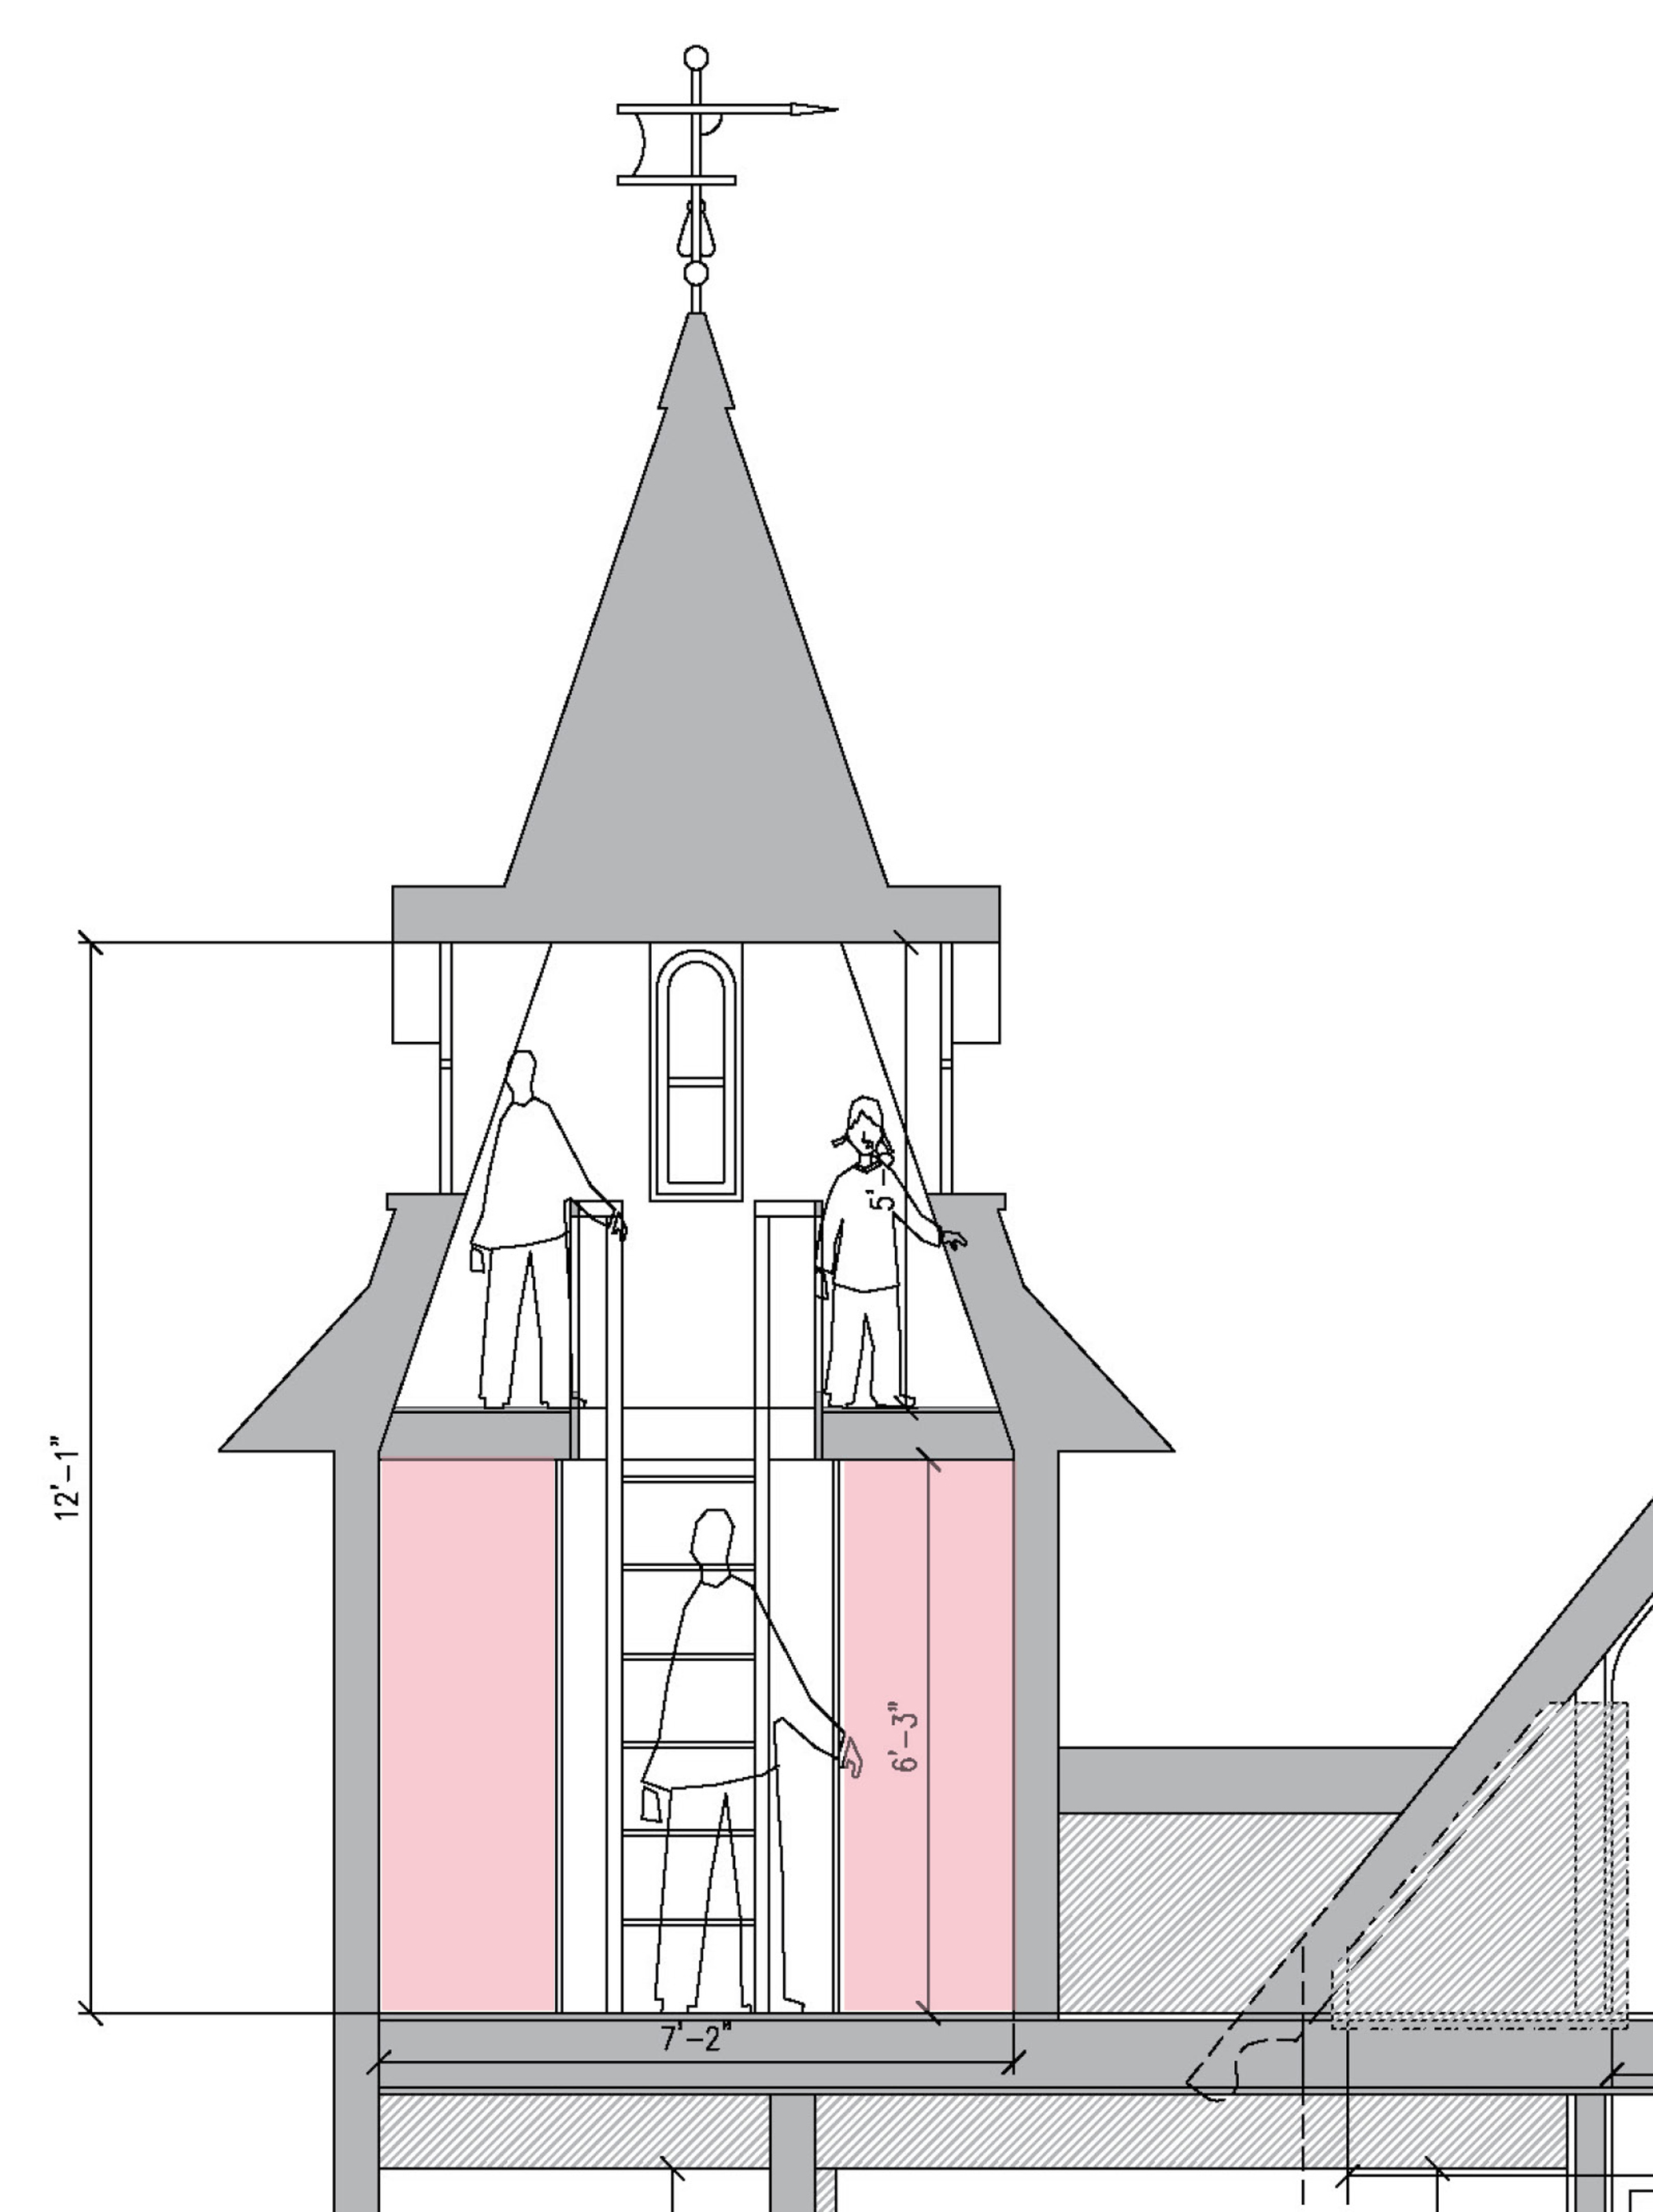
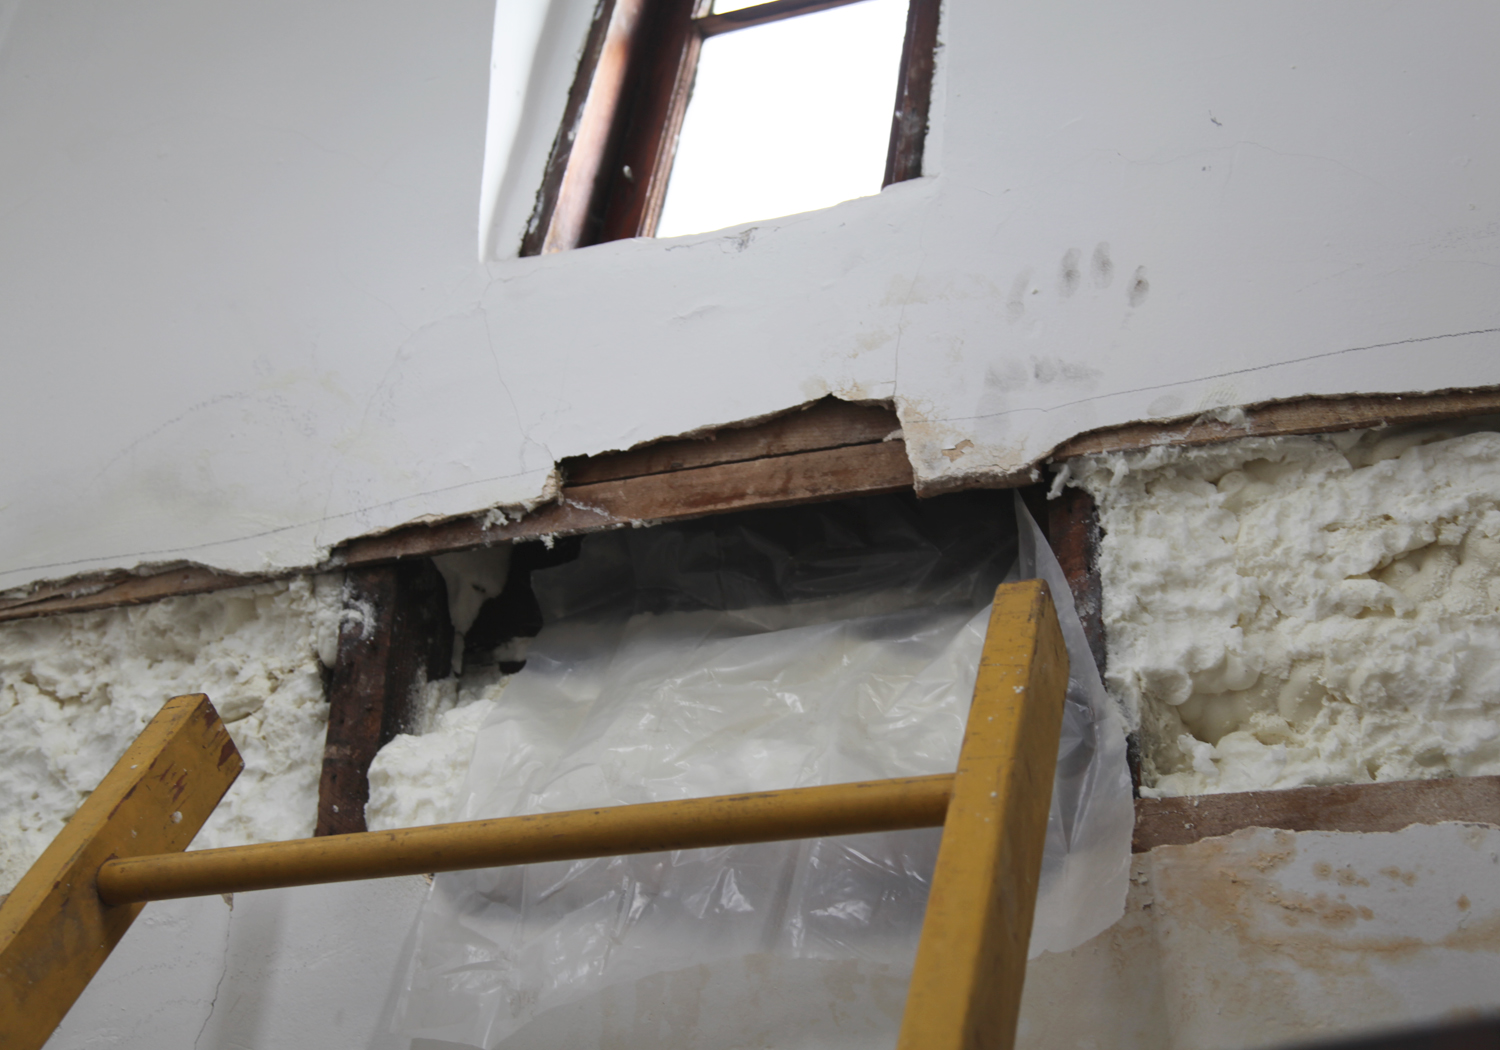
The last place they cut the holes and had a strategy for was the tower. My roofer came over yesterday morning (just as the spray foam was starting) to take a look at our various flashing problems. They hadn’t cut below the tower windows yet, so we could only speculate about the moisture problems. Mistake #3, I should have cut holes below the windows ahead of time. By the time they cut the holes (early afternoon) they discovered that the spot where the flashing is installed incorrectly was causing a slow drip (water and spray foam not a good mix). I stuck my hand up the hole to discover that the blocking adjacent to the flashing problem was wet. Fortunately the other 3 windows appeared to be dry. Given the super windy rain, it was a good day to feel around for dampness. After some discussion, it was decided that they would cut a piece of plastic under the sill and leave it unsprayed. I figured I could use a can of spray foam after the flashing is fixed.

sprayfoam-5
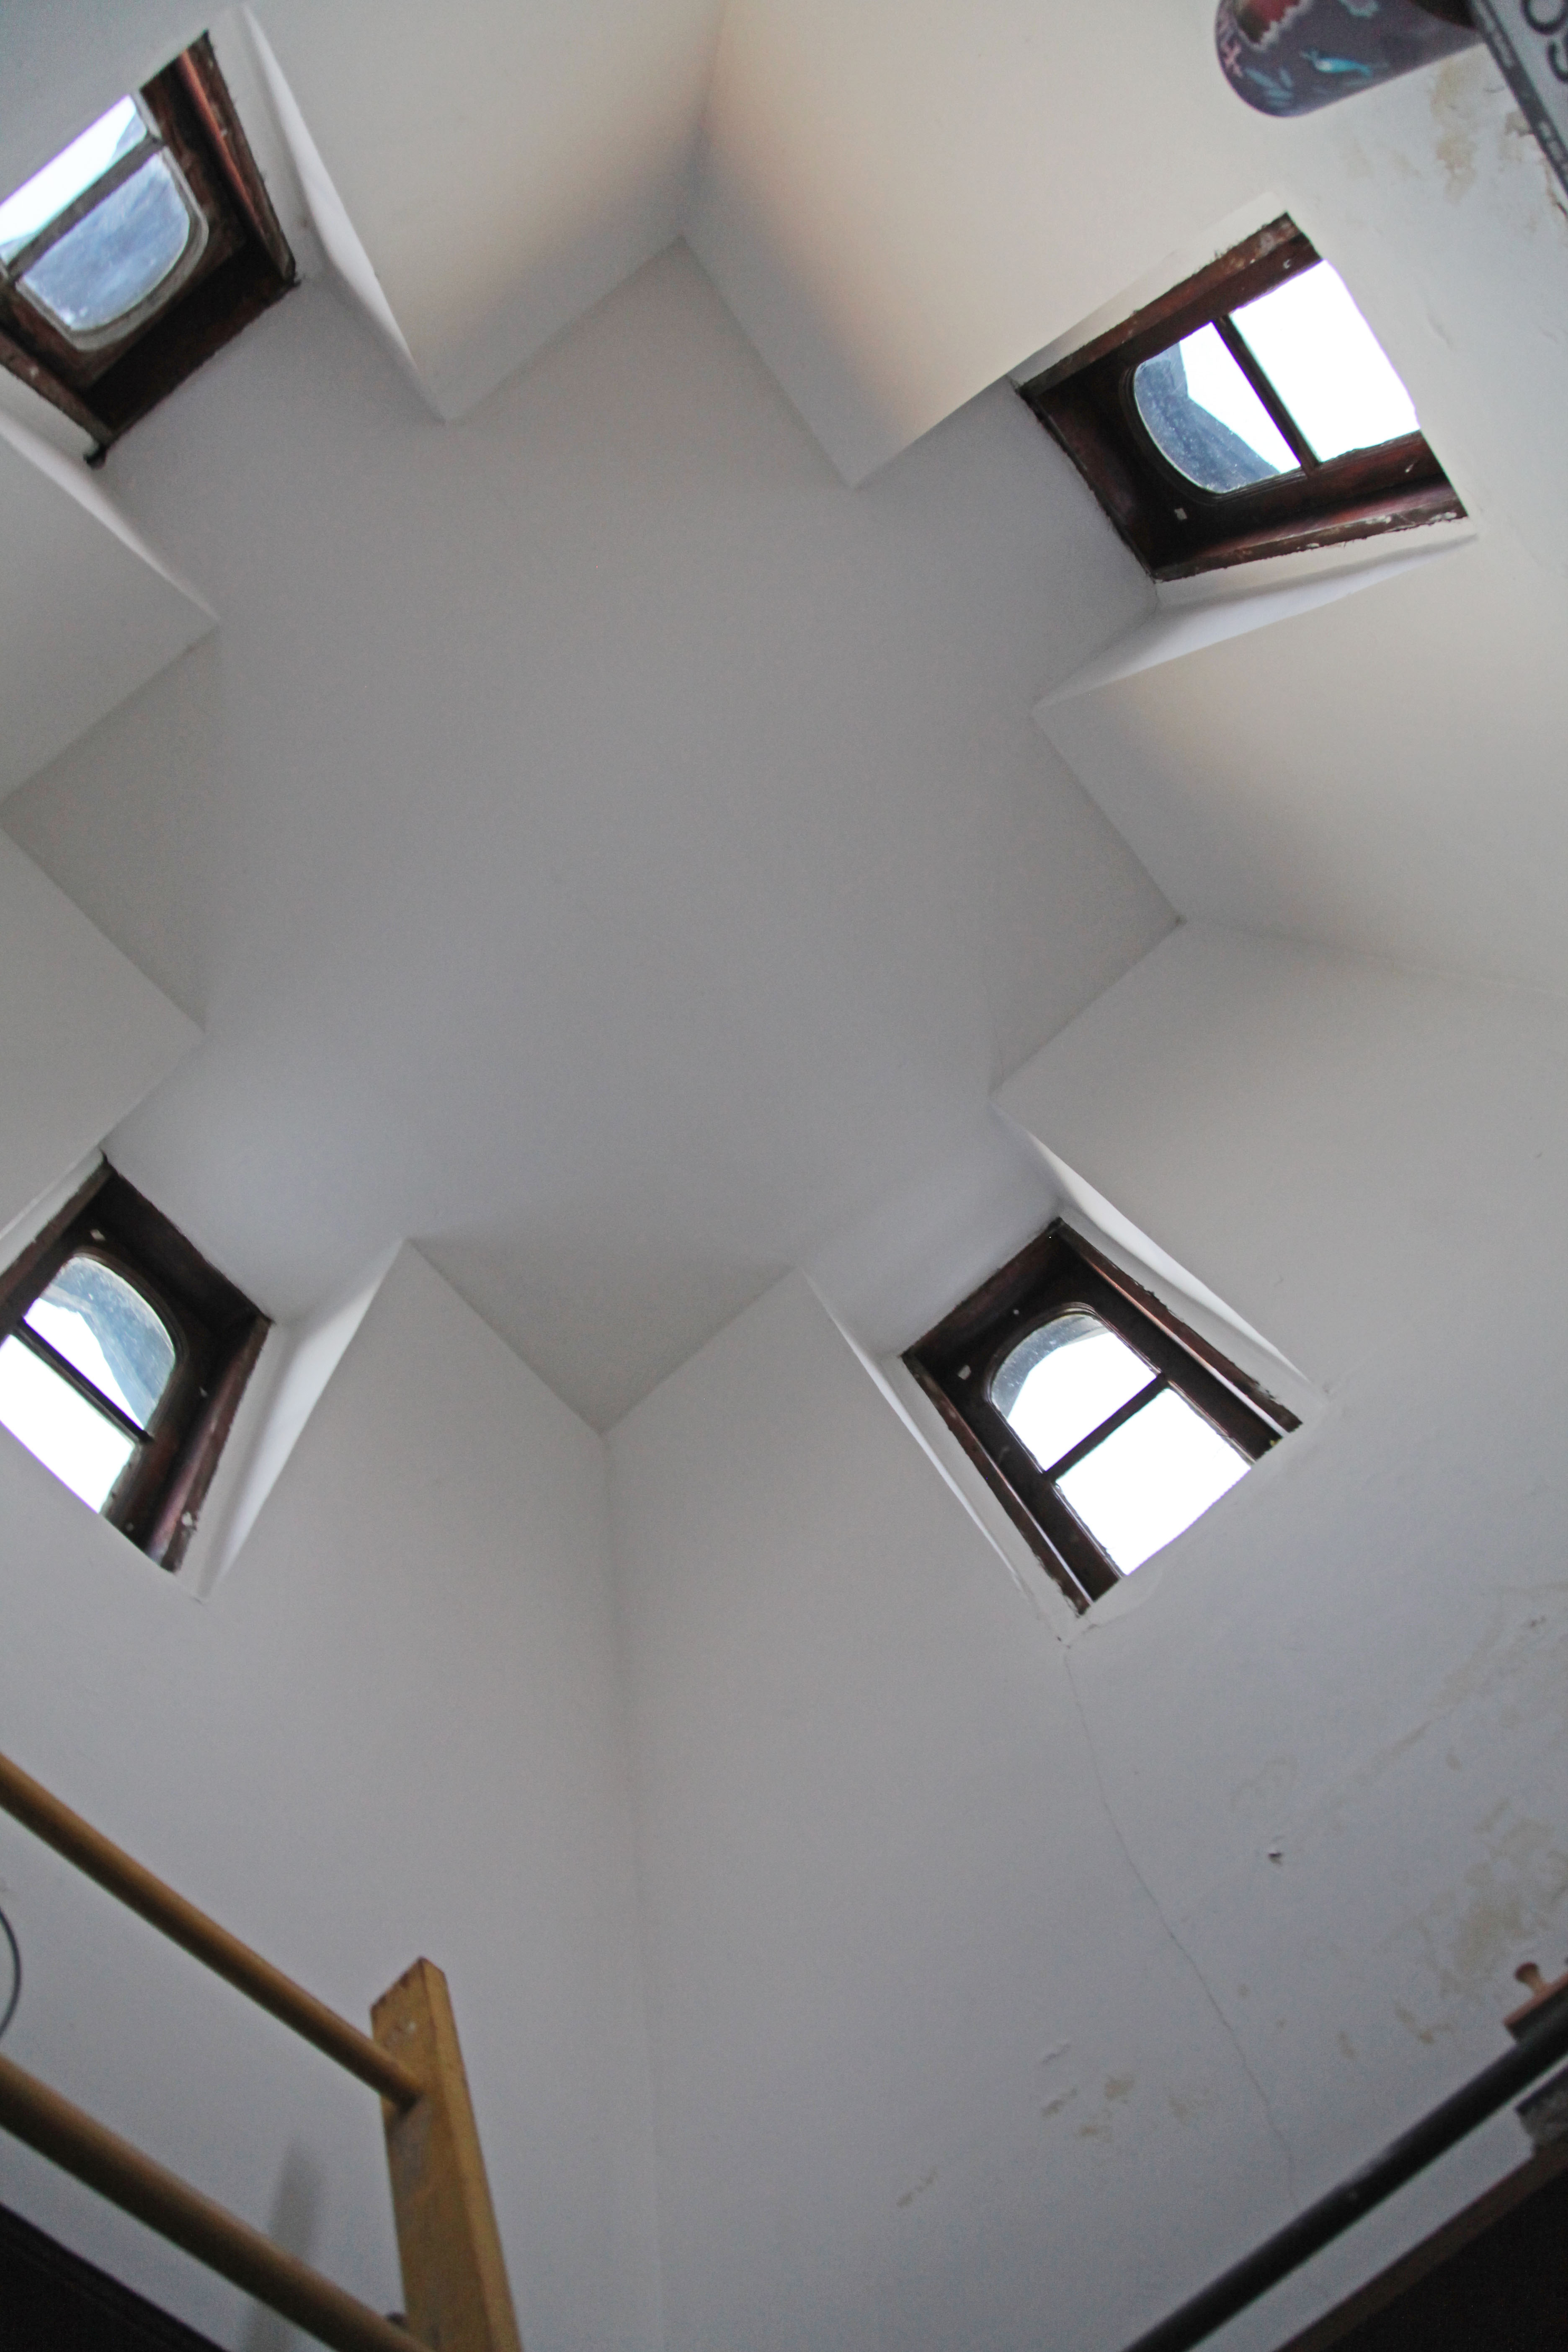
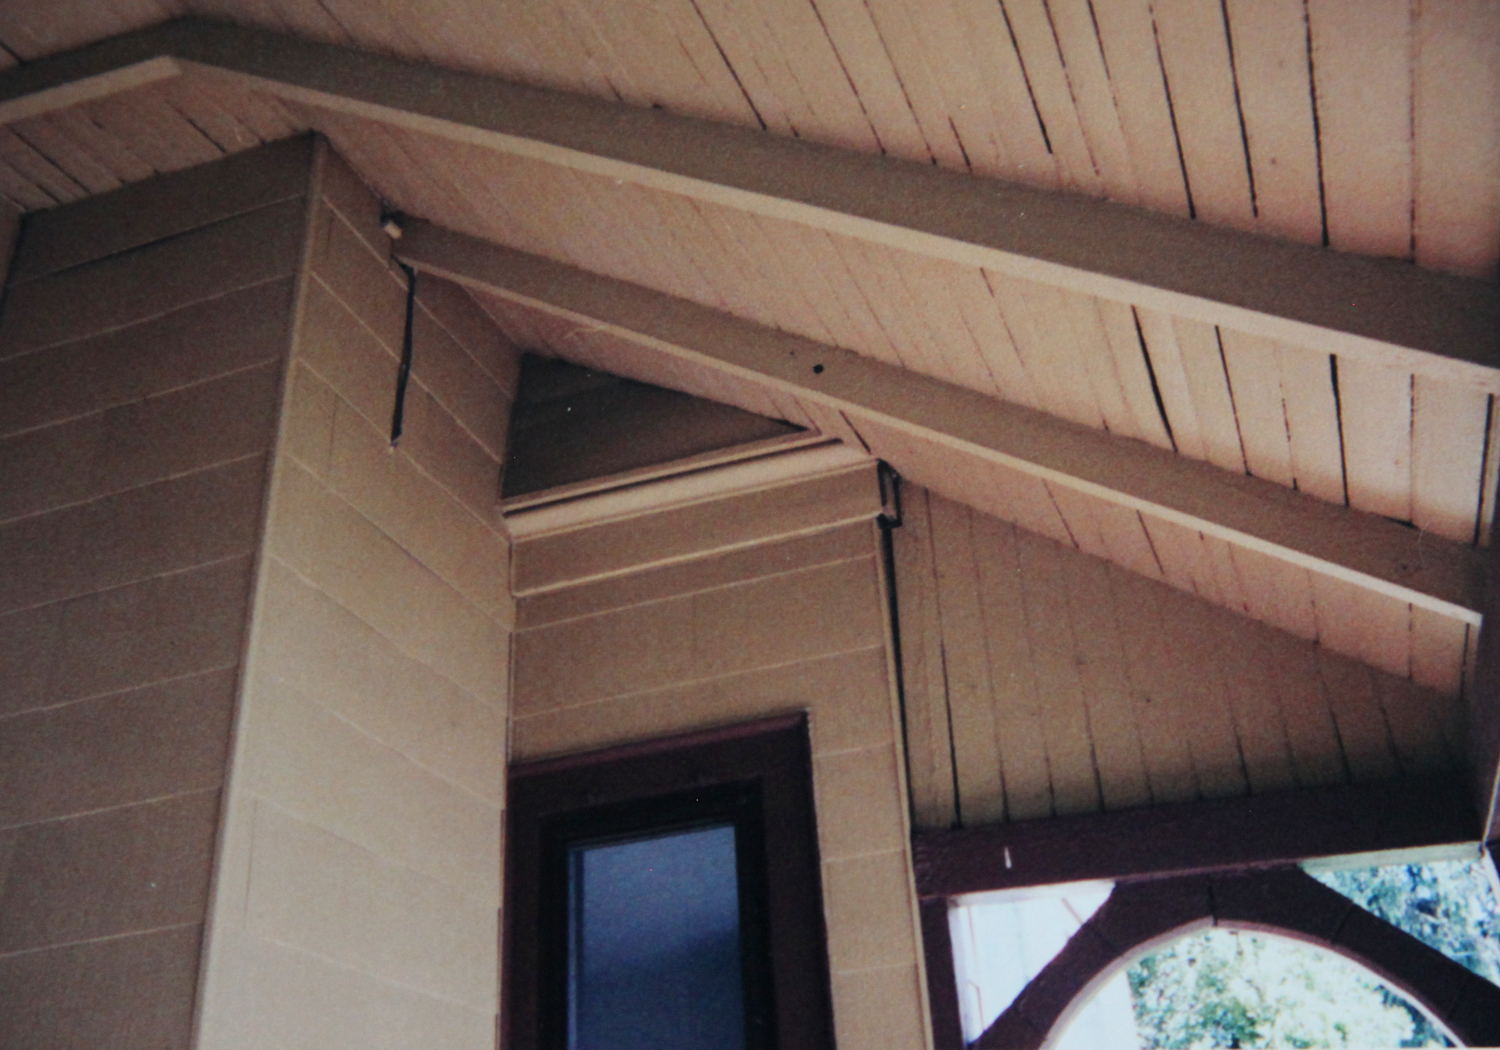
After a lot of perplexed looks they did manage to spray the top of the tower (about 18′ up). I wasn’t there when they did it so I’m not sure how they exactly got up there, but it is done. The plaster ceiling looks like crap (good thing I am planning on covering over it with beadboard or some other material).

sprayfoam-6

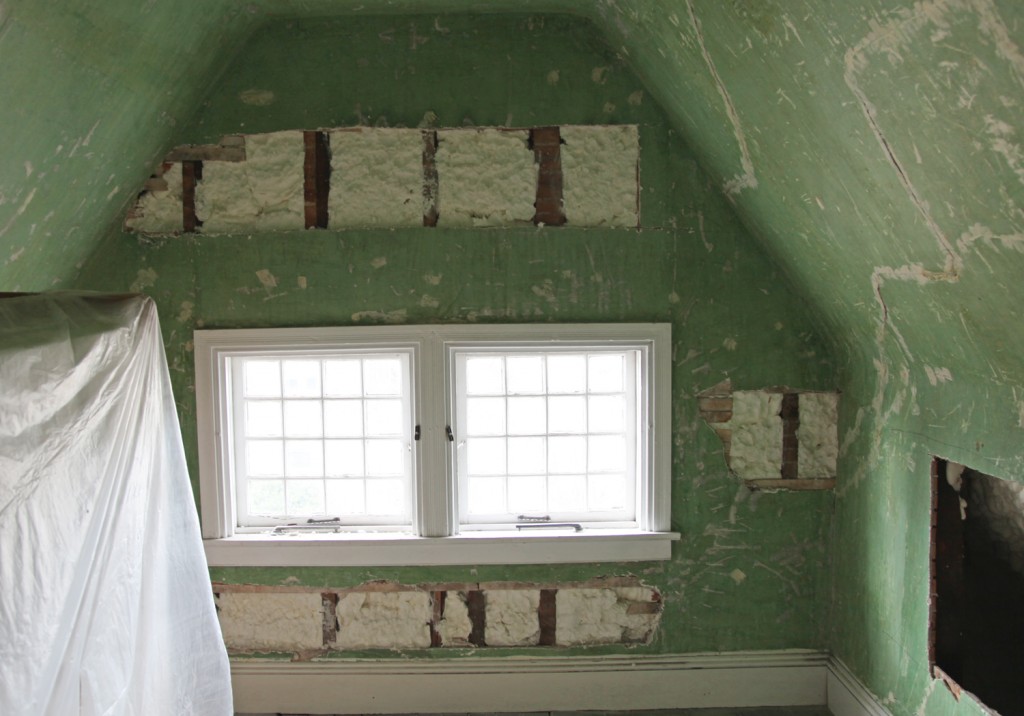
Here you can see the finished end wall. The verdict? There is a nice firmness to the walls now and they aren’t cold to the touch which is pretty nice. And the guys did do a reasonable job of cleaning up. And I still think this was the right solution for insulating our house. The R-Value per inch is way better than fiberglass and you get a much better seal. I was also impressed the cost of the spray foam has come down significantly in the last couple of years. We should actually recoup the cost in about 10 years with savings on heating and air conditioning. We won’t know for sure until we see our wintertime heating bills next year but fingers are crossed (after all we had NO insulation up there before). I am also hopeful that it will keep the worst of the summer heat from transferring to the house.

Next on the list is getting a couple of AC contractors in to figure out the system and layout!  But I think I am going to take a breather for a few days before then.

To summarize here are my thought on my spray foam experience:

1. Pick a reputable contractor. My contractor had a lot of good reviews and the architectural firm that I work with had recently worked with them.

2. Do NOT have them cut the holes in your walls. They will probably need to cut a few last minute holes into areas that they can’t get to, but I think that is better left to a carpenter or someone you trust with your house. After all spray foam is there thing not carpentry.

3. Make sure to have all of your access holes cut well ahead of the insulation to allow for #4 and #5.

4. Coordinate with the other trades including electricians and mechanical contractors, so that you can leave appropriate infrastructure in place BEFORE the insulation goes in.

5. Complete any roofing and flashing work before the insulation goes in to avoid moisture problems. Having a leak behind the new insulation could leave to quicker rot since the water doesn’t have any where to go. We did take a really good luck at the underside of the roof to check for leaks or moisture.

6. It is kind of smelly so I don’t recommend hanging out near by that day. We put our kitties in the basement to be as far away as possible.

Phew! I’m tired.

6 Comments

OLYMPUS DIGITAL CAMERA

My little blog is officially 2 today! So to my faithful readers: Thanks for reading!

A lot has happened in the last 2 years and I have been very fortunate to have a supportive family and friends while I try out new things, write this blog and take on more clients. To my family and friends: Thanks and love you all!

I am still working on a full house tour, but today I thought I would show you some before pictures of our house (aka 2000 when I didn’t know any better). I finally dug out some of the old photos and took photos of them (yes, photos of photos) so you too could enjoy the splendor of the 1970s wallpaper and color schemes too! And, yes clearly we were crazy!

houseflyer

Above is the flyer that was handed out at the open house. I removed the price but I will say that the price was lowered 3 times and was pretty reasonable (although I suppose if you factor in the work required maybe not so much). It was well under our budget and over $50,000 less than the original price. I don’t think we were the “antique buffs” the previous owner was thinking of but we do LOVE our house.

house-before1

This set of exterior photos are from the open house. I hope you enjoy the mustard asbestos shingles in all their glory (since thankfully they are all gone). Mr. S. is most amazed by our little privet hedge covered in ivy. One of my early jobs was spending many hours cutting out the ivy. The hedge is now 3 times as tall and wide (with some very stubborn ivy still there).

house-before4

Here is the back of the house with the “entrance” to the basement office. I was so happy the day we took that off since it was blocking our view of the backyard (in what was the dining room and is now the kitchen). One interesting fact is that the entrance was made completely out of old Boeing crates (the previous owner worked there). The window on the left is now where the piano is located but was behind the fridge when we bought the house.

house-before3

A straight on view of the back of the house. One of the things that sold us was the giant pine tree.

house-before2

In this shot you can see the bulge in the siding (which we were very curious about). When removing the siding we realized that it was because the first floor was covered with fake brick in between the original shingles and the asbestos ones.

porch-before

Just look at all that mustard! It was everywhere (well except for the brown trim)!

fronthall-before

Please step inside! I don’t think we actually have a picture of the front hall from before we bought the house. Here is Mr. S. about a week after we bought the house taking out the red carpeting and wallpaper from the front hall. Fortunately at least the wallpaper came off easily (at least in this space).

diningroom-before

Next up is the old Dining Room which is now the Kitchen. We had already replaced the light fixture in here. The first time we painted this space I went will a pretty bright light green. Later I thought that decision was a little too bright and primary, but when you are going from an endless see of 1970s gold, orange and brown gloom, all I could think of were happy bright colors.

diningroom-before2

This is looking back towards the front of the house. The middle door is no longer there (it has been replaced with a door in the hallway for the half bath). You can also see the corner of the wood burning stove sticking out from the fireplace. That was a beast!

kitchen-before

Finally I am going to leave you will a before picture of our kitchen (now the Dining Room). And yes, that is all the counter space we had! The door on the right lead out to the refrigerator room. You can also just get a glimpse of the faux wood “rustic” beams that were on the ceiling. The light blue on the cabinet was my test color. We lived with this kitchen for a couple of years before making a much more suitable space in the Dining Room.

I will be back next week with some more before and after photos! We will be celebrating our little one’s birthday this weekend.

7 Comments

foundobjects2

While we were working up on the third floor this weekend we spent a good bit of time talking about the house and its history. We realized that the house is going to be 125 years old in May. This may call for a Quasquicentennial Party! Hmmm, maybe this will give me incentive to get the AC working by then.

We are fortunate to know the age of the house, originally because a generous soul from our little borough put together a history complete with the year every house was built. This was confirmed a few years ago by a little slip of paper that we found under the stairs when we were building the half bath (the one in the middle of the picture above). It is a receipt for shingles dated May 2, 1888. It also includes the builder’s name Mr. J. Welsh (who built a number of houses in our town).

foundobjects1

All of the items in the 2 frames above contain paper that we have found in the house. I think my two favorite are the piece of sheep puzzle and the letter in the top of the second one. It says, “Come over Bill and I will sit with you.” Then it has an o.k. (circled so I assume that he agreed).

signature1977

This is our latest find. The previous owners’ signatures from March 4, 1977.  It is above the front windows in the third floor bedroom. Unfortunately a lot of this will be lost when we cut the plaster for the insulation. They also told us when we bought the house that there is an original 1888 signature in the craft room. Unfortunately the wallpaper is stuck on pretty tight and there is a really good chance we will loose it when we cut the plaster, which makes me a little sad.

Has anyone else found anything interesting in their house?

2 Comments