Archives For -Bathroom

Shower all Grouted!

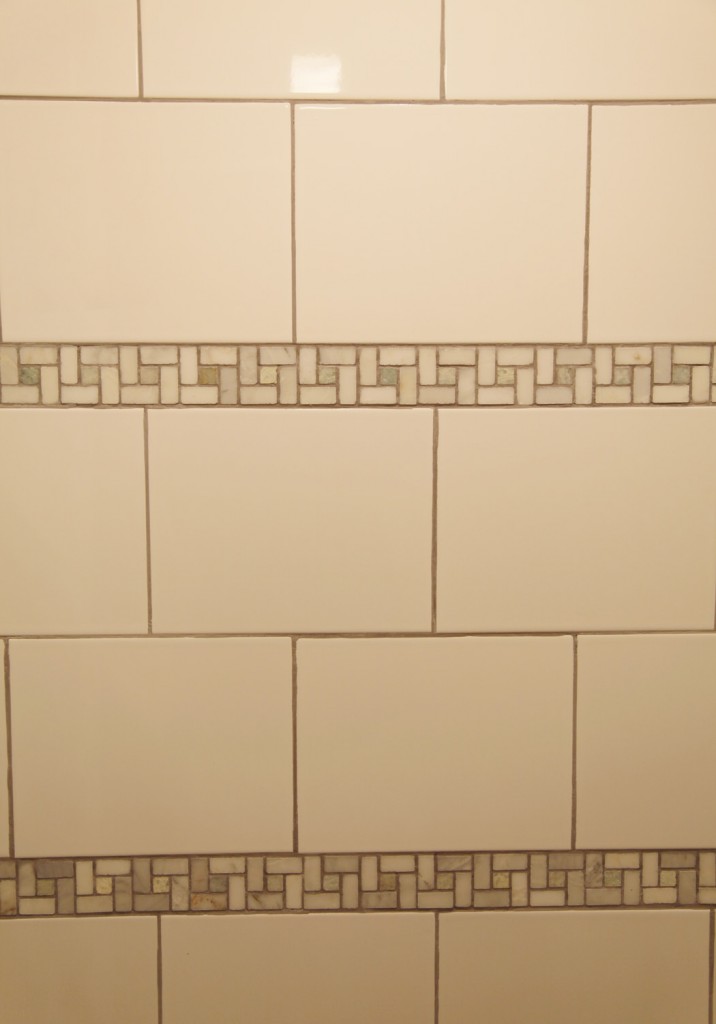
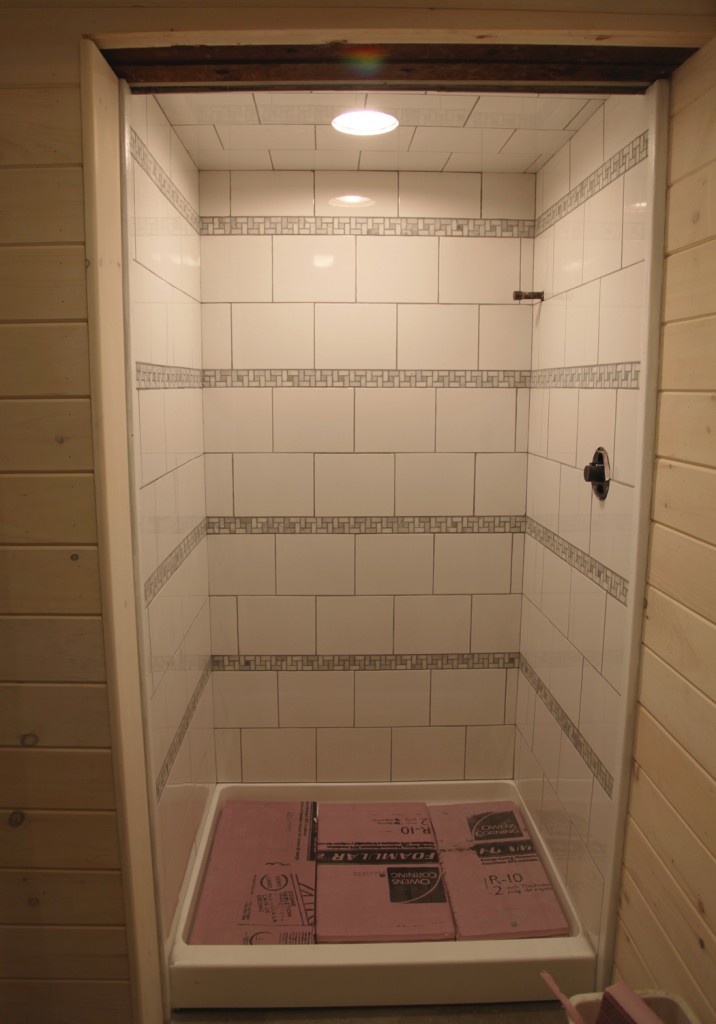
So we got our hands a little dirty this weekend and grouted the shower! My hands are now totally dry and cracked to prove I have had a busy weekend. I have grouted before although this was my first time grouting with gray grout and on multiple surfaces. I was a little rusty and a few of the joints aren’t perfect, but overall I am very happy with the results. I am in love with the gray grout with the stone stripes! The gray grout really brought out their color of the marble.  This ended up taking up a good bit of time this weekend, but I am very relieved to have this part of the bathroom finished. It still needs a little bit of caulk around the bottom and side seams, but we are otherwise ready for final plumbing (not counting the floor in the bathroom).

The Making of a Shower!

Close up of Tile

I will spare you all the ins and outs of grouting, since it has been documented many times by professionals but time wise I ended up spending about 3 hours getting excess thin set mortar out of the joints. I haven’t had to do this step before but I think because the mortar ended up being thicker than normal to accommodate the stone accent tile, we ended up with a good bit that had to be taken out. After some trial and error, I ended up using a combination of a utility knife, screwdriver and wooden bbq skewer. Then after cleaning everything off again with a sponge I spent about 6 hours grouting and cleaning up (in 2 sessions). I am sure if you are a professional you could do it in about half that time, but alas I am not! I even had a little “helper” for part of the clean up.

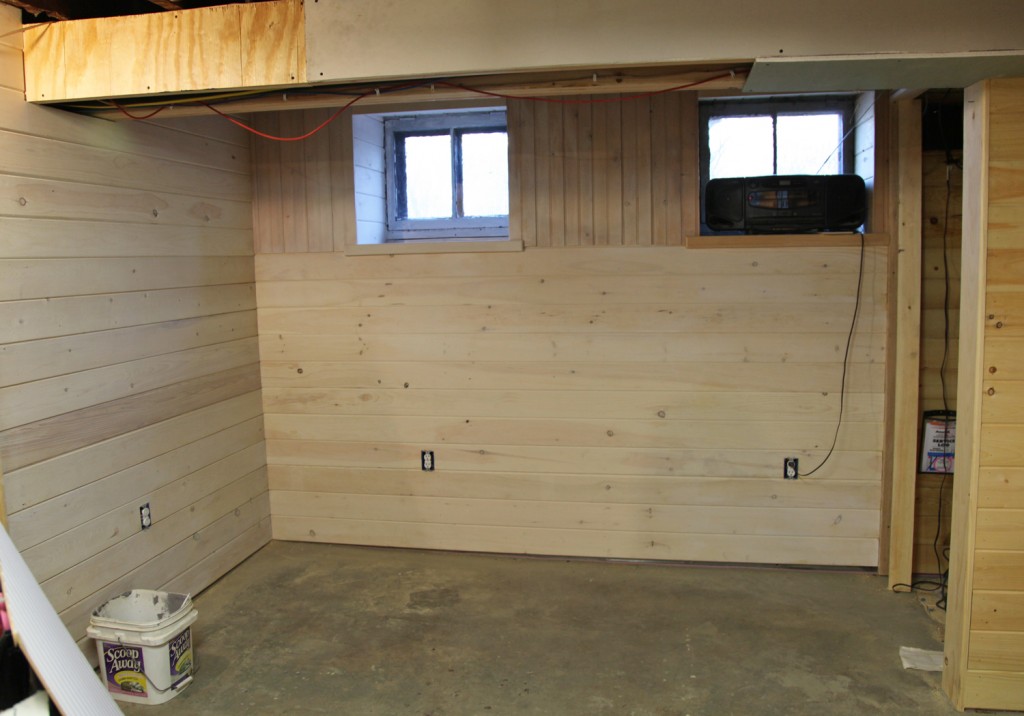
Main Room partially whitewashed!

We also did some more whitewashing and Drew cleaned out one of the windows (which has had dead ivy in between the storm and window for longer than I would care to mention).

Was anyone else productive this weekend?

* To see all of the posts about our basement click here.

1 Comment

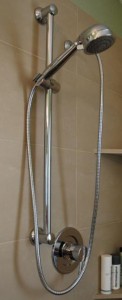
Moen Handshower w/ Slide Bar$134.95

Now that our shower pan is here, it is time to get moving on figuring out all of the details for the shower. Since we are installing all new walls I was able to use a pre-made shower pan, which means no grout cleaning (at least on the shower floor) for me! Next up is the shower itself. The ceiling height is quite short in this area so I wanted to have some flexibility in the shower head height. To maximize the height on the shower head we went with an adjustable shower mounted on a bar. On a normal shower you loose several inches due to the spout angle.  With this set up you can adjust the shower set up to the ceiling, or down low for the kids. My parents have a similar configuration in their shower and they love it.

I went round and round trying to find just the right setup at a reasonable price. It meant actually have to order 4 parts separately (a total pain!) to get what we wanted. I also now understand WAY too much about how a shower works and the different options and parts.

First up was the handshower. I wanted one with several different spray options. This eliminated quite a few of the sets. I also wanted one that included the slide bar. There were several major manufacturers to choose from, and it took me a while to weed through the various configurations to come up with this Moen model (3867), which comes in at $134.95.
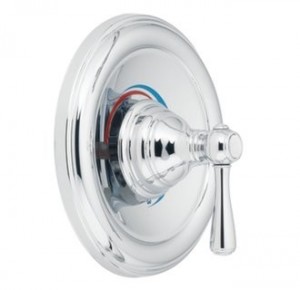
 

Moen Kingsley Single Lever Handle, $53
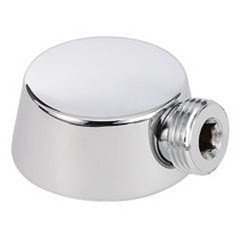
Moen Drop ELL-connector for shower, $26.95
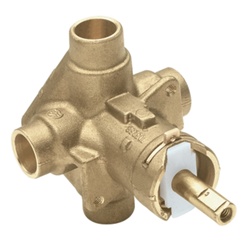
Moen 2520-2T Rough-In Valve, $55

Next up is the connector to the wall (drop Ell). I’m not sure why this wouldn’t come with the handshower system, but it doesn’t. Fortunately I found the right part after a little searching. Another $26.95 down the drain! Although I didn’t buy my shower from FaucetDirect.com I do recommend looking there, because they have very helpful descriptions that usually tell you the extra parts that you need to go with your set.

Finally was the control lever. This doesn’t have to be by the same manufacturer as the shower itself, but I figured I would stick with the same one anyway. When pricing these keep in mind that the actual controller in the wall will need to be bought separately. And these vary in price quite dramatically depending the brand. I also double checked with my plumber on which valve to buy, since it depends on your plumbing situation (copper or pex). It was also interesting to see that Home Depot was definitely not the cheapest place to buy the parts.

The Tile
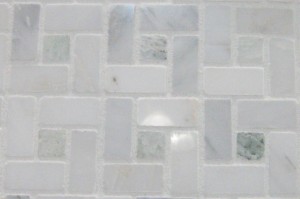
"Biltmore" Tile from The Tile Shop $3.99 sf on clearance

I am still a little bit undecided on the field tile for the shower. I bought some beautiful accent tile on clearance at The Tile Shop a couple of months ago when I was looking at options. I have enough that I can have 3 or 4 stripes in the shower. The “Biltmore” tile I bought (they still carry several other patterns) has a greenish square in the middle and grayer marble surrounding it.
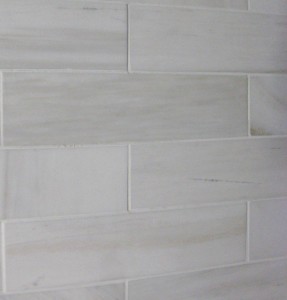
"Royal Satin", $9.99 at The Tile Shop
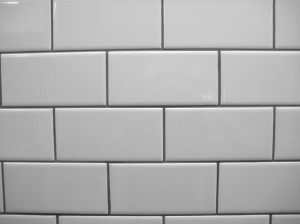
Whte Subway Tile

For the rest of the field I need to decide on either marble or white ceramic subway tile. The marble subway tile is about $9.99 sf verses about $2 for the white subway tile. The marble tile is quite beautiful, but is it worth the price for the basement?  I need about 65 sf worth so we are looking at a price of $130 verses $650. I think I may have found my answer! Although the satin marble does beg to be touched! What do you think?

Finally for the floor in the bathroom I will be using Faux Slate. Which I think will look great, and makes me think that a gray grout in the shower might be nice to play off the gray of the floor.

I need to make my decision on the wall tile in the next week or so and I also need to order the faux slate floor from Home Depot (they are  the only ones who make it and it is a special order). I would love to hear your opinion on the wall tile.

* To see all of the posts about our basement click here.


2 Comments

Our Basement Mood Board

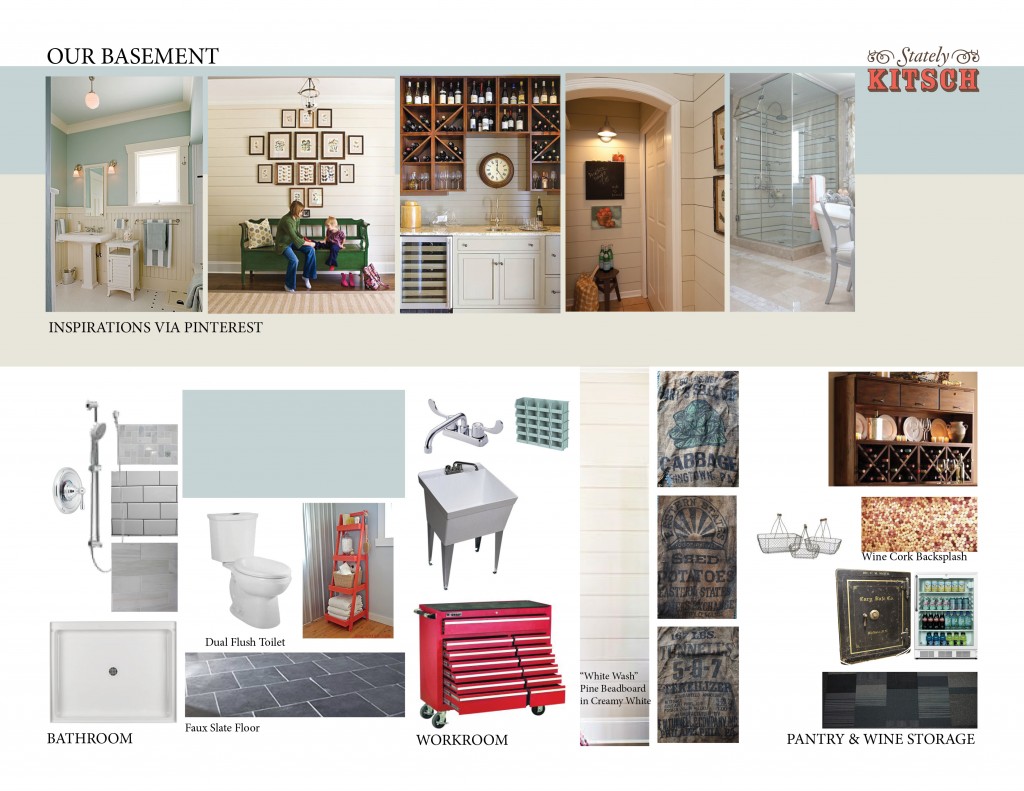
Today I thought it was about time to show you some pretty images! I put together a quick mood board for the basement. Most of this stuff is currently on my Pinterest Board but I thought it was about time to put it all together. In general I am happy with the look. The biggest issue I see at the moment is the carpet tile for the main room/pantry. I’m not sure it looks right with everything else. The good thing is that we will be installing it so it will be one of the last things to go down, so I’ve got a little time.

In basement progress news, our new sump pump and drainage system were put to the test on Monday! The rain combined with the melting snow meant LOTS of water. Our backyard turned into a giant mud pit (Sam was VERY excited!). The good news is that we went down into the basement to see how everything was doing we heard the faint sound of the sump pump. How exciting! And it didn’t feel the slightest bit moist down there (which is a big change). Also the hole for the shower drain had been getting water in it (since it is a good 9″ below the floor line) but it was bone dry, the clay didn’t even change into its bright orangy clay color; it looked dusty! Yeah! Very exciting! So now it is time to get moving on making the space usable!

Shower Pan (ours is white)

There are still a couple of things on our list before the contractor starts. The first is having the shower pan ready to go, since the walls get built around it and we are trying to maximize the ceiling clearance within the shower. The good news is that the shower pan arrived a couple of hours ago! I ordered it online and was disappointed to hear that it was coming freight (the website said it would come UPS), which meant having to be available between the hours of 9-5 and then having to lug it into the house myself. Fortunately the delivery guy came in the middle of day and actually carried it up onto the front porch.  Of course I now have to take it off the front porch and bring it around to the back stairs, but at least it is not sitting on the sidewalk.

2" Tongue and Groove Polystyrene Insulation

The second thing is installing the rigid insulation. We decided that we would save some money and install this ourselves. So we will be installing 2″ tongue and groove rigid polystyrene rigid insulation continuously around the entire foundation wall. We will be putting wood blocking at the top that will be attached to the joists above. This will align with the lip from the drain below. Once this is leveled we will attach the insulation to the blocking at the top and to the ground. We can also use a sanded grout to adhere it to the waterproofing membrane if that becomes necessary. The goal is to install most of the insulation this weekend. Fingers crossed it will go well. I will be making a bunch of trips to Home Depot to pick up enough! Fortunately it is less than 2 miles away.

* To see all of the posts about our basement click here.
1 Comment

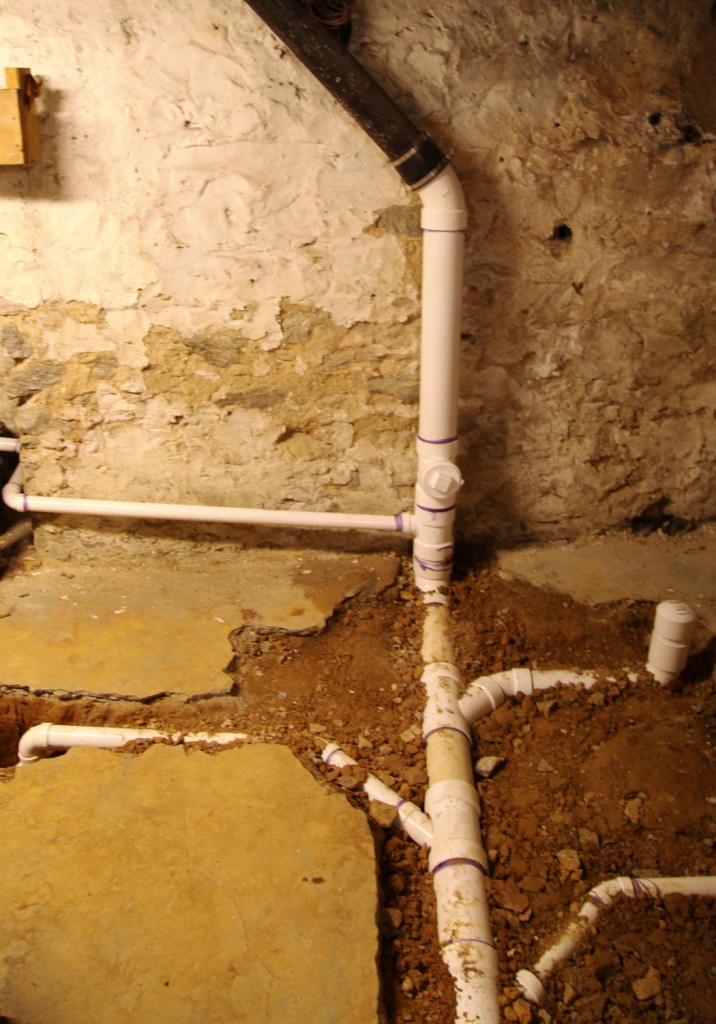
Look at those shiny PVC pipes!

It is has been a busy, noisy, smelly and cold couple of days in our basement. The good news is that our plumber is done with stage 1 of his work.

Here is a rundown of what he did:
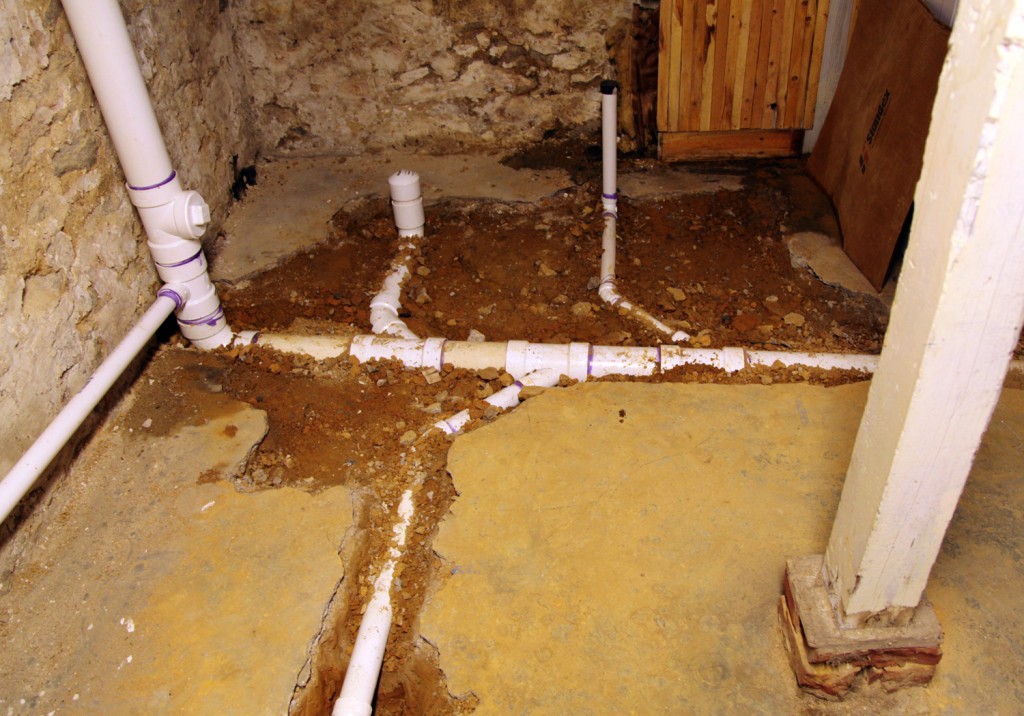
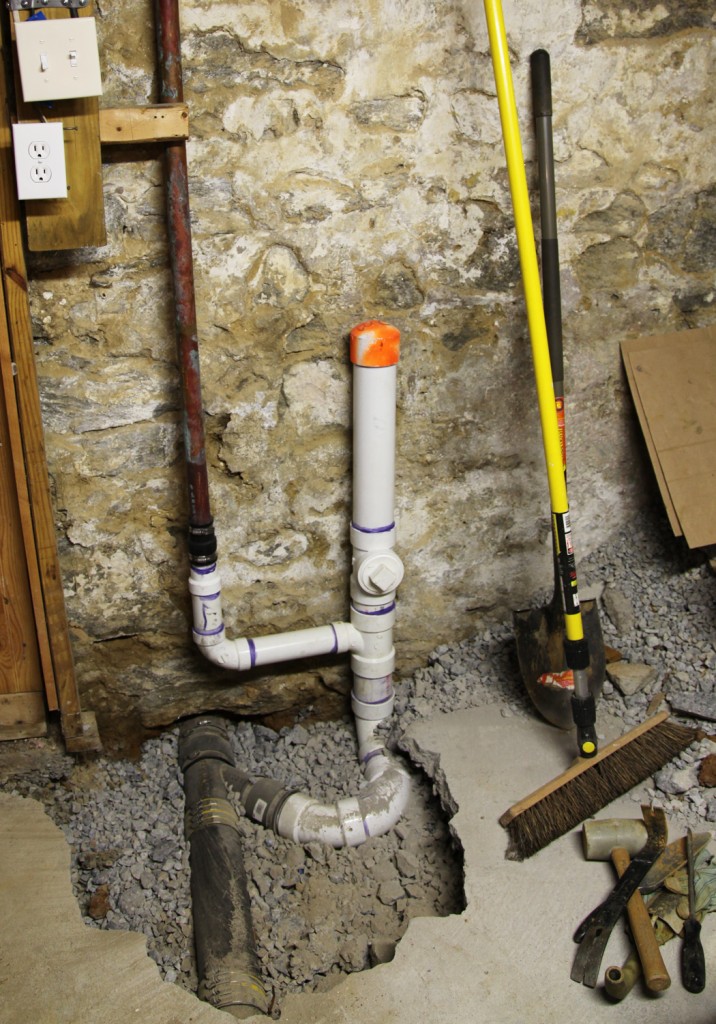
1. Replaced part of the old cast iron waste line/main stack and added a clean out.
2. Removed all of the old basement bathroom plumbing connections.
3. Installed the drain lines for the new toilet, sink, shower and stationary tub.
4. Replaced the connection from the kitchen sink waste into the main waste line and added a future connection.
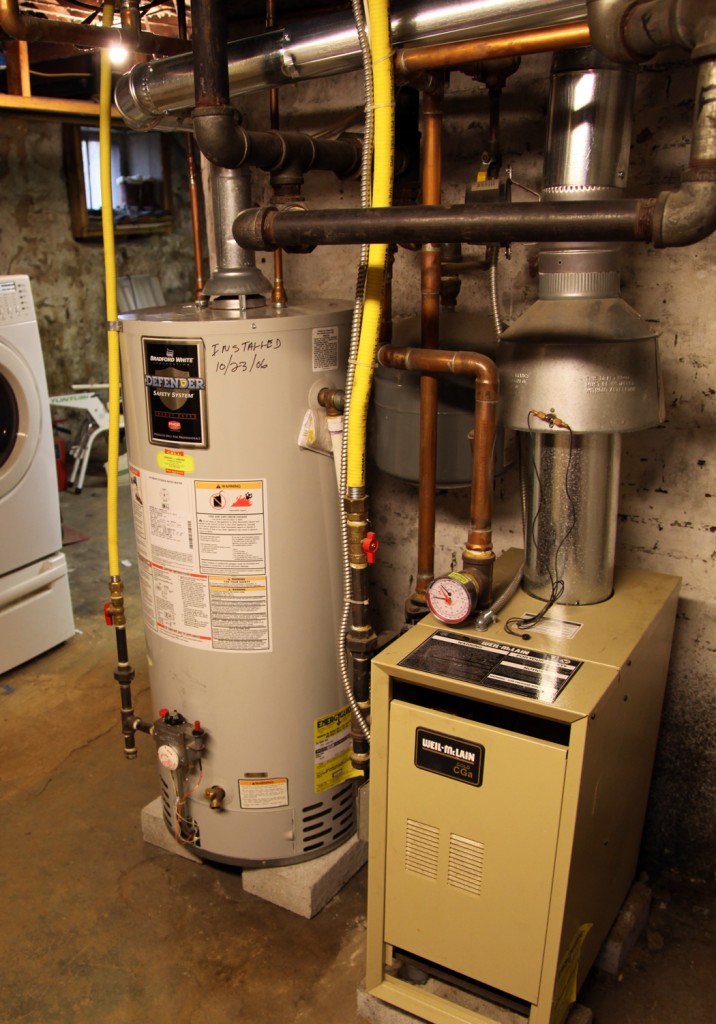
5. Moved the hot water heater to a more out of the way location.

New PVC waste pipes with old cast iron pipe up above on diagonal

New connection for kitchen waste pipe & future hook up w/ clean out

He and his assistant had a long day yesterday completing all of the waste line. This also meant that it was loud thanks to the drilling up of the part of the slab that we couldn’t get up, smelly thanks to the chemicals that adhere the PVC together and cold because the back door was open due to the fumes. It was really convenient that it was a day that the kids were at school (plus a lack of a bathroom doesn’t help).

Hot Water Heater in new location next to the Boiler

Today he moved the hot water heater and did a few last things to finish up. I wish I could say that we were done with demolition now, but alas we have another month of striping things apart before we can start building everything back. I am busy dreaming of tile floor and beadboard walls.

*To see a full rundown of the basement click here.
Leave a comment

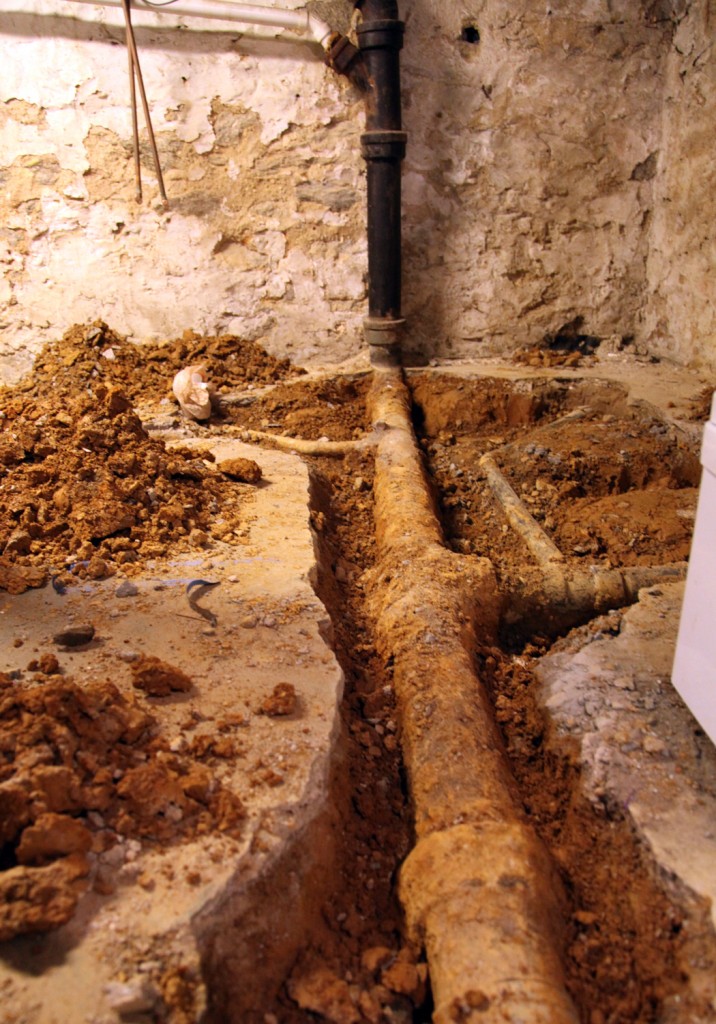
Cast Iron Waste Pipe under the concrete floor in the Basement

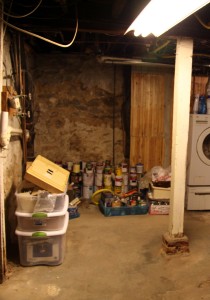
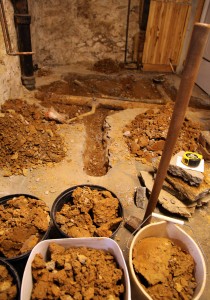
Today is a big day in the life of our basement! Mr S. and I spent a good bit of time this weekend breaking up part of the concrete floor in the basement and digging the clay soil out to get ready for the new drains for the basement bathroom. This included exposing a good section of the old cast iron waste pipe. This will all be replaced today! The plumber is here and will be shutting off the water shortly (okay right now!), so no bathroom for most of the day!

The demolition went pretty well over the weekend. Mr. S made good use of our antique sledgehammer (originally his Grandfather’s) and a crowbar and hammer. The floor is old, we are guessing from about 1900 (when they added the radiators). The concrete is quite thin averaging about 1 – 1 1/2″ thick, but I can’t say that it was easy to break up. One interesting fact about concrete is that it continues to get stronger and stronger as it ages, so it took some work to get it broken up. I was in charge of moving the buckets of concrete debris to the backyard (not sure what we are going to do with it yet) and digging up the dirt after the concrete was removed.

After the cast iron was exposed, we reviewed it with the plumber. It will be replaced from the angle part way up the wall to our existing (and a few years old) connection at the washer and dryer. This will include a clean out (really convenient considering we didn’t have one) and connection to the new stationary tub in the work room. The horizontal will include a connection to the new shower, toilet and sink. Yeah! At the other end of the waste pipe he will also be updating the drain connection from the kitchen sink to the waste pipe and adding a future connection, in case we ever put an addition on with a new bathroom (someday hopefully). The new PVC piping should outlast us, so hopefully we won’t ever have to dig this up again!

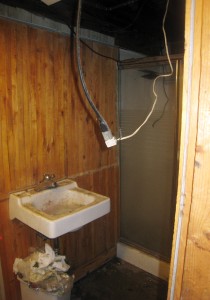
Old bathroom! Complete w/ tiny shower

Bathroom after demolishing all of the walls

Bathroom w/ bucket of clay (to go back in the ground)

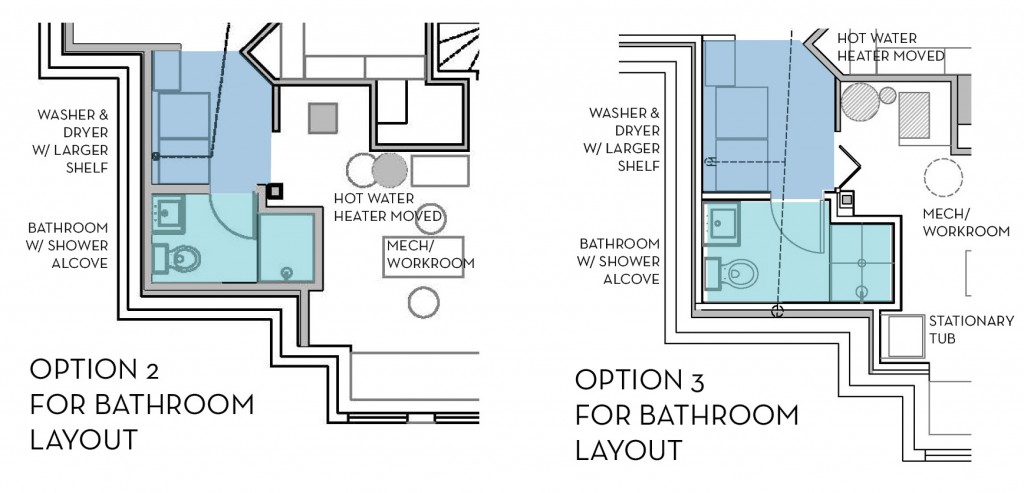
The bathroom plan is pretty much the same as I showed a couple of weeks ago.  Since then we have added a stationary tub to the workroom (I’m not sure why we didn’t think of it sooner) and tweaked some of the dimensions. We also found a better location for the hot water heater. It will JUST fit next to the boiler, this way the entry to the workroom won’t be so tight and we gain some extra wall space. I triple checked the plans yesterday, since as of right now I can’t change the plumbing locations.

Bathroom Layout Options (Option 3 is the FINAL Plan)

Fingers crossed we will have new waste pipes later this afternoon!

*For all of our Basement progress click here.

1 Comment

Basement Layouts

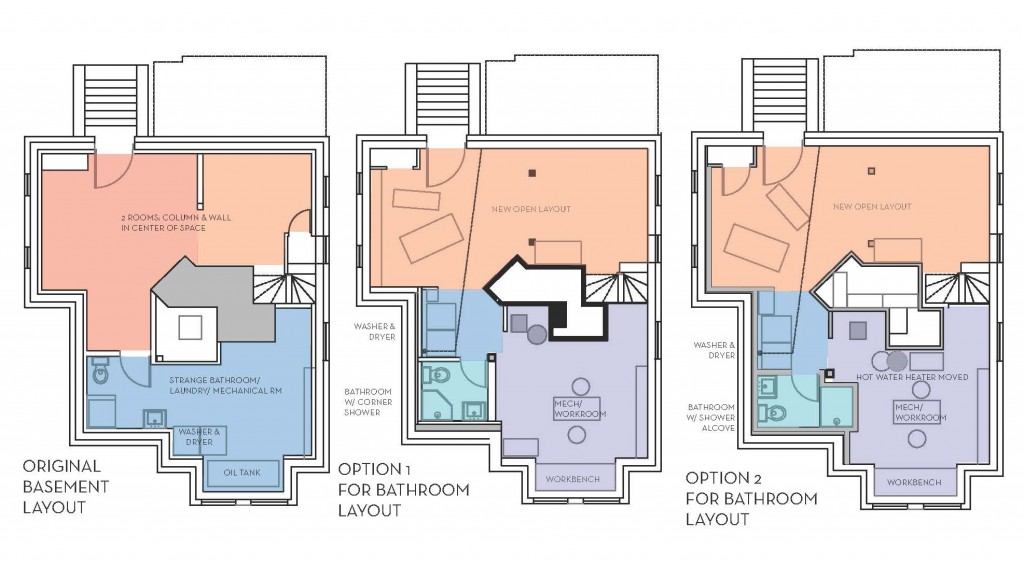
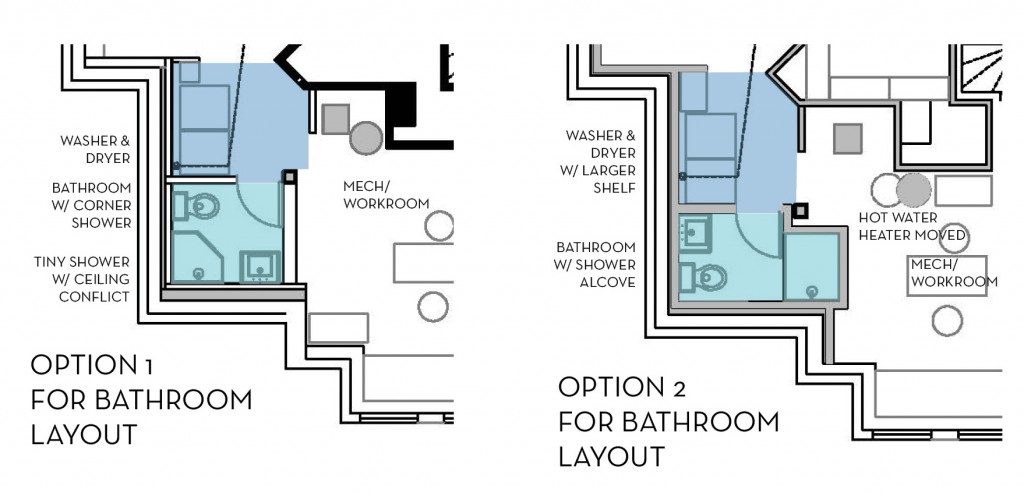
I have been trying to figure out the best layout for our basement bathroom/ overall layout. The old bathroom layout was very strange. It actually opened to the workroom/ laundry room. Yes, that’s right, you could close that room off from the other half of the basement, but you never actually felt like you were in a “bathroom”. Originally it had a shower, all be it a tiny kind of gross fiberglass model with a strange plumbing hookup. Since we only have 1 full bath on the second floor and none on the third floor, we felt that we should really try to put a shower back in down there.  Also we are going to bite the bullet and replace the plumbing under the slab in the space, which then gives us flexibility for a new layout, although we still have plenty of constraints!

Dreamline Corner Shower System

I started out thinking about a corner shower, since that was what was there previously, although I was looking at a corner glass model. The problem with the old location though is that the gas line runs directly above it, significantly limiting the ceiling height, and not allowing for a standard glass door to fit. So I expanded my options and after double checking the dimensions  down there came up with a plan that will give us a comfortably sized shower.

Bathroom Layout Options

The big trick to making this layout work is to move the hot water heater (gray circle in the plan). I know, that seems silly and an unnecessary expense, but the more I thought about it, why should I have a tiny shower due to the hot water heater. Eventually we plan on upgrading the hot water heater anyway with a tankless model (which would need to be mounted on the wall we are moving it to).

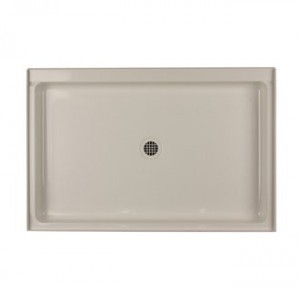
32x42 Shower Pan, we will use white

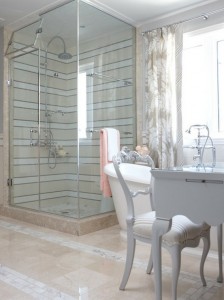
Sarah Richardson Tile Shower

I found this nice shower pan that will fit the space. I also like the striped tile in this shower by Sarah Richardson from her Sarah 101 show on HGTV. I actually picked up some accent tile for the striping on clearance, but am still deciding on some of the other tile and the floor tile. So stay tuned!

1 Comment