Archives For -Basement

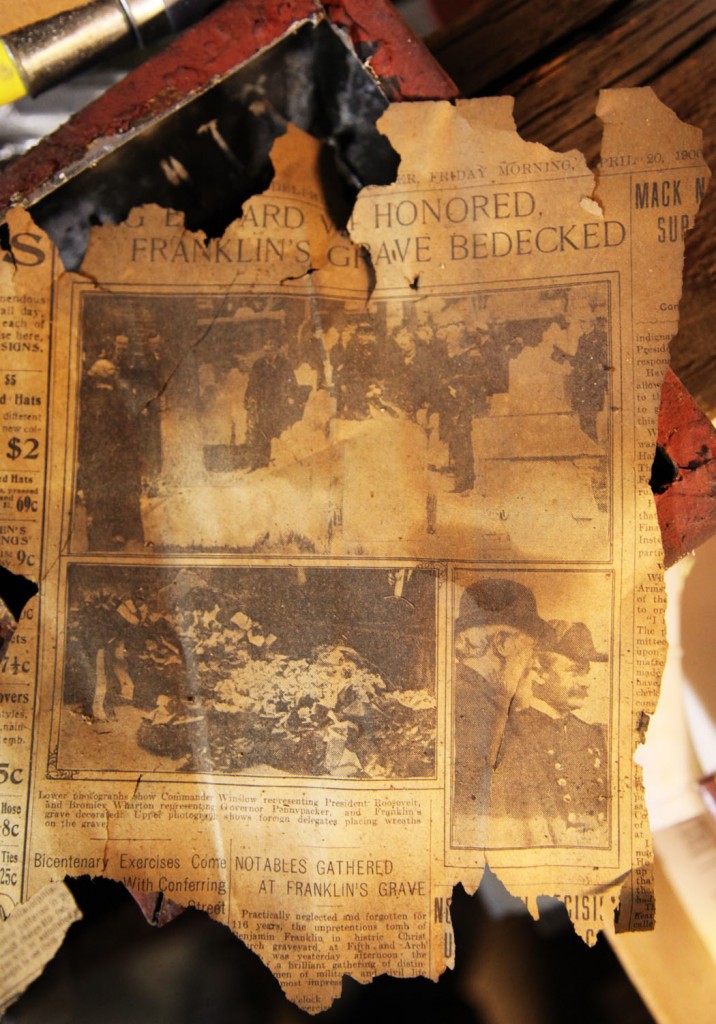
In an old house there is a certain amount of excitement when you do demolition because you never know what you are going to find. We have a box of “finds” and have even framed a few up. The underside of our first floor was “insulated” with newspaper in 1900 (in our case the Philadelphia Inquirer). The pieces are pretty fragile but mostly still legible. Here are a couple of our favorites from this weekend:

"Talk-O-Phone" Ad Circa 1900

This photos is of an article about Ben Franklin’s grave. “Practically neglected and forgotten for 116 years, the unpretentious tomb of Benjamin Franklin” at Christ Church graveyard in Philadelphia was redone and “bedecked” (what a good word). I find this very interesting as Ben’s tomb is still a favorite site for visitors today.

Article about 100 year old Ben Franklin Burial Site

This weekend we made our way to the front of the basement (under the Living Room) on our ongoing project to remove all the old 1970s paneling and walls and we (mostly Mr. S.) removed the last major walls in our demolition project. This meant that we had to get a second Bagster for the debris, but it was totally worth it because the satisfaction of getting all the old walls out is hard to beat.

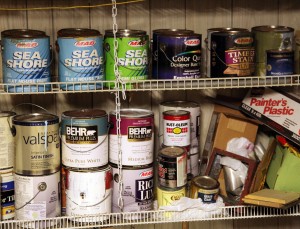
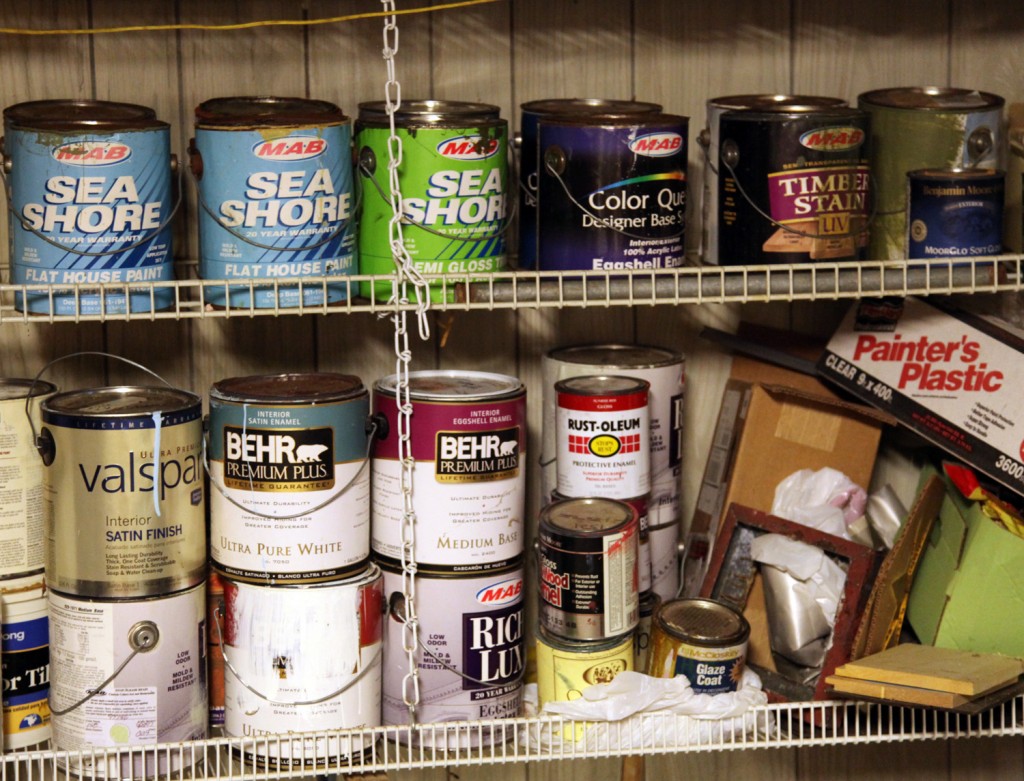
Paint Cans on Old Shelving from September (after removing a LOT of old cans)

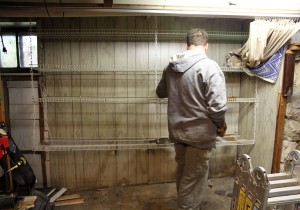
Basement wall before Demolition

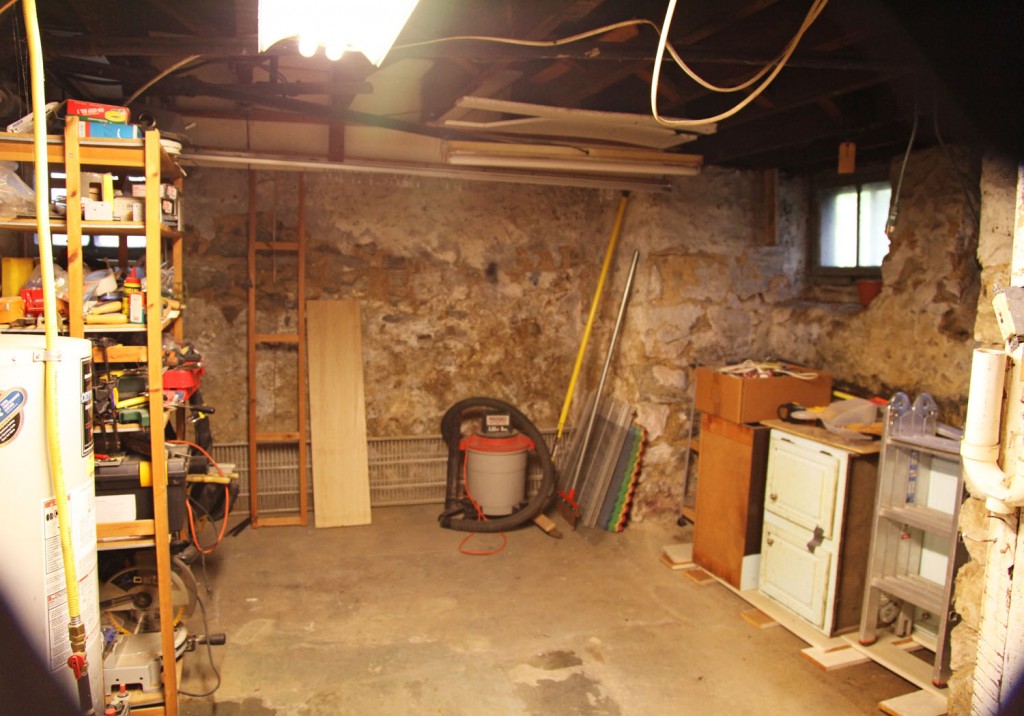
Demolition All DONE in this area!

We also signed the contract with the company who is going to install a new french drain around the entire perimeter of the basement a special “fabric” over the walls (BQ Basement Systems). They have a pretty long wait list, so it looks like we won’t be able to get this done until January, but in the meantime we still have lots to do. On the current list is:

1. Have our contractor grout the damaged areas on the old stone ruble foundation walls and remove the last wall (behind the washer and dryer)
2. Decide on the shower unit for the bathroom.
3. Rough in for the new bathroom
4. Patch the concrete floor
5. Make some decisions about the locations for future walls for the space.

We also have this crazy idea of creating an opening in one of the brick walls below our brick fireplaces and making a wine cave. I have to talk to my structural engineer about that one (it might cause issues with the shear load on the house).

1 Comment

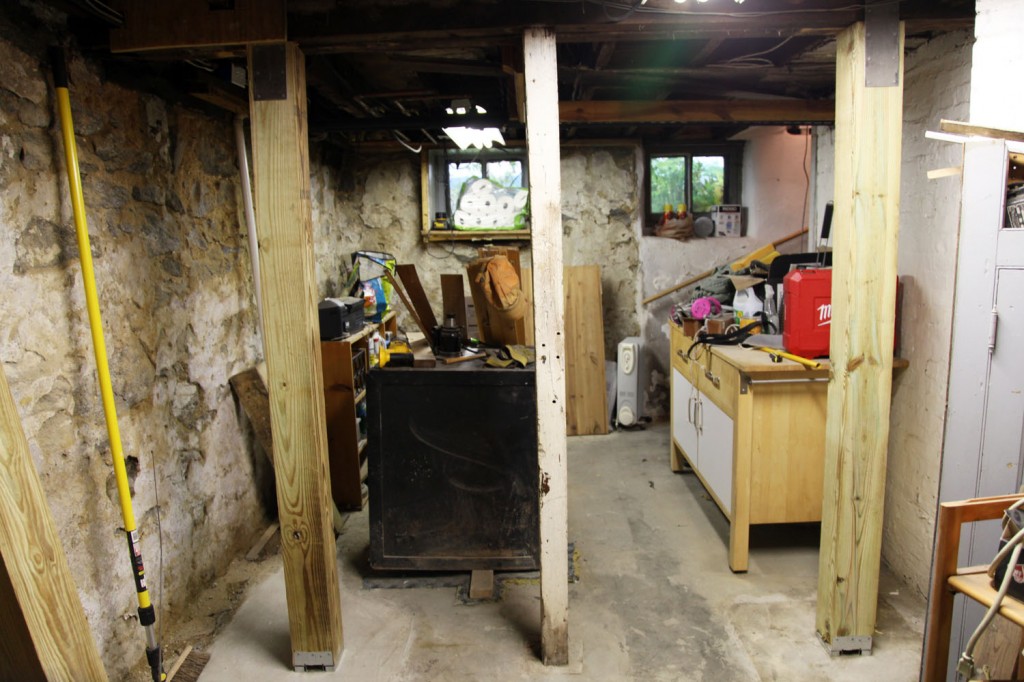
New 6x6 pressure treated columns with new concrete reinforced footings. The old post is still in the middle waiting for the concrete to cure.

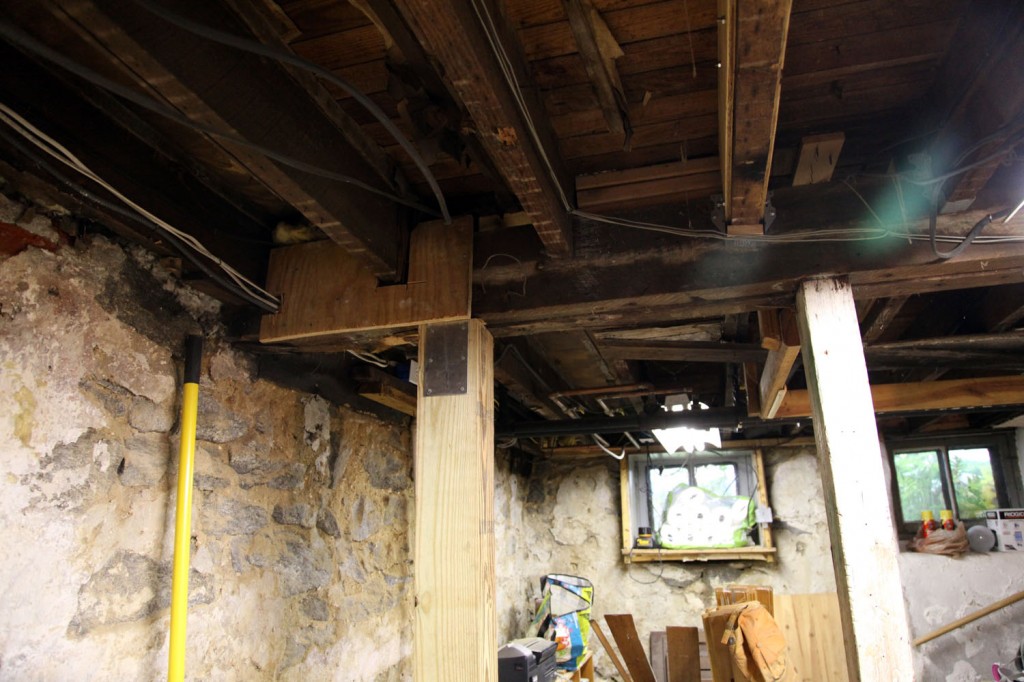
Cracked Beam w/ new plywood support and upper column w/ plate connecting it to the old beam.

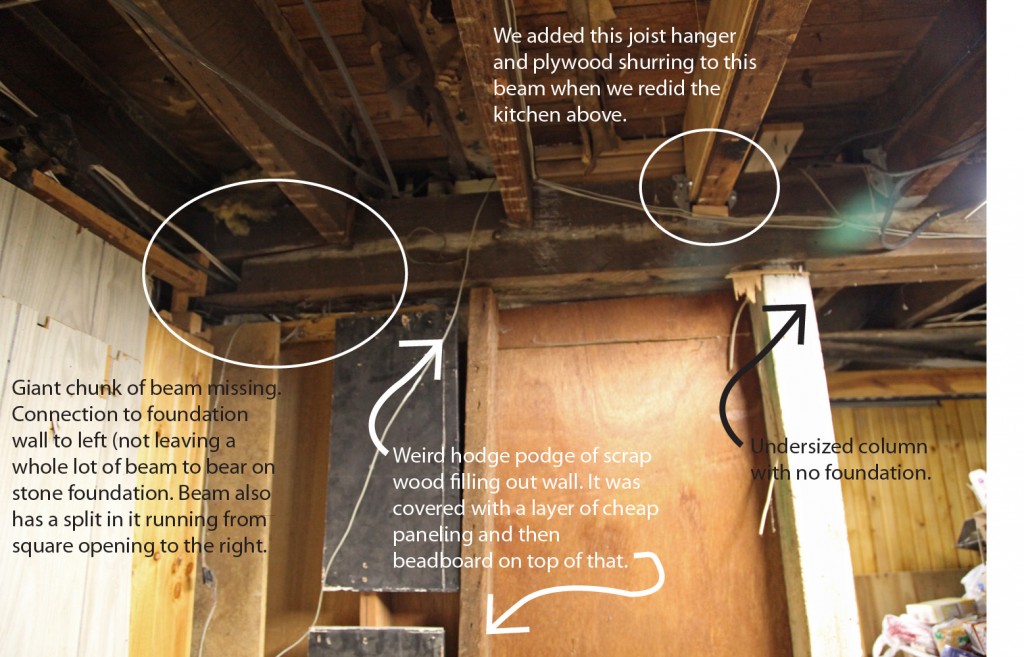
Visually this is not the most exciting post, but I thought I would show you my new columns. It is a big relief to have these two 6″x6″ columns installed with their new footings. The kitchen floor officially has less bounce and I can feel better about the structural stability of the house. This will also allow for the 2 “rooms” in the basement to be open to each other, which I didn’t think would be possible before my structural engineer came out. I would like to add that I had the sizing and the spaces of the columns and footings designed by a structural engineer. For this type of work it is ESSENTIAL to call the big guns in!  It is well worth the relatively little cost. Below is my mark up of this are before. Even though the basement still looks like a disaster, look at how much has been cleared out! We also had some of crazy electric taken out and our drainage contractor finally came out to take measurements for a quote. It doesn’t look like this will be done by the end of the year, but if all goes well at least by the end of winter.

Beam and wall at the beginning of demolition

I hope everyone has a great weekend! We will be busy between continuing to work on the basement and Halloween!

Leave a comment

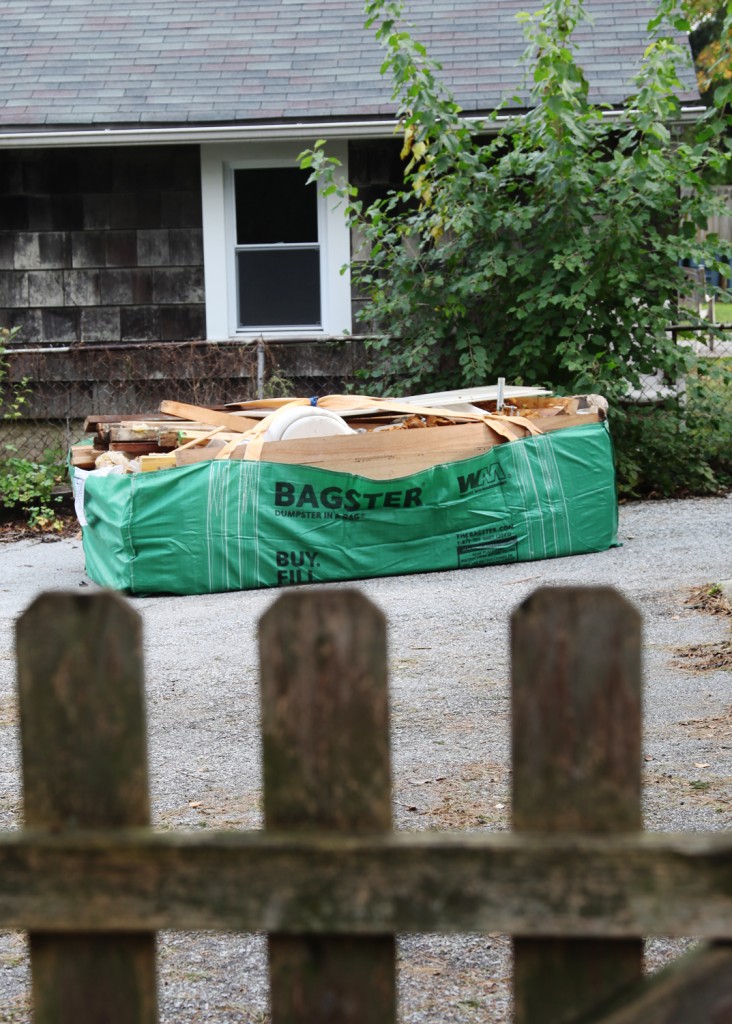
The Bagster: All filled!

It may not look like much progress was made over the last few days, but we have actually done quite a bit. Our contractor was over on Friday to put in the footings for our 2 new columns to support one of the main beams in the house. Now the concrete needs to cure for a while before the final posts can go in. He also added a second temporary column for the time being. We also demoed the bathroom and picked up a Bagster. 

What is the Bagster you ask? It is a giant bag that acts like a mini-dumpster (imagine a super giant Ikea bag). It is less expensive than a dumpster and best of all you can pick it up at your local hardware or big box store. We picked ours up on Saturday morning and laid it out on the driveway and by Saturday afternoon it was full of all the big and awkward stuff we hadn’t put out in the garbage: paneling, studs, the shower stall (broken down thanks to the sawsall), the toilet and sink. I also filled in with some of the clay and concrete that the contractor dug up for the footings. It is just over 8′ long and 4′ wide (to fit a standard sheet of plywood or drywall). And the cost? The bag itself will run you about $30. The pick up cost varies by zipcode. For us it is $139. This is less than a dumpster (which normally start in the $300-400 range) but obviously doesn’t hold as much. It also takes some work to organize your junk since the sides are soft. It won’t stand up until it is about half full. We also tied the handles together, since it is a requirement that the handles have to be able to touch for the crane/truck to pick it up. Now I just need to schedule a pick up. Yeah!

The Gutted Bathroom w/ exposed stack vent/ waste pipe.

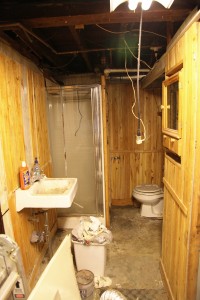
The gross unused bathroom (well except for cleaning paint brushes) before demolition

The bathroom demolition went pretty well. Thanks to the sawsall we took the shower out without much difficulty. And fortunately the walls were quite willing to fall down. It was really nice to see this corner emptied out (well except for the big hole under the shower. When the previous owner aka “Tony the cheap”, put in the shower drain he didn’t bother to pour concrete around the drain. No wonder we had some ground water from this area during the hurricane! It was also interesting to see the main wastepipe/stack vent. It was unfortunate to see that the washer drain was so poorly connected to it!

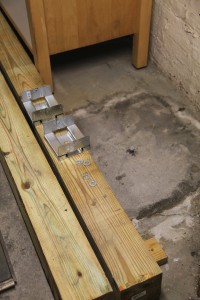
New footings w/ temporary columns. I know it is really hard to see with all of the mess!

New Footing w/ pressure treated columns drying out.

The new reinforced concrete footings are all in! One of the oddities of digging up the floor was that on one side we found clay (as expected) but on the other side we found ash, so they had to dig deeper on that side to find undisturbed earth. Can’t wait until they can get the new columns in!

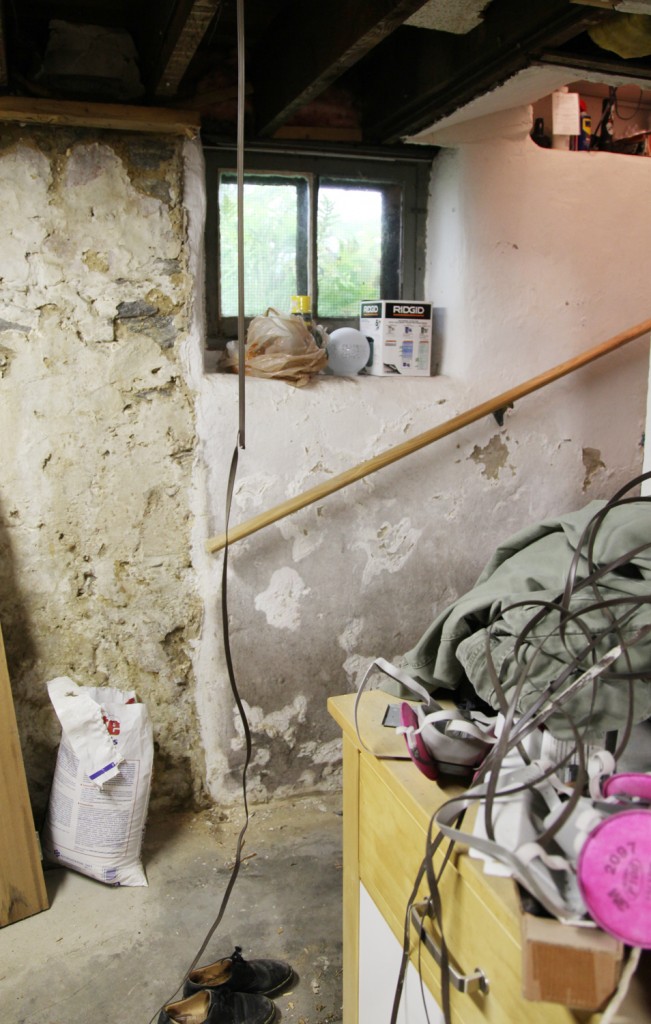
Basement stairs now that the weird enclosure is gone! On the right is the parging that was never covered up.

Because we had the bagster, we also decided to remove the strange “vestibule” at the bottom of the stairs. Before you would go down the stairs and then open a door to get into the basement. I am not sure what the logic on that one was, I think maybe to keep the cold air from coming up the stairs. I hope to remedy this in other ways.

Leave a comment

It has been a crazy couple of weeks here. I had a big presentation to put together at the office, had to call lots of contractors for work (not a fun job!), taught 2 architectural studio classes, had a Zoning Hearing Board meeting, worked on the basement, had a long overdue Mom night’s out with my Mom Group, and tried to keep the kids happy all while not pulling my hair out. Mr. S was really helpful with the kids, including putting them to bed without me several times (it is really hard for me when I miss bedtime). My head is still a big swirly mess, but I am hoping to regain my sanity starting today.

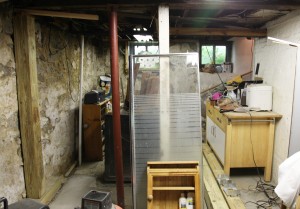
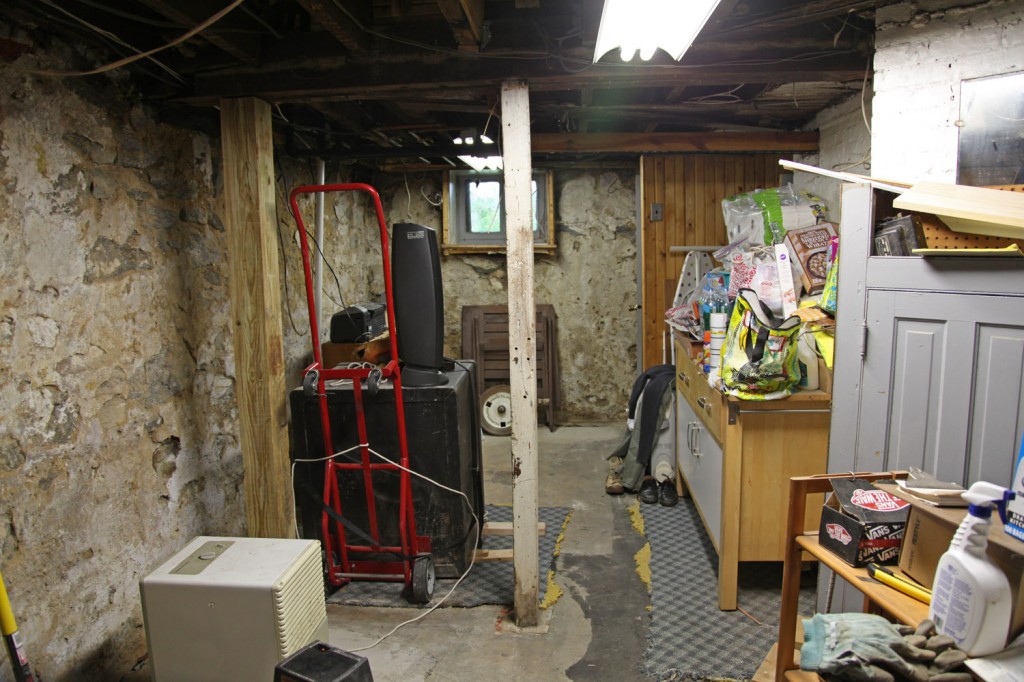
Basement Progress: The non-load bearing part of the wall between the 2 main spaces has been removed as well as the rest of the wall on the left. The column on the left is the temporary one we added in September. The one in the middle is original. We will be adding a new column near the temporary one and one to the right (near the Ikea island) and removing the one in the middle per our structural engineer's recommendations.

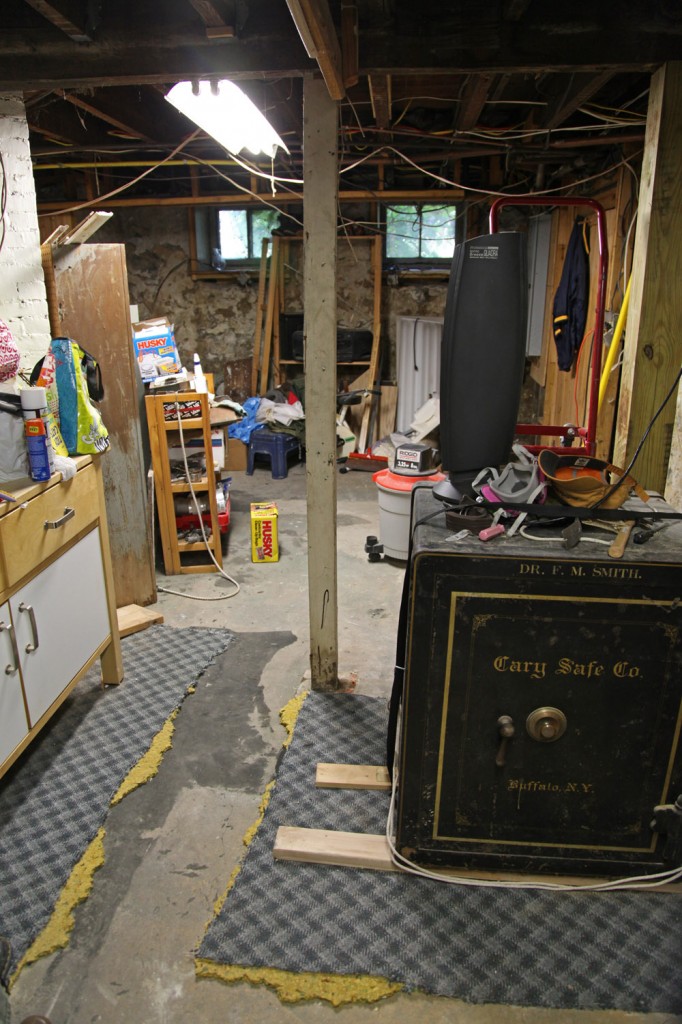
Basement Progress: The wall in the distance has been completely stripped. You can also see our lovely (but extremely heavy) vintage safe (it came with the house). Column in the middle to be removed after the 2 new columns are installed.

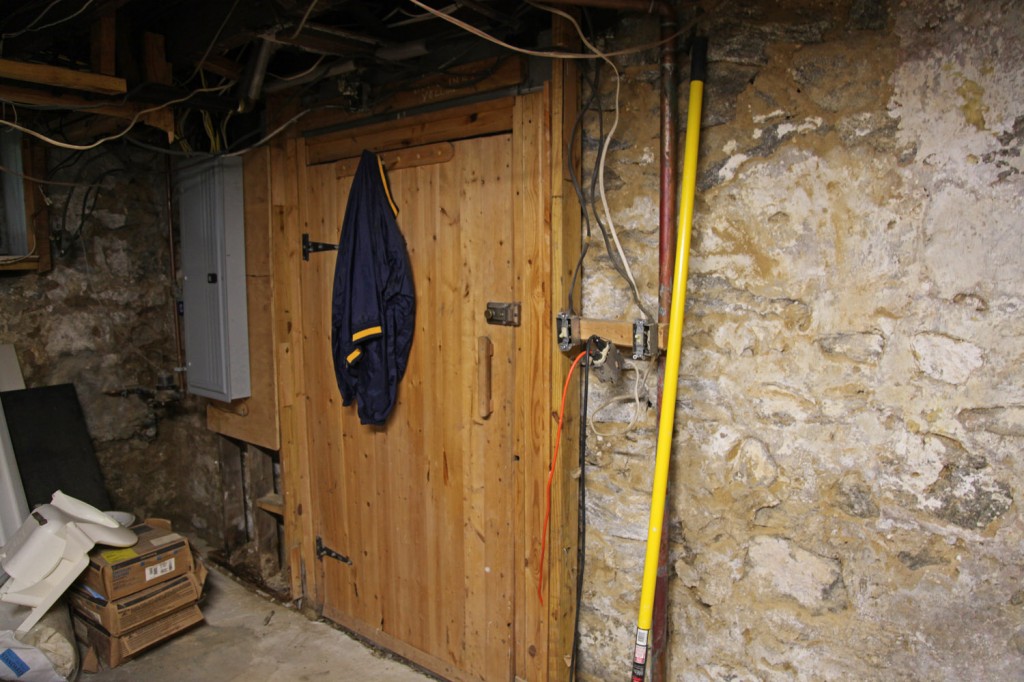
Back door with stripped foundation walls. I actually kind of like the looks of this. Although we need to seal off these walls, they have a beautiful quality to them. I also like the beadboard and stone together. Very rustic farmhouse!

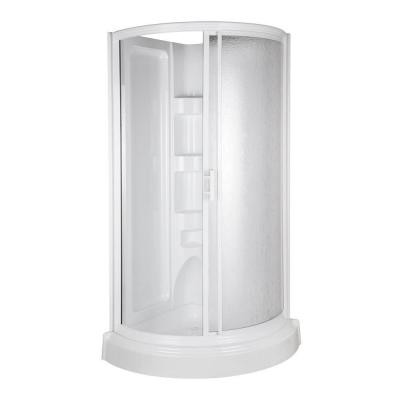
Mr. S was also busy this weekend in the basement! He has been very inspired to get the basement stripped back to its original foundation and I have been finding it is surprisingly rewarding to clear out the basement. We also had the plumber over to start mapping out the demolition of the old plumbing in the disgusting basement bathroom (so ugly in fact that I can’t show you a picture). Once we get the bathroom plumbing capped (hopefully later this week) we can start to figure out the new plumbing arrangement for the bathroom down there (which has to be done before they install the french drain and new skim coat on the floor). I also need to start looking at shower stalls. I am thinking of that opens at the corner. Maybe like this…

Round Corner Shower by ABS, $560 at Home Depot

For the bathroom we will also be using our old vintage sink that use to be in our upstairs bathroom (yeah, free and cute!). We are still deciding whether or not we will reuse the existing toilet. hmmm…. More decisions to make!

Also on the list this week is getting our Electrician over to remove some of the old wiring and our contractor to see about adding the new columns and their foundations.

P.S. Andi and Neil’s kitchen is finished (well except for the pretty accessories) and I am going to head over there to take some pictures. So stay tuned for an update later this week!

Leave a comment

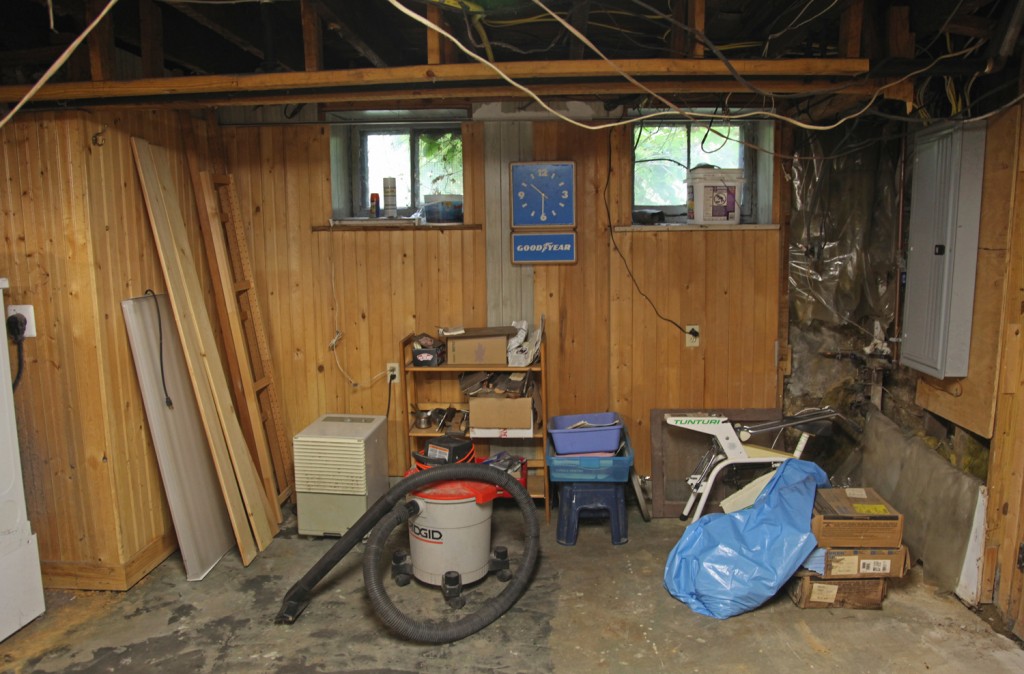
The largest Basement "room" under the Kitchen (walls to be demolished)

I wish I had more exciting images to show today but we spent a good part of the weekend working on the basement (and emptying out what we could to the garage storage loft). Basements in old houses are a funny thing, they were never meant to serve a purpose except house the boiler/furnace. They usually only had dirt floors and very low ceilings. The walls are typically stone rubble with a parge coat on it to keep the water out. Our basement has unusually high ceilings for a house of our vintage (that may be because it was built up on a mound). The previous owner (aka Tony that Cheap SOB) “finished our basement” back in the 1970s. That meant that he covered the exterior foundation walls with a stud wall, filled it with insulation, put up a plastic vapor barrier and covered with paneling. Unfortunately before he did this, he did not find a way to remove the inevitable moisture build up from the walls. Instead that moisture has been stuck behind these walls for 30+ years, creating a nasty mess! We have known of the potential issues for a while, but with the summer rain (20+ inches in August alone) we have had to make the basement a priority. So for the time being the plans for the Master Bedroom are on hold while we do some demolition and come up with a game plan for the basement.
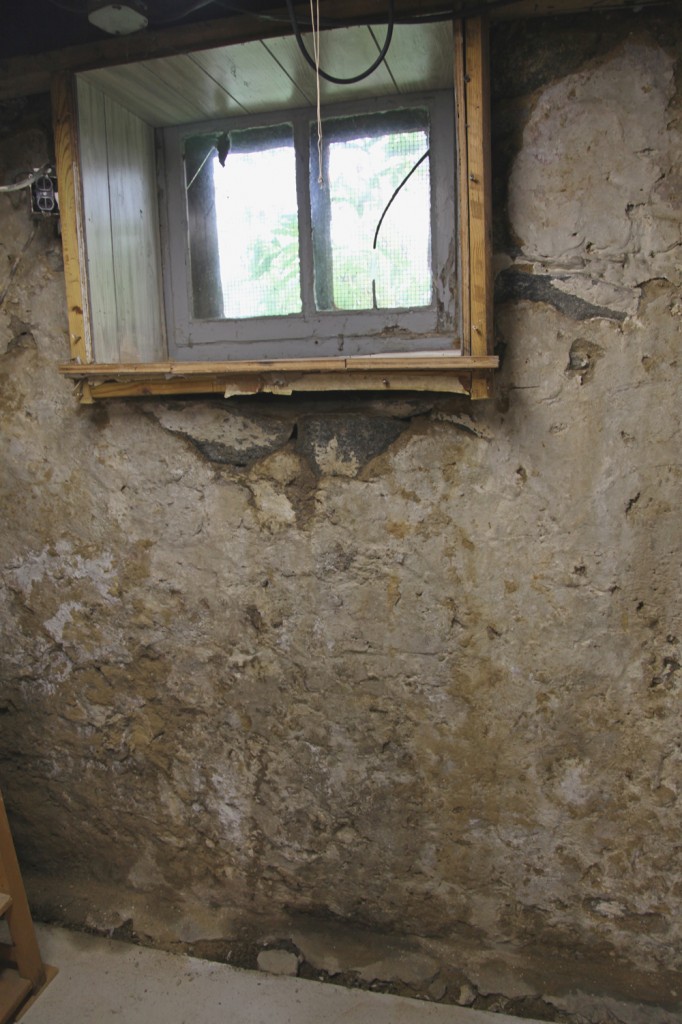
Foundation after stud wall was removed. You can see the parging is still partially there.

What to do with an old basement?

Ideally in a basement like ours, which gets damp in the summer and wet in extreme weather (when the water table rises to a high level) you would parge the walls, install a french drain around the inside perimeter, connect this to a sump pump, seal the slab with a water barrier and call it a day.

In our case we need to use the basement, not for every day living but for:

-laundry (oh, how I wish we had space for an upstairs laundry)
-storage and use of our various tools
-extra pantry storage
-bathroom (there is one down there now, I don’t think I would have added one otherwise)
-My dream of an extra space for possibly an elliptical machine or for working on larger projects
-or Mr. S’s dream of a space to play drums and rock out with the kids
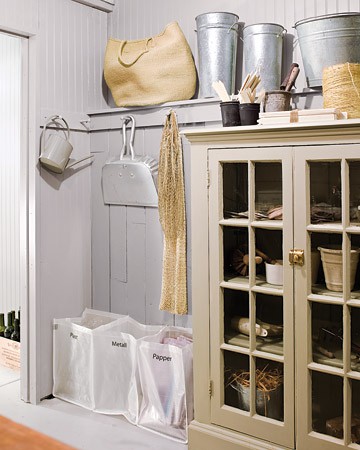
Inspiration Image from Martha Stewart Living

The Game Plan

Create a rustic but usable basement! Kind of like the image above from Martha Stewart Living (image from Designer Tricia Foley‘s basement. Photographed by Eric Piasecki). I first saw this basement on doorsixteen.

October:

-Finish Demolishing the stud walls in front of all of the foundation walls (we always wear special replaceable cartridge masks that are recommended for both mold, lead and asbestos and clothes that immediately go into the wash after working).
-Salvage beadboard where possible for re-installation
-Demolish the old shower and prep the connections for a future bath
-Demolish the couple of interior walls
-Remove all of the old electric, including lights and outlets
-Install 2 new columns and footings (per my structural engineer’s recommendations)
-Install new angle per structural engineer’s recommendation
-Have Drainage contractor out (it took over a month to get an appointment to have him even look at it!)

November (somehow I have a feeling this may be later then this):
-Clean up and parge foundation walls
-Cut out foundation at exterior walls and install french drain system (this will have a special lip to collect water from the walls and send it to the sump pump)
-Install new sump pump system w/ battery backup (drain out front of house)
-Install new skim coat to concrete floor w/ waterproofing layer

December:
-Have my general contractor install new walls in front of foundation walls using an air gap, pressure-treated sill plates, mineral wool insulation (which isn’t affected by moisture) and cladding walls with horizontal beadboard, using a plastic baseboard product that will have exposed screws, such that we can check the condition of the wall behind
-Install new electrical outlets and lights (I am thinking LED downlights)
-Install new interior partitions to create a bath w/ shower, laundry nook, workroom and large double room space for storage and multifunction use.
-Install new plumbing fixtures
-Install a new ceiling using a beadboard system that would allow access above in certain areas (i.e. where the electric and plumbing come into the building and where there are water connections)
-Whitewash all of the beadboard
-Install a yet to be determined floor (Mr. S. likes cork, I’m still investigating whether it will be suitable for a basement application installed over a plastic and plywood sub-floor product).

Phew, I’m tired just thinking about it!

2 Comments

This is the shelf AFTER I got rid of the old paint cans. The top shelf is exterior paint and the bottom shelf is interior.

So it is time for some more embarrassing photos of the house! Believe it or not I just got rid of about 12 oil based paint cans and miscellaneous chemicals today (before these photos were taken). It was hazardous waste drop off day at one of the local parks. If I had been more organized I would have dropped off some old computer equipment too, but I was proud of myself for at least getting rid of some gross old paint cans. Since we are now trying to deal more proactively with our basement (which is putting a damper on the master bedroom work) I decided it was time to spend a couple of hours sorting through the paint. So on Sunday I spent the time while Maisie was napping trying to get rid of some of the paint. It doesn’t help that we have 6 7 colors of paint on the exterior of the house. We also had left over paint from the “not quite right” color selections. Plus we have matching stain from the garage and shed. As a side note, I guess you can see our preferred exterior paint provider. I love my MAB exterior paint. MAB is now owned by Sherwin Williams, and I am waiting for them to close my local MAB store (where there is a Sherwin Williams only a couple of blocks away). Then I won’t be able to get my beloved Seashore paint! Our whole exterior is painted in the seashore paint. You can see that I am not as loyal with my interior paint. Most of the time for that I am lazy and hop over to the local Home Depot.  For our next painting project I am looking forward to trying the relatively new Behr Ultra (primer and paint in one with low VOC).

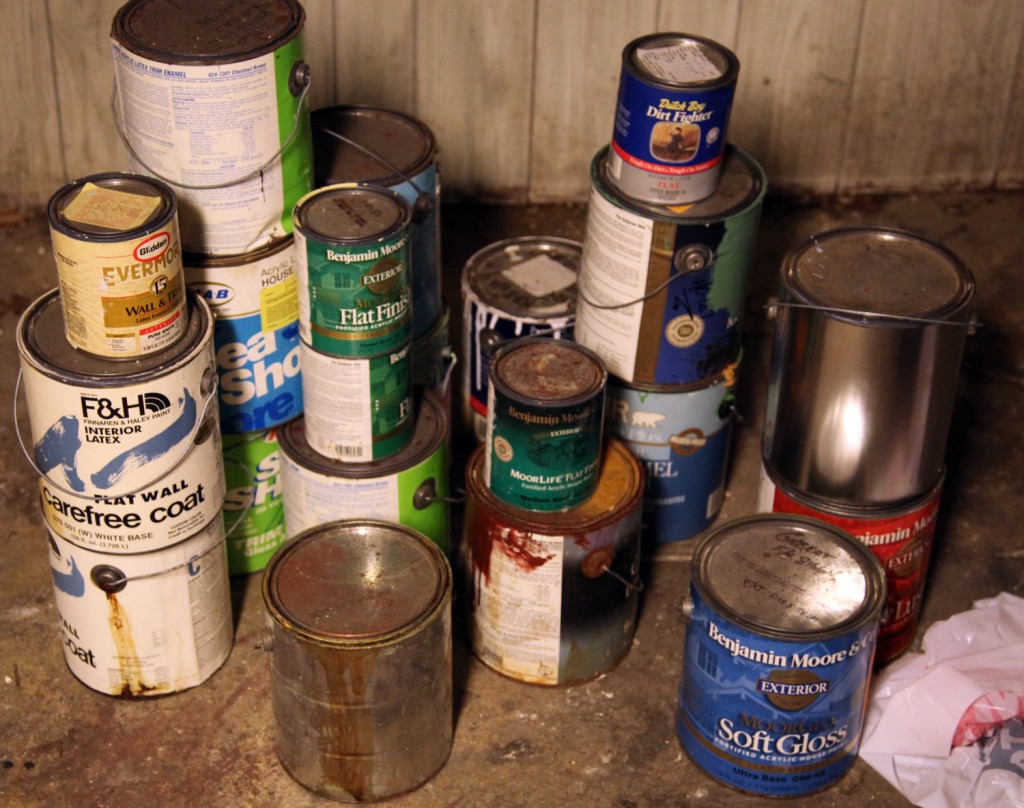
Pile of latex paint cans waiting to be dried out for the garbage.

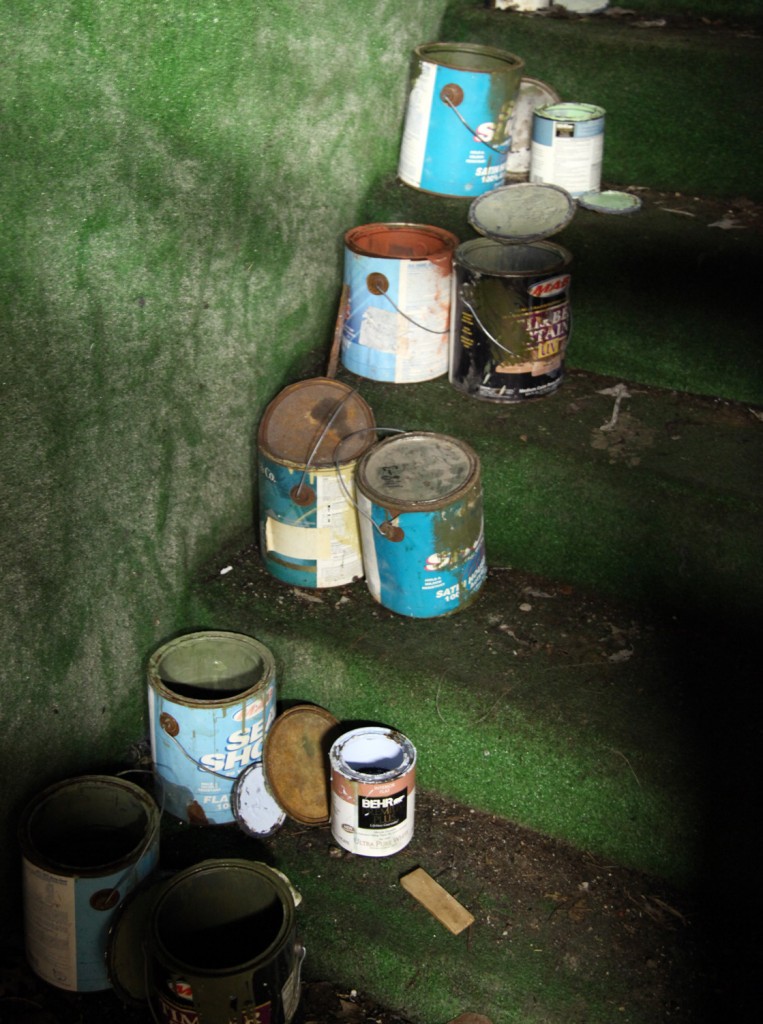
Latex Paint Cans drying out on the steps to the basement so that they can be thrown out (don't you just love astroturf).

The pile on the floor is the paint that will be next to be set out for drying and throwing out. I am currently using the back steps to the basement. These are covered by a plywood door (to keep unsuspecting animals from investigating) but won’t be offgassing into the house. Hopefully these will be dry for next week’s garbage. If not I may need to resort to the kitty litter method, which involves pouring the old latex paint into a cardboard box with a bunch of kitty litter to help it dry out more quickly. So far I think most of this paint will dry on its own. A lot of it is quite old, so the drying process started long ago!

I did manage to combine a bunch of the exterior paint cans. Because of the complicated house paint scheme we ended up with at least 2 partially opened cans of each of the main colors. Fortunately now that has been compressed and now I will be able to find each color more easily for projects like the porch swing.

Paint Sample Reference from www.domestically-speaking.com

I also have plans of putting together a couple of rings of paint sticks containing all of the interior and exterior paint colors, for handy reference. Kind of like this one I found on Pinterest which was from Domestically Speaking.

4 Comments

Main Beam exposed after paneling was removed

Temporary Column Added

Close up of beam damage

The previous owner of our house Tony (aka that cheap SOB) paneled our basement and installed a drop ceiling and wall to wall carpeting. He used it as his real estate”office”. It has always been kind of strange down there. Lots of little pieces of trim nailed together including things like “structural baseboard”.  I have to mention that we did not give Tony his nickname. Our old neighbor (also named Tony) referred to him as this and claimed that everyone in the neighborhood called him that. I’m not quite sure that it is totally true, but whenever I am working on something that he touched I do typically refer to him in rather unflattering terms.

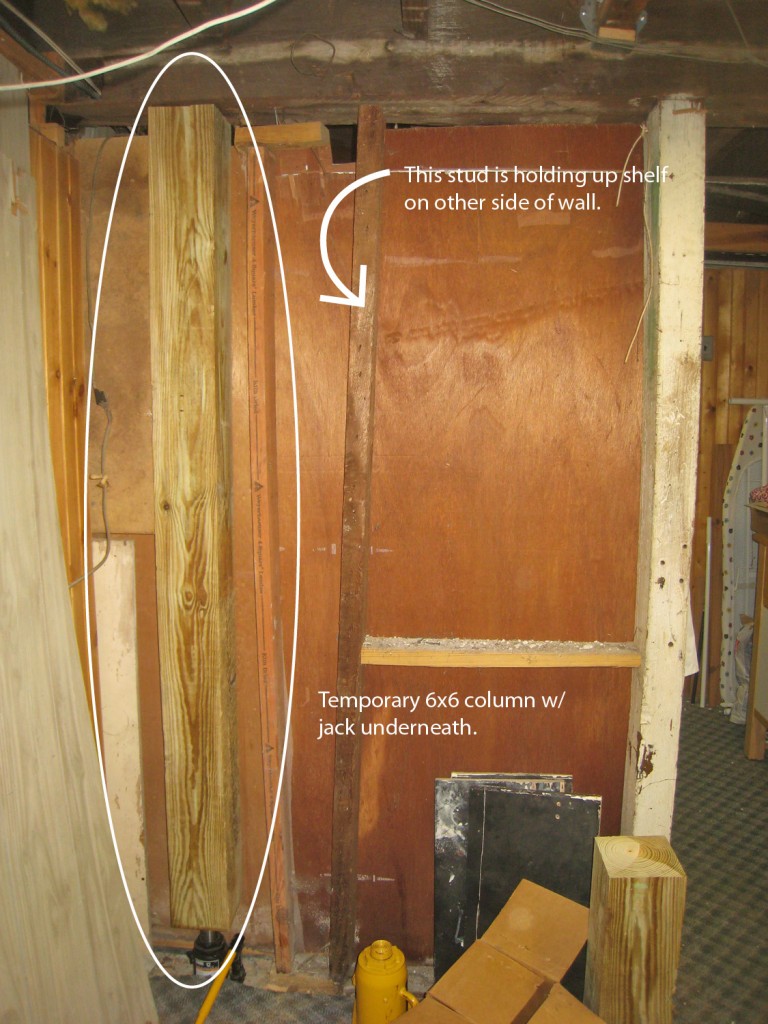
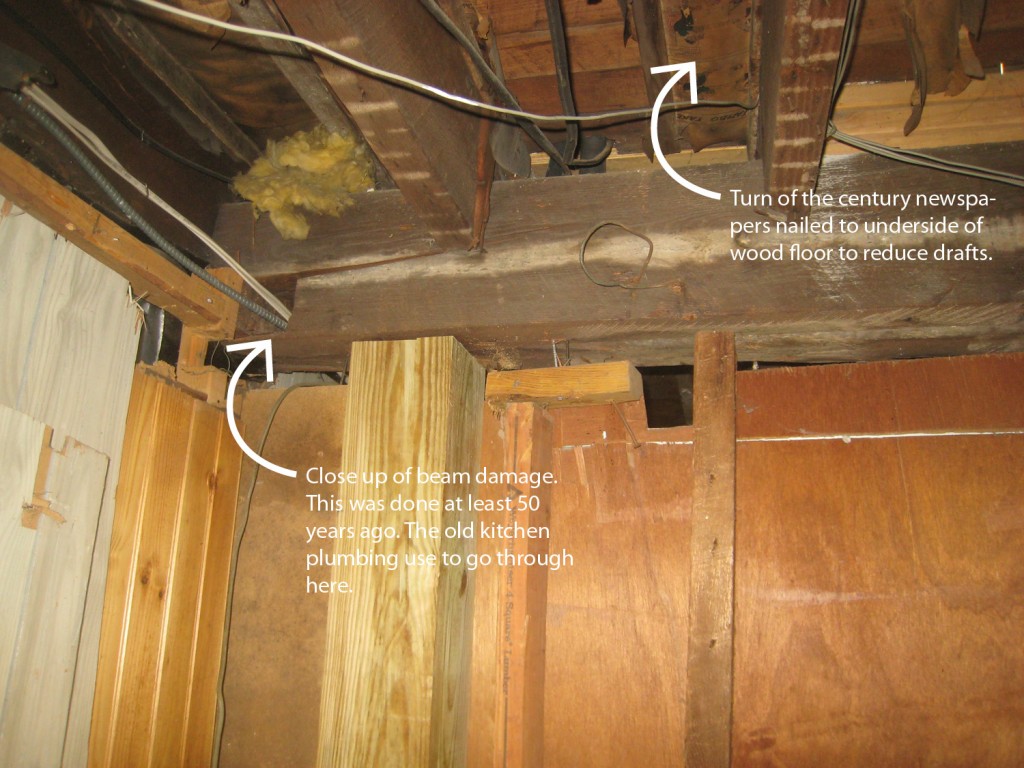
Since we bought the house 11 years ago we have gotten some water in the basement during VERY heavy rains and have removed most of the drop ceiling and parts of the paneling as we have needed access to things. During Hurricane Irene (and the wettest August on record) we took some preventative measures and put everything up on blocks or supports to minimize any potential water damage. We also removed some more of the wall to wall carpeting to try and identify where the water was coming in. We also decided it was time to look at 2 areas where we were concerned with the structural integrity. These were both spots where contractors over the last 123 years have hacked at beams to get their ducts, pipes and wiring through. They were covered up with the old paneling, so we bit the bullet and removed some of it to take a look. I have already scheduled a structural engineer to come and look at these conditions as well as advise us on a strategy for reducing bounce in the floor. He is suppose to come out next week. Of course once I saw the one condition I felt compelled to install a temporary 6×6 post so I could sleep at night. This is not the first structural work we have done on the house. We actually own a couple of jacks that we have used on several occasions to fix conditions that are not quite right.

The main area where I am concerned is a main beam that holds up the floor to the kitchen and dining room as well as the wall/structure of the back 2 bedrooms on the second and third floors. This beam (which is actually 2 beams adjacent to each other) was hacked away at some point years ago, most likely to get plumbing to the old kitchen. This was done only about a foot away from where it sits on the foundation wall/rim joist. They only left a sliver of beam below it. I was hoping that when I removed the paneling I would find a full stud wall holding up this portion of the beam. Of course in typical Tony fashion it was a hodgepodge of old and new wood, no two being the same height or depth. Needless to say this made me very uncomfortable! So I decided it was worth installing a temporary column under the beams until I can get an expert in to advise me on the best permanent method of support. The good news is that it is in, and it only took about an hour to do. The bad news is that the weight cracked the thin concrete slab underneath. So as not to cause the jack to push anymore into the ground, we left it so that the beam behind the one in the picture is definitely bearing on the column (it was sitting slightly lower) and the beam in front is not quite bearing on it, but is at least stabilized).

In the meantime we are also exploring installing a french drain around the perimeter and a sump pump. We are one of the only people in the neighborhood who doesn’t have one (we also sit higher then our neighbors). After studying the water coming in during Irene we have discovered that it is coming in from cracks and seams in the floor. The floor has been patched several times (including by us to install the half bath and new washer and dryer location). We could install a waterproof membrane and another layer of concrete, but then we are concerned that water pressure could build up under the slab. I am still exploring the options in more detail, so stay tuned for our final decision.

1 Comment