Archives For -Basement

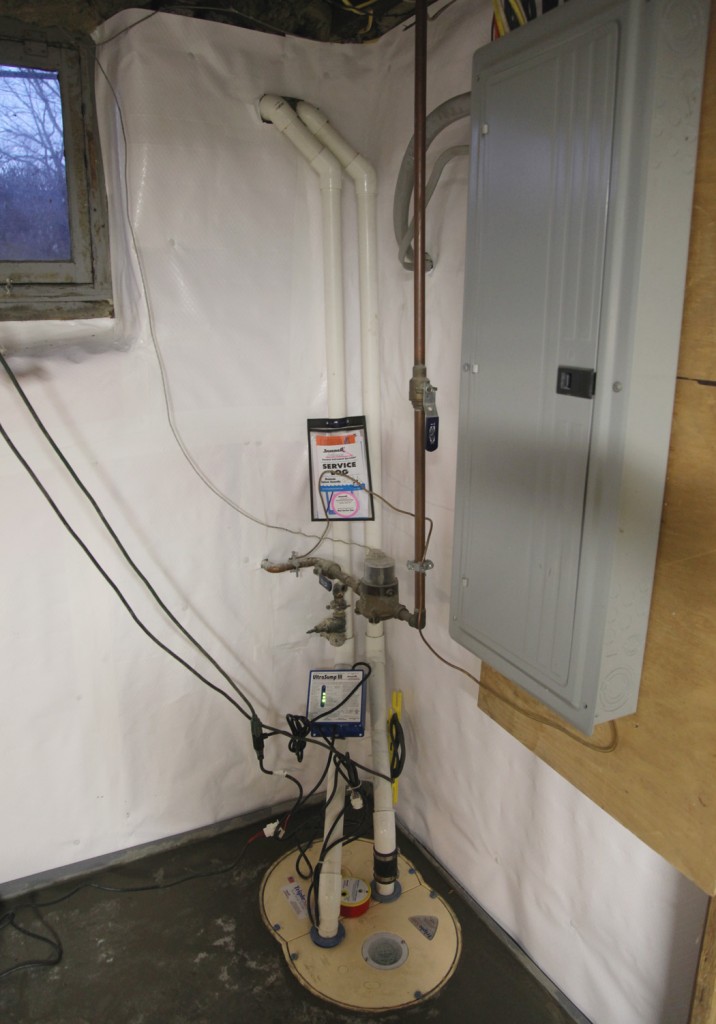
New Triple Sump Pump System w/ Battery Backup (this will all be boxed in a utility closet)

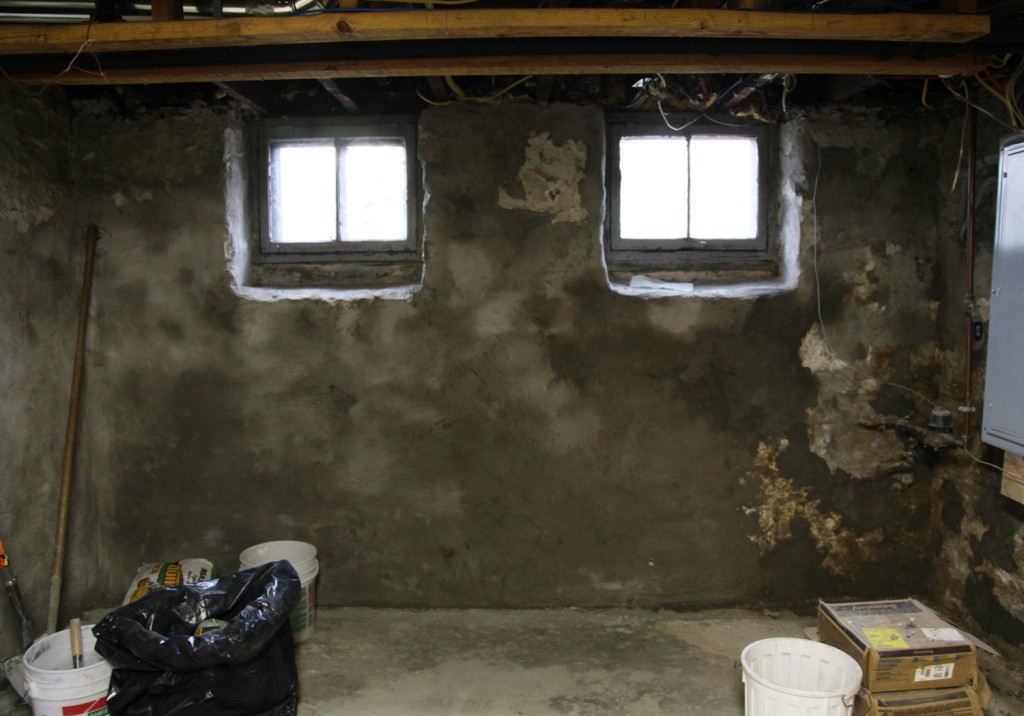
The drainage system is finished! It took 1 3/4 days. Not bad! It was a little crazy at the end since I was trying to leave for a meeting and they forgot to finish taping up one of the windows. But now I can relax for a few days until we get started on finishing the basement in earnest. The concrete is suppose to cure for a couple of weeks, although I need to see if I can get my contractor out to patch the rest of bathroom floor, so we can be all finished with the concrete work (and then I won’t have dirt in front of my washing machine). Once it cures it is time for the basement to turn pink briefly (with insulation) and then it will be time for studs! Yeah!!

I am also excited to start showing the finishes and details for the basement (some of which I still need to pick out). Here are a few more pictures of the progress…

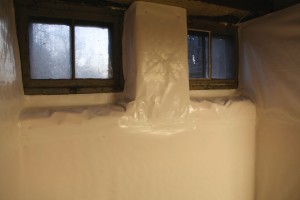
Bay window area (future workshop)

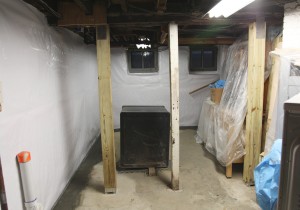
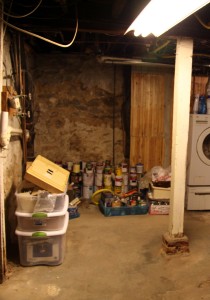
Main space (middle column is going to come out)

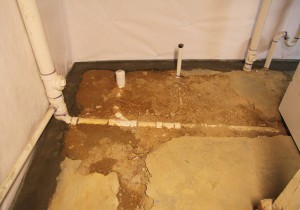
Future Bathroom (still need to be filled in with concrete)

* To see all of the posts about our basement click here.
** I was not paid by BQ Basement Systems in any way, I just think it is a good product.

If I squint real hard I can imagine the space all finished.

2 Comments

Drainage system

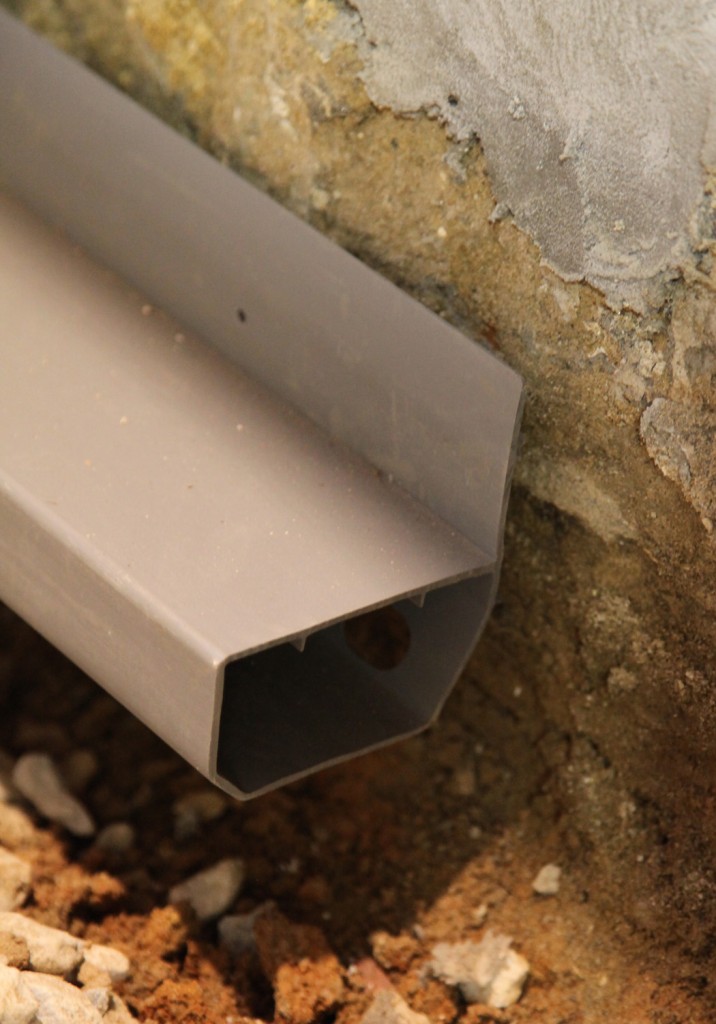
We are in Day 2 of our basement waterproofing/drainage system! It is very exciting! Yesterday they trenched all the way around the edge of the foundation, installed about 80% of the wall covering, put in the sump pump system, and ran the drain line out of the house. Today they will be installing finishing the wall covering, grading and installing the drain and putting in the concrete over the drain. They hope to be done by lunchtime! Yeah!!
Trench & Wall Covering at Bay Window
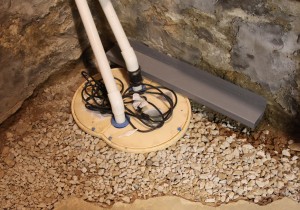
Sump Pump System w/ cover

When it comes to architecture, specifically wall design I tend to be a belt and suspenders kind of girl. Since my background is in designing institutional (mostly university) buildings, where they expect to be using the building for the next 50+ years it makes sense. So when I started to look through all of the options for keeping our basement dry, I ruled out a lot of the options quickly. I definitely wanted a sump pump with a battery backup (especially after all of the crazy weather and power outages in August and September). I also wanted a system that would remove any water from our stone rubble foundation. So I did some research and found BQ Basement Systems. It turns out that they also do masonry work (under a different name) and we had previously used them to repoint the exterior of our foundation.
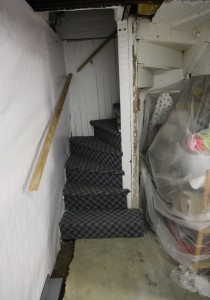
Stairs w/ new wallcovering
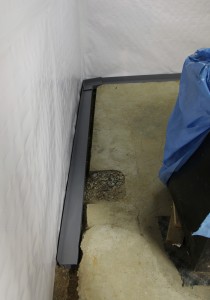
Wallcovering w/ drain laid in for rough placement

The things that I liked about their system:

1. Continuous drain around the exterior sits higher than most french drains. This way you are not trying to drain water away far below the slab. It also means that you are less likely to get dirt clogging the system.

2. Drain system is designed to tie into the wall covering/vapor barrier. The drain has a lip that sticks above the slab and the wall covering it attached directly to it, so any moisture that comes through the wall is diverted to the sump pump and won’t cause moisture problems in the basement.

3. The triple sump pump (okay so this may be a little bit of overkill). There are 3 sump pumps in the pit. The first two are electric, with one sitting slightly above the other (and plugged into 2 different circuits). The idea is that if there is a LOT of water both would be working, or if one circuit tripped the other one would keep going. The third sump pump is battery operated (basically a car battery). It sits above the other 2 and is for in case we loose power). It also has a meter so you can see how well the battery is holding its charge (typically these type of batteries are going to last 3-5 years and then need to be replaced). I also just saw a system on Ask This Old House over the weekend that was a single electric sump pump paired with a battery backup pump packaged as a single unit. They didn’t give the name but I would certainly recommend this over just an electric one.

4. The drain system has a clean out at the high point and because this system sits relatively high you can open the door and take a peak and see if it looks clogged.

5. The wall covering/ vapor barrier is 20 mils thick and is mold resistant (CleanSpace is the name of the product we are using). This will really help minimize the moisture particularly in the summer from coming into the space. It also means that I don’t have to worry about getting mold in the walls. They attach this to the walls with special screws and seal all of the seams with coordinating tape. It is also durable enough to leave exposed if you wanted to. We will be adding insulation to the inside, so that is not a concern for us. The only downside is that the plastic is currently off-gassing and is kind of stinky at the moment. I am hoping this will dissipate in the next few days.

The Downside:

1. It is pretty pricey (although not that different in price from having a regular french drain installed).

2. Getting an appointment! Thanks to the VERY WET summer/fall it took me 5 weeks to get an appointment for them to come out and look at the basement (they called me back right away but couldn’t schedule me for a long time). Then there was about a 3 month wait on actually getting the work done. For us it was okay because we had a lot of demolition and plumbing work to do, but if you were in a hurry you would be out of luck.

Next Steps:

Once they are done it is time to have my contractor over to walk through finishing the basement. I ordered the shower pan over the weekend too. This will be required to set before the walls of the bathroom go in, since it has very specific tolerances. The first thing on the list will be installing the rigid polystyrene insulation around the perimeter. It comes with grooves on the sides so that they can slot together and provide a continuous insulation line. Then will be the stud walls to frame out the spaces. Then electric and plumbing rough ins. Finally will be beadboard walls. We are still deciding what to do for the ceiling, and need to develop a system. I think once we get the walls figured then we will also frame out the required soffits/beams for the miscellaneous piping and electric.

* To see all of the posts about our basement click here.
** I was not paid by BQ Basement Systems in any way, I just think it is a good product.

Leave a comment

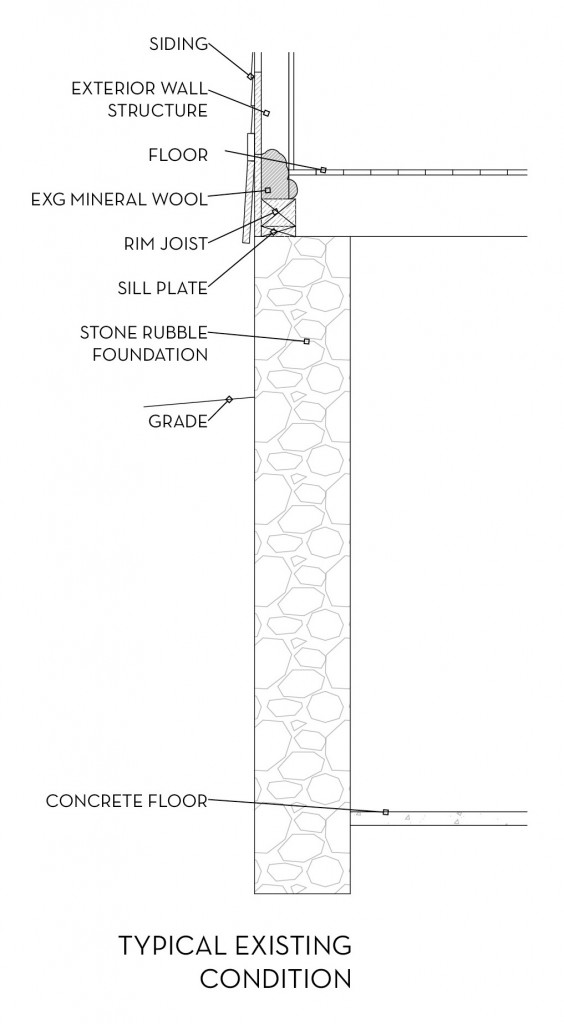
Existing Condition

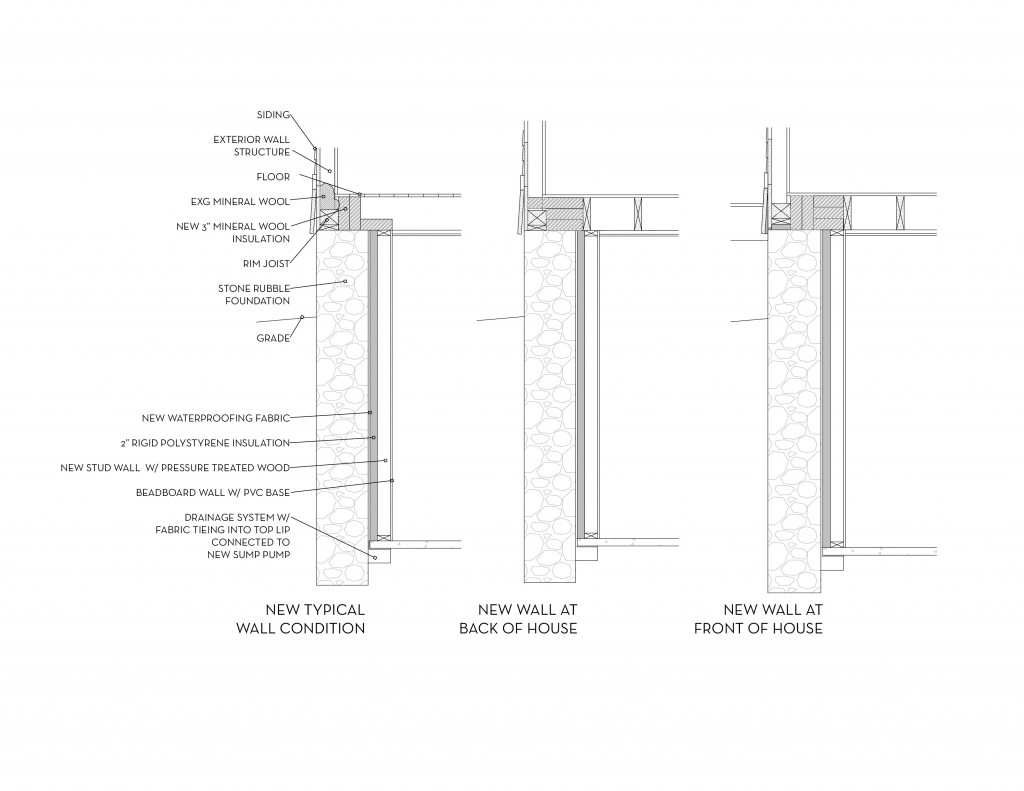
We are getting close to being able to actually start finishing the basement! The drainage system guys are set for next Monday (it has been a long wait)! We also managed to insulate the sill at the back of the house this weekend. It involved Mr. S’s long arms and a yard stick! Part of the area had a little bit of old mineral wool but a large portion didn’t have any insulation. Since the floor joist was running parallel to the foundation at this location the gap we had to work with varied between about 5″ to 1″ (see the middle drawing below). The method we used was the “stuff it as full as possible using small pieces of insulation”. There were a few areas where we could get a little bit of spray foam, but mostly it was a matter of taking the small 9 1/2″ x 16″ pieces that we used elsewhere and shoving them in as best a possible! The only other option would have been to fill it will loose fill, but that would have meant renting a machine and changing to a cellulose insulation, which I didn’t want to introduce.

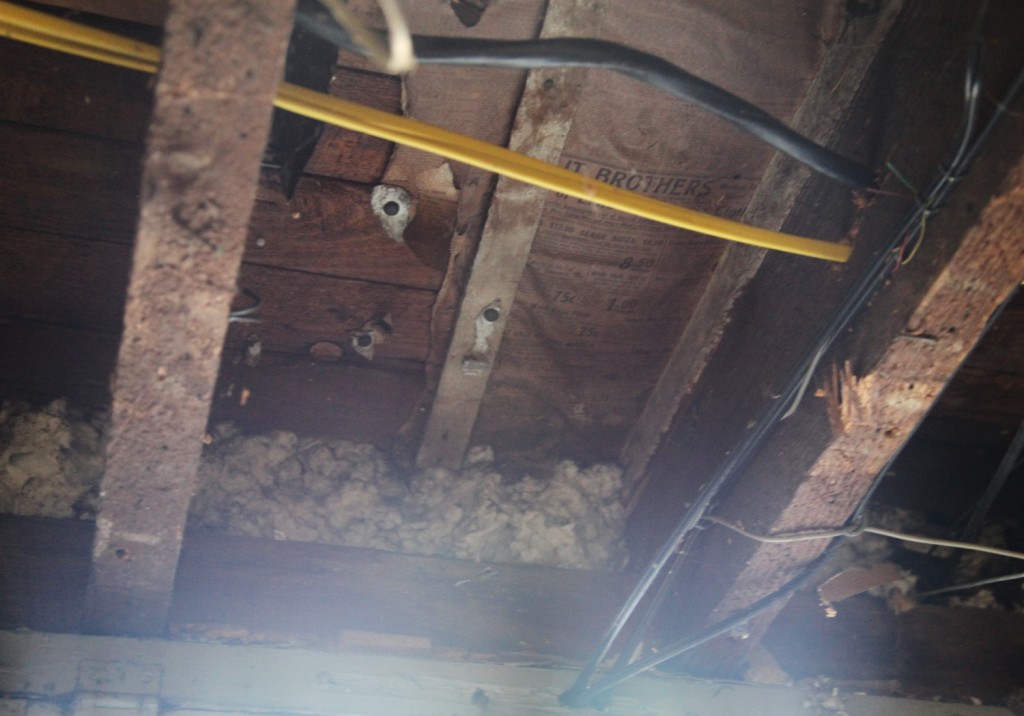
Today I wanted to get into more detail on where we installed the sill insulation and the wall section we will be using for the new finished walls. This first section is the existing typical wall section (after we removed the old stud walls and paneling) (click on the image if you would like to see it larger). You can see that someone a long time ago did there best to seal the condition between the rim joist and balloon framing with loose mineral wool. You will also notice that there are a lot of joints in the wood construction, leaving lots of gaps for air to infiltrate. On most of the house we have tyvek on the outside to help (except at the porch area where the original siding is located).

Typical Condition

Front of House Condition


In the new sections there is a minimum of 2 layers of 3″ mineral wool. We will be adding more to create a continuous thermal section to the bottom of the wall. The walls below will be have 2″ extruded polystyrene (which has a higher r-value per inch) and is rigid and good for basement conditions. Normally you would have to be concerned with the condensation of the foundation walls (which caused mold in our old walls) but because we have the waterproof layer in between that will wick any moisture down to the sump pump we don’t have to worry about that (yeah!). I will post up more about the drainage system next week once they get started. It is definitely a belt and suspenders type of system (which is the way I like it!).

P.S. The boiler has decided to stop working this morning, it is pretty dirty at the moment but we were hoping to wait and get it cleaned out in a couple of weeks once the concrete work was finished. I guess we waited too long! Fingers crossed a good clean out will fix it!

*For all of our Basement progress click here.


Leave a comment

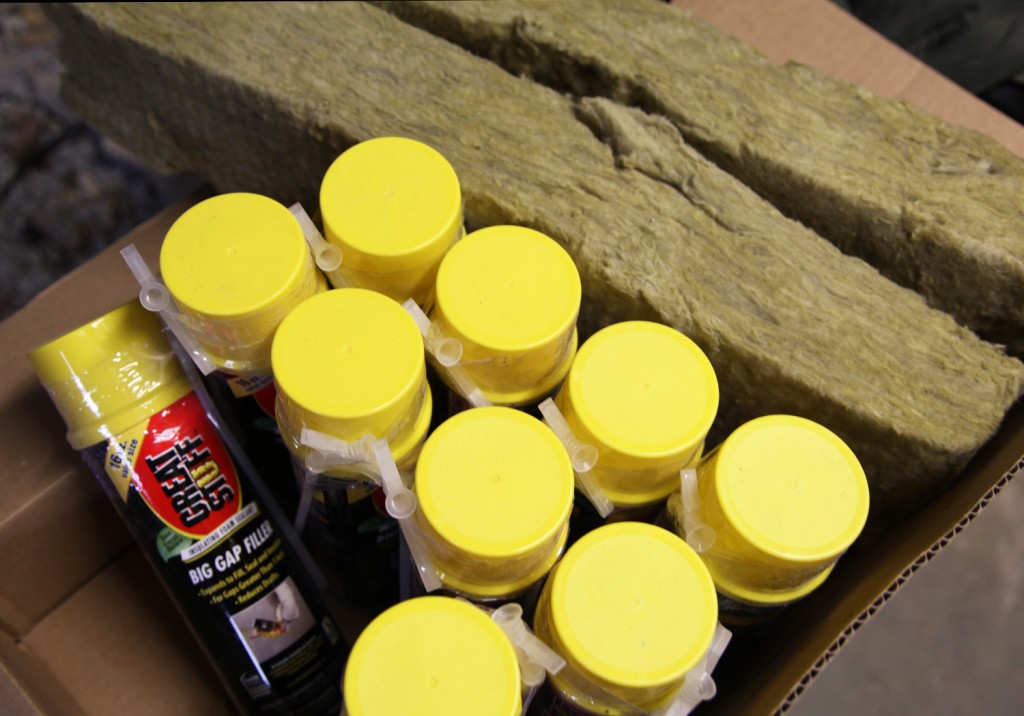
Large Gap Spray Foam Cans and a Sample of the Mineral Wool

This is going to be a 2 part post since I have some details that I want to show to help better explain some of the situations we found. I thought I would start out by discussing our material choices and general strategy.

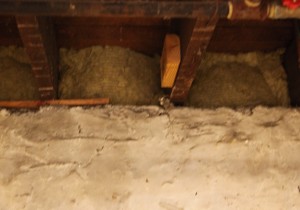
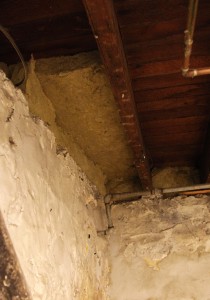
When we bought the house there were finished stud walls in front of the foundation walls and sill with fiberglass batt insulation. When this was done in the 1970s they also added some fiberglass to the sill area. This was done very poorly and irregularly. It also had paper facing on some of it, which is a bad idea unless you are going to define your line of moisture barrier and be consistent. Once we removed the walls and the miscellaneous fiberglass batt insulation we found an earlier layer of mineral wool (aka rockwool) that had been stuffed in between the exterior balloon frame wall studs above the sill. However the sill itself had not been insulated. We also encountered miscellaneous newsprint  from 1906. My guess is that the mineral wool is probably a little bit later than the newsprint.
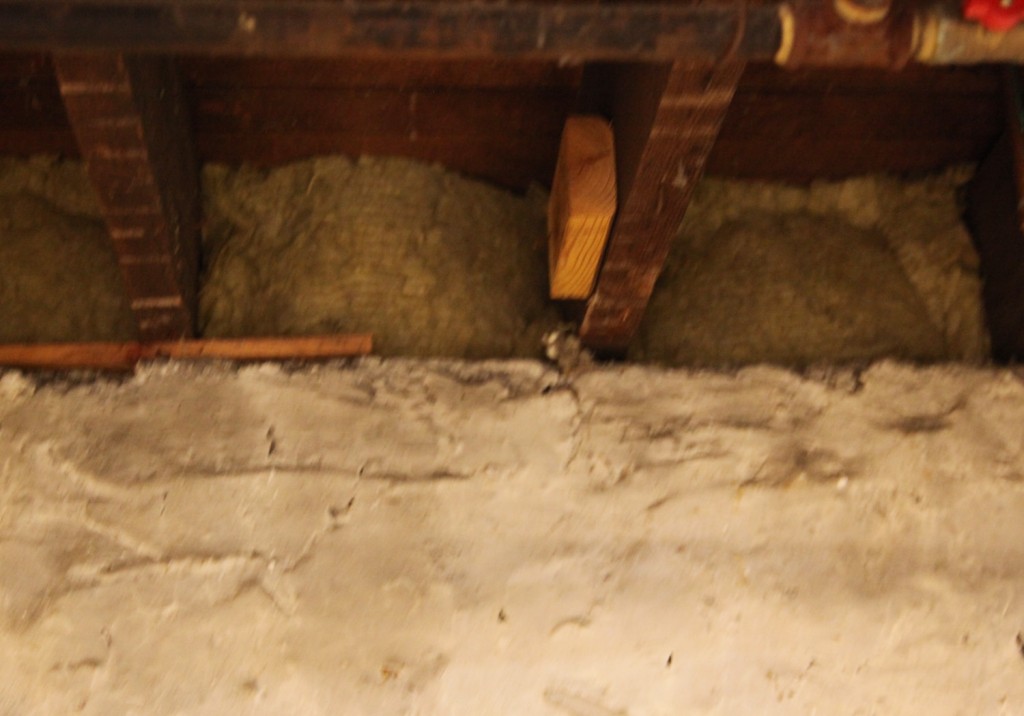
Sill w/ old Mineral Wool and New Spray Foam before new Mineral Wool Batt is Added

Once we evaluated the situation, we quickly  decided that before we could install the new mineral wool we need to seal any air gaps. I will get into all of the conditions tomorrow, but we decided to go with the DOW Great Stuff Big Gap Filler. It is cost effective at $4.79 a can and pretty easy to work with. As you can see we bought quite a bit and ended up going through about 10 cans (the rest will be returned to Home Depot). We used it where the wood sill plate met the foundation and in any gaps around the old mineral wool. Also to fill in the areas that did not have the old mineral wool (i.e. below the bay window).

Sill in Bay Window w/ spray foam where there was no mineral wool

Before we knew that there was mineral wool already there I had decided to use mineral wool batts already. As I had mentioned before, mineral wool has some advantages for a condition like this, including better fire resistance, better R-value per inch, acoustical properties and it can handle moist conditions better than fiberglass. It is also denser and tends to deter pests more then fiberglass. I have specified mineral wool on lots of occasions (usually for sound isolation between 2 spaces) but I had never worked with it. First I had to find it, which proved more difficult than I thought it would be. In the end I found that our local lumber yard can order it, although it took them a little bit to figure out what exactly I wanted and how the quantities worked. I ended up with Thermafiber 3″ thick batts. Unlike fiberglass they don’t come in a roll because they are more rigid and don’t take to rolling. Instead they are 16″ wide (like a typical fiberglass batt) and 48″ long. The bags we ordered contained about 48 sf and cost around $42.

I was warned that it was more itchy than fiberglass, but we were planning on wearing long sleeves, gloves and masks anyways, so I wasn’t too worried. Once I opened the first bag and did a sample cut I discovered that it cuts more easily and cleanly than fiberglass (I was using a straight edge and an Olfa Knive). Of course our bays are not a standard bay size and are typically around 14″ rather than the 16″. The height we needed was about 9 – 10″. So after a little bit of math and some trial and error in fitting the pieces we determined that we could get five 9 1/2″ x 16″ pieces. These fit nice and snugly in between the joists. We decided to use 2 pieces per bay.

2- 3" Rockwool Batts Installed in Between the Joists

This actually went quite quickly. I did the cutting while Mr. S. installed them. For the front of the house (parallel to the bay) we continued to use the small pieces and just butted them up next to each other. We found the longer pieces were hard to push into place. I also found it was about as itchy as fiberglass, but because it was less messy to cut I actually prefer it by far to work with.

We have already noticed a difference in the basement and on the first floor. We still need to do the rear wall of the house. In that case there is only a narrow gap between the floor joist that runs parallel to the foundation wall and the wall. It is going to probably be a little trial and error.

Tomorrow I will show you some sections of the sill condition so I can better explain our strategy.

*For all of our Basement progress click here.

2 Comments

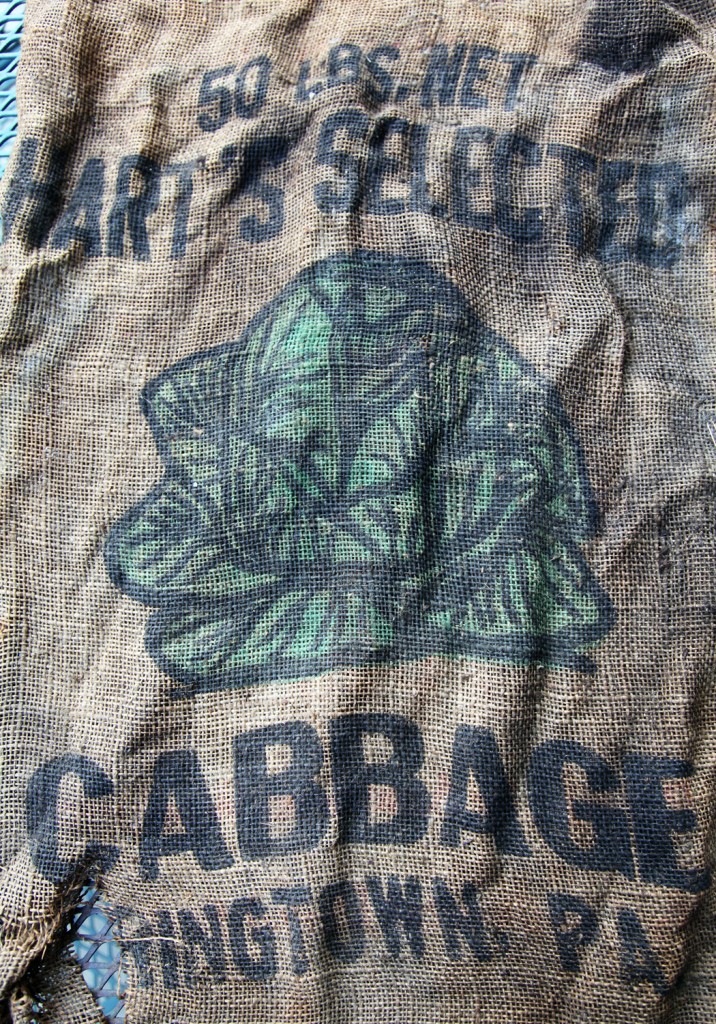
Hart's Selected Cabbage Burlap Bag from Springtown, PA

I know I promised a longer post about foundation sill insulation (I know you are very disappointed!) but I wanted to show everyone our latest find from the basement. When we were clearing out above the foundation walls this past weekend we found some old burlap bags. I had seen a corner of burlap hanging down a while ago and hadn’t bothered to see what it was. Well it turns out that it was 3 OLD (100 years or so) burlap bags that had been shoved into the space between the stone foundation and the sill plate a LONG time ago (now replaced with spray foam). Drew gave them a rinse off outside over the weekend. They are still kind of gross but they are really cool at the same time. They are fairly fragile so I’m not sure that they would be able to be framed, but I could always frame pictures of them in the new finished space in the basement. What do you think?

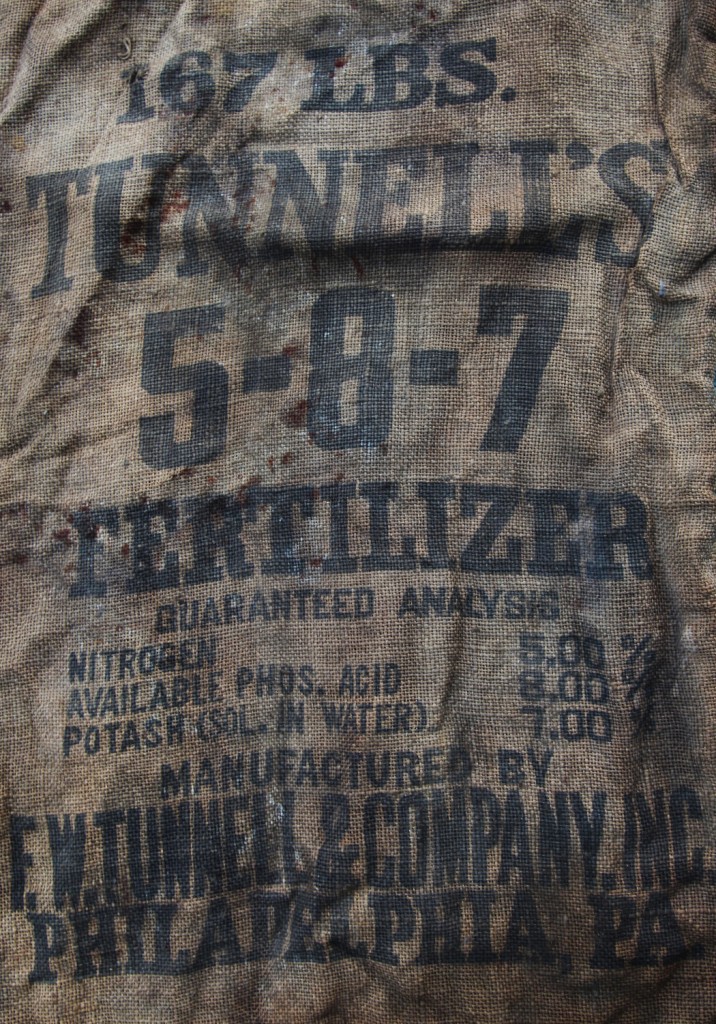
The first one is a 50 lb cabbage bag. The second is a 100 lb potato bag. And the third one is a 167 lb fertilizer bag (I can’t imagine trying to carry a bag that heavy!).

Eastern States Seed Potatoes Burlap Bag from Springfield, MA

Tunnell's 5-8-7 Fertilizer Burlap Bag from Philadelphia, PA

*For all of our Basement progress click here.

5 Comments

I will be posting up updated basement photos later but in the meantime I thought I would show you the plans for the flooring. We spent the long weekend installing new insulation at the sill/ top of the foundation. 10 cans of spray foam and 2 large bags of mineral wool and we are almost done! We have already noticed less draft in the house. Of course once we get the walls insulated down there, it should feel even warmer!

Inspiration 1 via Houzz

Inspiration 2 via homebunch

Inspiration 3 via Houzz

So in the meantime I thought I would show you the flooring that we picked out. We started with the idea of large porcelain tile for the bath and laundry area but we couldn’t seem to find anything to our liking that was also in our price range. So we expanded into looking at real stone and slate and also vinyl tile. I love the look of the slate, but not the maintenance (it is the basement after all). We are also challenged in the height department down there. So in the end we have selected a vinyl tile that looks like slate (plus you can grout it). It is thinner than tile or stone and should be a little warmer on the feet too. I know it seems a little “cheesy” but I like how it looks in person and it had good reviews so we are willing to give it a try.

12x24 Vinyl Tile in "Slate"

The photo is from my phone, sorry the color is a little off! The price is good about $1.69 sf. It is special order from Home Depot. It is from their TrafficMaster Ceramica line. They don’t list the slate color online but here is a link to a similar one called Coastal Grey. We will be using the 12×24 in a staggered joint pattern, similar to my first inspiration. We plan on using a mix of horizontal and vertical beadboard throughout the basement. I am leaning towards the horizontal beadboard similar to my second inspiration in the bathroom.

For the main room we are thinking of having some fun with the flooring. We decided that we wanted the warmth of carpet in this space. My preference is for durable carpet tile in this case, but the price on most carpet tile is expensive (especially for a basement) but I think we have found the answer!

Mixed Lot Carpet Tile in "Bright"

Mixed Lot Carpet tile in "Grey"

These are from Carpet Corporation of America based out of Georgia. These odd lots are priced in the $.29-.49 sf range. I still have to call them but I like it! The beauty is if one gets damaged you just put a new one in! They also offer random lots of matching tile in the $1.50 sf range. So stay tuned to see what i end up picking! It will be a big departure from our understated beadboard walls.

*For all of our Basement progress click here.

Leave a comment


Newly Parged Wall (dark gray will fade as it dries)

So this is not one of my pretty posts. Somehow looking at foundation walls is not a particularly eye catching thing to do. But for us, this means that we are one step further to having pretty finished walls! My contractors (Kent, Chris & Nate) have been busy down in the basement this week. They were here for 2 days this week and probably have 1 more day to wrap things up (at least until the drainage specialists show up). They are about 2/3 of the way done with the parging on the walls. Parging is basically a skim coat of mortar that is applied to the stone (rubble) foundation. Since the foundation is made up of lots of smaller stones this help to even out the wall and help minimize the potential for leaks and spots for bugs and mice to enter. Inevitably the parging starts to deteriorate after a certain point (with years of moisture from the outside making its way inside). Ours was probably last parged about 50-70 years ago. The process consists of using a wire brush/chisel to remove all of the lose parging. In our case the parging was generally in good condition above the ground line and in varying degrees of deterioration below the ground line. We also noticed that once we removed the interior walls in front that the stone walls that the walls dried out quite a bit and more parging fell off. Then they fill any of the larger cavities/holes first. Then they come back with a thinner coat to skim coat the walls.

This is only the first step in our wall construction. After parging comes a special fabric that is applied to the walls that will keep any moisture away from the inside. This will attach to the new perimeter drain system with a special lip that will allow all of the moisture to drain into the new perimeter drain and back to  the sump pump to take it away (back outside).

After the drainage system is complete we will be adding rigid extruded insulation to the inside along with stud walls. We will also be adding new mineral wool insulation just above the foundation at the sill plate. There is a mix of insulation in there now that we are going to take out and replace for consistency. Mineral wool which is made from molten rock (and now from slag leftover from the steel making process). It has a couple of advantages over other insulation. It is an excellent fire retardant, doesn’t deteriorate or lose its insulative properties when wet, has a better R-value per inch then fiberglass and is a excellent sound attenuation. I’m still working out the exact detail for this location to maximize R-value and fire separation. I also had to special order the mineral wool (usually listed as Rockwool or Thermafiber).

New Floor Joist Support

Reglazed window

So along with this process they also fixed an unsupported floor joist (it has only been unsupported for about 100 years ago), put in a new exhaust line for the dryer, added a new exterior electrical outlet to the front of the house, reglazed one of the windows, temporarily hung our electrical box so that the drainage guys could work underneath it, and extended one of our gutters so that we minimize water collection in one corner! Phew! It was like Christmas all over for us.

We also managed to make it over to Home Depot to look at some products and finishes without the kids yesterday. We decided on a floor!! And found some great affordable LED recessed lights. So stay tuned for more developments!

May everyone have an amazing 2012! Thanks for reading!

*For all of our Basement progress click here.

Leave a comment

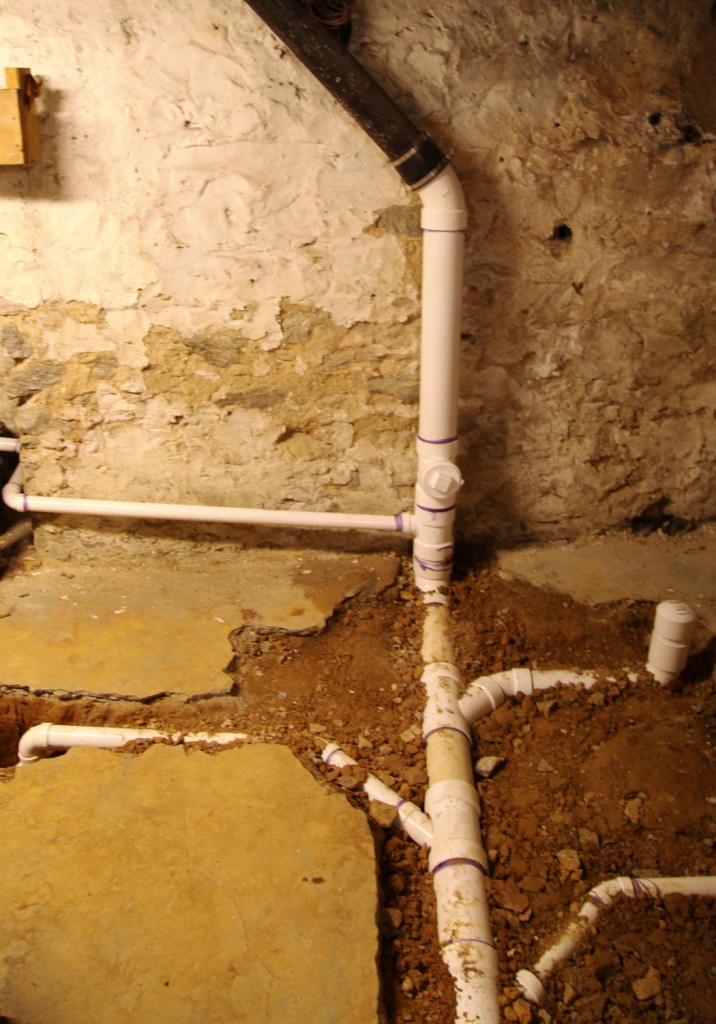
Look at those shiny PVC pipes!

It is has been a busy, noisy, smelly and cold couple of days in our basement. The good news is that our plumber is done with stage 1 of his work.

Here is a rundown of what he did:
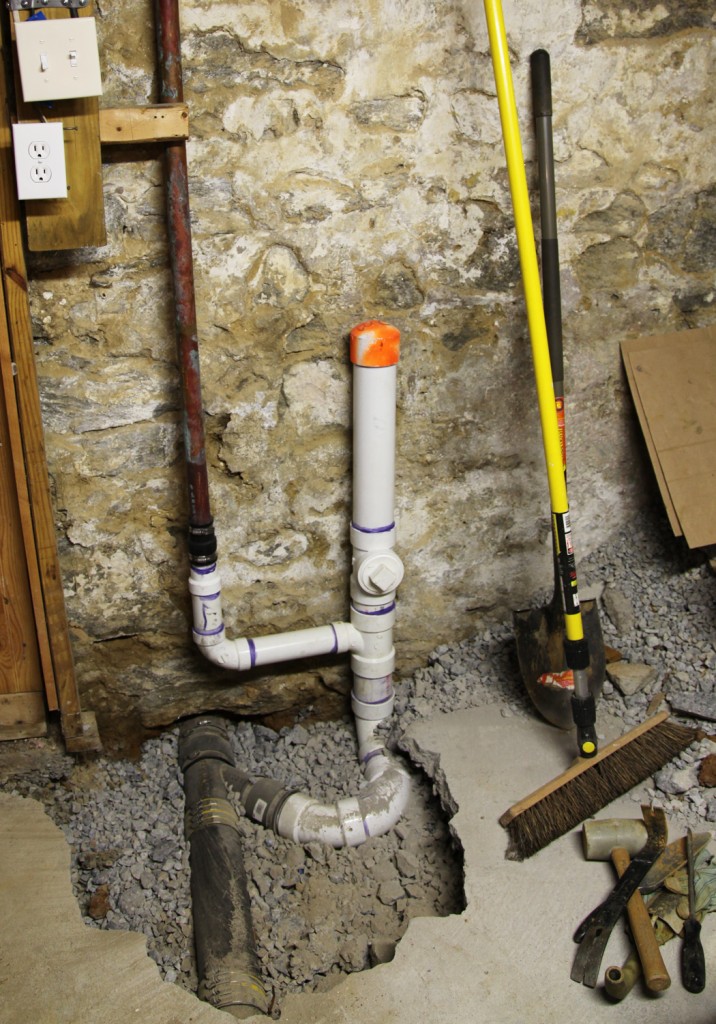
1. Replaced part of the old cast iron waste line/main stack and added a clean out.
2. Removed all of the old basement bathroom plumbing connections.
3. Installed the drain lines for the new toilet, sink, shower and stationary tub.
4. Replaced the connection from the kitchen sink waste into the main waste line and added a future connection.
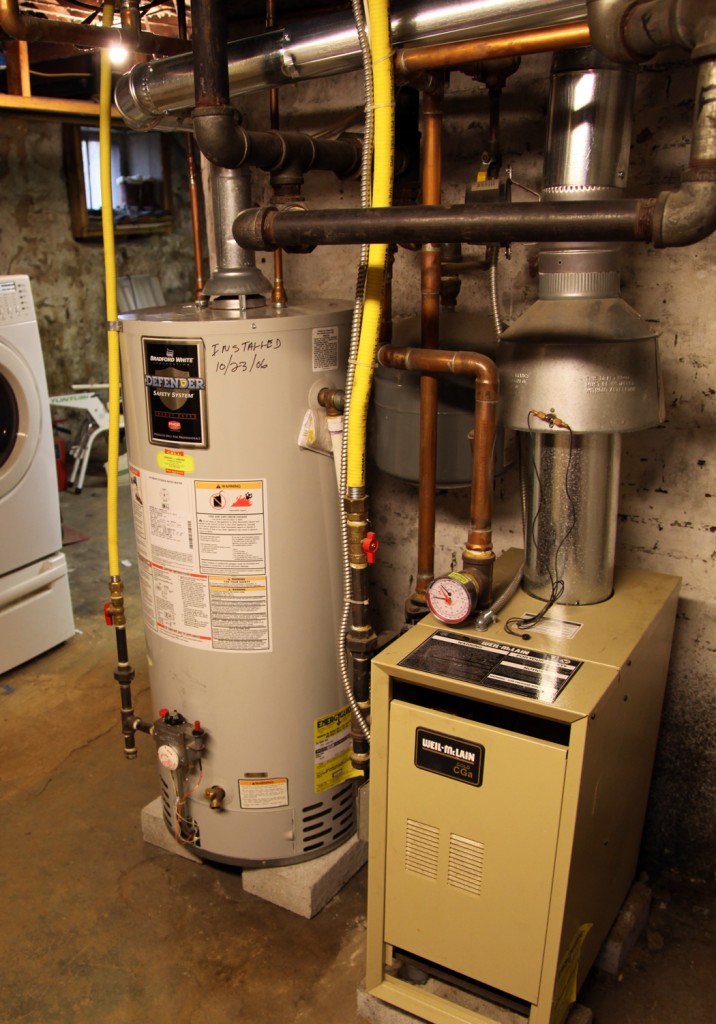
5. Moved the hot water heater to a more out of the way location.

New PVC waste pipes with old cast iron pipe up above on diagonal

New connection for kitchen waste pipe & future hook up w/ clean out

He and his assistant had a long day yesterday completing all of the waste line. This also meant that it was loud thanks to the drilling up of the part of the slab that we couldn’t get up, smelly thanks to the chemicals that adhere the PVC together and cold because the back door was open due to the fumes. It was really convenient that it was a day that the kids were at school (plus a lack of a bathroom doesn’t help).

Hot Water Heater in new location next to the Boiler

Today he moved the hot water heater and did a few last things to finish up. I wish I could say that we were done with demolition now, but alas we have another month of striping things apart before we can start building everything back. I am busy dreaming of tile floor and beadboard walls.

*To see a full rundown of the basement click here.

Leave a comment

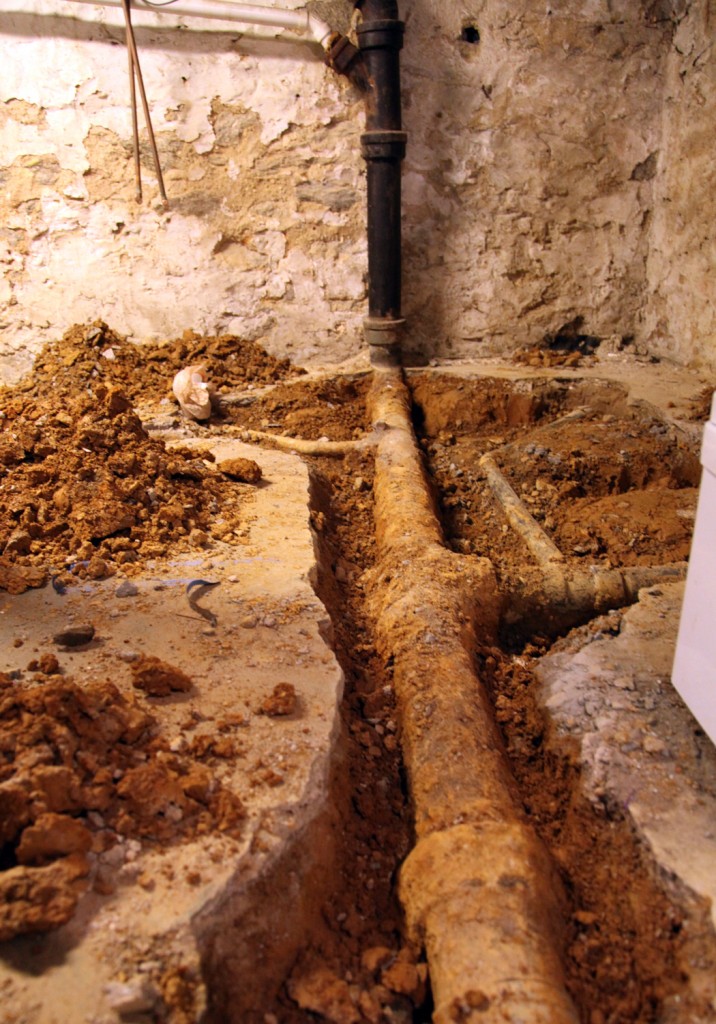
Cast Iron Waste Pipe under the concrete floor in the Basement

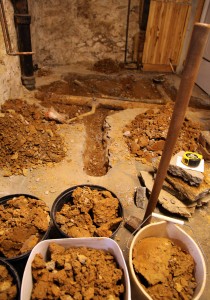
Today is a big day in the life of our basement! Mr S. and I spent a good bit of time this weekend breaking up part of the concrete floor in the basement and digging the clay soil out to get ready for the new drains for the basement bathroom. This included exposing a good section of the old cast iron waste pipe. This will all be replaced today! The plumber is here and will be shutting off the water shortly (okay right now!), so no bathroom for most of the day!

The demolition went pretty well over the weekend. Mr. S made good use of our antique sledgehammer (originally his Grandfather’s) and a crowbar and hammer. The floor is old, we are guessing from about 1900 (when they added the radiators). The concrete is quite thin averaging about 1 – 1 1/2″ thick, but I can’t say that it was easy to break up. One interesting fact about concrete is that it continues to get stronger and stronger as it ages, so it took some work to get it broken up. I was in charge of moving the buckets of concrete debris to the backyard (not sure what we are going to do with it yet) and digging up the dirt after the concrete was removed.

After the cast iron was exposed, we reviewed it with the plumber. It will be replaced from the angle part way up the wall to our existing (and a few years old) connection at the washer and dryer. This will include a clean out (really convenient considering we didn’t have one) and connection to the new stationary tub in the work room. The horizontal will include a connection to the new shower, toilet and sink. Yeah! At the other end of the waste pipe he will also be updating the drain connection from the kitchen sink to the waste pipe and adding a future connection, in case we ever put an addition on with a new bathroom (someday hopefully). The new PVC piping should outlast us, so hopefully we won’t ever have to dig this up again!

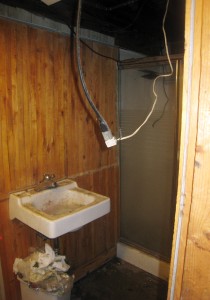
Old bathroom! Complete w/ tiny shower

Bathroom after demolishing all of the walls

Bathroom w/ bucket of clay (to go back in the ground)

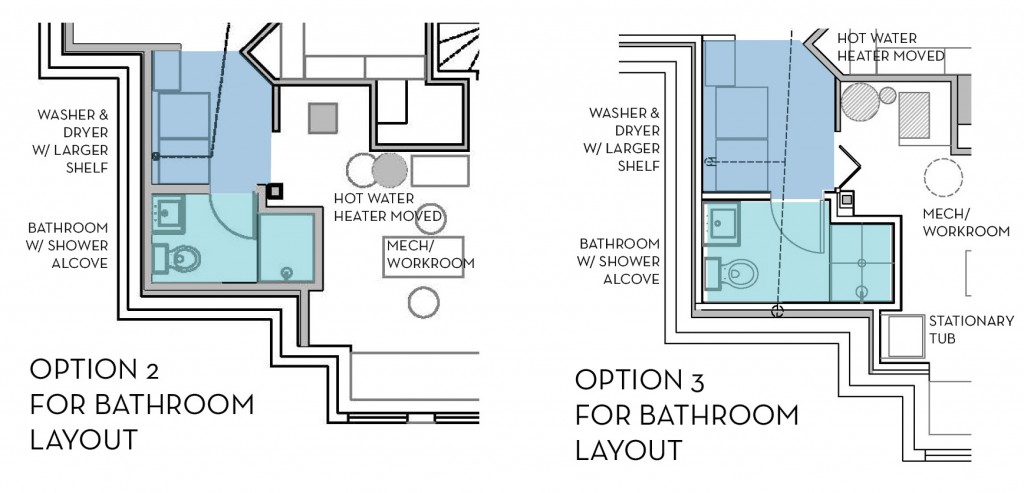
The bathroom plan is pretty much the same as I showed a couple of weeks ago.  Since then we have added a stationary tub to the workroom (I’m not sure why we didn’t think of it sooner) and tweaked some of the dimensions. We also found a better location for the hot water heater. It will JUST fit next to the boiler, this way the entry to the workroom won’t be so tight and we gain some extra wall space. I triple checked the plans yesterday, since as of right now I can’t change the plumbing locations.

Bathroom Layout Options (Option 3 is the FINAL Plan)

Fingers crossed we will have new waste pipes later this afternoon!

*For all of our Basement progress click here.

2 Comments

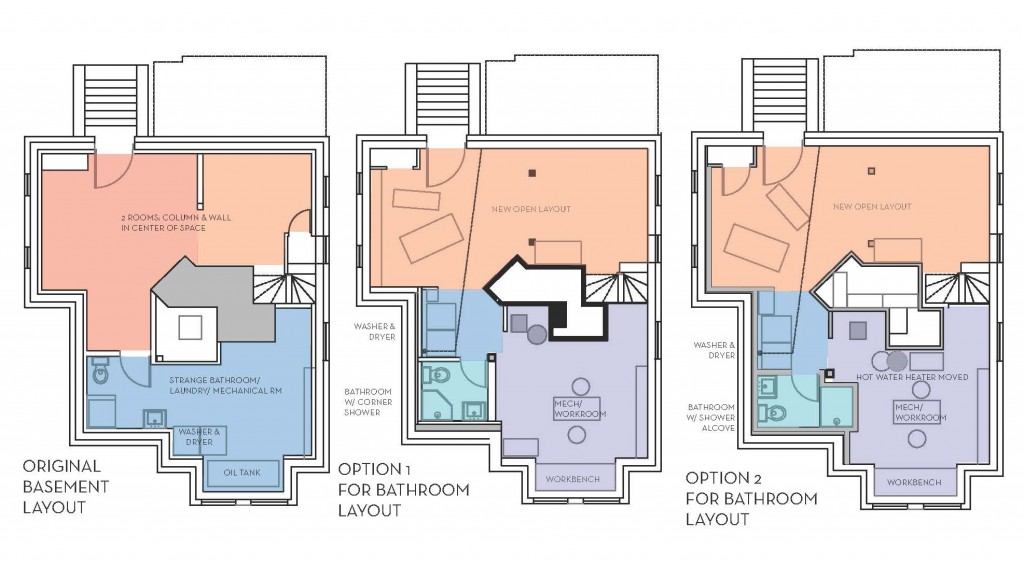
Basement Layouts

I have been trying to figure out the best layout for our basement bathroom/ overall layout. The old bathroom layout was very strange. It actually opened to the workroom/ laundry room. Yes, that’s right, you could close that room off from the other half of the basement, but you never actually felt like you were in a “bathroom”. Originally it had a shower, all be it a tiny kind of gross fiberglass model with a strange plumbing hookup. Since we only have 1 full bath on the second floor and none on the third floor, we felt that we should really try to put a shower back in down there.  Also we are going to bite the bullet and replace the plumbing under the slab in the space, which then gives us flexibility for a new layout, although we still have plenty of constraints!

Dreamline Corner Shower System

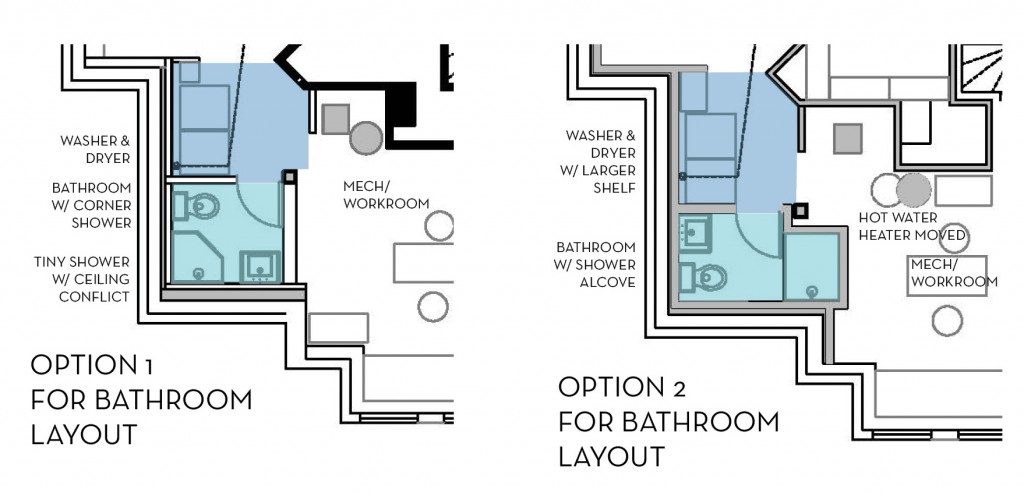
I started out thinking about a corner shower, since that was what was there previously, although I was looking at a corner glass model. The problem with the old location though is that the gas line runs directly above it, significantly limiting the ceiling height, and not allowing for a standard glass door to fit. So I expanded my options and after double checking the dimensions  down there came up with a plan that will give us a comfortably sized shower.

Bathroom Layout Options

The big trick to making this layout work is to move the hot water heater (gray circle in the plan). I know, that seems silly and an unnecessary expense, but the more I thought about it, why should I have a tiny shower due to the hot water heater. Eventually we plan on upgrading the hot water heater anyway with a tankless model (which would need to be mounted on the wall we are moving it to).

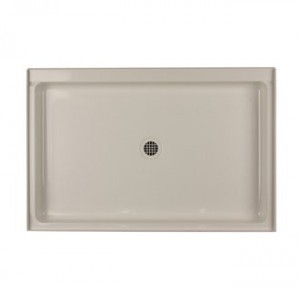
32x42 Shower Pan, we will use white

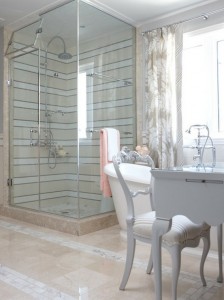
Sarah Richardson Tile Shower

I found this nice shower pan that will fit the space. I also like the striped tile in this shower by Sarah Richardson from her Sarah 101 show on HGTV. I actually picked up some accent tile for the striping on clearance, but am still deciding on some of the other tile and the floor tile. So stay tuned!

1 Comment