Archives For GARDENING & PLANTS

Nature in our Yard

July 20, 2011 — 1 Comment

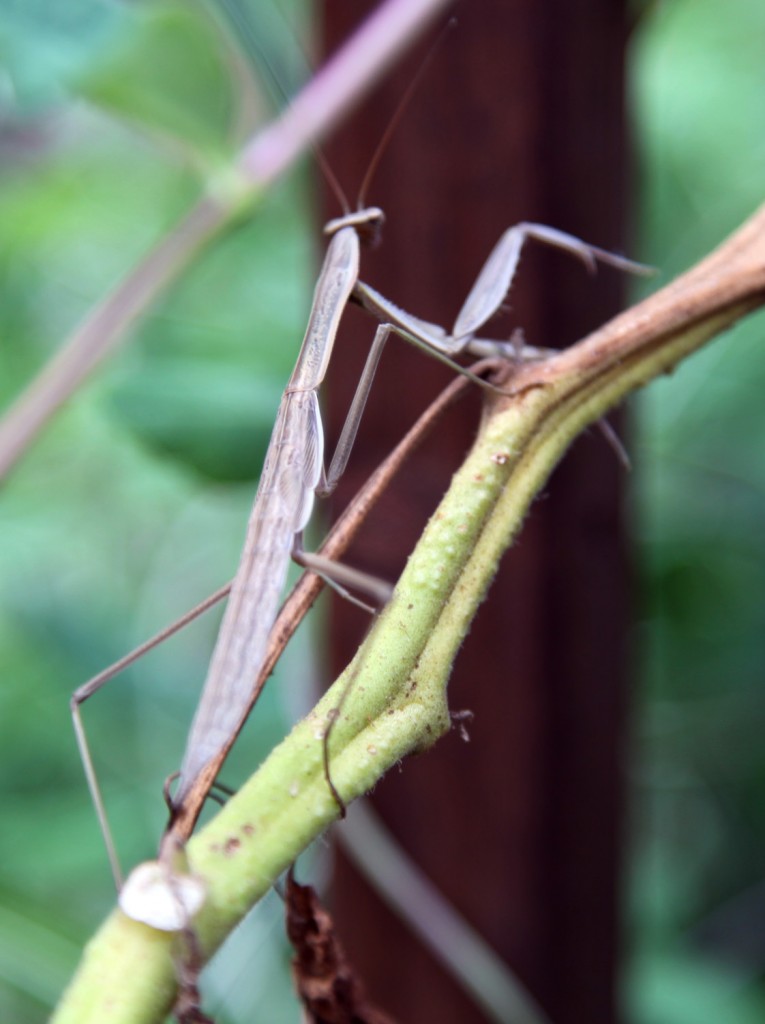
Large Praying Mantis

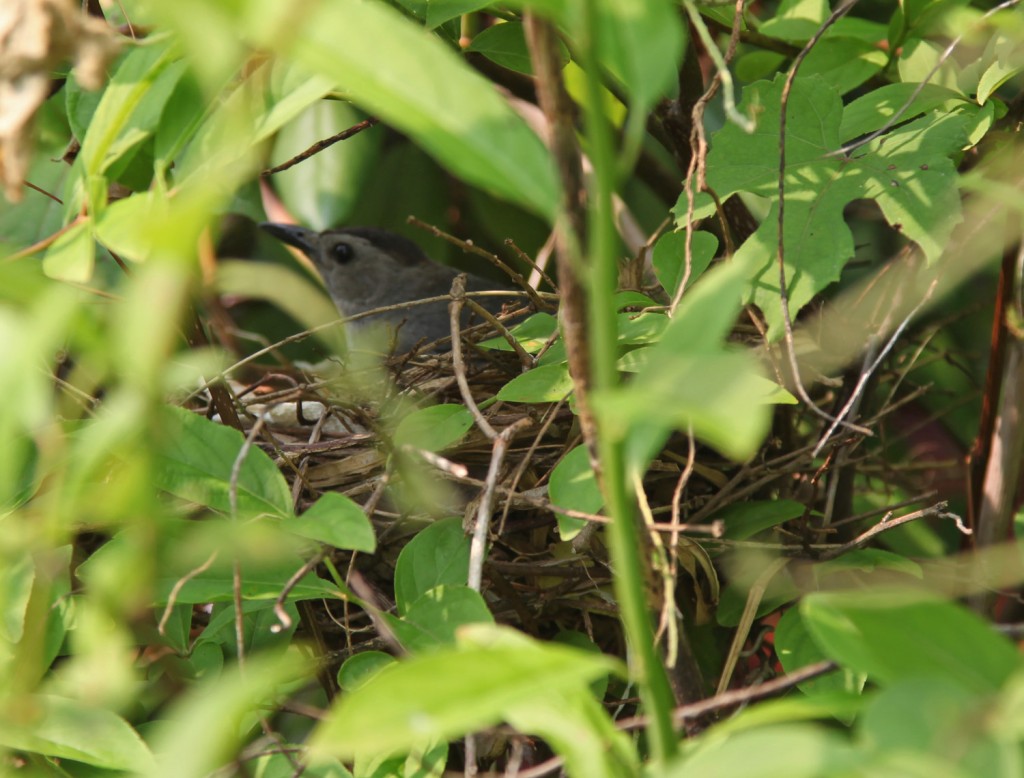
Catbird sitting on her nest (which has 3 blue eggs in it)

It is amazing to me how many animals, birds and insects visit and live in our small yard! When we first moved here we tended to only see squirrels and robins. Of course there wasn’t much here for the wildlife, except for a few bushes and trees. We have not used any chemicals in the yard in years (with the exception of wasp spray for some ground wasps next to the patio and a patch of poison ivy about 5 years ago).  Although our grass is not particularly lush, I feel like we are getting paid back in wildlife. Last week I was pulling some weeds out of a shrub and almost took out a Catbird nest. Fortunately I saw the 3 beautiful blue eggs and proceeded to very carefully put the vine back on the bush (so much for the front yard looking nice).  On Monday we saw a huge Praying Mantis on the deck (sitting on the tomato plant). The kids loved it. It moved around for them and then pretended to be a branch. We have also been seeing lots of butterflies, bumble bees and hummingbirds (partially thanks to my plantings of Native Honeysuckle, Bee Balm, Butterfly Bushes and Butterfly Weed). I just came in from running errands and as soon as I opened the back gate I saw the bunny munching on the lawn (definitely a mixed blessing) a robin, a little gray bird and a finch flying around. It makes me very happy that I can provide a home for some of these little animals. We also have a bird bath for the birdies and the squirrels (especially important in the hot weather). I also have a bird feeder which I am forgetful about filling.

Who are you sharing your yard with?

1 Comment

Butterfly from this morning

One of my 2 original Butterfly Bushes

Same bush as above from the Kitchen window

One of the first things I planted when we moved into our house were 2 dark purple ‘black knight’ butterfly bushes (and a nikko blue hydrangea). I really wanted some butterflies in our pretty boring landscape and I heard that Buddleia grew quickly and were quite hardy. And sure enough the first year we planted them the butterflies showed up as soon as they started to flower! As I sit here, I have seen 3 pass by the window.

I have since expanded my collection (with some good and some not so good varieties). Now that I have a lot of other plant varieties in the yard, I don’t find the Buddleia quite as aesthetically appealing as I once did (although they do reliably bloom in July and August). They can look kind of rough towards the bottom (if possible I recommend underplanting them with some perennials). I also recommend cutting them back quite heavily (either in the fall or spring). The older branches tend to be less attractive and have a tendency to break over time. Also if left to grow unchecked mine have reached 15′ tall. If you want to avoid seedlings, cut back the spent blooms before they turn to seed. I have had a number of volunteer plants from the seeds (both in good and bad locations), but ultimately I keep them because I love the butterflies. It is interesting that these plants are not generally native to North America, but somehow they seem to be the butterflies favorite food! I have also added Orange Butterfly Weed to the garden as well as a number of other butterfly friendly plants, but I see the butterflies mostly choosing the butterfly bush.

Although they won’t make my Plant of the Week because they can look a little rough at other times of the year, I still highly recommend planting at least one, preferably where you can see it from a window. We have them planted so that you can see them from 2 of the kitchen windows and I get to enjoy the butterflies while I make dinner. Sometimes it is the little things that make you smile.

Leave a comment

A second peacock to keep my first one company at the back gate

Cowbell

I celebrated my birthday last week and Mr. S. surprised me  with a second peacock (after he told me that he thought 1 was enough). So now we have a matching pair at the back gate. He also picked out this cow bell at Terrain (a present from the kids). I haven’t decided where to hang him yet. I was thinking somewhere on the back deck so I could call the kids in from the backyard. Or maybe in the kitchen or dining room to announce dinner. It is pretty loud (as demonstrated by the kids who proceeded to ring it as many times as I would let them) hmmm… Let me know if you have any ideas.

We also had a lovely time at Longwood Gardens yesterday. They have added a bunch of kids stuff since we have been there last, including 3 big treehouses and an indoor children’s garden. I will post a few pictures soon.

I’m off to run some errands but I am working on a couple of posts for this week. One about our bedroom and one about Sarah’s living room/ dining room/ front porch. So stay tuned.

Leave a comment

Hardy Hibiscus, Disco Ball

Purple Liatris & Coneflowers

White & Pink Coneflowers

I’ve decided to take a couple of days off from the blog. I am in need of a little downtime and some extra time with the family. I will be back next week. In the meantime if anyone has a topic that they would like me to write about, please let me know. I’m also working on some ideas for Sarah’s Living Room, Dining Room and Porch. More on that next week.

I’ll leave you with a few of the blooms in the front yard. Now if the front beds could just weed themselves I would be all set.

Leave a comment

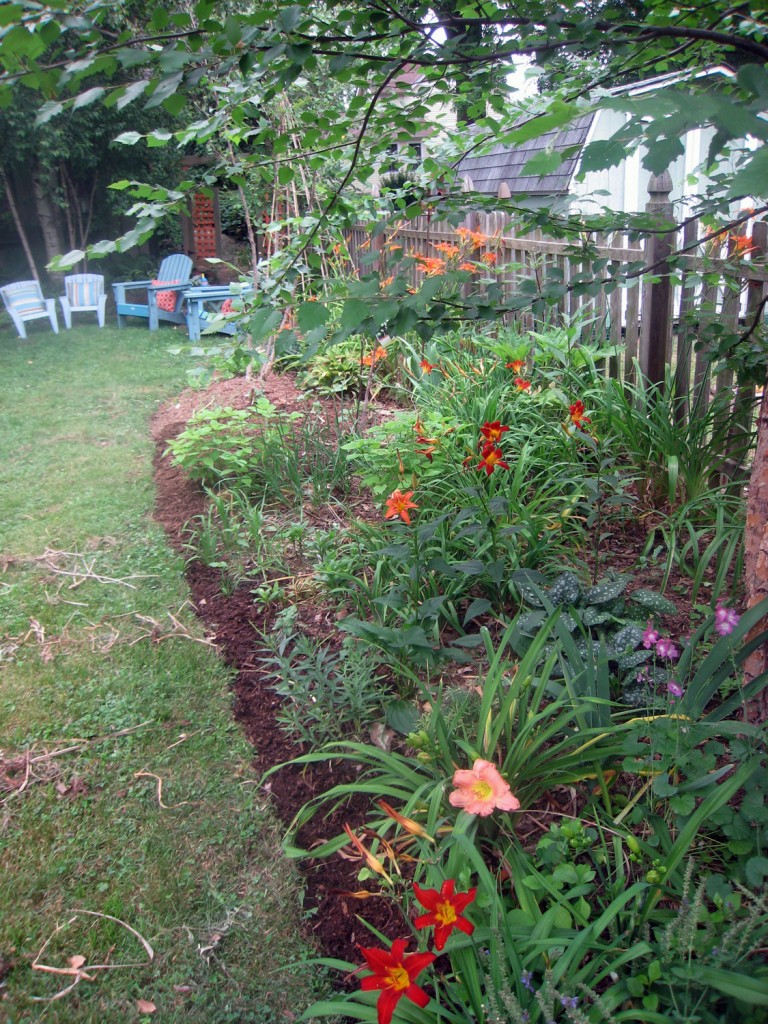
A couple of weeks ago, with the lilies in full bloom. The empty spot in the distance is meant for veggies.

I think it is so easy to look at a “finished” flower bed in someone’s yards or in a magazine and lust after it. Most people don’t see the work and patience that goes into creating a lush planting bed. I thought it would be useful to give you a detailed breakdown of creating a landscape. And also help dispel the myth that they are finished right away (although I suppose if you have a professional gardener you could put everything in at once).

I pulled out some old photos of the side bed in the backyard. We originally started the planting area back in 2007 to give us some privacy from our nosy old neighbor lady (anyone else have one of these?). Since then it has been enlarged and tweaked quite a bit. I took some photos yesterday and realized that it needs some work.

Here is the rundown:

The Background:

We had the 4′ high fence installed in 2006 (even though our neighbor refused to let us take out her 40+ year old chicken wire fence which sits 6″ from ours). However the fence wasn’t giving us the privacy that we were looking for. We are not allowed to have 6′ fences here in town.
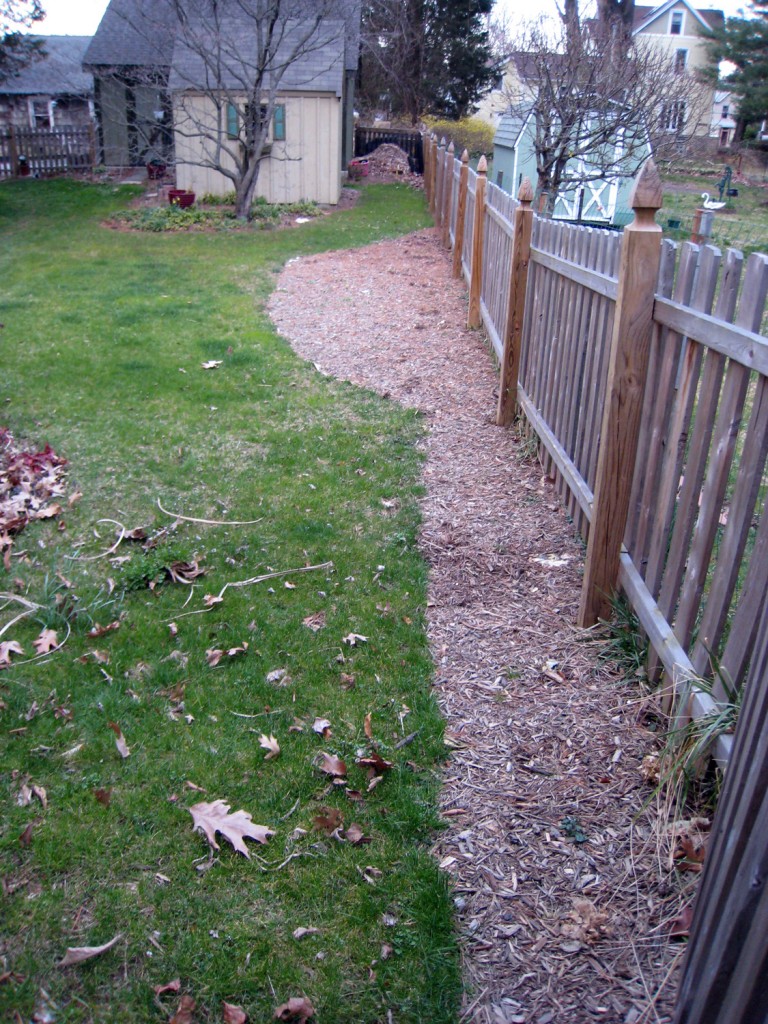
Early Spring 2008: Mulched planting bed ready for planting. I know not very exciting.

The Beginning:

In Fall of 2007 we decided to put in a planting bed to offer some additional screening between our house and our neighbors.We also wanted to block the view of the compost pile behind the garage from the side gate (where this picture is taken). We placed newspaper (about 6 layers) in the location of the future planting bed. Then we wet them down to keep them in place. Then we covered it with about 2-3″ of mulch. Then we let the grass and weeds die underneath the newspaper over the winter.
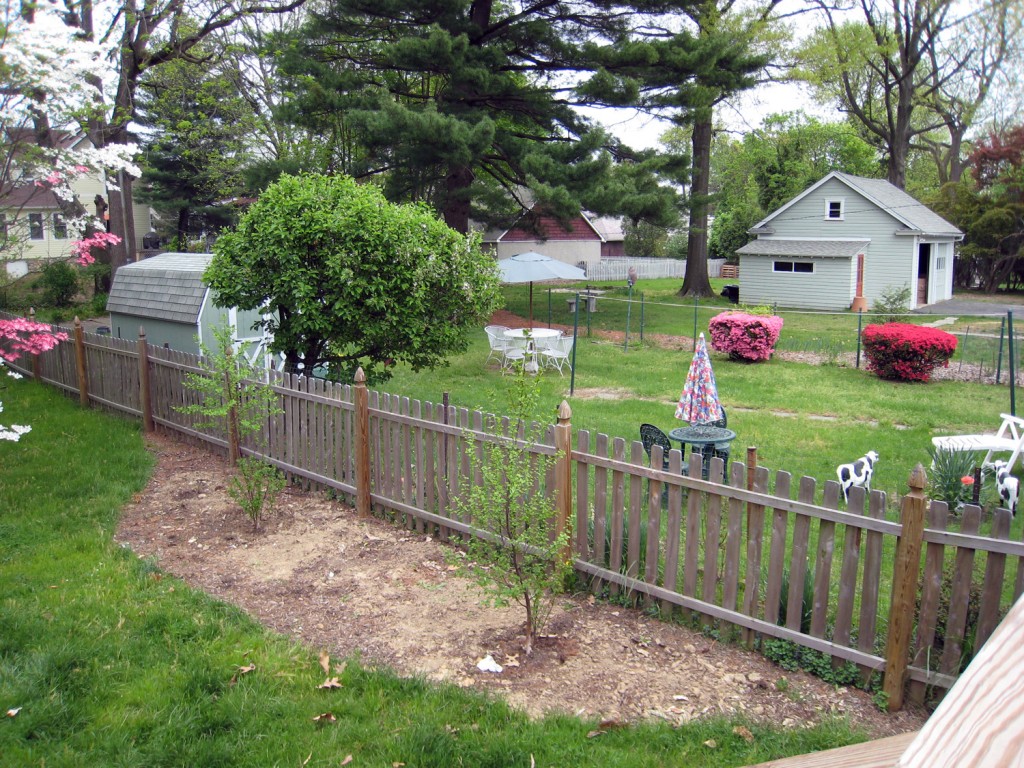
Spring 2008: River Birches just planted. And yes those are plastic cows next store (Maisie is a big fan).

The Trees:

In the Spring of 2008 we started planting. We decided to go with River Birch as the main “structure” of the bed. River Birch are native, quick growing and have beautiful bark and lovely small leaves that provide dappled shade. They are also not fussy about moisture (which is good with clay soil and wet springs and hot and dry summers).

In a bigger planting bed I would recommend some shrubs and evergreens as well to create more structure. Our bed is quite narrow at 5′ so we don’t have quite enough depth.
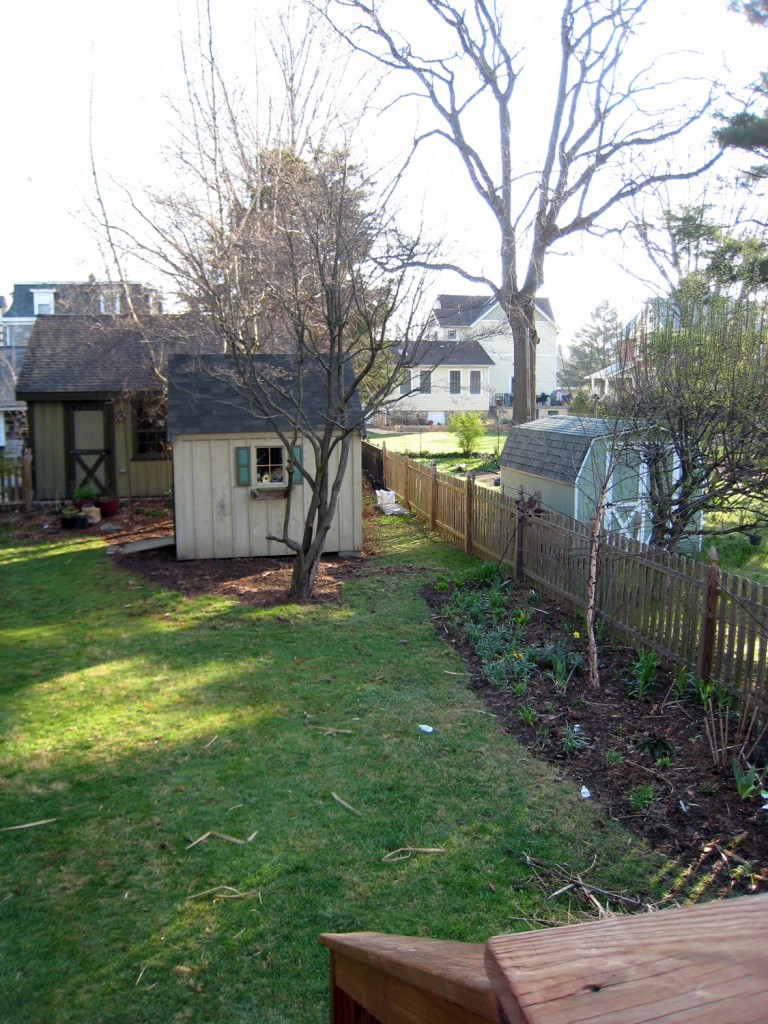
 

Spring 2010: River Birch have grown and a number of the perennials are coming up. This is shortly before we moved the shed.

The Perennials:

In 2009 I started with some easy to grow perennials and bulbs is this planting bed including: Daylilies, Irises, Daffodils, and Snowdrops.  For taller perennials I added: Ironweed (grows to 10′ high), Joe Pye Weed and Hardy Hibiscus. It was starting to fill in but certainly was not very exciting. Most of the leaves were the same shape and green. In 2010 I worked on filling in with different leave types, textures and colors. I added some salvia (both purple and white may night and purple rain), yarrow (I love the feathery leaves), peonies, poppies (didn’t come back this year), autumn joy sedum, Penstemon digitalis ‘Husker Red’, coreopsis, virginia bluebells, plumbago and amsonia (a beautiful feathery native plant).
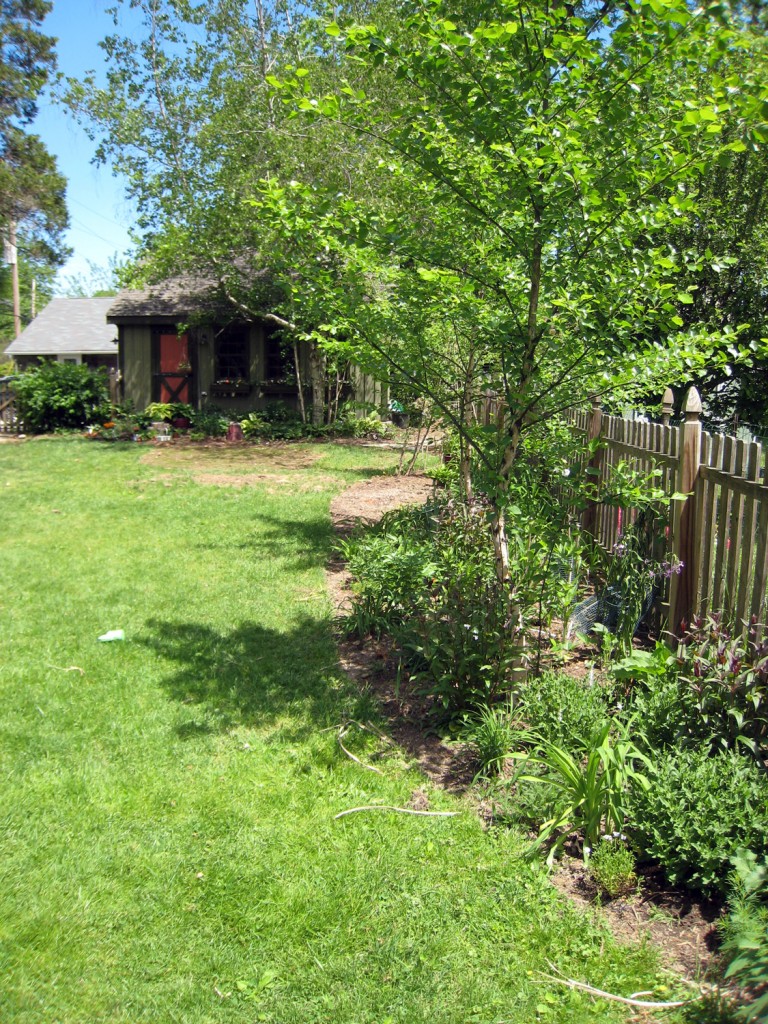
Later Spring 2010 (just after the shed was moved) and I was finalizing the shape of the planting bed.

The Shape of the Bed:

The shape of the planting beds in the backyard were originally determined by the location of the trees in the backyard, which lead to the location of the shed (in between the dogwood and the European birch tree). This lead to an awkward space between the shed and the garage and limited the size of the side bed. Well in the giant early spring snow storm of 2010 we lost about 1/3 of our old pine tree (a whole other story). This lead to a weird empty spot next to the pine tree. So we decided to move the shed over there to free up the middle of the yard and allow for a clear view of the garage (which we had so carefully designed). The dogwood tree in front of the shed was on its last leg and we had already planned on removing it, so when we had the pine tree trimmed we had them take out the dogwood. It was amazing! The yard felt so much bigger and we now had a nice big space in the middle for playing ball and running around with the kids. It also meant that we could extend the planting bed all the way back to the planting bed adjacent to the garage. That spring I spent a huge amount of time moving plants from under the dogwood and around the shed, and then replanting everything in the new bed shapes. It also meant we had enough space to add 2 more river birches in between the 2 previously planted ones and the old European birch next to the garage.  It also meant I could pull out the planting bed a couple more feet to give it some more breathing room.
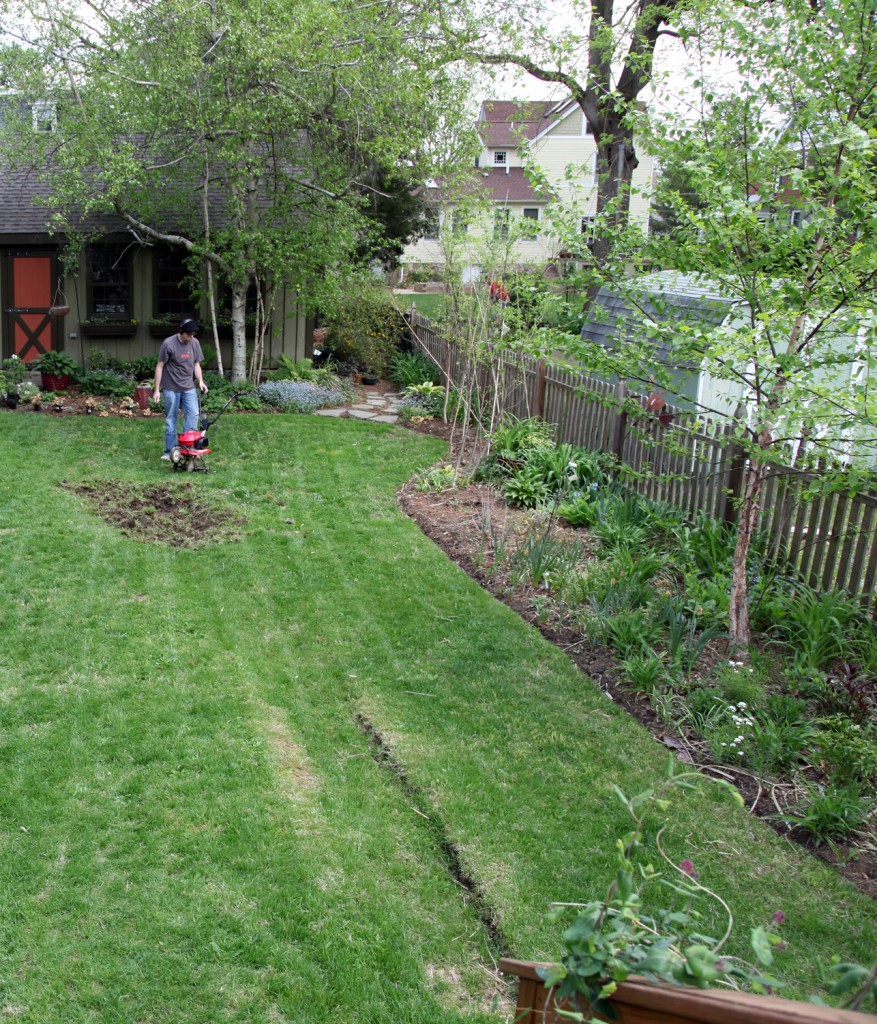
Spring 2011 (Mr S is working on the divets from the crane here). This shot gives you the best view of the shape of the bed.
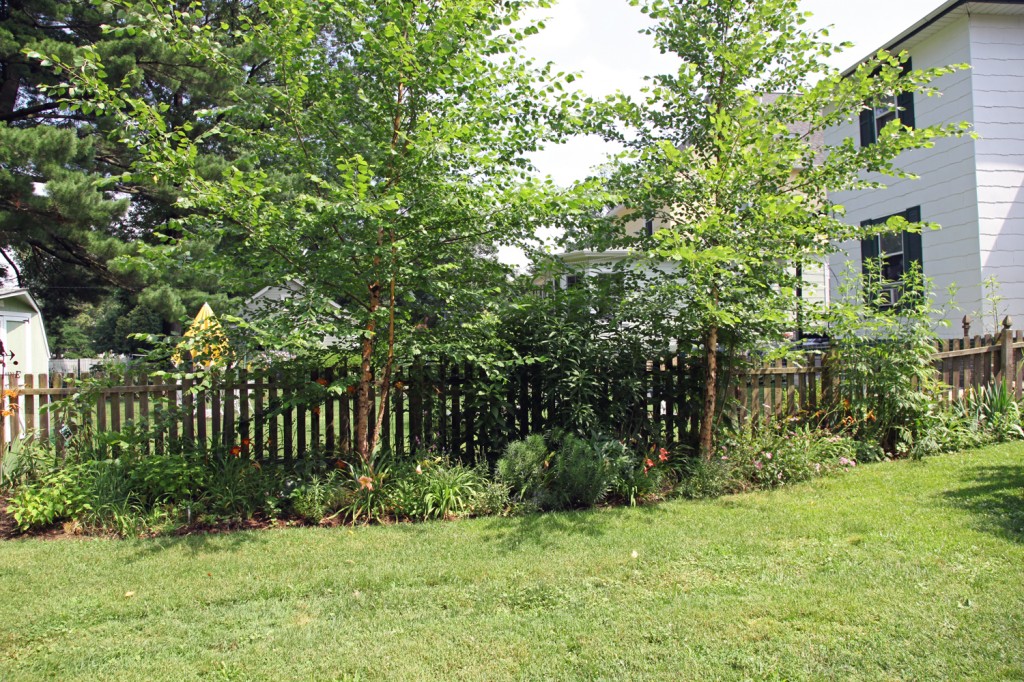
Straight view of the side bed taken yesterday. The birches and iron weed are doing a nice job of filtering the view of the neighbors.
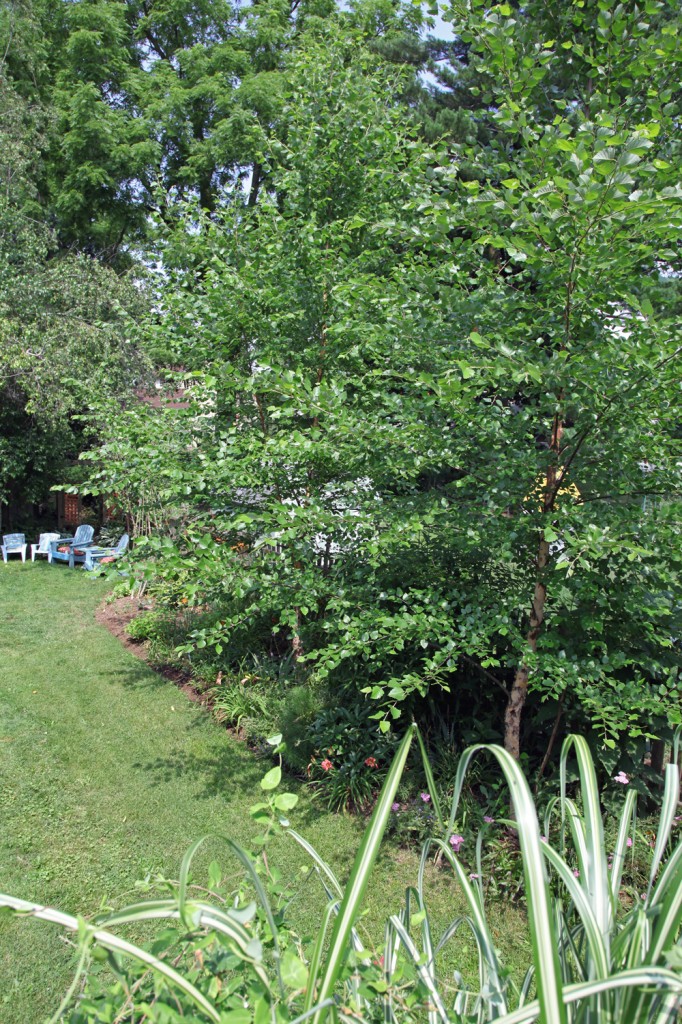
View from the deck yesterday. The birch trees need a good trimming.

Next Steps:

Now that the bed has a good shape it is time to step back and see what is and isn’t working. Looking at the photos today it dawned on me that the river birch need a good trim on the lower branches. They are providing too much shade underneath and the leaves are blocking the view of the beautiful bark and some of the perennials. I also am thinking that I need to add some small evergreens to add some structure to the bed (particularly in the winter). I also need some more plants with interesting foliage. I find it is a lot easier to find shade plants with good foliage. hmmm… So far on the list is some more lambs ear (I should be able to divide some of the plants that I already have elsewhere), artemesia (for its silvery leaves), allium purple sensation for some spring height, oriental poppies (I keep trying to grow these because I think they are stunning), and some sun friendly coral bells.

Any other suggestions?

1 Comment

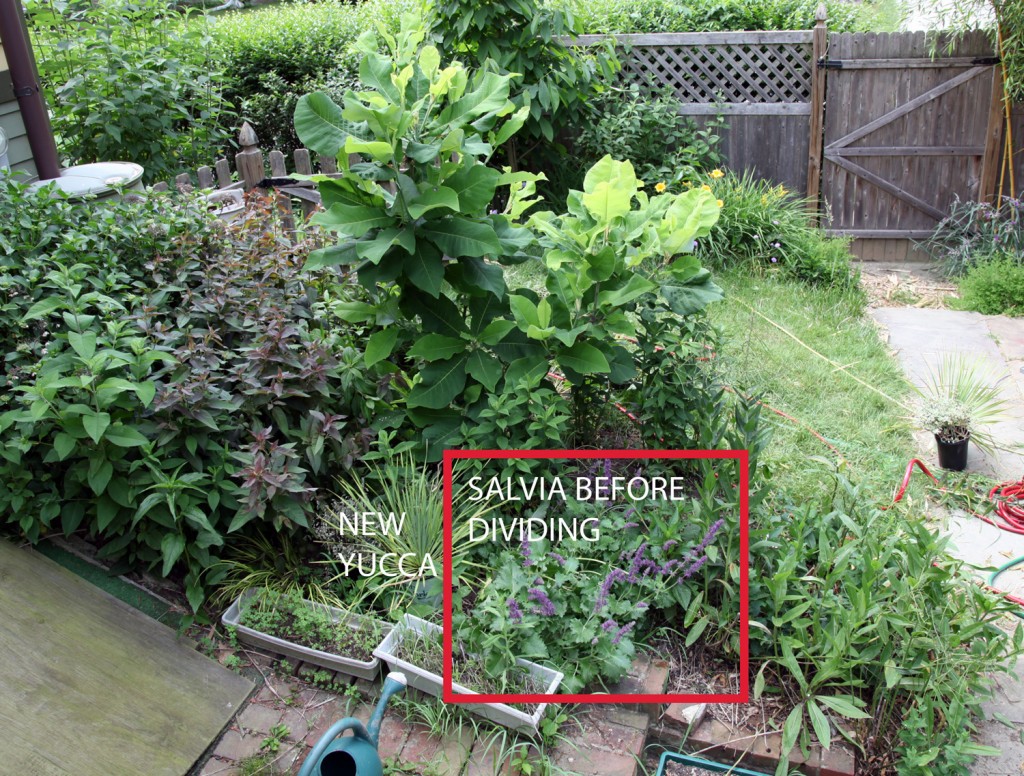
'Purple Rain' Salvia before dividing with yucca roughly placed still in the pot

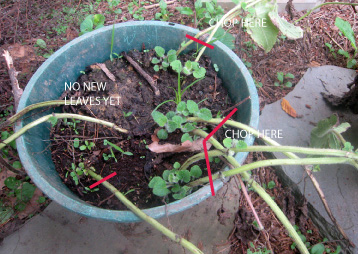
One of the two pots of divided salvia

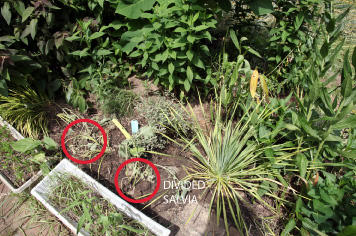
Divided Salvia in new location w/ Yucca


I use to be afraid and too intimidated to divide my perennials. I started out a few years ago dividing hosta (when they would get too big for their spot). They are one of the easiest plants to divide.  Take them out with a spade (this typically requires lots of heavy lifting), remove them from the hole and divide with a big saw, making sure to leave some leaves and roots on each section. Alternately you can take a spade and try to chop off a section and leave a portion of the plant in its place. Hosta are typically quite strong and thrive on being divided. However with most other perennials I was nervous about killing the plants! The rest of my perennials I started dividing purely by accident. I would be moving a plant and discover that as I was digging it up to move to a new location that it could be easily split into several plants (at which point I couldn’t help myself). Typically, I try to leave one bigger plant (to try and ensure its survival) and plant the smaller ones in new locations (and discard any really woody or rotted portions). Now that I know more about a lot of my perennials, I have discovered that a number of perennials prefer to be divided (i.e. when you see the middle part dying out or the plant seems to have lost some of its vigor). One of my favorite activities is pulling up a plant and seeing how many plants I can get out of it! Depending on the plant, dividing is done with one of a couple of methods. The best way to determine how to divide it is to pull it out and carefully wash off the dirt. A number of plants can be divided by simply teasing apart the roots and sniping the plants apart (i.e. like Salvia). Woodier roots will require a saw or clippers (i.e like daylilies). Typically plants with tap roots should not be divided (i.e. the root looks like a carrot such as Baptisia). Fortunately if you aren’t sure it is very easy to look up what type of root most perennials have.  One downside to this is that the area where you pulled out the plant will look kind of sad for a while (which calls for dividing in early spring or the fall to minimize the bare spots during the prime garden season).

A couple of weeks ago I dug out one of my huge  ‘purple rain’ salvia to divide (and because I wanted to rearrange some of the plants in the bed). This time of year is not the ideal time to do this! Early/mid spring or fall is much easier on the plants (and requires less watering), but sometimes I need to divide in non-optimal times. So is the case with my salvia. When I dug the plant up, I managed to divide (by removing the dirt from the roots and pulling apart the roots, while leaving some leaves on each root) the plant into about 10 plants. I put a couple back near the original location, with my new Yucca and the rest into a couple of pots filled with compost. I added some compost to the the plants that I put back in the ground. I also cut back the flowers, so the plant would concentrate its efforts on it roots rather than its flowers. I also watered every other day (when it didn’t rain) for the first week and a couple of times a week for the first month or so. Whenever I do something like this I hope for about a 75% success rate. I have found that it is unrealistic to assume that all of the plants will take (especially this time of year). However, less than 2 weeks later I have new leaves starting to grow at the base of all but one of the plants! Today I am going to chop off the older larger leaves and stems down to the new leaves.

So don’t be afraid, go out and divide and make more plants! Happy gardening!

3 Comments

It is amazing how quickly the garden changes. A few weeks ago the garden was all cool blues and purples. Now it is ablaze in oranges, yellows and reds. It seems appropriate given how hot it has been! I am especially loving my Hot Poker Plant (kniphofia), lilies and butterfly weed. This is my second year with the kniphofia and they have already expanded (I started with 3 plants). I think I may divide them this fall. It looks like they should be pretty easy to divide, just dig up the clump and chop or saw away, similar to a daylily. I love when I can divide plants (and use a saw). Free plants make my day!

Do you have any “hot” plants that you love in your garden?

Hot Poker Plant (kniphofia) in the frontyard. The kids love this plant!

The long planting bed in the backyard. Dotted with lots of lilies.

Purple Liatris w/ Orange Butterfly Weed and Tiger Lilies

Shade Garden w/ bright highlights of coleus (annual), heuchera (coral bells) & red accents

1 Comment

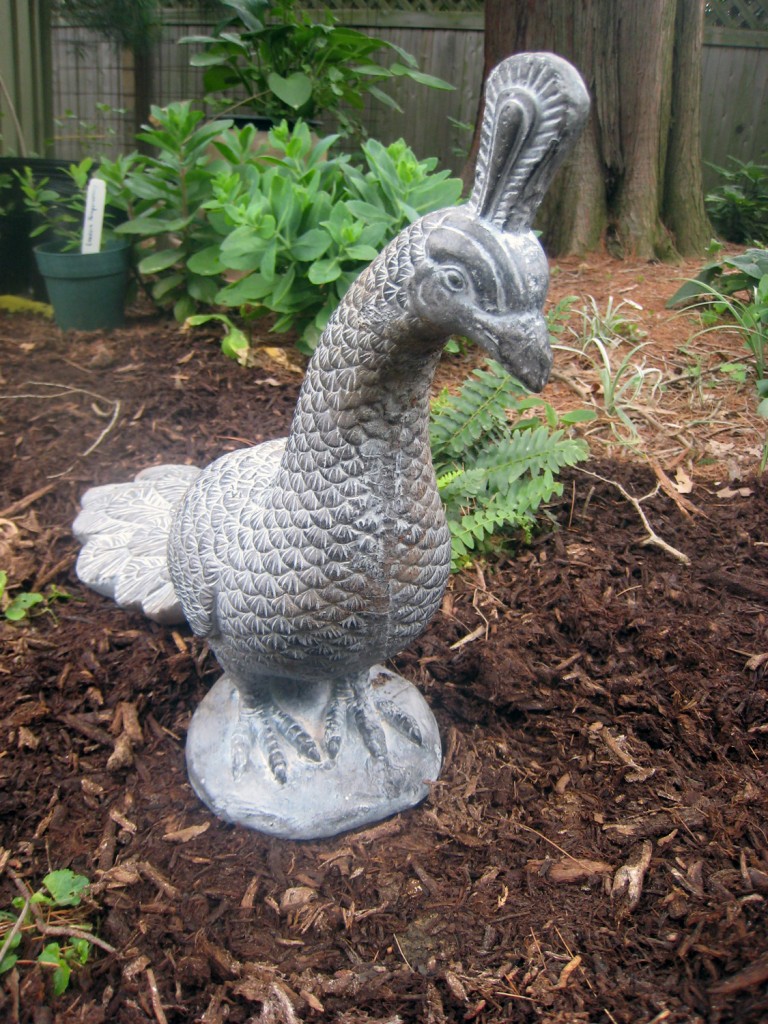
My New Garden Greeter, on sale at Target $34.99

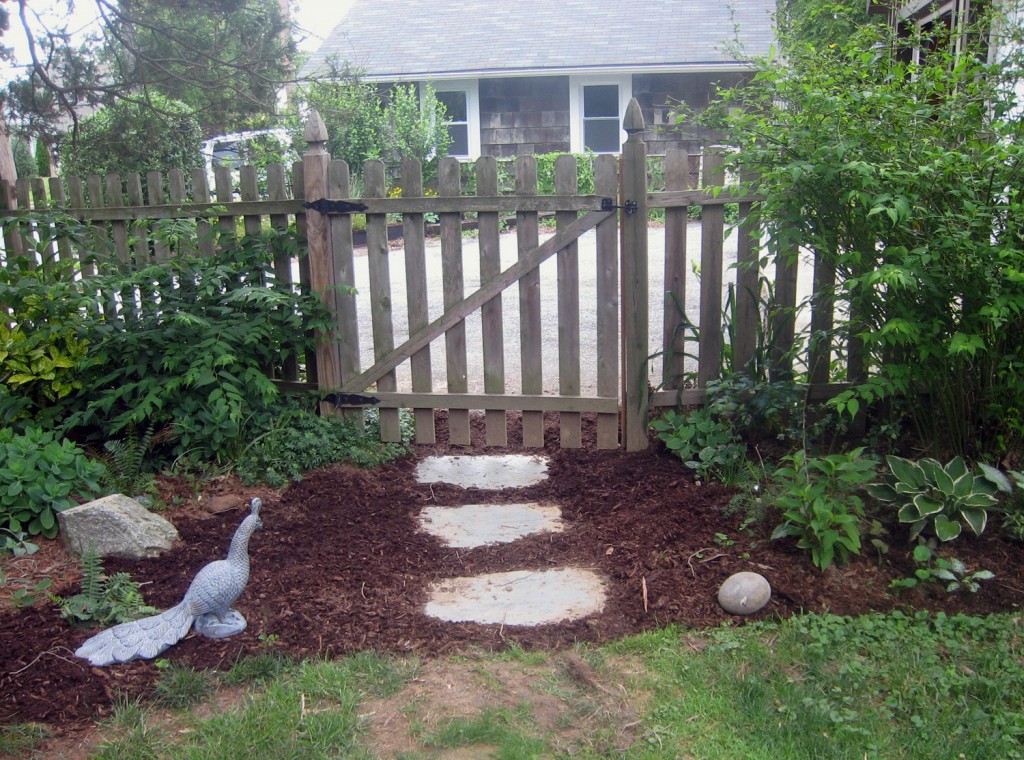
Don't you think a second peacock where the stone is located would be nice?

Last week I picked up a new friend for the garden! He is a lovely peacock from Target. I first admired him at the Philadelphia Garden Show back in March where Target had a big display. Shortly thereafter he appeared at Target, but the $50 price tag made me sadly walk away. At $35 (he is still listed at full price on target.com), he still isn’t cheap but since I have been admiring him almost every time I have been in Target since, I thought it was time to take him home. I think a second one where the rock is currently shown would be nice. Mr. S. says that he likes the peacock but a second one wouldn’t make him twice as happy. I need to decide soon or else I’m sure he will be gone. What do you think?

Leave a comment

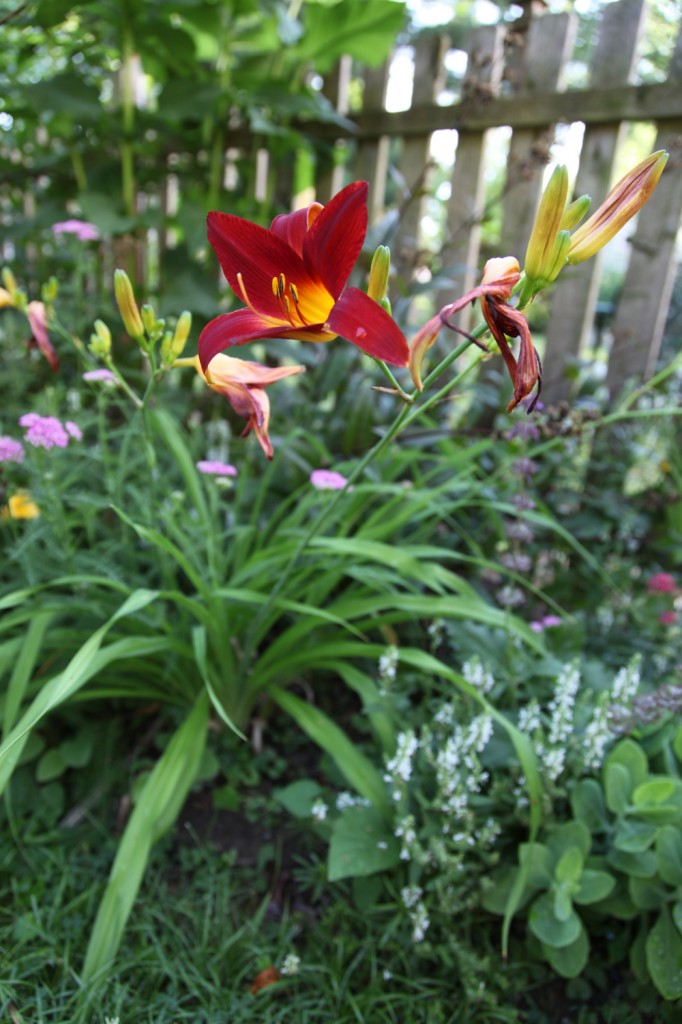
'Spider Man'? Daylilies with White Salvia & Pink Yarrow

While we were away on our little vacation it finally managed to rain. I’m not quite sure how much, but it was raining when we got home last night. It was nice to see the garden so happy! When we left everything was looking pretty sad, even with a watering. It appears that while we were gone all of the day lilies have decided to bloom at once! The Tiger Lilies, the ‘Stella de Oro’ (yellowy orange),  the ‘happy returns’ (yellow), and a couple of other ones which names escape me. It is amazing how quickly my purple garden turned orange and yellow. I actually love the combination of some of my cool colored salvias and irises with the bright daylilies. It is amazing sometimes how quickly the garden changes!

What is blooming in your garden right now?

3 Comments

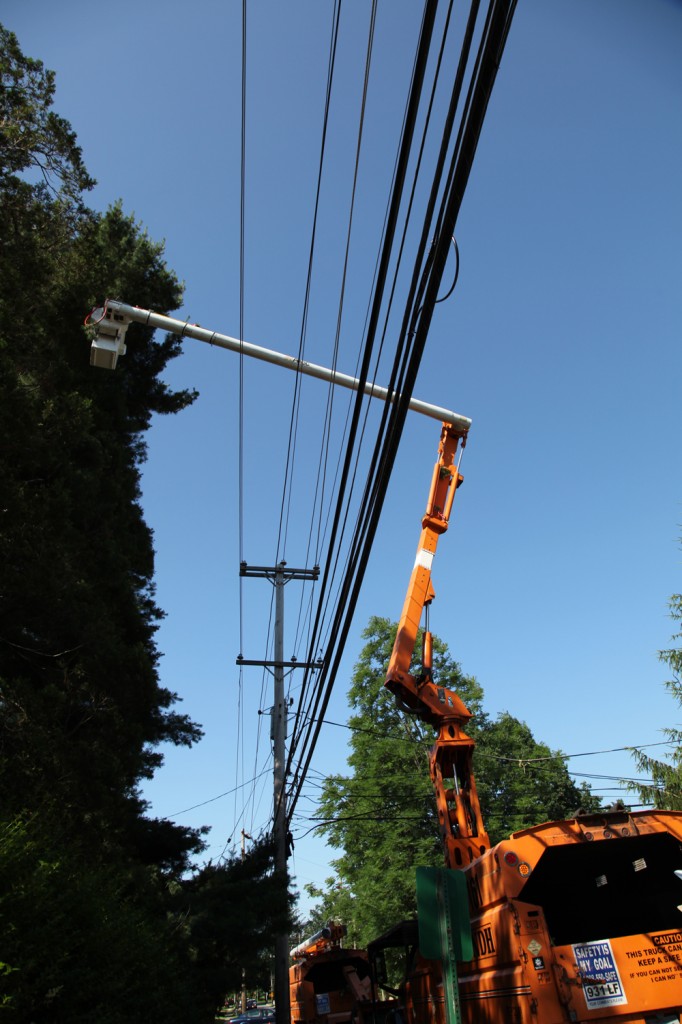
Asplundh "trimming" the tree

We are back from a little vacation and are trying to get back on some sort of schedule. So I was caught off guard this morning when Asplundh pullled up next to the house with their lift and chipper.

Asplundh was here a couple of months ago to “trim” our old pine tree for PECO, so I was pretty surprised to see them back here this morning. They have been here for over an hour “trimming” the tree. I spoke to the supervisor who assured me that they were just going to shear a couple of feet off all the way up. hmmm…I have been back out once since the initial conversation and they are definitely removing branches MORE AGGRESSIVELY then he promised. He discussed trimming straight up but they are definitely angling toward the tree. He also said that the previous tree trimming was just “maintenance” and this group is the one that comes every 5 years to actually “trim” the tree. hmmmm…. So far I have managed to not swear in front of the kids. Sam wants to stand out there and watch the whole thing. It was making me sick to my stomach so we came back in.  What a great way to come back to the real world!

6 Comments