Archives For FAMILY

Beautiful Mix of Fall Colored Perennials & Shrubs including Coral Bells in 2 Colors and Barberry

I hope everyone had a lovely weekend. Saturday was splendid here and we took the opportunity to head over to Tyler Arboretum to enjoy the fall weather and let the kids run around in the woods (and up into some treehouses). I have to say that Tyler is pretty great. Over the last few years they have added a lot of kid friendly treehouses and experiences, that are the right mix of nature paired with activities to keep the kids occupied. So if you are in the Philly area I highly recommend a visit.

I thought I would share a few of the interesting plants and creations that we saw on our visit.

Berm with tube for the kids to climb through.

Maisie loved this tube with a berm on top. I was impressed that the plants could survive on top, including a beautiful Oak Leaf Hydrangea and some purple beautyberry (which make excellent cuttings also). Depending on the topography of your yard this would be pretty easy to replicate.

Gnome Bridge: I love the use of twigs for guardrails

Palette Shed

I really liked this shed that used a palette vertically on one side and filled it with annuals. The vintage terracotta roof tiles are also a nice touch.  I think this would be an interesting idea for someone to liven up a boring shed.

Bamboo Teepee with Rock Seats

I really liked this extra large bamboo teepee, complete with large rock seats. I have a stockpile of bamboo, so I am excited to try replicating this somewhere (Zdenka I am thinking of your house).

Beautiful 7′ tall light purple asters

Very Interesting Mystery Plant: Can someone tell me what this is? Asclepias physocarpa? (Thanks Stacey!) The seed pods are amazing.

Beautiful Mix of Annuals still holding strong

2 Comments

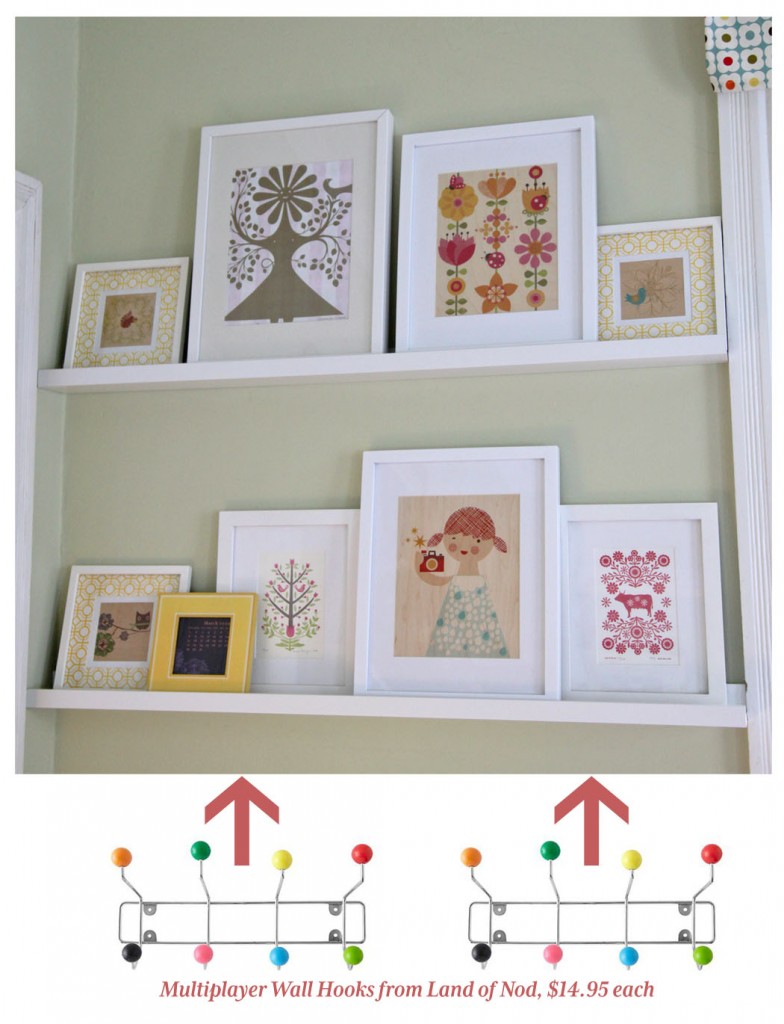
Kids Dress Up Area with Picture Ledges Above

One of my kids favorite activities is dressing up. At least once a day Sam appears in some sort of “costume”. We have had a bin of dress up for a while, but I wanted to give the kids a spot with some hooks and space to see some of their accessories. I still need to weed out some things (the bin below is still full), but it feels good to have finally devoted a corner to this activity.

I ordered these cute hooks from Land of Nod. The hooks for the hats are just the removable hooks, since I figured they might change over time.

Hats & Colorful Hooks

Here is a run down of what I spent:
2 45″ Ikea RIBBA Picture Ledges (Cut down on one side to fit perfectly in the space): $14.99 x 2=$29.98
2 White 11×14 Picture Frames from Target (I already owned the rest): $12.95 x 2= $25.90
4 Removable Hooks: ~$5.00
2 Mutliplayer Wall Hooks from Land of Nod: $14.95 x 2=$29.90

TOTAL: $90.78

I was hoping to spend about $50 for the dress up area, which I fortunately managed to do. I spent a little bit more on the picture rails and frames then I had hoped, but it was nice to not have to make the rails from scratch, otherwise they would probably still be half finished (considering I only spent about an hour hanging the ledges and another half hour putting up the hooks). I think I am most excited about getting some stuff off of the floor and giving them a proper home, which makes it a lot easier for the kids to put their own stuff away.

I hope everyone has a great weekend! I am hoping to finally get the shelves organized.

Leave a comment

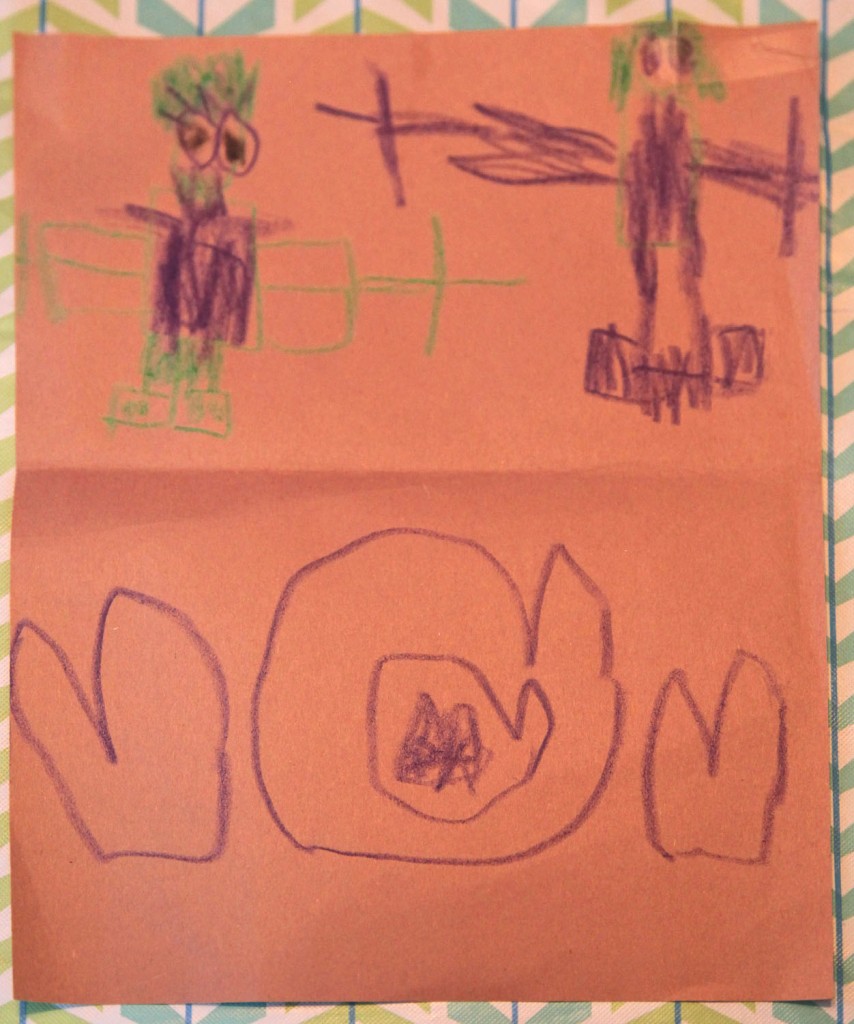
Anniversary Card from Sam (I’m the one on the right, Mr. S. is on the left)

We celebrated our 11th Anniversary over the weekend! Which included actually going out to dinner without the kids. Last year we managed a whole 2 1/2 days away in Charleston, but this year dinner will have to do. We did get some good family time in over the weekend, including snuggling on the couch while watching some TV. Maisie napped while snuggled up with us, which hasn’t happened in quite a while and probably won’t happen very many more times (sniff, sniff).

Today I wanted to share the lovely card from Sam. He got up early on Sunday morning and came downstairs while we were still in bed hanging out.  Then he worked secretly in the corner of the Dining Room and wouldn’t let us come in until he was done.

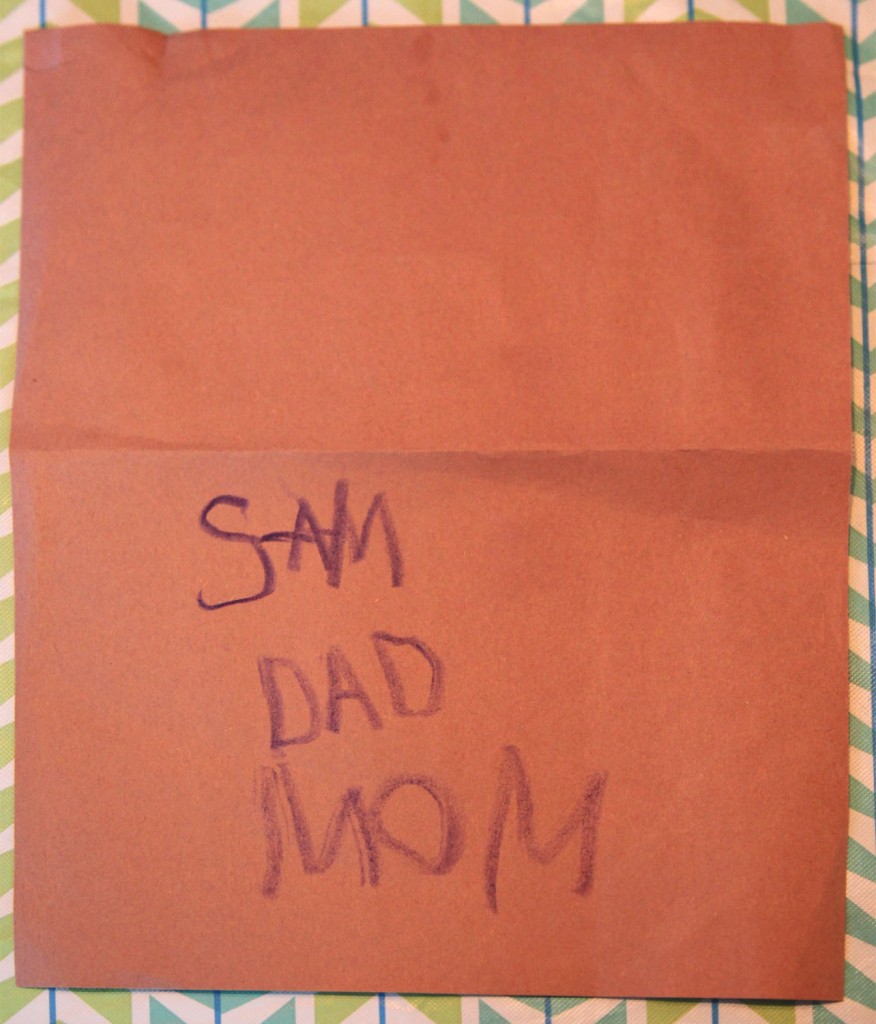
He drew a lovely picture of Mr. S and I. I somehow got to be the tall one (which is pretty funny since Mr. S. is 10″ taller than me). The lower portion of the page are hearts. Then he wrote his name and our names without any help.

Sam’s writing, age 5

He was so proud of himself! Sometimes they just melt your heart and all of the naughty, whiny things they do go out the window.

I hope everyone had a lovely weekend!

1 Comment

Artwork for the Playroom, sitting on Ribba Picture Ledge from Ikea, $14.99

The playroom is still a mess but I did manage to install 2 picture ledges from Ikea. Then I was able to put up a lot of the artwork that had been sitting around for longer than I would care to admit. I also picked up a couple of new white frames at Target. I was getting pretty frustrated finding white frames. I had bought some from Michael’s before but they don’t seem to sell plain white frames anymore.  Plus the 2 prints that I had from Petit Collage were already matted so I needed an 11×14 frame so Ikea was out. Finally I went back to look at Target again and they had just what I needed. Oh how I love you Target!

Below these ledges I am going to hang hooks for all of the kids dress up clothes (which are quite substantial and well used). I think I have settled on these Multiplayer Wall Hooks from Land of Nod. I was hoping to find something a little cheaper, but I did a quick search and didn’t come up with much (even if I painted them). The added bonus is that they aren’t pointy, so it should minimize injury (at least I can hope). It won’t be as nice as Chloe’s DIY costume closet (which I adore), but I think it will be well used.

What you can’t see is my old college shelf below stacked high with kids artwork. I have been meaning to photograph these for about a year. Now I really need to get on that! Then I can just keep a few and move the shelf out of the way.

I hope everyone is having a good week! We are having some beautiful fall weather. So nice and crisp!

2 Comments

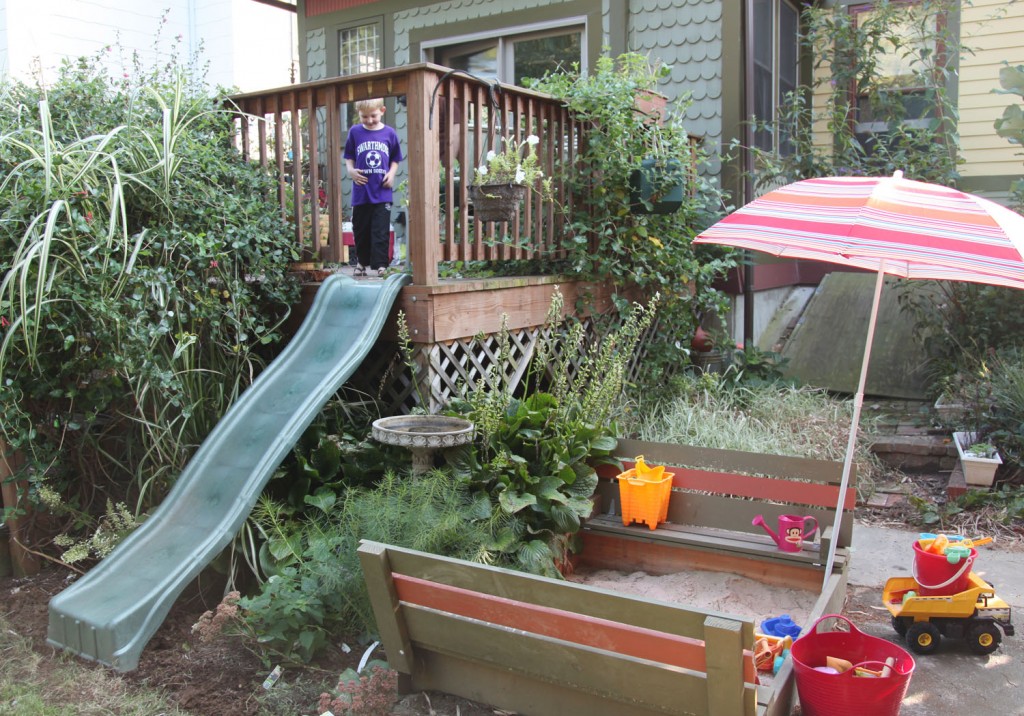
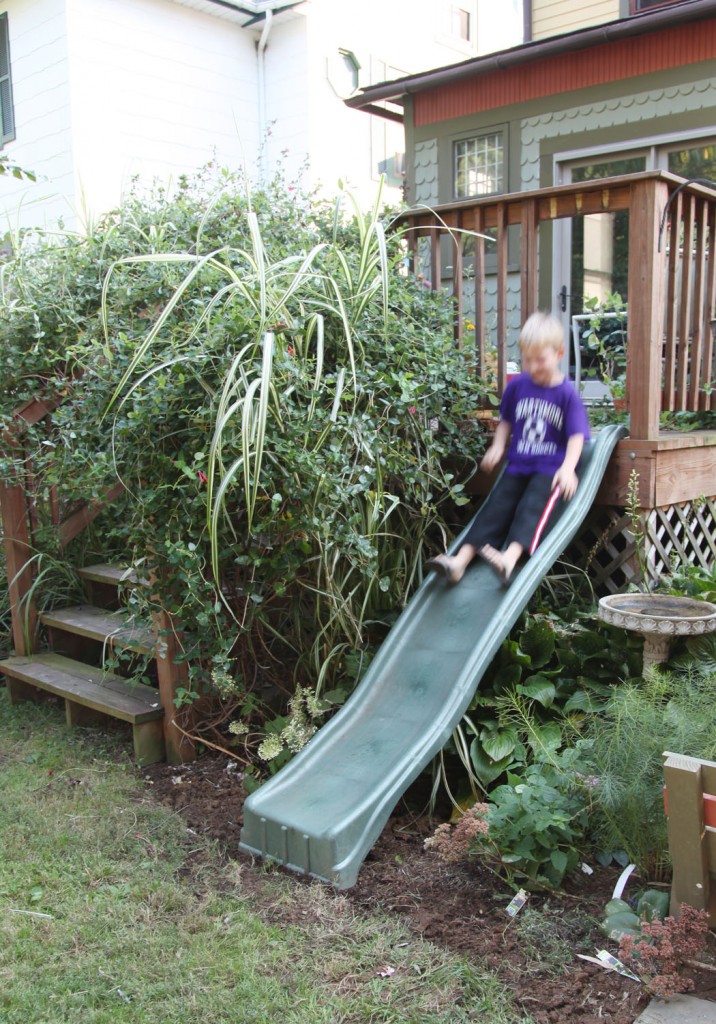
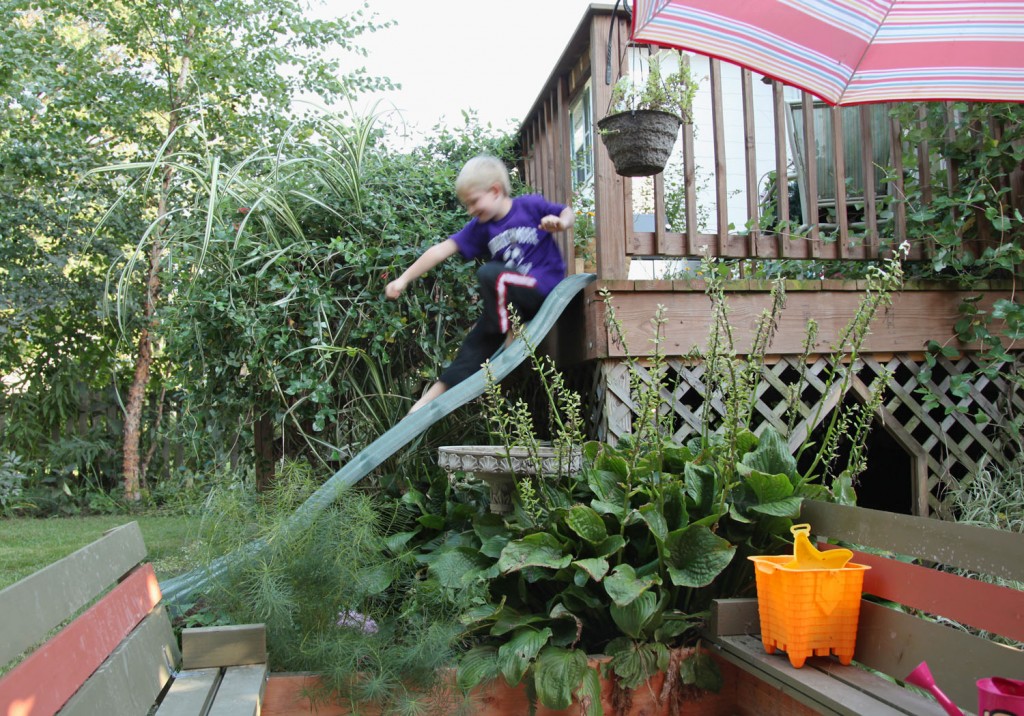
Sam seeing the slide installed for the first time

Well it has been a long time coming, but we finally have a slide set up off of our deck! I first thought about adding this a couple of years ago, since we don’t have space in the yard for a full swing set. This spring I put a plan together and figured out where to put the sandbox and swing. The only component left was the slide. Then I looked and looked on Craigslist, with no luck. Then summer hit and the last thing on my mind was working out in the yard. Well at the end of the summer I got lucky and someone about a block away put a slide out for the garbage. I drove past it and got very excited. We were on our way to a kids birthday party and couldn’t stop. I thought sure it would be gone by the time we got back, but fortunately it was still sitting there. I walked over and found that it was in incredibly good shape and looked to be about the right height! Then I proceeded to run down the block with it like a silly kid.

Sam testing out the new slide

It has been sitting in its new home for the past month waiting for me to get around to cutting the handrail and bolt it in. This weekend I got tired of the kids asking if it was “nailed in yet” and decided to get it functioning while they watched a movie.

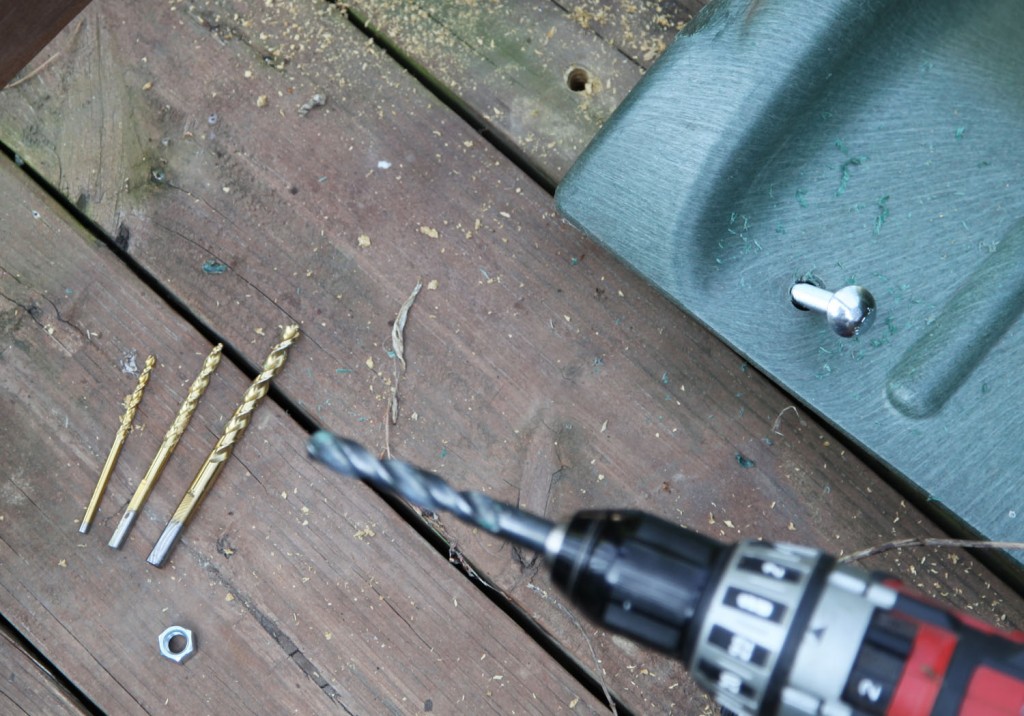
Drilling for the new Carriage Bolts to hold the slide on the deck

The first step after determining the rough location was to determine how I was going to attach the slide. The slide had 2 holes at the top. I decided to reuse these and bolt through the deck. Our decking is 1 1/2″ thick pressure treated wood. This gave us a nice strong material to bolt through. I drilled a small pilot hole at each location to make sure it was a clear shot. I ended up having to shift it over about 1/4″ to miss the joist underneath.

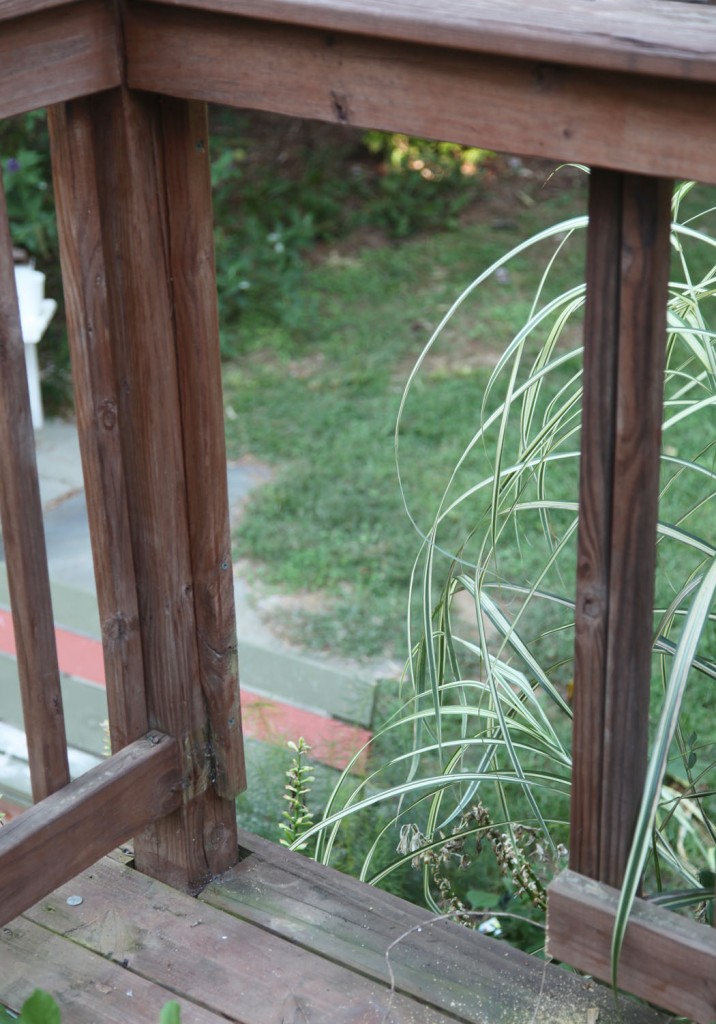
Guardrail after removing the spindles and lower horizontal member.

Next I removed the portion of the guardrail that was in the way. I unscrewed the vertical spindles. Then I took one of them and doubled up the spindles on the freestanding side. Then I used a sawsall to cut the bottom member.

Then I drilled the final larger holes and bolted them in with carriage bolts (the kind that are round and smooth on top). I also used a large washer underneath (to increase the bearing on the wood) and then a locking washer (to keep it nice and tight) and finally a hex nut. I used a 3/8″ carriage bolt. It looked nice and sturdy and I new that the top would cover the slide holes.  I spent about $3 for the bolts, washers and nuts. Pretty good deal!

Finally I had Mr. S. stand on top of the slide to make sure it was nice and tight and I used a wrench underneath to do the final tightening.

Our deck is a little over 5′ off of the ground (a lot of play slides are designed for 5′). So after the top was installed I did a little regrading at the bottom. I also made sure that the bottom of the slide was firmly in the dirt (by about an inch) so that it wouldn’t move.

The slide is definitely a little steeper than it would be on a playset, which makes it extra fast. The kids LOVE it. I think if I had smaller kids I would have added some additional dirt to the bottom.

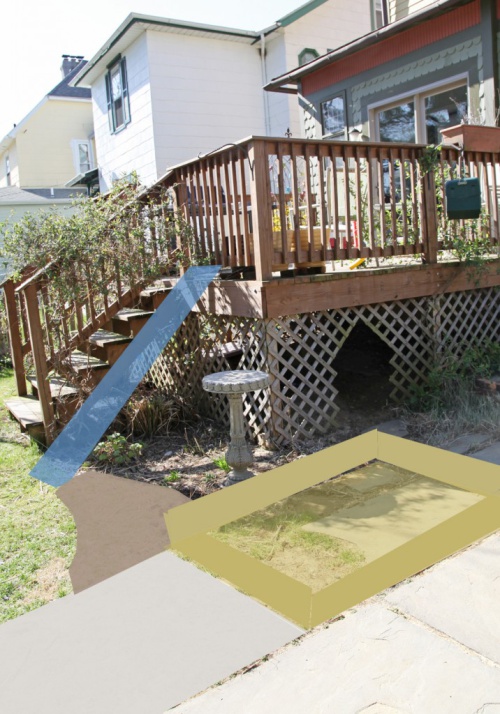
Here is my rendering from this spring:

Rendering of play area from this spring.

And here is our play area now:

Sam making good use of the “new” slide.

I am pleased to be able to give them areas to play outside without sacrificing a large portion of the yard to swing set. What do you think?

13 Comments

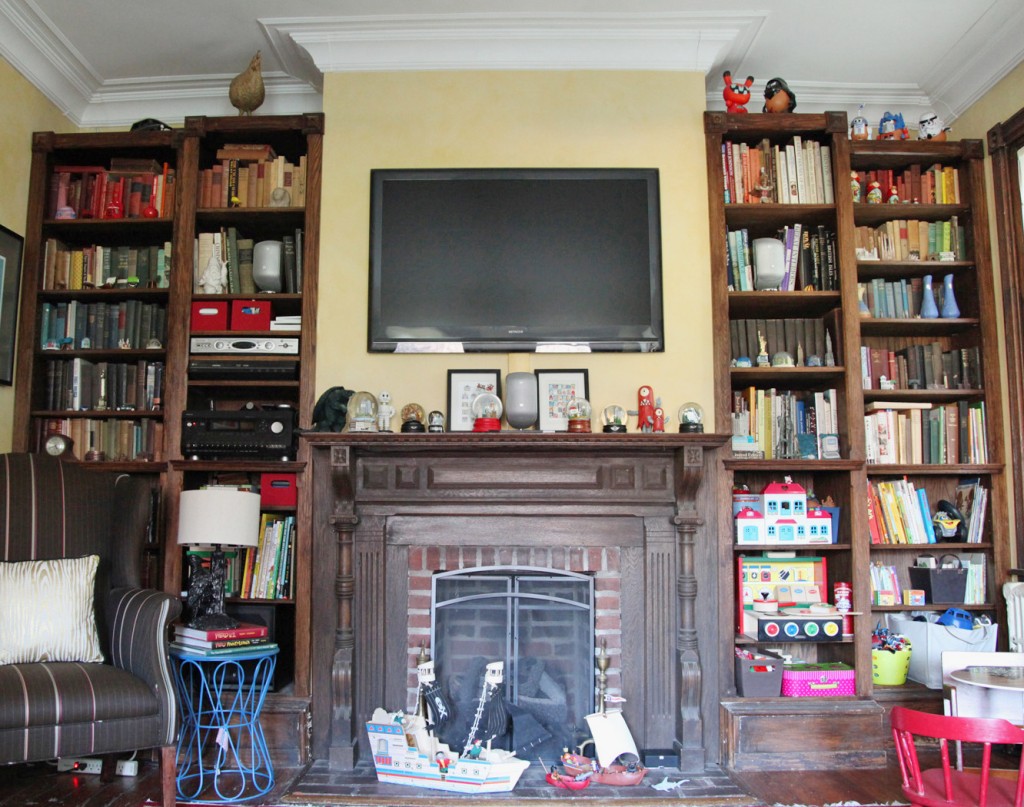
Living Room with Built In Bookcases (by us) and Original 1888 Mantel.

I hope everyone had a lovely weekend. The weather was splendid here this weekend! Sunny and not too hot or cold. This is the best week of weather we have had in MONTHS and it is long overdue. We have been sleeping with the windows open and the fresh air feels so nice in the morning when I wake up.

We spent most of Saturday outside between soccer and playdates and I spent most of Sunday cleaning and doing some rearranging in the Living Room, which brings me to today’s title. I pride myself on meeting deadlines and going above and beyond what is required. I don’t usually miss deadlines (although I do tend to run 10 minutes late a lot of the time now that I have kids). This week I had to let a deadline go which made me sad. Jen (and her husband) from Rambling Renovators are working on a new book called Blogger Style and they were taking submissions. It was a great opportunity to showcase our house and I blew it! I mentioned it a while back, hoping that I would be motivated enough to get the house picture ready. But alas life took over, as it tends to do, and the house wasn’t up to pare. I considered throwing some pictures together anyway but I was too embarrassed to submit them. Ultimately my family matters way more than this blog or our house, but it really hard to admit defeat. I am still trying to work on making my way through the house and make it picture worthy, but I have a feeling I will be at this for a while even though I would like to add a house tour to the website sometime soon.

Our Living Room.

So here is my Living Room as it stands today. I rearranged the books and objects by color (I know already totally overdone).  This proved somewhat challenging because we had arranged the book by height previously, so I had to arrange it by color several times across the shelves. I decided in general to follow suite with all of our miniature building, furniture and miscellaneous tchotchkes and arrange them in them the same way to correspond to the books. I think it does add some needed order to the bookcases and helps make them feel at least a little bit more up to date.

Bookshelves arranged by color.

I also wanted to keep our favorite art and architecture books together and within easy access so they are separated with a couple of my favorite items.

Our favorite art books on the lower shelf and our NYC souvenirs on the upper shelf.

We also have the kids toys in the lower right corner of the shelves including their mini play kitchen, which gets daily use. The one big advantage of using lots of color is that the kids stuff, generally fits right in. Of course I don’t think Maisie’s plastic pink castle will ever look quite right but the wooden kitchen has been happily living here for years. The pirates ships are also currently sailing on the hearth.

Kids area on the built in shelves.

The mantle has also stayed relatively the same. It houses our collection of nice snow globes and a few of our favorite characters.

The mantle complete with snowglobes and Helper and Little Helper

And last is our old sofa filled with pillows. Certainly not the most glamorous thing, but very comfy to melt into at the end of the day. And and you can tell, it is hard for me to say no to a nice patterned pillow.

Our old sofa with lots of colorful patterned pillows (from Thomas Paul, Ikea & Pottery Barn).

5 Comments

First Peak at the old Heart Pine Floor

We are still adjusting to our new schedule here. Last night Sam had his first night of homework, which I have to say so far is as difficult for us as it is for him. After a long day, we usually want to hang out and have some fun. Instead last night after dinner Mr. S. spent 45 minutes with Sam working with him on his homework instead. By the time they were done, it was time to get ready for bed. Bummer! While they were working on that I had to keep Maisie away, because of course she wanted to “help” too. Phew! To all those parents who told me that it gets harder, you aren’t kidding. At least the kids were exhausted by bedtime and were asleep in 2 minutes flat.
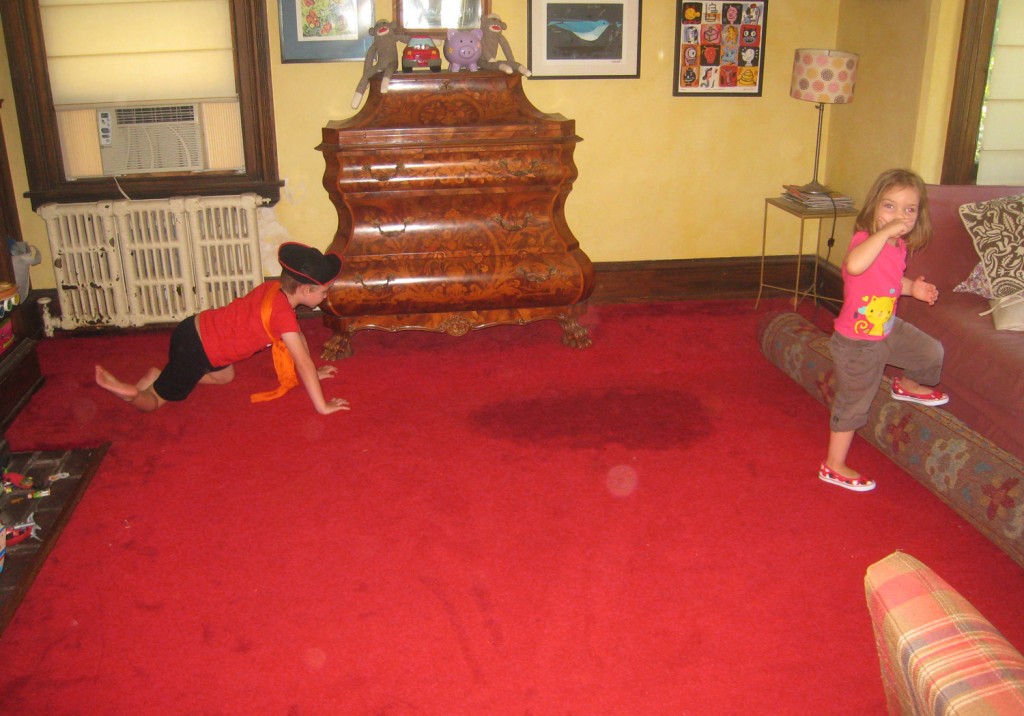
Old Red Carpet (I have no idea where that giant stain came from, it was covered up and not nearly as visible in person)

So after that digression, I have some photos from our last minute weekend project. We removed the red carpet from our Living Room! This was installed by the previous owner (i.e. at least 12 years old). We have been covering up the majority of it for the last 11 years with a large Ikea wool rug, but the edges were exposed.

Living Room Before Carpet Removal (you can see the carpet around the edge of the room)

The carpet was actually in the front hall when we moved in as well. One of our very first projects when we moved in was taking that out.
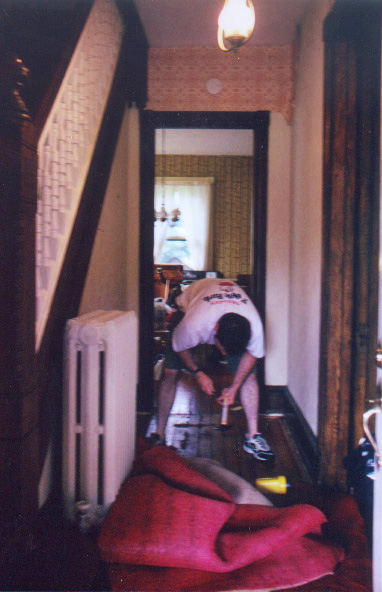
Mr. S. back in 200 removing the padding from the Front Hall. Don’t you love the light fixtures and wallpaper!

Lately one of our beloved (but crazy) cats has decided that the corner of the carpet make a wonderful litterbox (sorry for that visual). Well, it reached the point of no return and we decided to keep Spot and get rid of the carpet.
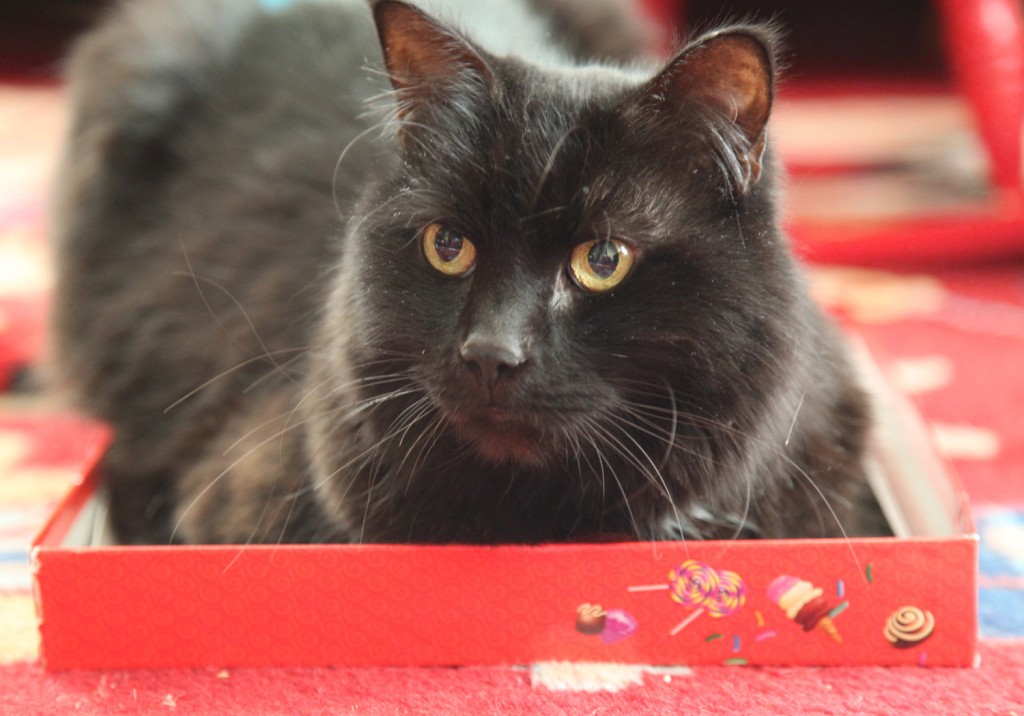
Spot sitting in the Candy Land box (aka the Culprit)

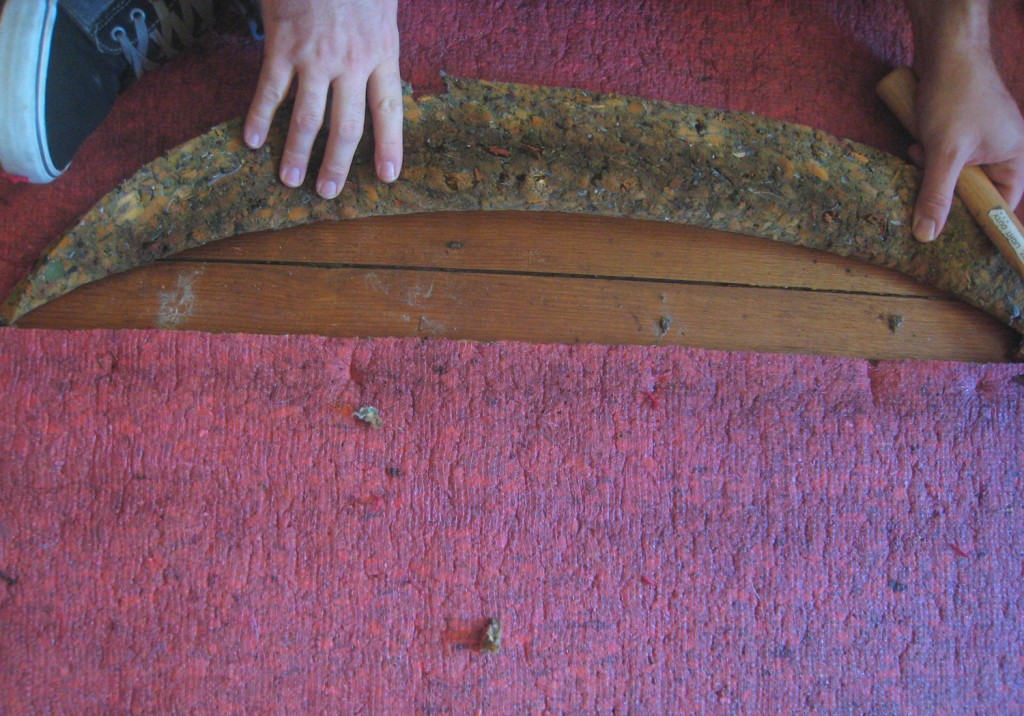
We knew that there was at least one tin patch in the bay window area (which we could see below) but otherwise were not sure what we would find. The floor in our house is also the structure, so it adds an extra element of adventure (and gaps where you can see below). We started by moving the small stuff out and clearing half of the room. We started on the fireplace side and broke it into 3 sections. We have found that it is definitely easiest to cut the carpet into manageable sections and roll it up and tape it for disposal. First we rolled up the carpet. Then we removed the padding carefully, making sure to removal all of the staples as we went. Removing staples is a pain and tedious.
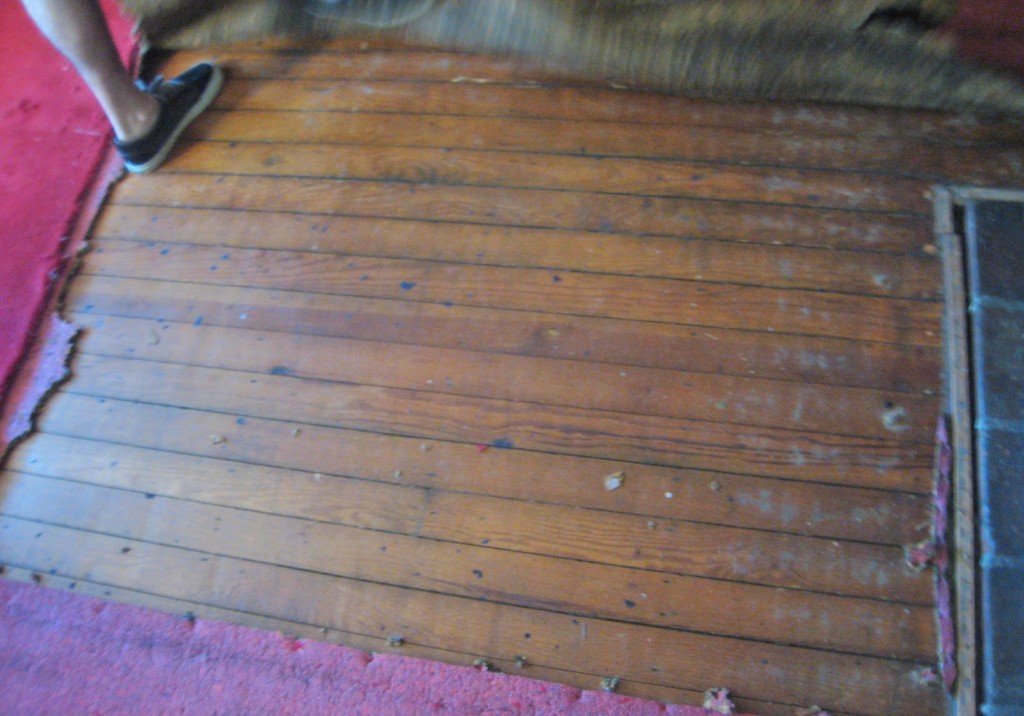
First Section of Wood Floor

Fortunately the carpet came out pretty easily and after a few hours of removing staples and nail strips it was done. We vacuumed as we went with our HEPA vacuum and gave the floor a quick wipe down and tried to remove any residue from the padding. We have 2 tin patches (fortunately currently covered by the sofa).
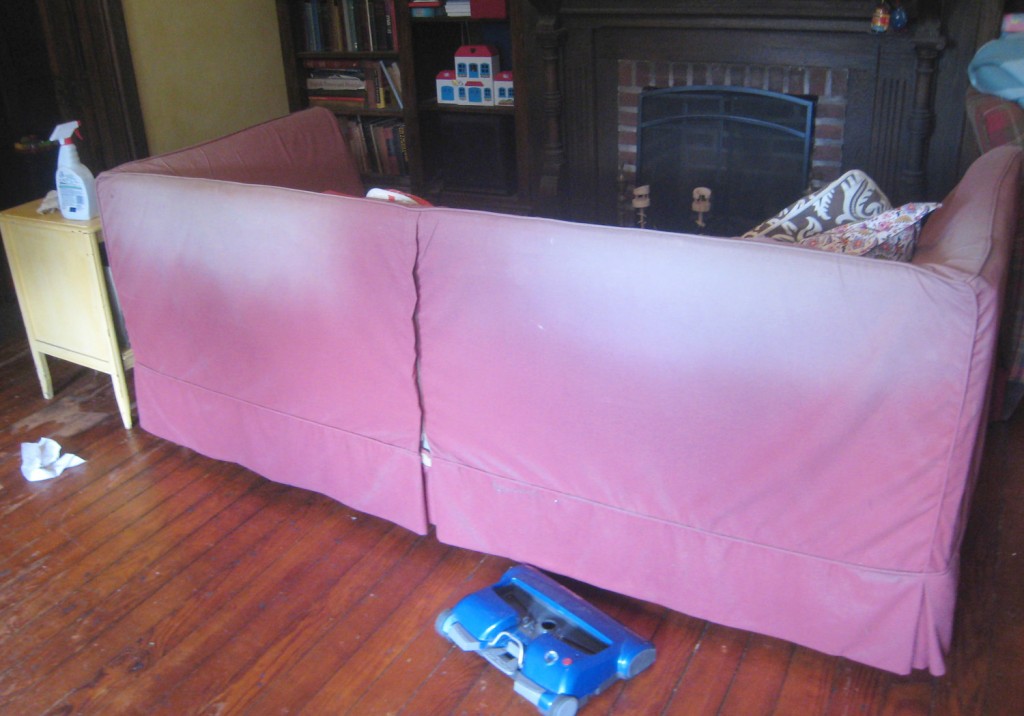
Sunlight damage on the back of our sofa that sits in our bay window. Notice the two rectangles that line up with our 2 front windows (which actually have the shades drawn for the majority of the time)

On a side note this is what direct sunlight does to fabric. The back of our old sofa is now SUPER bleached thanks to the sun. We even have translucent shades that are drawn most of the time. I am thinking that when we finally get a new sofa we will have to get a nice throw to keep at the top to prevent this.
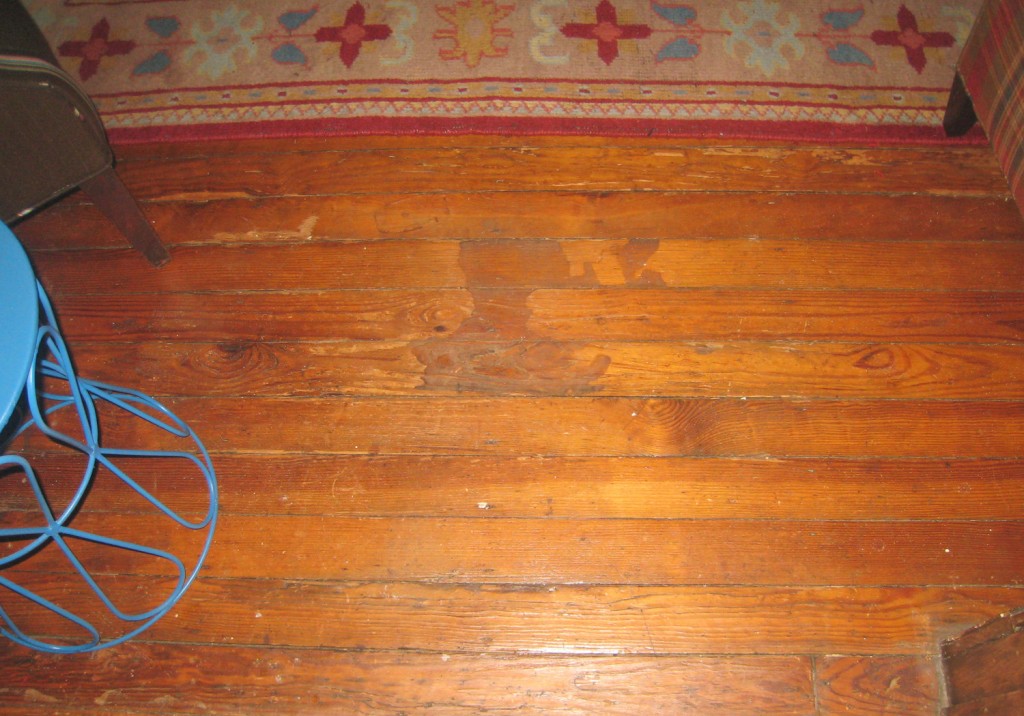
Wood Floor near entry (there is some stubborn residue from the old padding here)

Now that the old floor is visible, it definitely needs some patching (fortunately we have a supply in the garage), which is tedious and slow. It will also need a new finish (which I haven’t researched yet). So I happy that the room is smelling fresh and not so happy with how it is looking at the moment.
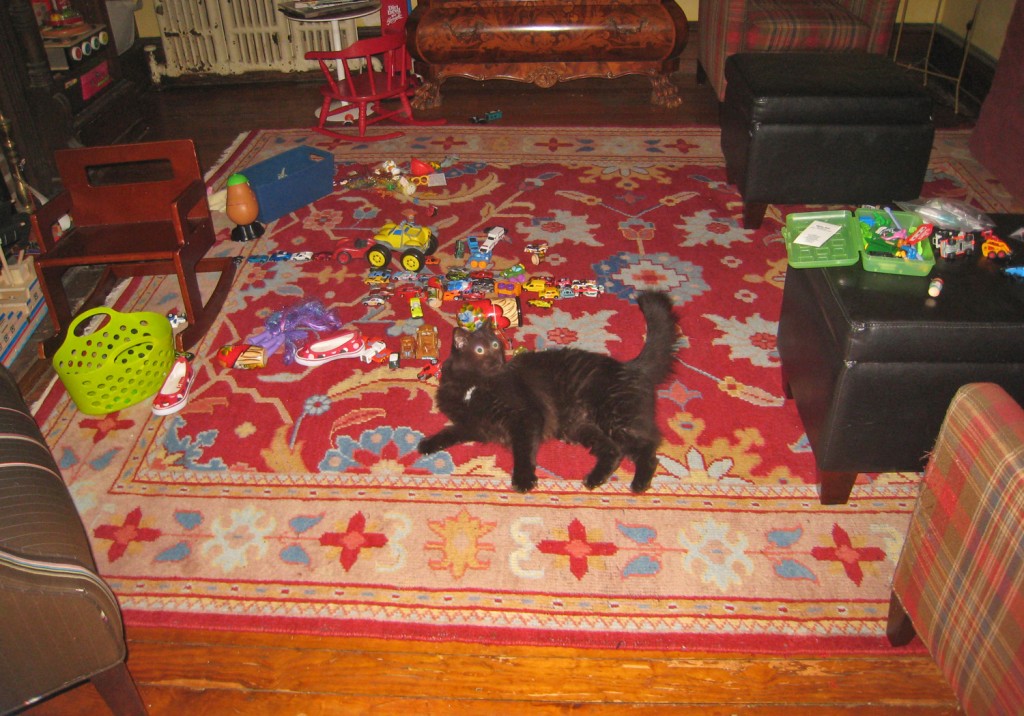
The Living Room Back in Use with Spot making herself at home (the floor was being used as a racetrack)

Fortunately the kids don’t seem to care that the floor is suddenly harder (I need to order a rug pad) and immediately went back to playing on the floor. Here it is a couple of hours later with Spot showing her approval (please excuse her devil eyes).

Has anyone else been busy with last minute projects?

Leave a comment

First Day of Kindergarten!

September 5, 2012 — 3 Comments

Sam and Maisie all dressed up for the first day of school. May they always love each other this much!

Life has been busy around here! Yesterday Maisie had her first full day in her new preschool class and today Sam has his first day of school today. He had his orientation yesterday which included meeting his teacher and getting a little tour. I am very proud and a little sad that my little guy isn’t so little anymore. I’m off to wave at the school bus. I hope everyone is enjoying the school season! I will be back with more regular posts tomorrow.

3 Comments

Life Update

August 29, 2012 — Leave a comment

Sam and Maisie enjoying the firetruck at Sesame Place

I can’t believe the summer is almost over and my little man is going to be starting kindergarten. I have been trying to go through the kids clothes and do some long overdue general sorting and purging. It has been incredibly slow going, and I am only now finally starting to feel like I have made any progress. I’ve got 3 bags of outgrown kids clothes ready to go to new homes! I shredded 2 wine boxes full of paper this morning and am almost finished reorganizing our desk area. In the meantime we have been trying to have a little fun.

The Kids with Super Grover in Plant Form

We made a trip over to Sesame Place, to the kids delight last week. They had a great time and even rode the roller coaster (a first for both of them). Their favorite ride was the tea cups (even though it made mom a little dizzy).

Sam, Age 5

I am nervous and excited for the next couple of weeks as Sam gets use to riding the bus, making new friends and having to sit still for a couple of hours of learning. I know he will do great but it is still hard to let go. He has turned into quite the little man and I am very proud!

P.S. I will be back later today with some garden updates.

Leave a comment

My little helper

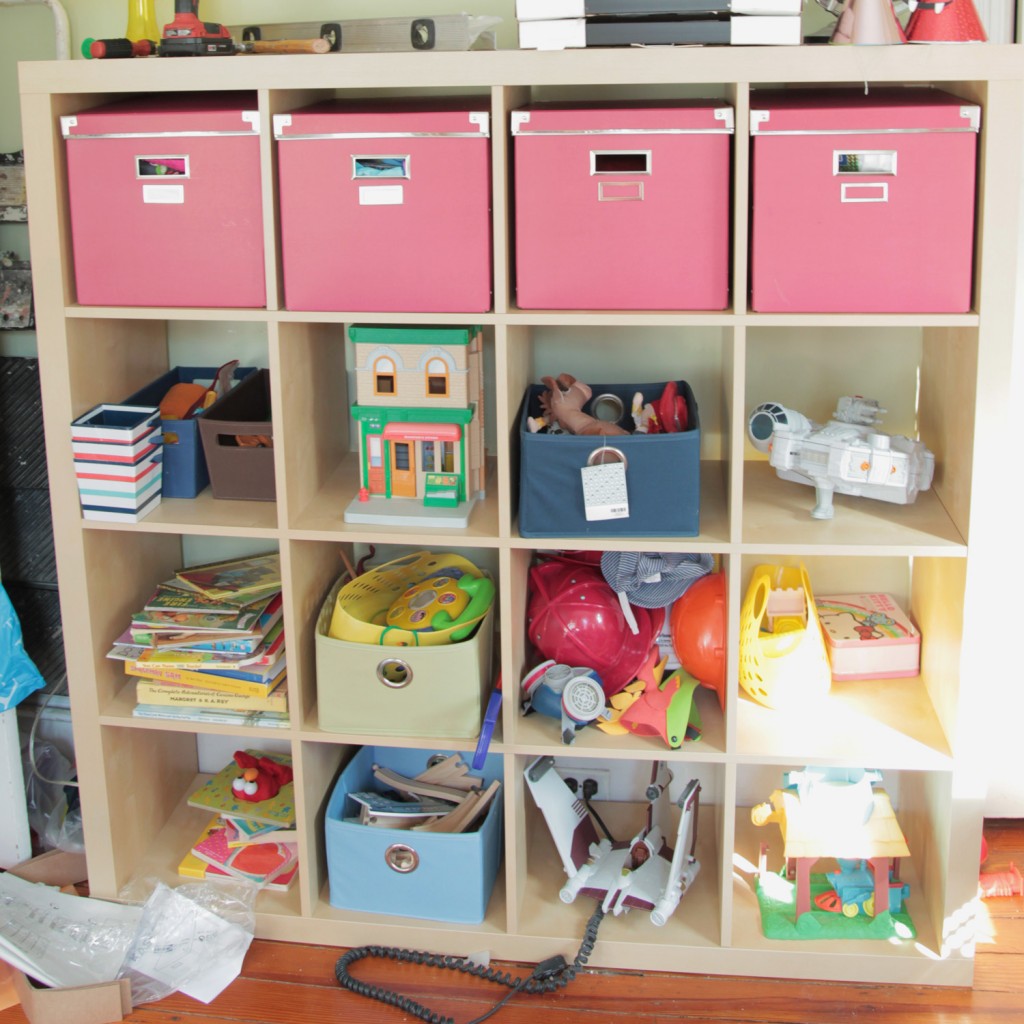
I know it has been a while! Life has been busy, fun, frustrating, tiring and everything in between the last few weeks. I’ve been trying to stop and enjoy some time with the kids before school starts. With my little man getting ready for kindergarten, there is going to be some adjusting. As part of the getting ready for fall, I have been trying to get the house in better order. It has been a painfully slow process. I did manage to get some of the shelves up in the Playroom. I am planning on adding a second set on top and some additional wall shelves. That will probably take a while, but at least we have some cubbies to start to put the kids stuff in.

Playroom Shelves, up but not organized!

Meanwhile, I saw that Jen from Rambling Renovators is going to be writing a book called Blogger Style. She is taking entries for interiors designed by bloggers (due by September 15th). It is a pretty exciting opportunity, even if my own chances of making the cut are small. I have also been meaning to put together a house tour for my blog for ages, so I am trying to use this as a catalyst for taking some pretty pictures of the house. I tend to get bogged down in the actual construction of things, and it feels like I never get around to the final pictures and staging. So for the next couple of weeks I am going to focus on the pretty aspect of my house and try to ignore all of the other unfinished big and small projects and put some makeup on her. After all I think she deserves it! I have certainly been pinning up enough pictures on pinterest for inspiration.

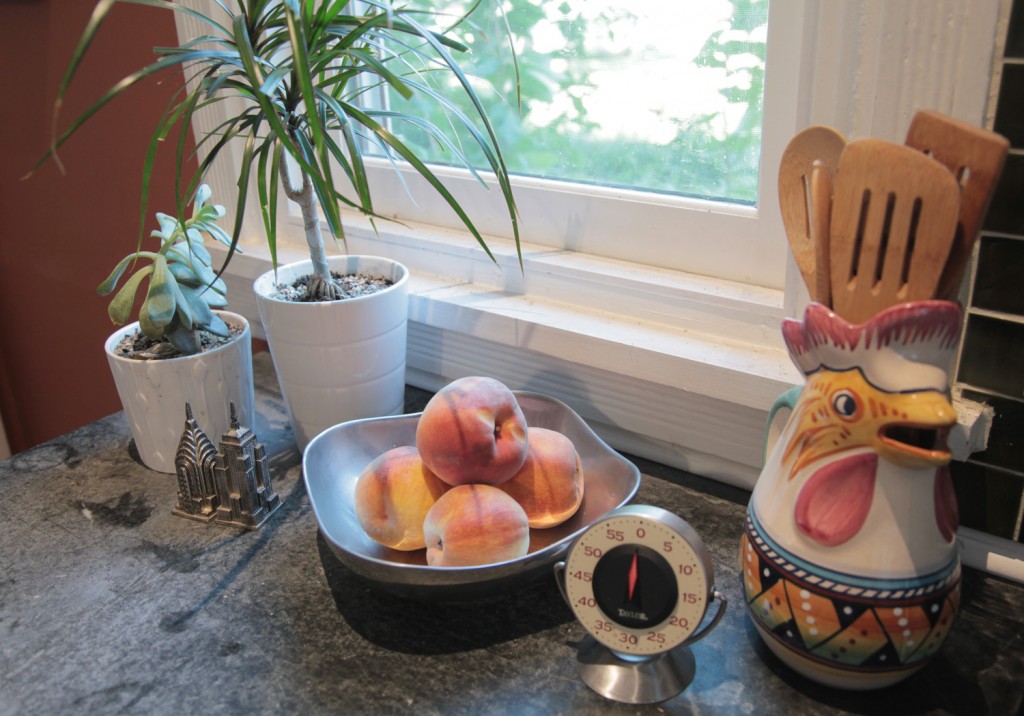
Kitchen Counter in progress

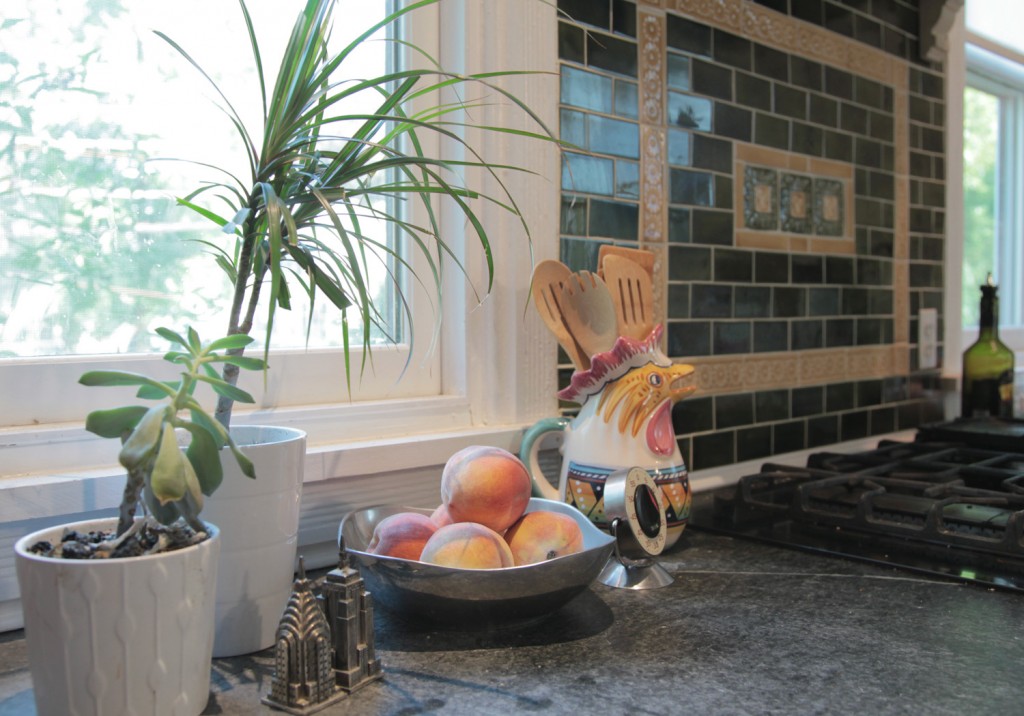
As part of this process I actually need to do a little shopping (mostly from around the house but it is also time to pick up a few things to make the house feel fresh). I am working on taking some photos now, so I can take a look and tweak things before I shoot better photos. It is amazing the things that are obvious only after you take a photograph (eek, those window sills need to be cleaned and I really need to oil the counters).

Kitchen Counter in progress

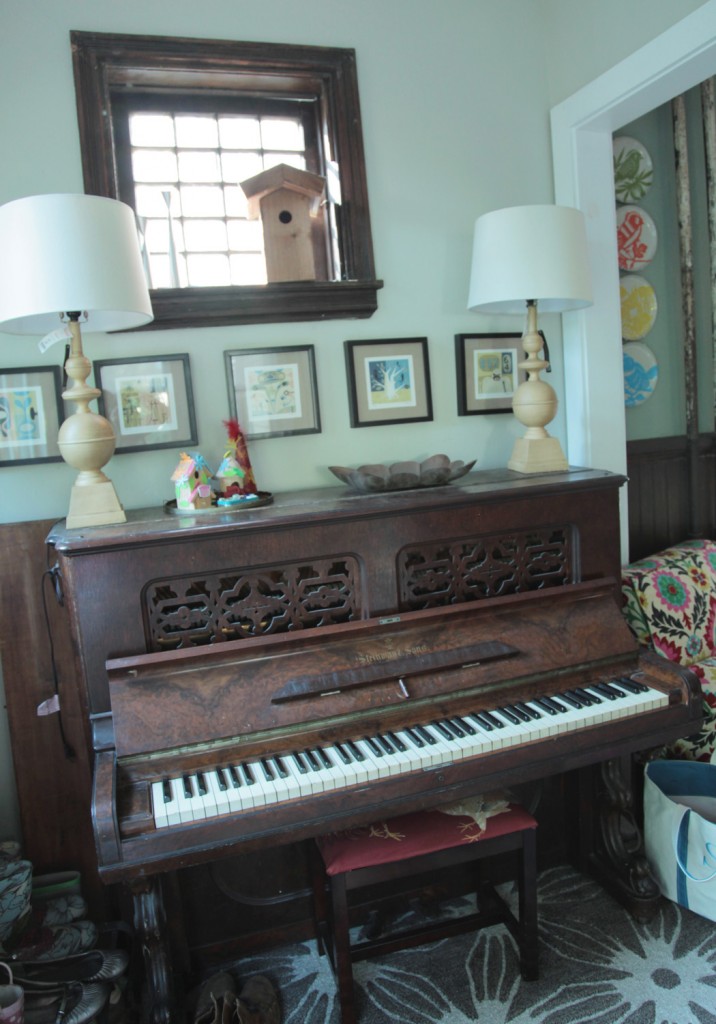
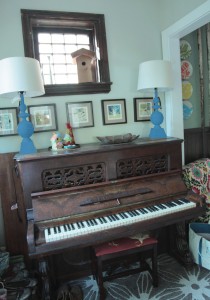
For example, the area on top of the piano had become a dumping ground. I am hoping by paying some attention to it, I can make it more of a focal point.

Piano w/ new lamps and kids artwork

I bought these new lamps yesterday at Homegoods. They were are really good deal ($29 a piece) and I really liked the height and shape.  I don’t care for the color. I am now trying to decide what color to paint them. I am currently thinking about red or blue.

Red Lamp Option

Blue Lamp Option

What do you think?

2 Comments