Archives For ARCHITECTURE & DESIGN

Inspiration for tile from "Sarah's Summer House" on HGTV

I stopped over at Andi and Neil’s house on Monday to check out some sample marble tile samples that they picked out over the weekend. We started out with this tile inspiration from Sarah’s Summer House on HGTV.

"Biltmore" Marble Tile in 2" Hexagon Pattern

"Biltmore" Marble Tile in Basketweave

This inspiration lead to these a couple of potential backsplashes from the Tile Shop. These were in a marble called “Biltmore”. Unfortunately this name doesn’t match any other manufacturers and these are only available online (they don’t have any stores near here), requiring ordering samples and waiting for delivery. The prices were quite reasonable, but we wanted to check and see if we could find something local.

Polished Ming Green Marble Tile w/ Granite & Painted Cabinets

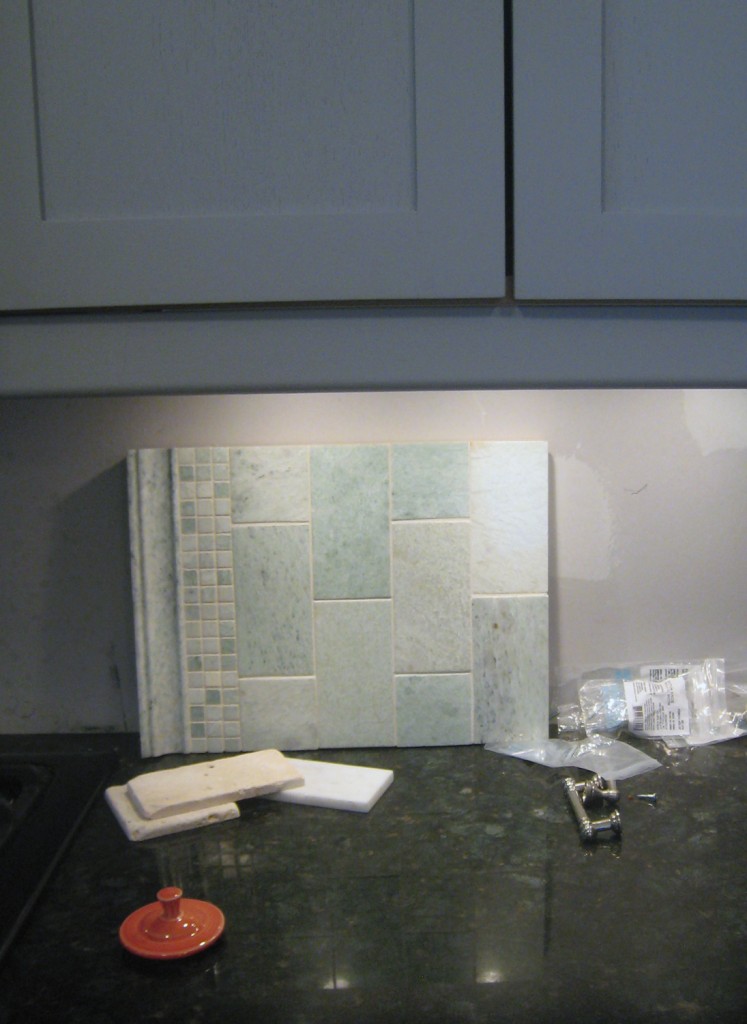
Andi and Neil took a look this weekend and picked up these samples up at Century Tile . This tile looks to be the same or very similar to the “Biltmore” but is called “Ming Green”. We are all in agreement that the variation in the marble is quite lovely. Two questions came up:

1. Was the tile color TOO simliar in color to the cabinets.
2. What size and shape tile should we use.

Our decision was that it was okay to be somewhat monochromatic with this but that we should pick a different contrasting color for the cabinet knobs (more on that in a bit).  Also the tile looks quite nice with the granite counters, picking up some of the green flecks. And after some discussion we decided that the 3″x6″ tile across the backsplash would look clean and not take away from the nice variation in the marble tiles. If there were a bigger backsplash behind the stove I would recommend changing patterns, but because the backsplash is fairly low and continuous I think this is the best decision.

So now that the tile is decided on what do we chose for the knobs. Andi pulled out some of her fiestaware to look at for inspiration. The “persimmon” color (orangy red coral color shown in bottom left of picture above) is a lovely contrast to all of the cool blues and greens. This meant back to the drawing board for more knob options. I had trouble finding just the right color. Here are some of the knobs I came up with:

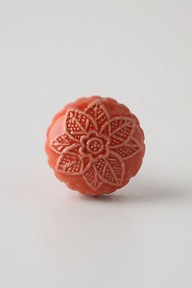
1. Coral Ceramic Knob, $8

2. Red Granita Knob, $8

3. Resin Knob, $14

4. Ruby Glass Knob, $3.49

5. Honey Glass Knob, $2.99

6. Amethyst glass knob, $3.49

7. Amber Glass Knob, ~ $5.50

8. Blush Glass Knob, ~$4

9. Button Knob, $8

List of Knobs:
1. Melon Knob in Coral, Anthropologie, $8

2. Red Granita Knob, Anthropolgie, $8

3. Resin Kelmscott Knob in Plum, Anthropolgie ,$14

4. 5. & 6. Ruby, Honey & Amethyst Glass Knobs, Look in the Attic, $2.99-$3.49

7. Amber Glass Knob, Amazon, 6 for $33.30

8. Blush Rose Glass Knob, Amazon, 12 for $42

9. Orange Resin Button Knob, Anthropologie, $8

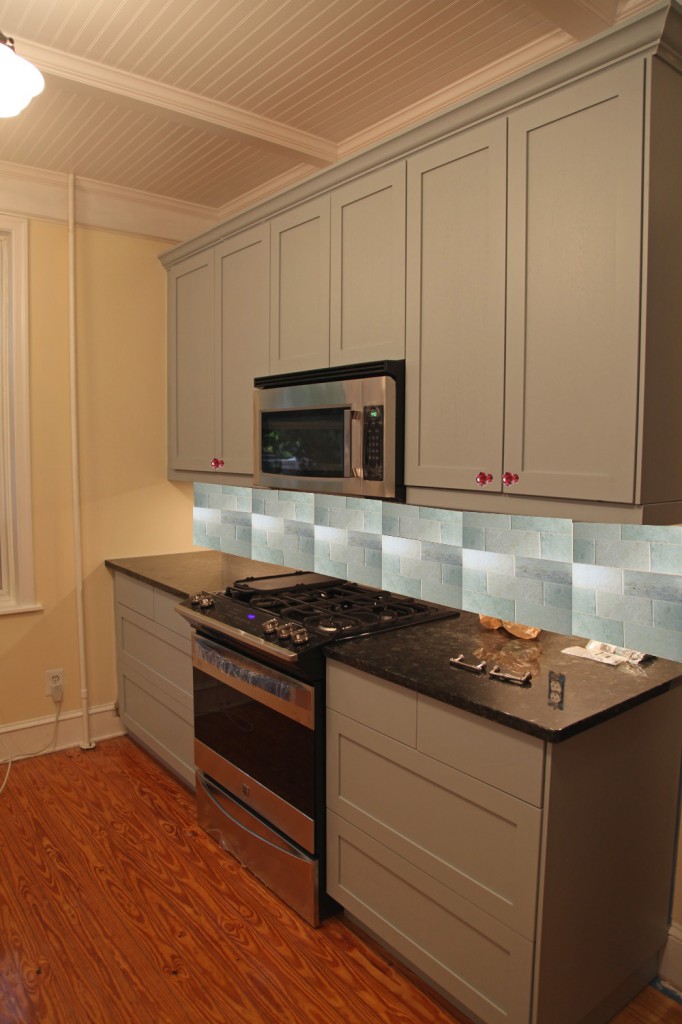
My preference is for #1 but I think any of these would look nice. I also did a quick rendering to see what the space will look like with the tile and a bright knob. It isn’t a great rendering but it does give a general feel for the tile and knobs.

What is your preference?

Quick Rendering with Tile and Bright Knobs

Leave a comment

My gardening helper!

After edging and weeding

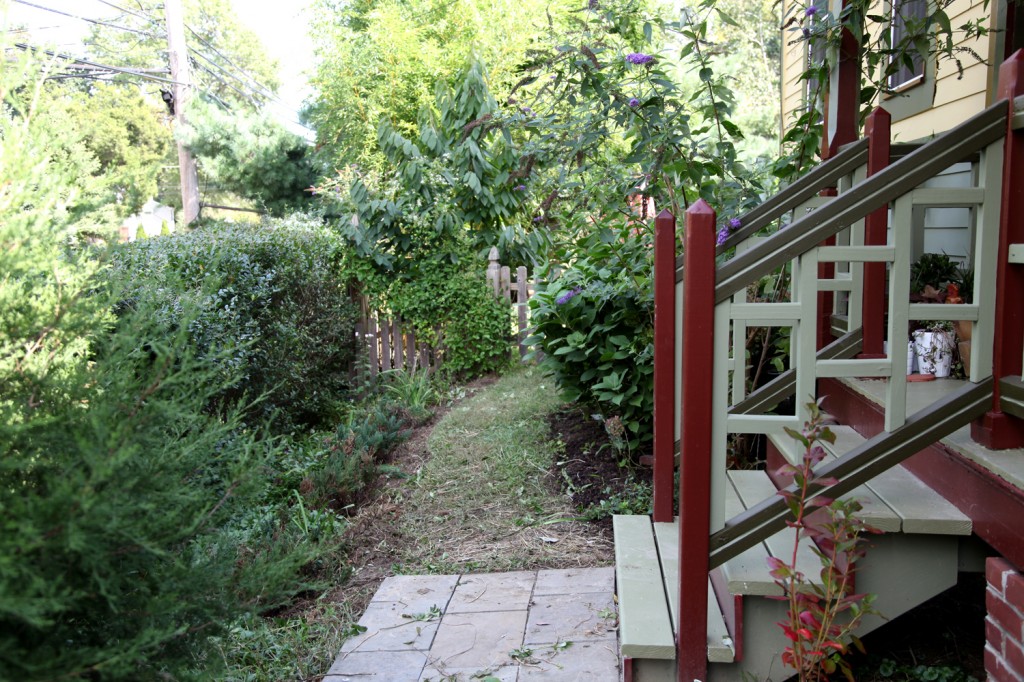
This past weekend was the Scott Arboretum Plant Sale (held every other year). In past years I have bought a LOT. This year, I definitely did not need as many plants. I am finally at a point where most of changes and additions in the garden are smaller. That said, the sideyard is a bit of a mess. We added the new steps and a bluestone landing back in May, then I proceeded to ignore the area, except for the occasional mow/weed wacking. The area was in desperate need of some edging, weeding and planting.

New Steps with Blueberry Bushes on either side

I also decided that this would be a good spot for blueberries. I have thought about planting blueberry bushes for the last few years, although I hadn’t found a good spot until now. This area is in sun for a good part of the day, so I thought it would be a good choice. Additionally the blueberry bush leaves turn a pleasant reddish color in the fall (and go with the coloring of the front porch). I picked up 2 of the “Patriot” variety. These get 3′-4′ tall and wide (smaller then a lot of the other varieties) and tend to look good most of the year. I think the kids will really like being able to pick blueberries, although I have a feeling we will be covering these with mesh so that the birds don’t take them first.  This area is right off of the kitchen, which is nice too.

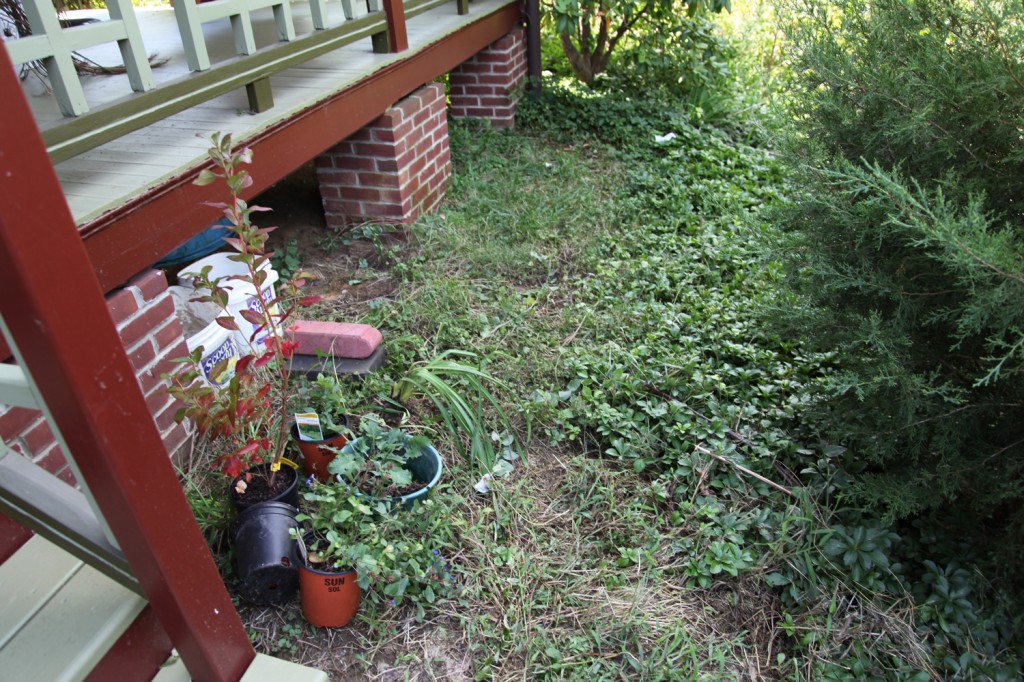
Sad and embarassing weedy patch! Home of future raised bed. I also need to transplant the cedar tree that seeded itself here.

Part of this area is also going to be designated for a raised planting bed for veggies. I haven’t started on the future planting bed area yet, but I did manage to get the edging done and began to battle back the pachysandra. The pachysandra was brutal and I know there are a ton of roots still there (they tend to break when you are trying to pull them out). This will be a multi-year battle! At least it is mostly gone from the upper portion of the hill.

Leave a comment

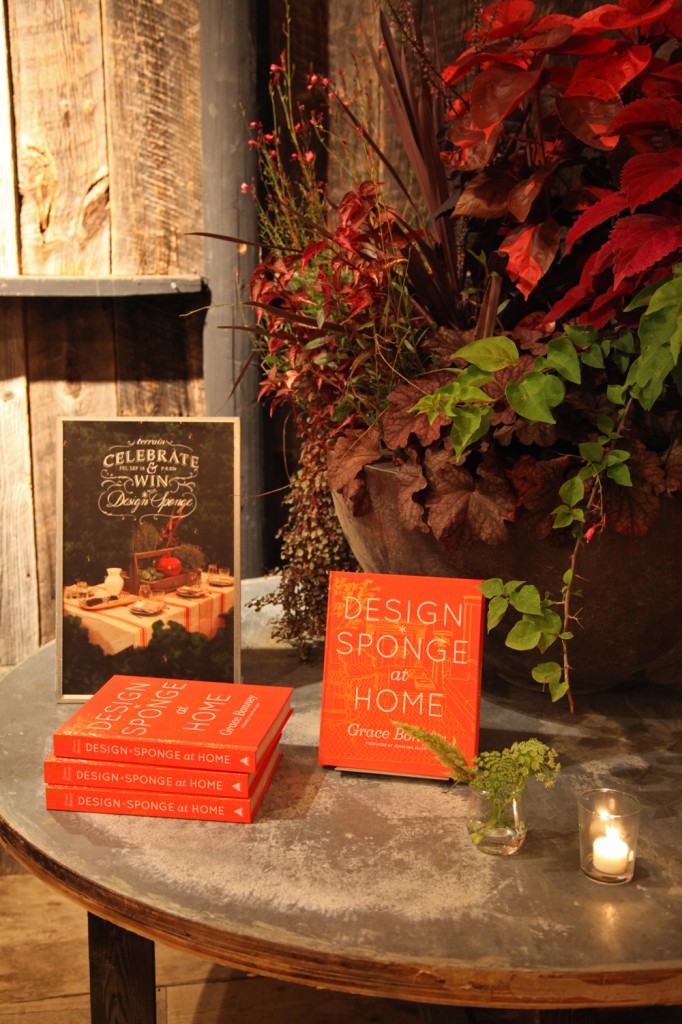
Design*Sponge at Home Book on Display

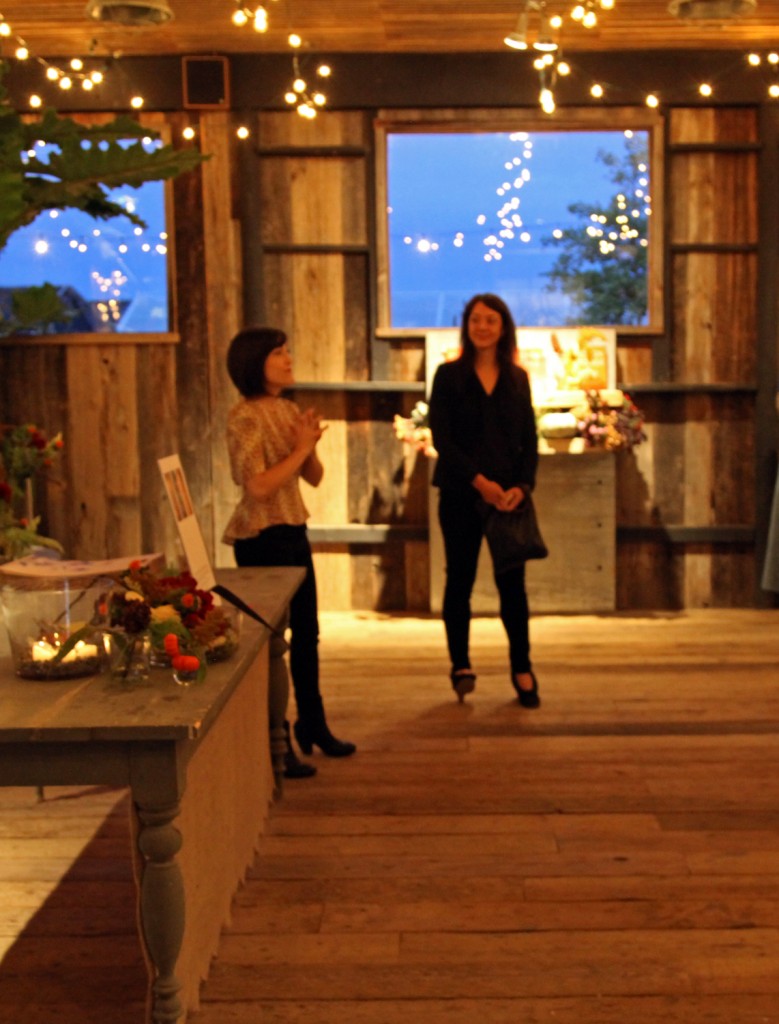
Grace and Amy

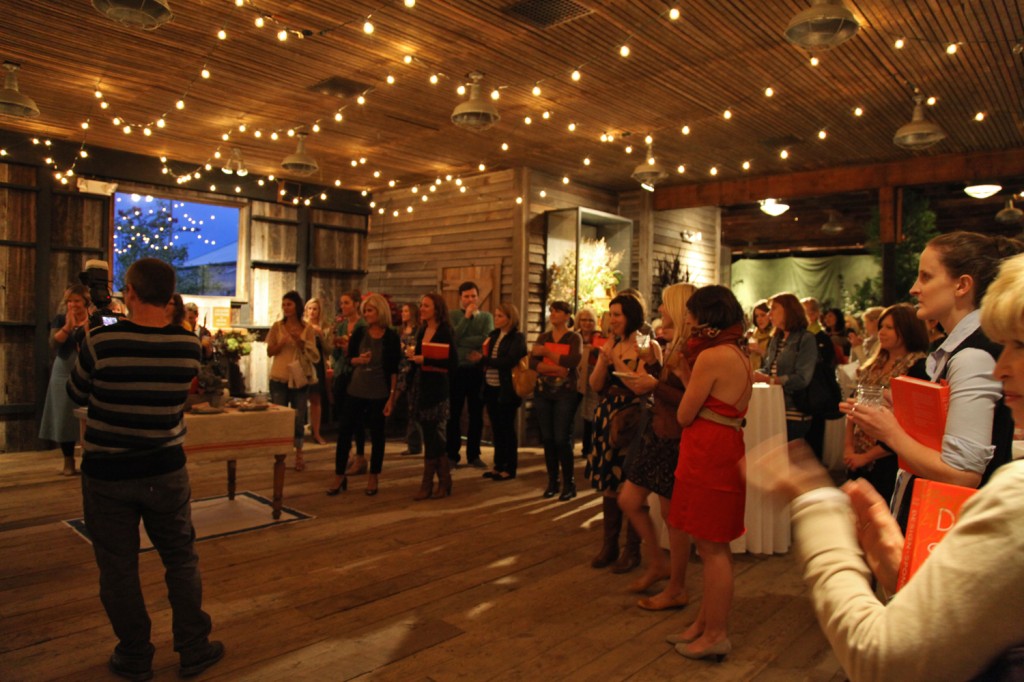
The crowd with all of the twinkle lights

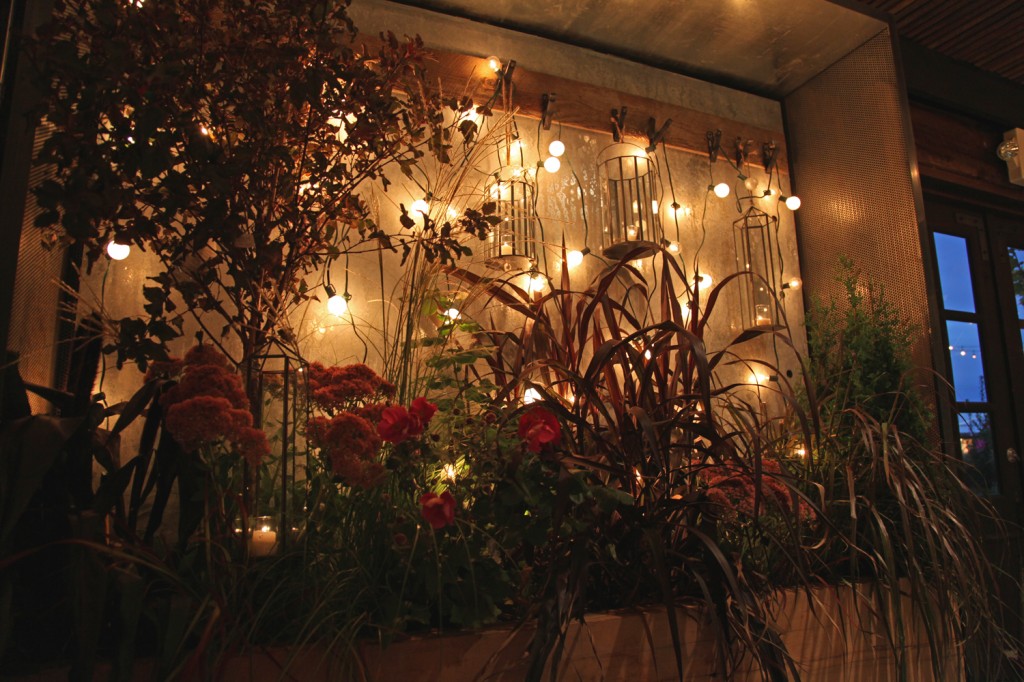
I had a lovely ladies night out on Friday at Terrain at Styers. It was the book signing party for the new Design*Sponge at Home book by Grace Bonney. The party was pretty short, but I did manage to get my book signed and a picture.

Grace and me

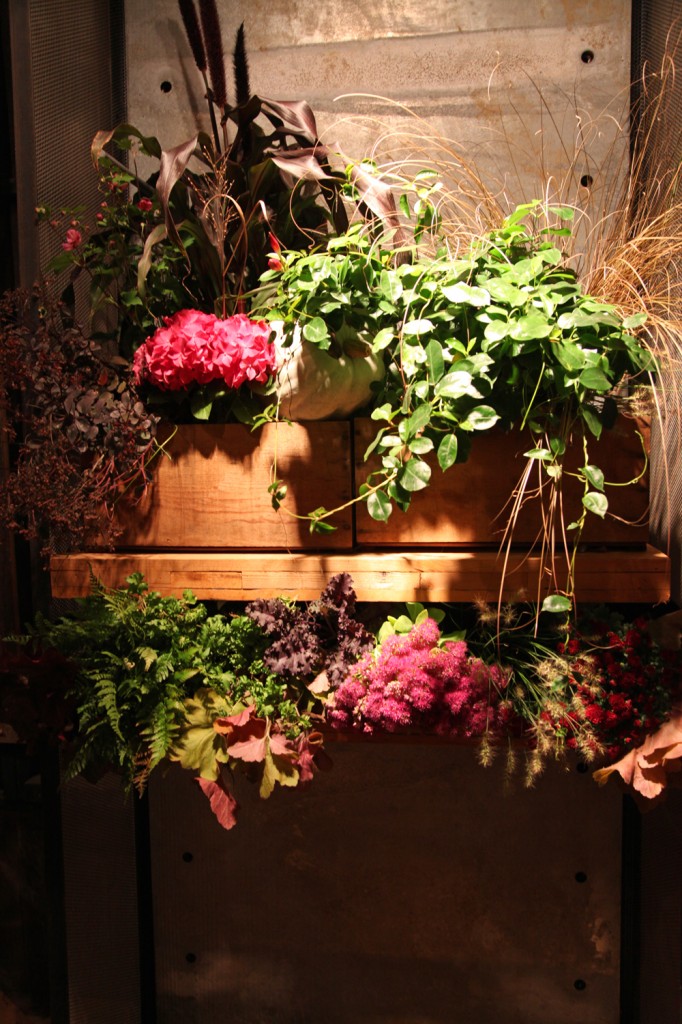
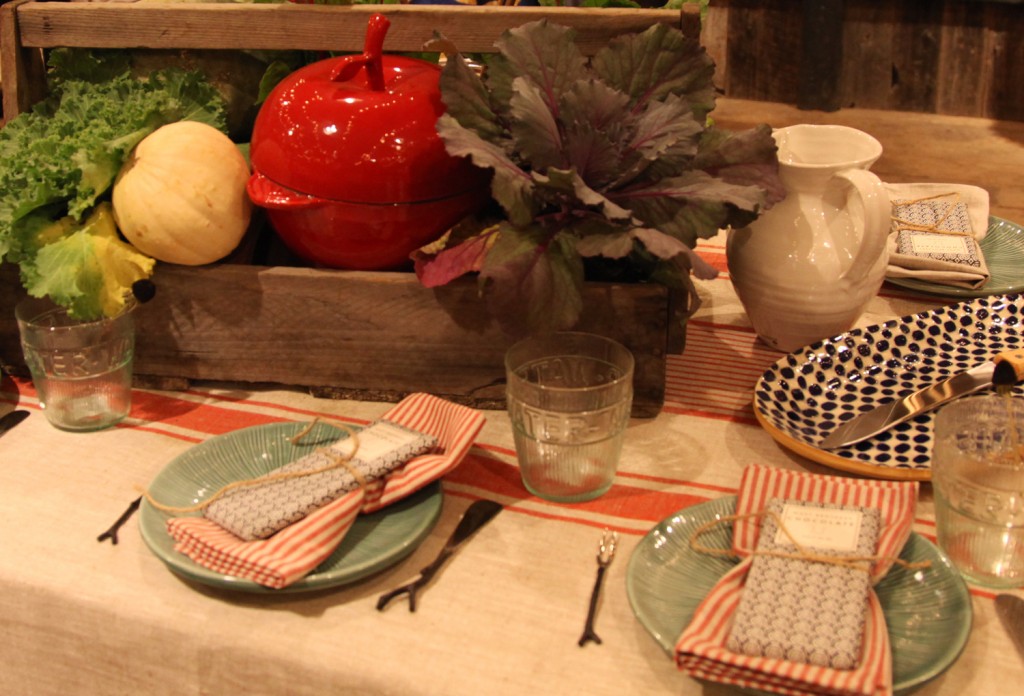
Terrain at Styers (owned by the parent company of Urban Outfitters and Anthropologie) is always full of LOTS of eye candy in the form of plants, pots and old wood. The party was in one of the old barns on site. The classic twinkle lights hung on the ceiling made the space feel really initiate (although a little dark for shooting photos). They served a delicious punch (I should have asked for the recipe) in jelly jars w/ little ribbon stirrers. They also had a raffle for a beautiful table spread (items were picked out by Grace and Amy from Terrain). I didn’t win, but it was still pretty to look at. All in all a good time, especially considering I heard Grace speak in the same space over a year ago when she was finishing up putting the book together. Grace is lovely and gracious, just as one would expect!

Lantern and Plant Display

Beautiful Plant Display mixed with rough wood

Table display that was auctioned off. I really love the apple pot, not that I would ever actually use it.


1 Comment

Design*Sponge at Home book by Grace Bonney and some delicious Golden Crisp Apples from Linvilla

It was a beautiful fall day here. I actually had to dig out some jackets for the kids. We spent the morning over at Linvilla Orchards playing on their giant playground, feeding the chickens and peacocks, eating apples and admiring the pumpkins. It was such a lovely day to be outside! It would have been perfect except for the yellow jackets swarming us as we tried to eat the apples.

Tonight I am off to a book signing party for the new Design*Sponge At Home book by Grace Bonney at Terrain at Styers! Hopefully it won’t be too crowded (I see that it has sold out in the last day). I always love visiting Terrain and it will be nice to be there for a special event. I guess I shouldn’t be picking out perennials in a nice dress and shoes. hmmm…maybe I should bring an apron just in case! If all goes well I will post some photos on Monday.

I have already opened and taken a peak at my book (I ordered the Barnes and Noble copy with extra content online). It has some nice home tours (called sneak peaks) and DIY projects. It is quite a long book (over 400 pages) and you definitely feel like you are getting your moneys worth. On my first pass, my only disappointment is that some of hour tours were a little short. To me it feels like you are peaking in the door of someone’s house and getting a glance but not really getting the full tour. I’ve seen a good number of the DIY projects already (since I read the blog) so there were only a couple of news ones that perked my interest.

I hope everyone has a great weekend!

Leave a comment

Time to Pick Some Cabinet Door Hardware!

It is funny that sometimes the small stuff in a renovation is what causes the most controversy! Andi and Neil’s kitchen is almost done but there are a few things left to decide on including the hardware for the upper cabinets and tile for the backsplash (the contractor will be back in a week or two to finish the last of the things up once everything is delivered).

Handle Options: Final Selection Brushed Nickel on the Right

Andi and Neil found nice simple handles for the drawers on the lower cabinets. They are by Martha Stewart for Home Depot are quite reasonably priced (around $4.50) but have a nice heft to them. They are brushed nickel and go nicely with the Ikea faucet. But for the upper cabinets, I typically recommend knobs. I think visually they look nicer at eye level and I think it is a good opportunity to bring in some pop of color and/or texture. The other nice thing about using a knob is that they are easy to switch out. If you use a handle you are forever stuck with the hole spacing.

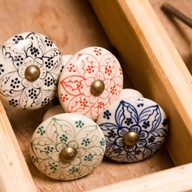
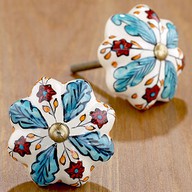
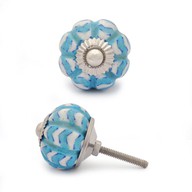
1. Handpainted Ceramic Knob, $11

2. Handpainted Ceramic Knob, $5

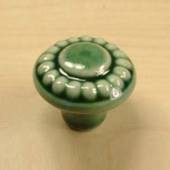
3. Green Glazed Knob, $3.29

4. Custom Made to Order Map Knobs, $20

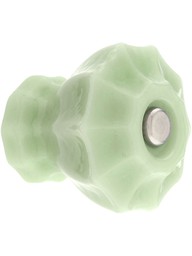
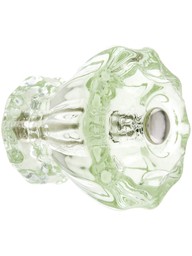
5. Jade Milkglass Knob, $5.39

6. Chevron Patterned Knob, $8

7. Clear Glass Knob, $5.39

8. Seashell Shaped Bone Knob, $10


I’ve rounded up a few of my suggestions here but we can’t seem to come to an agreement. It is crazy that we were in agreement about the cabinets, the layout and the overall colors. I stayed out of their selection for the counters, but they picked out a lovely dark granite. I was a little worried about it because the sample photos I saw online were a bit muddled looking, but the actual slabs are quite lovely and have a nice depth to them, that you couldn’t get with quartz (my original recommendation). For some reason I feel more vested in the selection of the knobs. I guess because I see it as a lost opportunity to bring another layer of texture and color to the space. Andi and Neil are not afraid of color (their living room is dark purple and the front bay of their house is periwinkle) so I am surprised to see reluctance on choosing something a little more fun.

I REALLY love the map knobs. I thought that Andi and Neil would be into them too. They have lived in and traveled to lots of places, so I thought customizing them to those places would be cool. I also found a second person on Etsy selling them for $10 a piece (rather than 20). I also found a posting on making your own custom knobs with printed paper and resin. Then the knobs could be done for even less. Then they could really pick out something interesting! Although now I think it time for me to step out of the decision even though I am a little sad about it.

Which ones would you choose?

List of Products:

1. Handpainted Ceramic Knobs, Fair Trade, $10.95 a piece. Green Heart Shop.
2.  Blue and Red Floral Ceramic Knobs, Set of 4 $20. WorldMarket.
3. Glazed Green knob. $3.29. Cabinetparts.com
4. Custom Map Pulls, 4 for $80. Etsy. Another option for $10.
5. Milk Glass Cabinet Knob in Milk Green (Jade), $5.39. House of Antique Hardware.
6. Chevron Patterned Turquoise and white ceramic knob, $7.99. Potteryknobs.com.
7. Clear Glass Cabinet Knob, $5.39. House of Antique Hardware.
8. Seashell Shaped Hand Painted Bone Knob, $9.99. Potteryknobs.com

1 Comment

Toddler Hat & Mittens

Toddler Shoes

Papergoods

Today was the day for the Missoni Collection at Target to premiere. I love good design, so even though I am not the biggest Missoni fan, I still needed to check out what was available. Missoni, known for their colorful zigzag pattern, is one of those brands that most of us cannot afford normally, so when it shows up at Target it is a pretty good deal, even if it is expensive by Target standards. Two years ago they featured Orla Kiely housewares (which was SUPER awesome). I wanted to buy EVERYTHING (and bought quite a bit for our kitchen and for Maisie’s room)! Last year they featured Liberty of London which was also pretty cool, although I didn’t buy very much.

So this morning I tried to go to the Target website, but it was down. Was it down because of the Missoni collection? Are there really that many Missoni fans? Are there a lot of speculators trying to buy it up to resell on ebay (I just checked and there are already 6233 items on ebay for sale)? I did finally see that yes in fact it was all the Missoni fans crashing their site, and in fact the website is still extremely glitchy this afternoon and it keeps crashing on me. I also saw this article about a mobbed Target in LA.  So this afternoon with my novacaned up mouth, jaw and tongue (thanks to having a cavity filled this morning),  I meandered over to Target to see what they had. We have 2 targets within 3 miles of our house (totally crazy I know). There were a bunch of empty shelves with Missoni labels on them.  Although I did find a few things that I decided to pick up, figuring if I change my mind there is always ebay or I could just return it. I picked up 2 small boxes (I have these same boxes in an Orla Kiely pattern from 2 years ago), a pad of paper and a cup. Then I picked up a couple of things for Maisie, a really cute dress and matching shoes. I also picked up mittens and a hat in the same pattern. The dress and shoes will be for next year, but the mittens and hat will be for this winter, now I just need to find a winter coat to match! If they had everything in stock I would have probably picked up a couple more boxes, a cute zigzag hand towel and a cardigan for myself.

I thought I would add a comment about the quality. On the little girls clothes, I thought the quality was quite nice on the dress (for $29.99 I feel like it should be). The shoes (@$19.99) look like okay quality. The shoes are fabric with plastic bottoms, so I doubt the lifespan will be very long on them, but we will be using them for special occasions. The more expensive housewares (i.e. vases) that are porcelain looked like a nice quality. The melamine plates looked okay, although I’m not a big fan because I find that the melamine scratches pretty easily (although I do have a number of melamine plates on display). I can’t comment on the women’s clothes (since it was so picked over) or the towels which were non-existent at the store.

The only funny story from my adventure is that the only reason that I ended up with the 2 boxes was that someone had left them on top of the drink fridge at the checkout and the saleslady told me that they had been there for a long time so I was free to purchase them (which I quickly did).

Are there any designers that make you go out of your way?

2 Comments

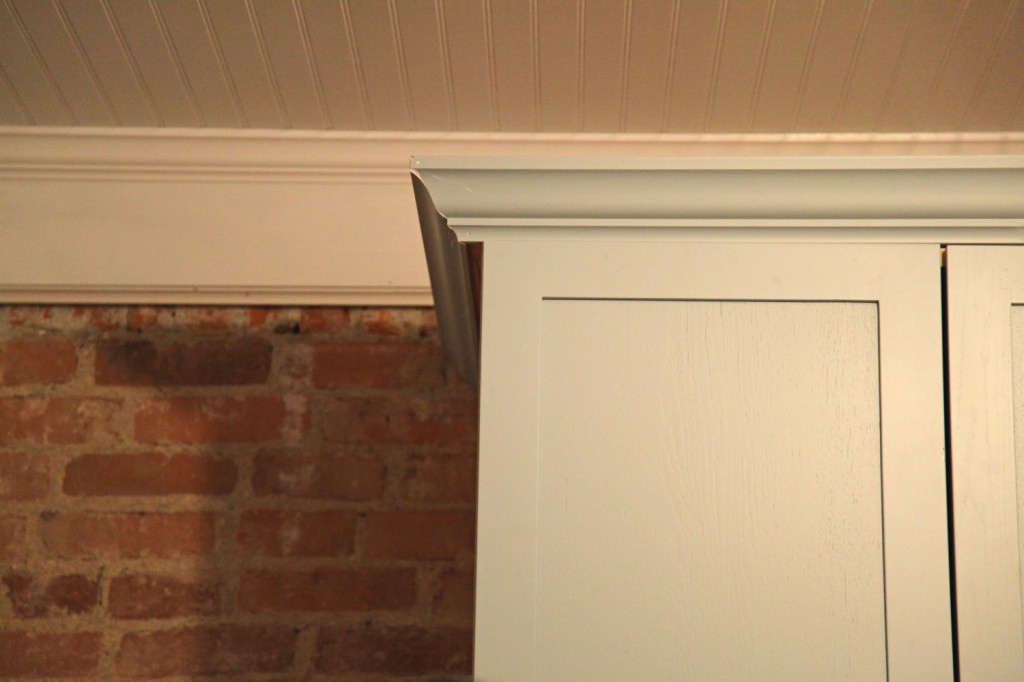
Painted Cabinet Door w/ matching painted trim (still waiting on final touch up on crown molding)

So are you thinking about purchasing Ikea Kitchen Cabinets and having the doors and trim custom painted? Below are some things to consider if you are headed down this path. The good news is that it can be done beautifully. The bad news is that it take preparation, organization, patience and finding a good refinisher. Here is a link to a good article from Carol Reed on this very subject. Also Sarah Richardson has used this method on several of her episodes before including on Sarah’s House (the farmhouse series).
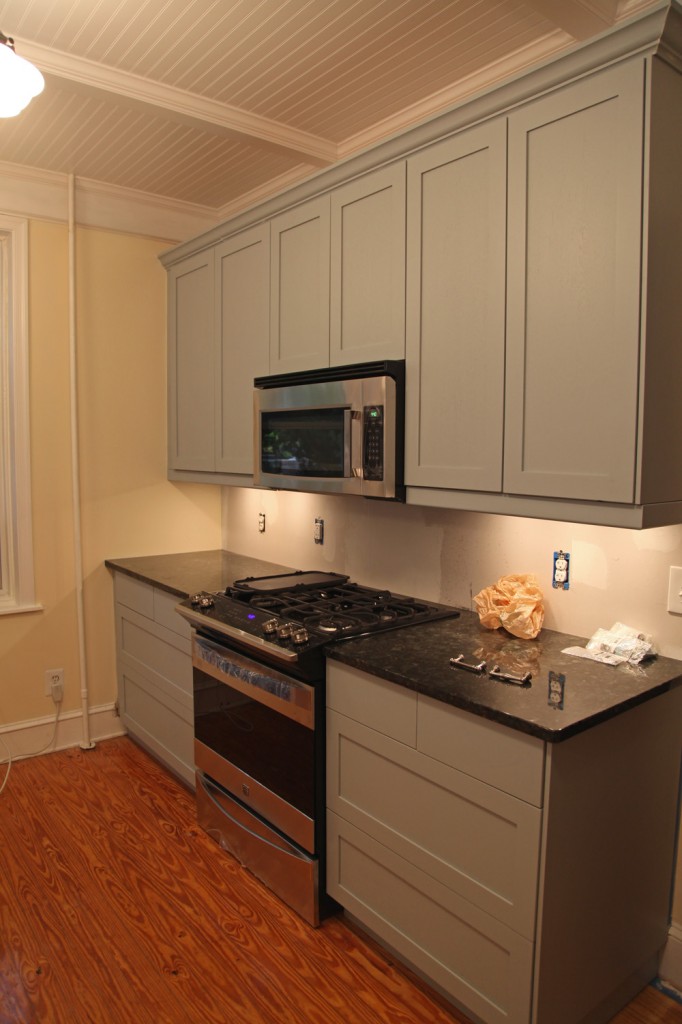
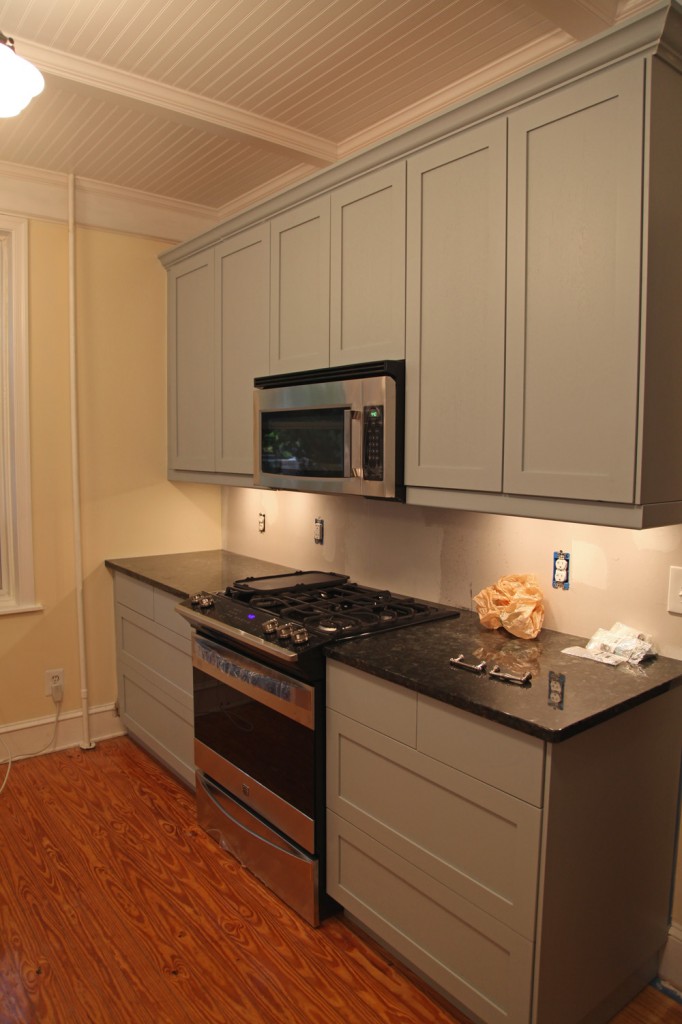
Installed Painted Cabinets and Trim. I think you would be hard pressed to know that these are Ikea cabinets!

Pros:

-You can have cost effective cabinets, with a custom color to your liking. Typically the painter can match any paint swatch you provide.

-Because the boxes on Ikea cabinets are never exposed, you don’t have to paint them, and can even start installing them while everything else is at the painters.

-By having the cabinet doors professionally spray painted, you will get a durable finish. The last thing you want to do is hand paint new cabinets and then have the finish wear off in a couple of years.

-Because you are having a custom finish applied, you don’t need to use Ikea crown molding for the cabinets. We chose larger molding for Andi and Neil’s kitchen.  Also if you are mixing Ikea cabinets with some custom millwork, you can have them all painted together for a seamless look.
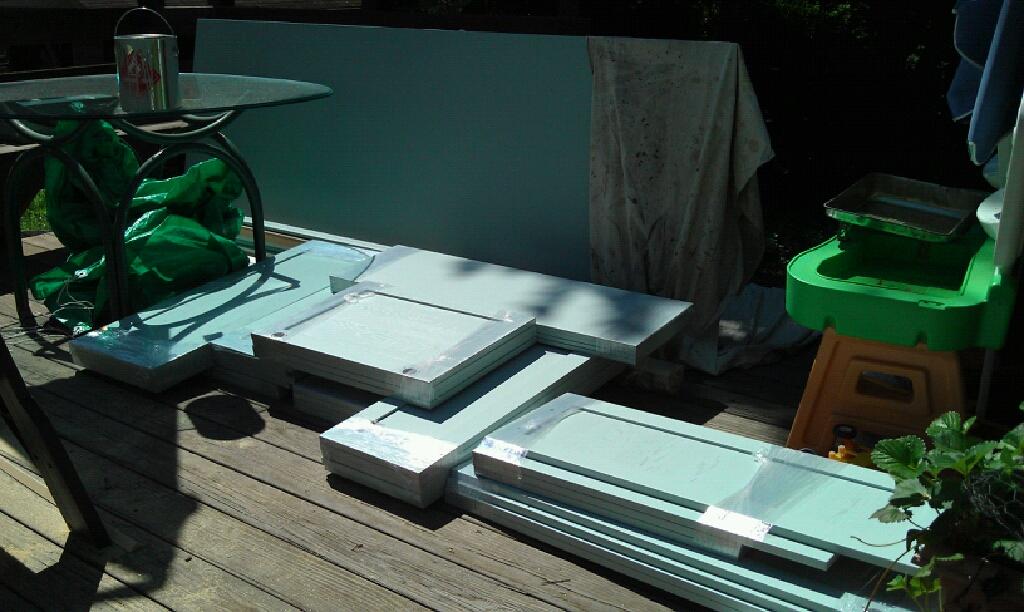
Cabinet doors, just delivered (good sides facing inwards)

Cons:

-Plan for the extra time it takes to have these painted (typically 2-4 weeks). The good news is that you can typically start installing the boxes from the cabinets while you wait for the doors, drawer fronts, trim, baseboard and panels.

-Professionally painting is not cheap. Plan on spending $35-60 a door to sand, prime & paint. Plus the cost of paint ($100-200) and possibly a set up charge. Also keep in mind that you also need to have all of the panels and trim painted as well. For a medium size kitchen, plan on spending $1000-2000 on painting. You will probably also want to pay to have a sample panel painted to make sure you are happy with it before you commit to ALL of the pieces. Try picking up an extra panel in the As-Is section at Ikea. Then you can have it painted while you wait for your cabinets to arrive.

-You will need to divide your Ikea order into 2 piles, boxes and doors and trim. Then either you will have to have the pieces to be painted dropped off or picked up. The Ikea delivery people are not going to help you in this. With Andi and Neil’s delivery, we tried to divide the boxes as they were coming in the door (then had to double check after they left). Before you send this off to the painter, triple check that all of the right parts are there! Also make sure to remove any miscellaneous hardware from the boxes before sending it off. We had to hunt down some missing attachment brackets at the last minute that we misplaced.

-You will need to match the paint for inevitable touch up (particularly on trim pieces).
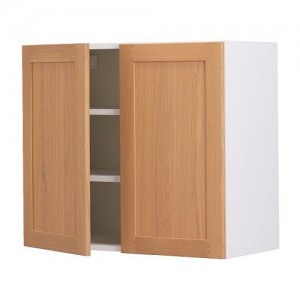
Tidaholm Upper Cabinet
Tidaholm Lower Drawer Cabinet
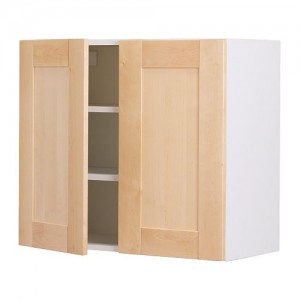
Adel Door
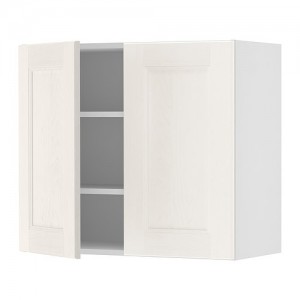
Ramsjo Door
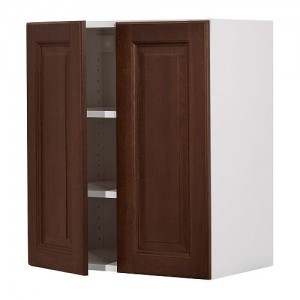
Lilje Door

Door Style Selection:

This is one of the most important steps in determining whether it makes sense to use Ikea cabinets. We chose the Tidaholm Oak Cabinet (in a clear finish) for our starting point. This cabinet has now been discontinued! This is very unfortunate, because it has a simple shaker look with solid oak frames and jointed corners. Currently Ikea is offering the Adel, but the joint in the frame is a v-groove which doesn’t look as high end. Also the frame proportions feel too wide. They are also offering the Ramsjo which is beach and the Lilje, which is an oak door with a raised panel. Unfortunately the Lilje only comes in a dark stain, which will make paint coverage more difficult. I haven’t seen the Ramsjo in person, so I can’t comment on it, but it looks like it might have some potential (even in its original color).
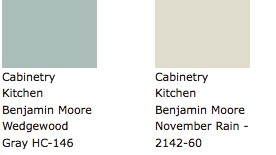
Andi and Neil's Cabinet Paint Color Options

Paint:

If you are going to go to the expense of having your doors professionally painted, you should choose a color that is unique, but timeless enough that it won’t look dated in a few years. For me, the go to for paint color inspiration is Sarah Richardson (from Sarah’s House, Sarah 101…). We used her own cottage kitchen as our inspiration for Andi and Neil’s kitchen. We decided to use Benjamin Moore Wedgewood (one of the colors that she used on some of her accent cabinets).

Different types of wood take paint and stain better than others. Our doors are oak and the refinisher warned us that we would not get a totally opaque finish with the oak, and should expect to see some variation. We actually preferred that since we still wanted the cabinets to look like wood. Typically a beech or maple will take the paint more evenly.

We used Delaware Valley Furniture Restoration (in Kennett Square, PA) and they typically charges $30-50 a door to refinish. They required drop-off but delivered the painted doors and trim. They wrapped the doors well (keeping the good side protected).  Also they were good about keeping the paint, so that we could have additional pieces painted, which was very useful since we ended up needing several extra pieces painted, due to several issues during construction.

Final Thoughts:

After going through this process and seeing the result,  I don’t know any other way of getting this look at this price point. If you are up for the hassle of getting the cabinet painted you too can have a custom look for a fraction of the cost of custom or even semi-custom cabinets.

7 Comments

I was VERY excited to stop over at Andi and Neil’s yesterday to see how things were going. So without further ado here is a peak (I will take more detailed photos once the kitchen is truly finished).

View from the Dining Room (looking south). Sink doors haven't been installed yet.

East Wall (missing cabinet doors are being painted). Look at the shiny refinished floors and the beautiful brick!

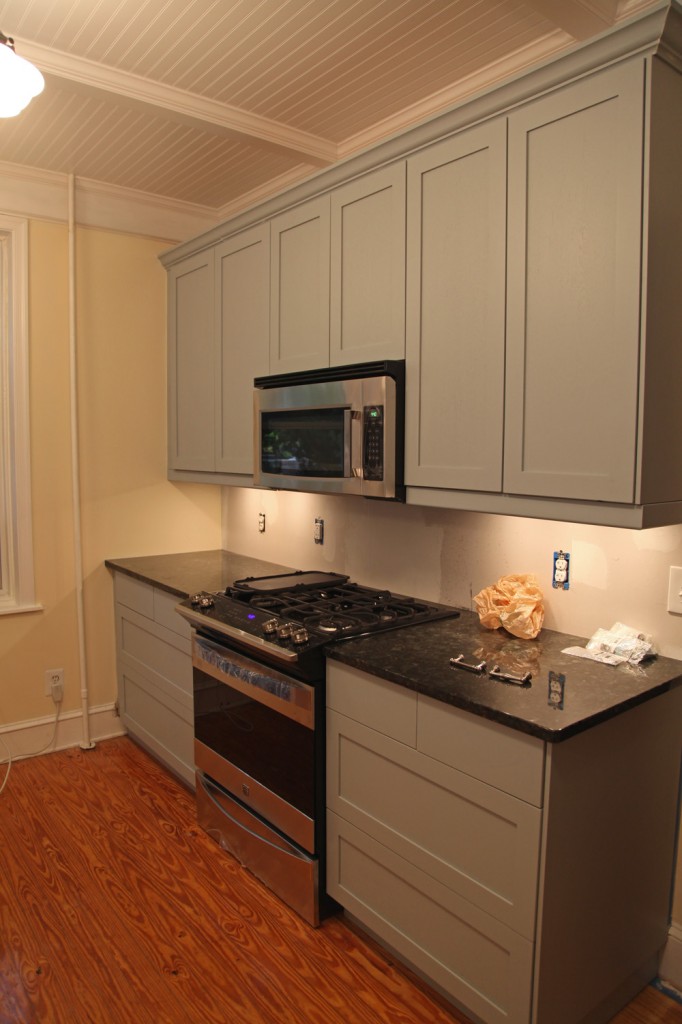
North Wall (stone tile backsplash will be continuous on this wall). You can also see the creamy wall color.

Close up of North Elevation w/ new Kenmore Slide-In Range

Beadboard Ceiling and Beautiful Schoolhouse Pendants

Detail of Brick w/ under counter lighting and granite counter

There are a bunch of miscellaneous items that need to be ordered and installed in the next couple of weeks but all of the big stuff is done! The contractors cleaned up most of their stuff yesterday (minus the paint cans for final touch up) and removed the tarps on the floor. They will be back once the last of the panels are painted and delivered, the handles and knobs are ready, and the tile backsplash is decided on and delivered. In the meantime, Andi and Neil can start using the kitchen! It is REALLY nice to see the kitchen without all of the construction clutter. And with another day or two of work it will be completely finished!

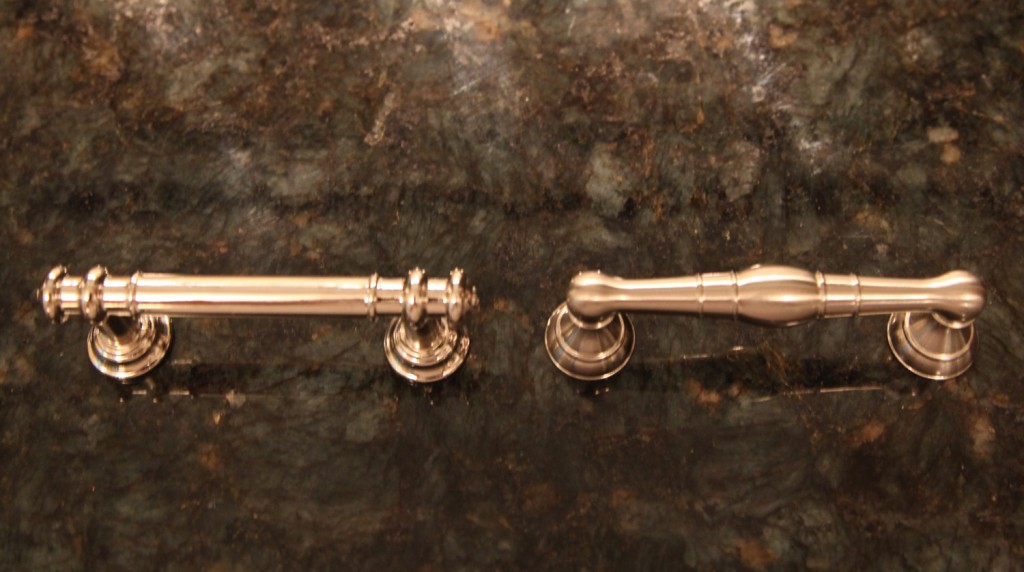
Handle choices (left is bright nickel, right is brushed nickel) & granite counter

I think we decided on the handles for the drawers, a traditional style handle with a brushed nickel finish (to coordinate with the faucet). We are still reviewing knob options. I think we should go with something fun and colorful for the knobs. They are at eye level and are the one thing that can be changed out quickly at a later point. For most of the choices on the kitchen we went fairly safe with the finish and coloring (which is good for items that you can’t change easily) but the knobs I think could start to bring some of Andi and Neil’s colorful style back into the room.

"Biltmore" Marble Tile in 2" Hexagon Pattern

"Biltmore" Marble Tile in Basketweave Pattern

Carrera Marble Subway Tile, 3"x6"

We are in agreement that we should use a marble tile for the backsplash behind the stove. The backup is to use a carrera marble subway tile but I prefer the hexagon or basketweave “Biltmore” Marble from The Tile Shop, but Neil is not convinced (at least not yet). I think we should be able to come to a consensus in the next few days though.

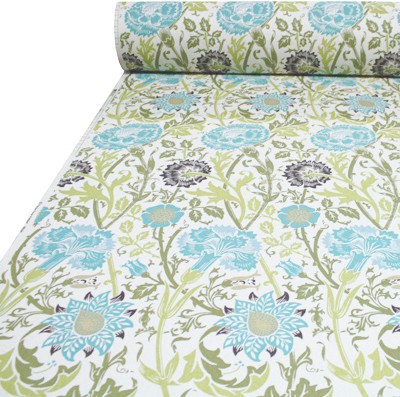
William Morris Inspired Fabric for Window Valance

We still need to look at accessories for the kitchen too. We all love this William Morris inspired fabric, that I think will make a lovely window valance. We also need to look at the space above the opening to the Sunroom and figure out what would look nice above there. I like the idea of vintage plates hanging or possibly a long shelf holding some fun accessories.

2 Comments

New Granite Counters with the Giant Farmhouse Sink Hooked Up.

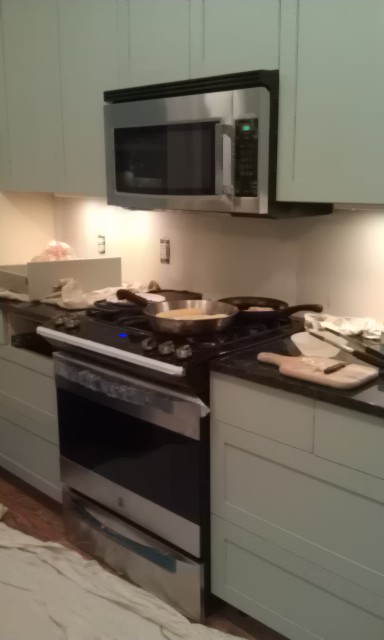
New Counters with Stove Installed

New Wall Color (creamy yellow) & new pendant lights

Granite Counter with Farmhouse sink sitting on it

So the day finally arrived, the counters have been installed! Andi took a couple of photos for me. I am going to head over later today to take some more photos and go over the last of the details. Also since the last time I was there, they finished up some of the trim and painted one of the walls. The contractors also managed to get the sink and stove hooked up today! I see that Andi already has a pan on the stove! I think there was a BIG sigh of relief over at Andi and Neil’s house yesterday. They can finally start using their kitchen again.

Items Left to Decide On:

-Cabinet handles for the Drawers
-Cabinet knobs for the Doors
-Tile Backsplash
-Accessories and window treatment!

We decided to hold off on these until the counters were installed. This way we can make sure that all of these coordinate nicely with the counters.  One item for debate is the finish on the handles. The lights are oil rubbed bronze and the faucet is nickel plated with a slightly rubbed appearance. Which finish do we go with? Or do we go more shiny for a little bling? We also looked at glass knobs for the cabinets. We will have to see what these look like now that everything else is in place. For the tile backsplash I am recommending a stone subway tile (possibly carrera marble). I think a plain white tile may look to stark with everything else, but again we wanted to wait and see how the granite looked first (especially since this doesn’t have to go in to make the kitchen function).
 

Leave a comment

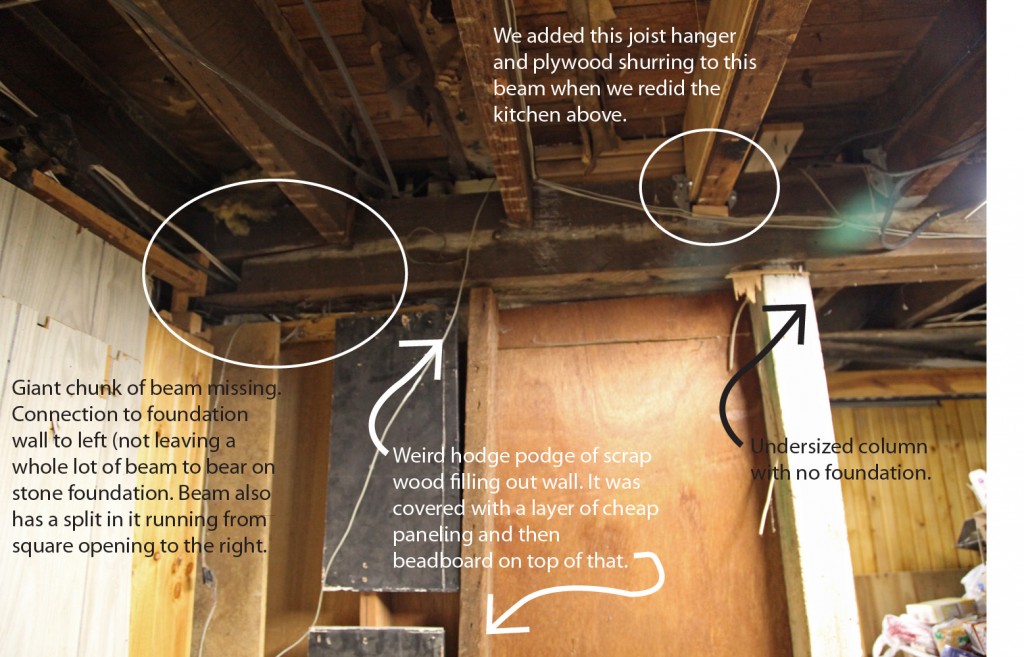
Main Beam exposed after paneling was removed

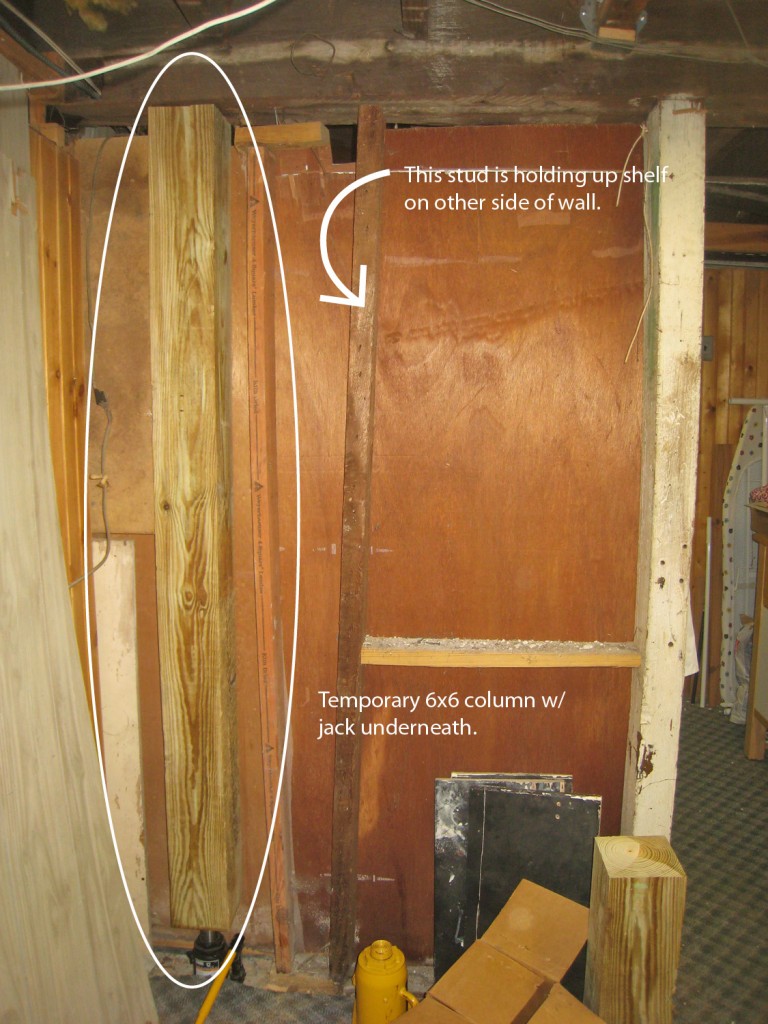
Temporary Column Added

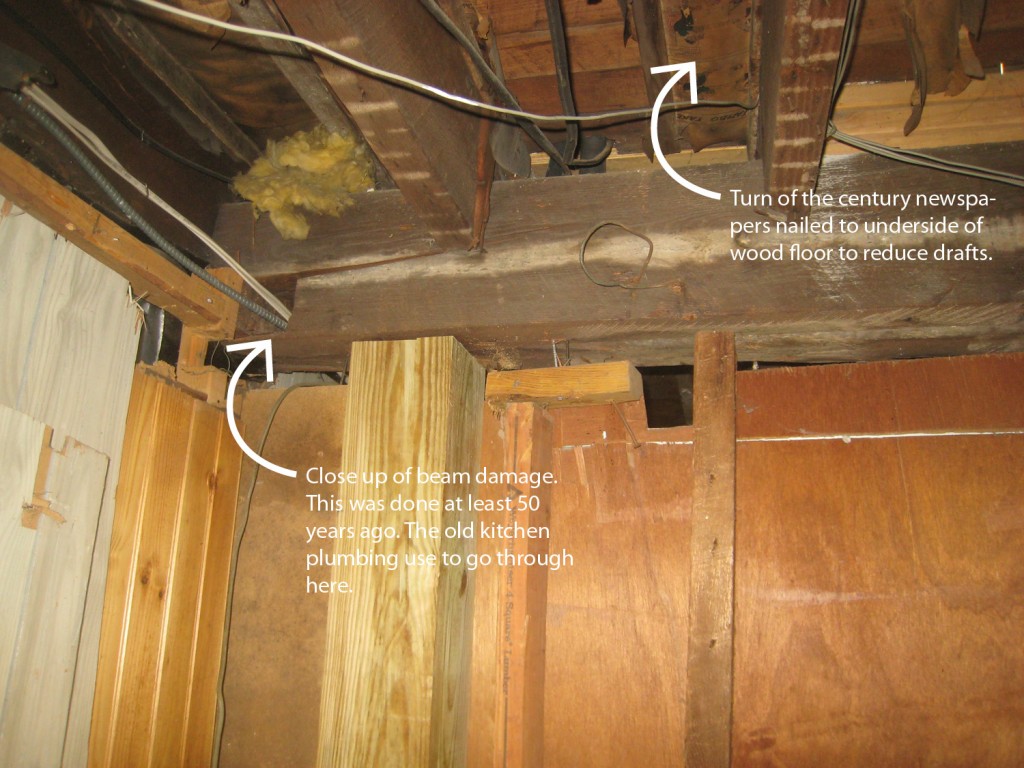
Close up of beam damage

The previous owner of our house Tony (aka that cheap SOB) paneled our basement and installed a drop ceiling and wall to wall carpeting. He used it as his real estate”office”. It has always been kind of strange down there. Lots of little pieces of trim nailed together including things like “structural baseboard”.  I have to mention that we did not give Tony his nickname. Our old neighbor (also named Tony) referred to him as this and claimed that everyone in the neighborhood called him that. I’m not quite sure that it is totally true, but whenever I am working on something that he touched I do typically refer to him in rather unflattering terms.

Since we bought the house 11 years ago we have gotten some water in the basement during VERY heavy rains and have removed most of the drop ceiling and parts of the paneling as we have needed access to things. During Hurricane Irene (and the wettest August on record) we took some preventative measures and put everything up on blocks or supports to minimize any potential water damage. We also removed some more of the wall to wall carpeting to try and identify where the water was coming in. We also decided it was time to look at 2 areas where we were concerned with the structural integrity. These were both spots where contractors over the last 123 years have hacked at beams to get their ducts, pipes and wiring through. They were covered up with the old paneling, so we bit the bullet and removed some of it to take a look. I have already scheduled a structural engineer to come and look at these conditions as well as advise us on a strategy for reducing bounce in the floor. He is suppose to come out next week. Of course once I saw the one condition I felt compelled to install a temporary 6×6 post so I could sleep at night. This is not the first structural work we have done on the house. We actually own a couple of jacks that we have used on several occasions to fix conditions that are not quite right.

The main area where I am concerned is a main beam that holds up the floor to the kitchen and dining room as well as the wall/structure of the back 2 bedrooms on the second and third floors. This beam (which is actually 2 beams adjacent to each other) was hacked away at some point years ago, most likely to get plumbing to the old kitchen. This was done only about a foot away from where it sits on the foundation wall/rim joist. They only left a sliver of beam below it. I was hoping that when I removed the paneling I would find a full stud wall holding up this portion of the beam. Of course in typical Tony fashion it was a hodgepodge of old and new wood, no two being the same height or depth. Needless to say this made me very uncomfortable! So I decided it was worth installing a temporary column under the beams until I can get an expert in to advise me on the best permanent method of support. The good news is that it is in, and it only took about an hour to do. The bad news is that the weight cracked the thin concrete slab underneath. So as not to cause the jack to push anymore into the ground, we left it so that the beam behind the one in the picture is definitely bearing on the column (it was sitting slightly lower) and the beam in front is not quite bearing on it, but is at least stabilized).

In the meantime we are also exploring installing a french drain around the perimeter and a sump pump. We are one of the only people in the neighborhood who doesn’t have one (we also sit higher then our neighbors). After studying the water coming in during Irene we have discovered that it is coming in from cracks and seams in the floor. The floor has been patched several times (including by us to install the half bath and new washer and dryer location). We could install a waterproof membrane and another layer of concrete, but then we are concerned that water pressure could build up under the slab. I am still exploring the options in more detail, so stay tuned for our final decision.

1 Comment