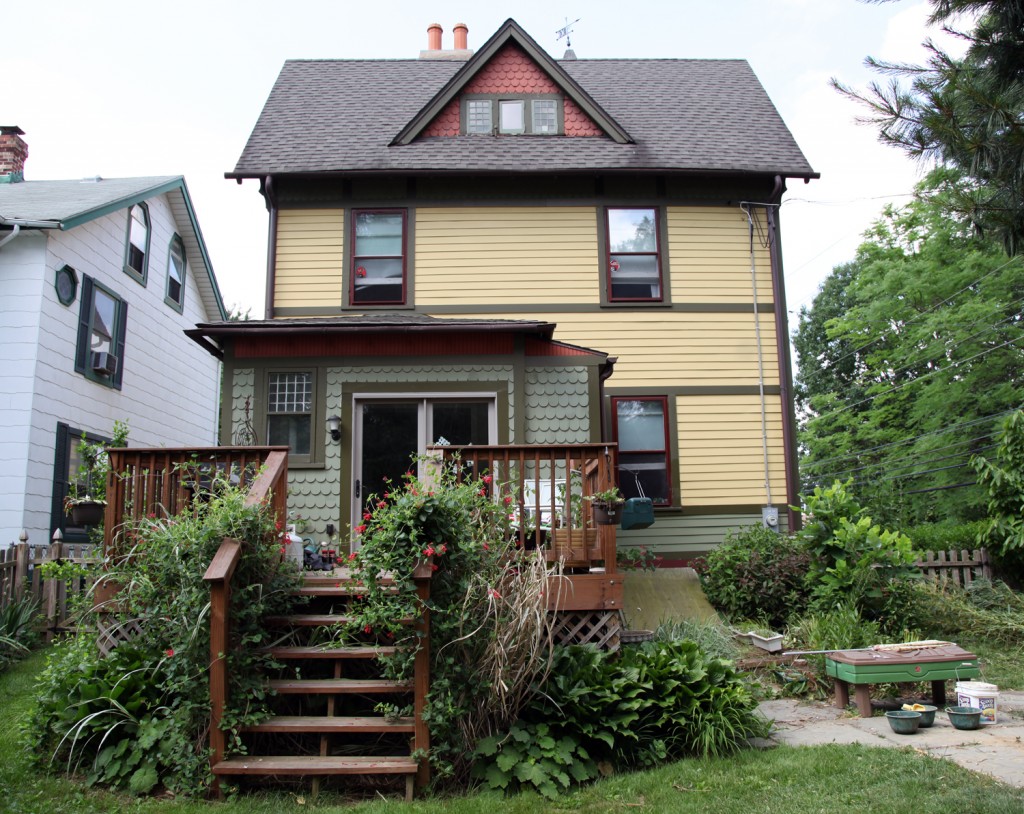
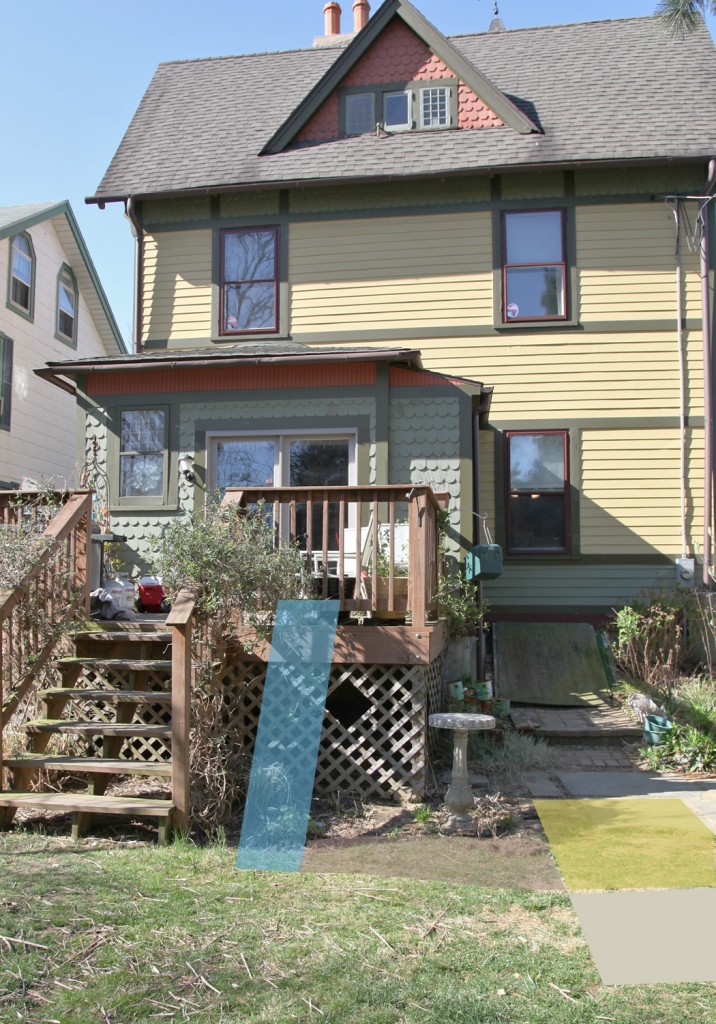
I have been talking about creating some backyard spaces for the kids for a long time (over a year now). I decided it is time to act now! The kids LOVE being outside but are lacking a good spot to dig and play and it is becoming an issue. We now have a large hole in the grass thanks to a treasure hunt. I am hoping to provide them with some space that they can call their own and spend some good imagination time. Our backyard is fairly small and I don’t want to loose too much more grass since we have just enough right now to kick and hit a ball. That pretty much rules out a traditional playset.
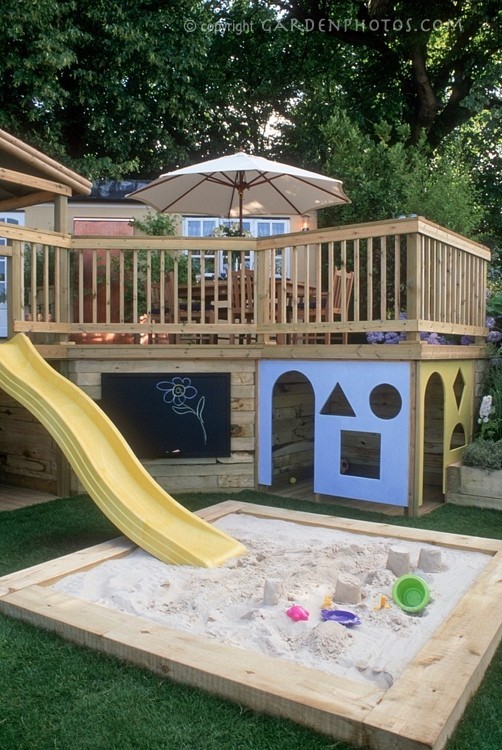
I saw this picture last year from gardenphotos.com and it really resonated with me. We have a deck that sits about 4 1/2′ off of the ground and the space underneath was totally sealed up by lattice. I don’t actually like our deck very much. It serves a useful purpose of a place for the grill, a couple of chairs and a few pots, but it doesn’t have any redeeming qualities otherwise. I have several native honeysuckles growing on it along with a bunch of grasses and perennials to hide it as much as possible. So the thought of altering it a little bit to make it more of a play space is very appealing.
The Plan
1. Fort under the Deck
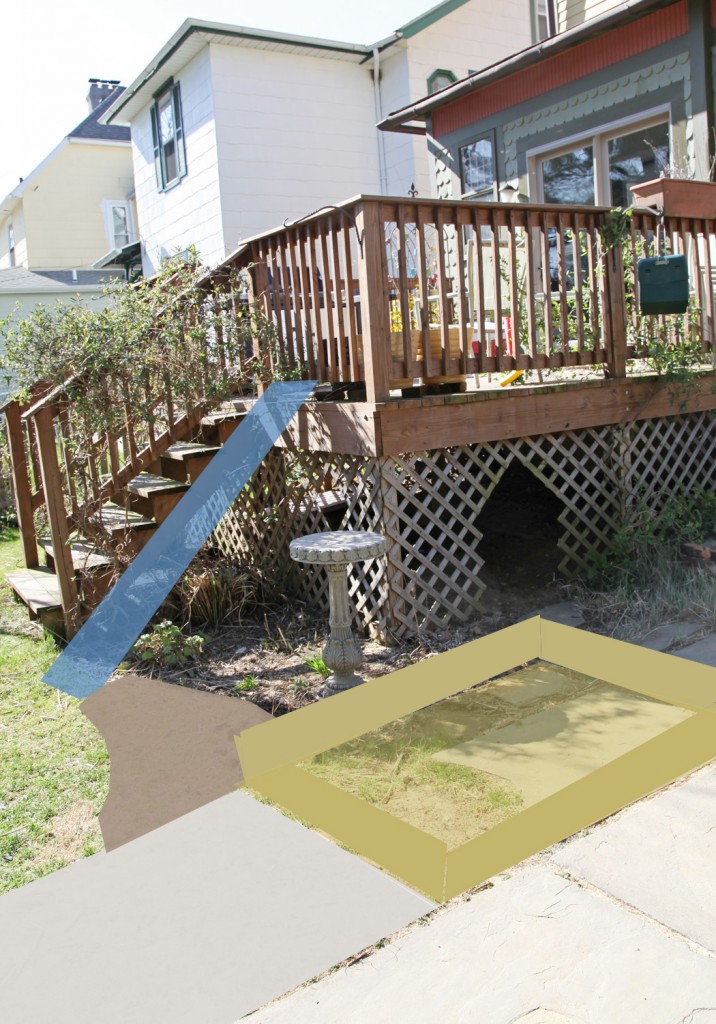
On Wednesday I decided to start. I took my jigsaw and made some cuts into the lattice. We now have a door and a window. I will be adding some pine trim to reinforce the lattice and cover the rough edges. Sam can’t quite stand under there, but the kids couldn’t wait to get under there. I gave them a couple pieces of extra rigid foam from the basement to sit on. I will be building a little wooden spot on sleepers sometime soon, but I have a feeling that they will be busy digging in the dirt for a lot of the time. There is some moss under there and I might even plant a few ferns as well. I am also considering ordering some burlap to help give them some more privacy and create a door.
2. Sandbox
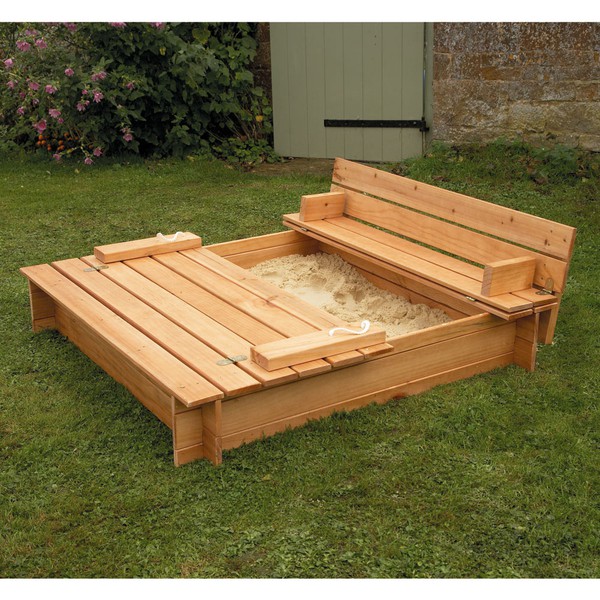
The kids have been asking for a sandbox since they could talk. We used a baby pool filled with sand when they were smaller but they are too big for that now. I also want something that I can cover when not in use. I am still debating 2 options. Option 1 is really cool because it has a cover that turns into a seat. This model is only available in England. But the good news is that over on Ana White’s website someone came up with plans based on the design. Option 2 would be simpler to make but would require some sort of fabric cover. The one advantage with this one is that I could make it a little bit bigger without having to recalculate all of the dimensions for the plan. We are planning on picking up a couple of beach umbrellas to shade it similar to the Option 2.
The sandbox will sit in between some slate stones on the patio. It may seem like a strange spot, but I like that it is really visible from the kitchen window and will be close to the table if we are sitting outside. In the future this could also easily be filled in with a planting bed or more slate.
3. Slide
I still have plans of installing a slide right off of the deck (I would like to attach it to the bottom rail of the guardrail). I am actually on the hunt on Craigslist and Freecycle for one. I haven’t found quite the right one at the right price, but I have hopes in the next couple of weeks of finding one.
4. Chalkboard
I haven’t decided on a location yet, but I think a chalkboard made of exterior grade plywood would be a good idea. The kids love to draw and I think this might be the answer. I just need to find the right spot to put it.
5. Plants
I temporarily moved the birdbath to the spot in the photo, but I think I will need to move it further from the kid area. I think I will be planting this area with durable perennials and grasses. So far I am leaning towards hosta in the shadier spots and some shorter grasses in between. I will also probably put in some small stepping stones in between the sandbox and deck.
Next Steps
The good news is that all of this work is doable in small increments. Last year I had bigger plans, that never got done because they couldn’t be broken down into little projects. The kids are old enough now that they will even “help” for brief periods of time, especially if it is for them.
First on the list is reinforcing the trellis. I’ve picked up the wood and just need to do a little cutting and screwing. The total cost so far is about $9.50. Next up will be moving the piece of slate where the sandbox will go and getting the spot ready for the sandbox. I probably won’t get around to building the sandbox for a couple of weeks but the kids are super excited, which helps keep me motivated.
I hope everyone has a good weekend! We have some painting and cleaning to do in the basement.

